2019 MERCEDES-BENZ GLB SUV reset
[x] Cancel search: resetPage 33 of 689
*
NO
TEBattery discharging from using
devices connected tothe diagnostics
connection Using devices at
the diagnostics connection
drains the batter y. #
Check thech arge leve l of the batter y. #
Ifth ech arge leve l is lo w,charge the
batter y,e.g. bydriving a considerable
dis tance. Connecting equipment
tothe diagnostics con‐
nection can lead toemissions monitoring infor‐
mation being reset, forex ample. This may lead
to theve hicle failing tomeet therequ irements of
th e next emissions inspection during the main
inspection. Qualified specialist
workshop
A qu alified specialist workshop has the neces‐
sary special skills, tools and qualifications to
cor rectly car ryout any necessary workon your
ve hicle. This particularly applies tosaf ety-re le‐
va nt wo rks. Alw
ays ha vethefo llowing workcar ried out on
yo ur vehicle at a qualified specialist workshop:
R safety-re leva nt wo rks
R service and maintenance work
R repair work
R modifications as well as ins tallations and
con versions
R workon electronic components
Mercedes‑Benz recommends a Mercedes‑Benz
service centre. Ve
hicle registration
Mercedes-Benz may ask its service centres to
car ryout tech nical inspections on cer tain vehi‐
cles. The quality or saf ety of theve hicle is
impr oved as a result of the inspection.
Mercedes-Benz can only inform you about vehi‐
cle checks if Mercedes-Benz has your registra‐
tion data. It is possible
that your vehicle has not yet been
re gis tere d in your name in thefo llowing cases:
R ifyo ur vehicle was not pur chased at an
authorised specialist dealer.
R ifyo ur vehicle has not yet been examined at
a Mercedes-Benz service centre.
It is advisable toregis teryo ur vehicle with a
Mercedes-Benz service centre.
Inform Mercedes-Benz as soon as possible
about any change in address or vehicle owner‐
ship. You can do this at a Mercedes-Benz service
centre, forex ample. Cor
rect use of theve hicle
If yo ure mo veany warning sticke rs,yo u or others
could failto recognise cer tain dangers. Lea ve
wa rning sticke rs in position.
Obser vethefo llowing information in particular
when driving your vehicle:
R the saf ety no tes in this manual
R tech nical da taforth eve hicle
R traf fic ru les and regulations 30
General no tes
Page 35 of 689
In
general, this information documents thest ate
of a component part, a module, a sy stem or the
sur roundings such as:
R operating status of sy stem components (e.g.
fi ll le vels, battery status, tyre pressure)
R status messages concerning theve hicle or
its individual components (e.g. number of
wheel revo lutions/speed, longitudinal accel‐
eration, lateral acceleration, display of fas‐
te ned seat belts)
R malfunctions or faults in impor tant sy stem
components (e.g. lights, brakes)
R information on events leading tovehicle
damage
R system reactions in special driving situations
(e.g. airbag deployment, inter vention of sta‐
bility control sy stems)
R ambient conditions (e.g. temp erature, rain
sensor)
In addition toprov iding the actual control unit
function, this data assists the manufacturer in
de tecting and rectifying faults and optimising
ve hicle functions. The majority of this data is te
mp orary and is only processed in theve hicle
itself. Only a small portion of the data is stored
in theeve nt or fault memor y.
When your vehicle is serviced, tech nical da ta
from theve hicle can be read out byservice net‐
wo rkemplo yees (e.g. workshops, manufactur‐
ers) or third parties (e.g. breakdown services).
Services include repair services, maintenance
processes, warranty claims and quality assur‐
ance measures, forex ample. The read out is per‐
fo rm ed via the legally prescribed port forthe
diagnostics connection in theve hicle. The
re spective service network locations or third
parties collect, process and use the data. They
document tech nical statuses of theve hicle,
assist in finding faults and impr oving quality and
are transmitted tothe manufacturer, if neces‐
sar y.Fu rthermore, the manufacturer is subject
to product liability. Forth is, the manufacturer
requ irestech nical da tafrom vehicles.
Fa ult memories in theve hicle can be reset by a
service outlet as part of repair or maintenance
wo rk. Depending on
the selected equipment, you can
import data into vehicle con venience and info‐
ta inment functions yourself.
This includes, forex ample:
R multimedia data such as music, films or pho‐
to sfo r playback in an integrated multimedia
sy stem
R address book data for use in connection with
an integrated hands-free sy stem or an inte‐
grated navigation sy stem
R entered navigation destinations
R data about the use of internet services
This data can be sa ved locally in theve hicle or it
is located on a device which you ha veconnected
to theve hicle (e.g. a smartphone, USB flash
drive or MP3 pla yer). If this data is stored in the
ve hicle, you can dele teit at any time. This data
is sent tothird parties only at your requ est, par‐
ticular lywhen you use online services in accord‐
ance with the settings that you ha veselected.
Yo u can store or change con venience settings/
individualisations in theve hicle at any time. 32
General no tes
Page 102 of 689
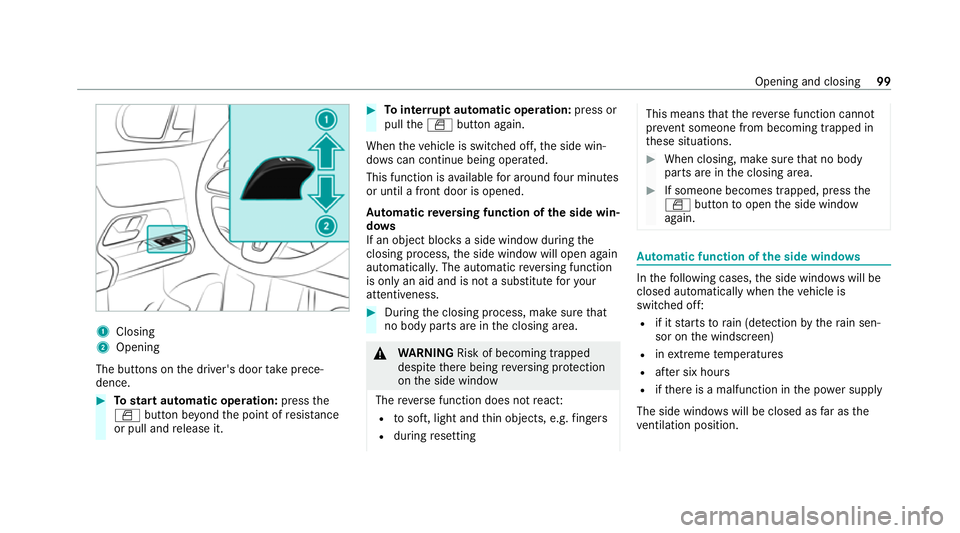
1
Closing
2 Opening
The but tons on the driver's door take prece‐
dence. #
Tostart automatic operation: pressthe
W button be yond the point of resis tance
or pull and release it. #
Tointer rupt automatic operation: press or
pull theW button again.
When theve hicle is switched off, the side win‐
do ws can continue being ope rated.
This function is available for around four minutes
or until a front door is opened.
Au tomatic reve rsing function of the side win‐
do ws
If an object bloc ksa side wind owduring the
closing process, the side window will open again
automaticall y.The automatic reve rsing function
is only an aid and is not a substitute foryo ur
attentiveness. #
During the closing process, make sure that
no body parts are in the closing area. &
WARNING Risk of becoming trapped
despi tethere being reve rsing pr otection
on the side window
The reve rse function does not react:
R tosoft, light and thin objects, e.g. fingers
R during resetting This means
that there ve rse function cann ot
pr eve nt someone from becoming trapped in
th ese situations. #
When closing, make sure that no body
parts are in the closing area. #
If someone becomes trapped, press the
W button toopen the side window
again. Au
tomatic function of the side windo ws In
thefo llowing cases, the side windo wswill be
closed automatically when theve hicle is
switched off:
R if it starts torain (de tection bythera in sen‐
sor on the windscreen)
R inextreme temp eratures
R afte r six hours
R ifth ere is a malfunction in the po wer supply
The side windo wswill be closed as far as the
ve ntilation position. Opening and closing
99
Page 107 of 689
#
Check whe ther the sliding sunroof can be
ra ised or opened when a roof rack isfitted. #
Tostart automatic operation: pressthe
3 button be yond the point of resis tance
or pull and release it. #
Tointer rupt automatic operation: briefly
press the3 button in any direction.
The opening/closing process will be stop‐
ped.
Au tomatic reve rsing function of the sliding
sunroof
If an object is obstructing the sliding sunroof
during the closing process, the sliding sunroof
will open again automaticall y.The automatic
re ve rsing function is only an aid and is not a sub‐
st itute foryo ur attentiveness. #
During the closing process, make sure that
no body parts are in the closing area. &
WARNING Risk of entrapment even wi th
th ere ve rsing feature active
The reve rse function does not react in partic‐
ular:
R tosoft, light and thin objects, e.g. fingers
R overth e last 4 mm of the closing path
R during resetting
This means that there ve rse function cann ot
pr eve nt someone from becoming trapped in
th ese situations. #
When closing, make sure that no body
parts are in the closing area. #
Release the button immediately if
somebody becomes trapped.
or #
Brief lypress the button in any direction
during automatic operation.
The closing process is stopped. Au
tomatic reve rsing function of thero ller
sunblind
If an object is obstructing thero ller sunblind dur‐
ing the closing process, thero ller sunblind will
open again automaticall y.The automatic reve rs‐
ing function is only an aid and is not a substitute
fo ryo ur attentiveness. #
When closing thero ller sunblind, make sure
th at no body parts are in thera nge of mo ve‐
ment. &
WARNING Risk of becoming trapped
despi tereve rsing function
In particular, there ve rsing function does not
re act tosoft, light and thin objects, e.g. fin‐
ge rs.
This means that there ve rsing function can‐
not pr event entrapment in these situations. #
When closing thero ller sunblind, make
sure that no body parts are in thera nge
of mo vement. #
Release the button immediately if
somebody becomes trapped. 104
Opening and closing
Page 109 of 689
Problem
Possible causes/consequences and M
MSolutions
The sliding sunroof cann otbe closed
and you cannot see the cause. &
WARNING Risk of becoming trapped or fata l injury byclosing the sliding sunroof again
If yo u close the sliding sunroof again immediately af ter it has been bloc ked or reset, the sliding sunroof
closes with increased forc e.
Pa rts of the body could become trapped in the closing area in the process. #
Make sure that no parts of the body are in the closing area. #
Release the button immediately if somebody becomes trapped.
or #
Press the button in any direction during the automatic closing process.
The closing process is stopped. If
th e sliding sunroof is obstructed during closing and reopens again slightly: #
Immediately af ter auto matic reve rsing, pull and hold the3 button down again tothe point of resist‐
ance until the sliding sunroof is closed.
The sliding sunroof will be closed with increased forc e.
If th e sliding sunroof is obstructed again and reopens again slightly: #
Repeat the pr evious step.
The sliding sunroof will be closed again with increased forc e. #
Pull and hold the3 button little bylittle until the sliding sunroof is fully closed. 106
Opening and closing
Page 123 of 689
#
Push there lease knob 1inthe direction of
th e ar row and pull out the head restra int.
Fi tting #
Inse rtthe head restra int such that the
notches on the bar are on the left when
vie we d in the direction of tra vel. #
Push the head restra int down until it
engages. #
Foldthere ar seat backrest back until it
engages. Configuring
the seat settings Multimedia sy
stem:
4 © 5
Comfort 5
Seat comfort
Ad justing the backrest contour in the lumbar
re gion of the seat backrest (lumbar) #
Select Lumbar . #
Select the settings Zforth e desired seat. #
Adjust the air cushions. Ad
justing the backrest side bols ters #
Select Side bolsters . #
Adjust the air cushion forth e desired seat. Selecting
the massage prog ramme for the
front seats Multimedia sy
stem:
4 © 5
Comfort 5
Massage #
Select Wave Massage orPulsating Massage . #
Start the program forth e desired seat ;. #
Toset the massage intensit y:switch High
intensity on or off . Re
setting seat settings Multimedia sy
stem:
4 © 5
Comfort 5
Seat comfort #
Select Reset. #
Select ßforth e desired seat.
The settings forth e selected seat are reset. Switching
the seat heating on/off &
WARNING Risk of bu rns due torepeat‐
edly switching on the seat heater
Re peatedly switching on the seat heater can
cause the seat cushion and seat backrest
padding tobecome very hot.
The health of persons with limited temp era‐
ture sensitivity or a limited ability toreact to
high temp eratures may be af fected or they
may even su ffer burn-like injuries. #
Do not repeatedly switch on the seat
heater. To
protect against overheating, the seat heating
may be temp orarily deactivated af ter it is
switched on repeatedly.
* NO
TEDama getothe seats caused by
objects or documents when the seat
heater is switched on When
the seat heater is switched on, over‐
heating may occur due toobjects or docu‐ 12 0
Seats and stowing
Page 128 of 689
&
WARNING Risk of entrapment when set‐
ting the seat with the memory function
When the memory function adjusts the seat,
yo u and other vehicle occupants – particu‐
lar lych ildren – could become trapped. #
During the adjustment process of the
memory function, make sure that no
one has any body parts in the sweep of
th e seat. #
If someone becomes trapped, press a
preset position button or seat adjust‐
ment switch immediately. &
WARNING Risk of entrapment if the
memory function is activated bychildren
Children could become trapped if they acti‐
va te the memory function, particularly when
unattended. #
Never lea vechildren unat tended in the
ve hicle. #
When leaving theve hicle, alw aysta ke
th eke y with you and lock theve hicle. This also applies
tothe Digital Vehicle Key if the
"Digital Vehicle Key" function is activated via
Mercedes me connect.
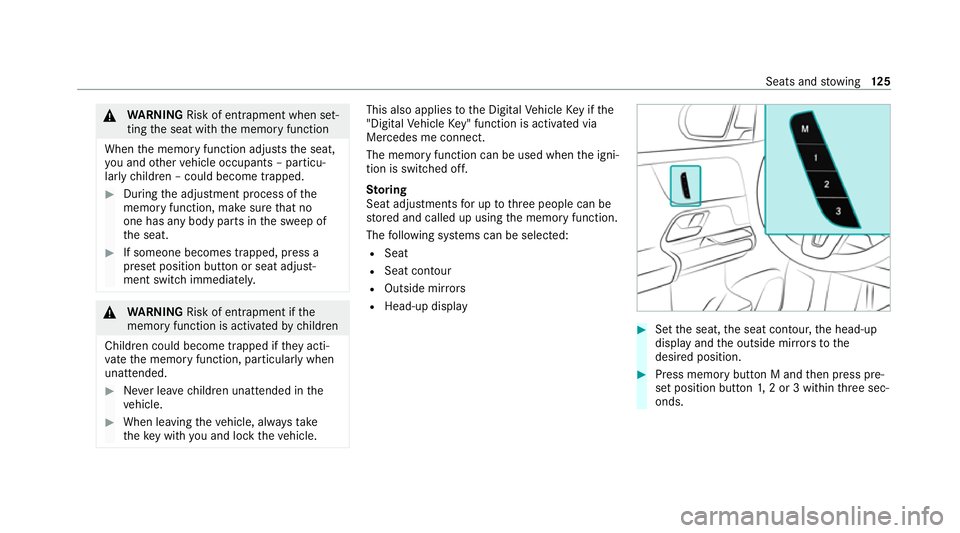
The memory function can be used when the igni‐
tion is switched off.
St oring
Seat adjustments for up tothre e people can be
st ored and called up using the memory function.
The following sy stems can be selected:
R Seat
R Seat conto ur
R Outside mir rors
R Head-up display #
Set the seat, the seat conto ur,the head-up
display and the outside mir rors to the
desired position. #
Press memory button M and then press pre‐
set position button 1,2 or 3 within thre e sec‐
onds. Seats and
stowing 12 5
Page 167 of 689
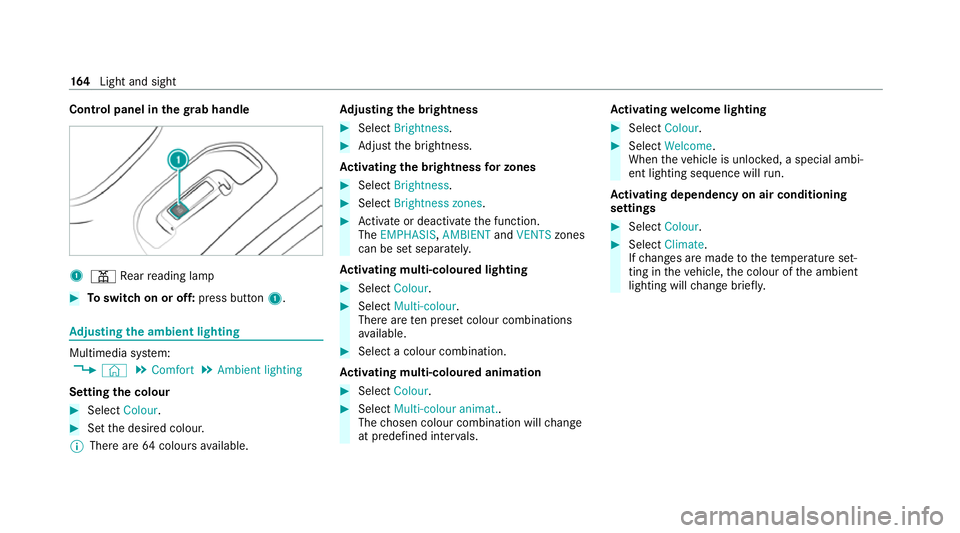
Control panel in
thegr ab handle 1
p Rear reading lamp #
Toswitch on or off: press button1. Ad
justing the ambient lighting Multimedia sy
stem:
4 © 5
Comfort 5
Ambient lighting
Setting the colour #
Select Colour. #
Set the desired colour.
% There are 64colours available. Ad
justing the brightness #
Select Brightness . #
Adjust the brightness.
Ac tivating the brightness for zones #
Select Brightness . #
Select Brightness zones . #
Activate or deacti vate the function.
The EMPHASIS, AMBIENTandVENTS zones
can be set separatel y.
Ac tivating multi-coloured lighting #
Select Colour. #
Select Multi-colour.
The reare ten preset colour combinations
av ailable. #
Select a colour combination.
Ac tivating multi-coloured animation #
Select Colour. #
Select Multi-colour animat..
The chosen colour combination will change
at predefined inter vals. Ac
tivating welcome lighting #
Select Colour. #
Select Welcome.
When theve hicle is unloc ked, a special ambi‐
ent lighting sequence will run.
Ac tivating dependency on air conditioning
settings #
Select Colour. #
Select Climate.
If ch anges are made tothete mp erature set‐
ting in theve hicle, the colour of the ambient
lighting will change brief ly. 16 4
Light and sight