Page 287 of 436

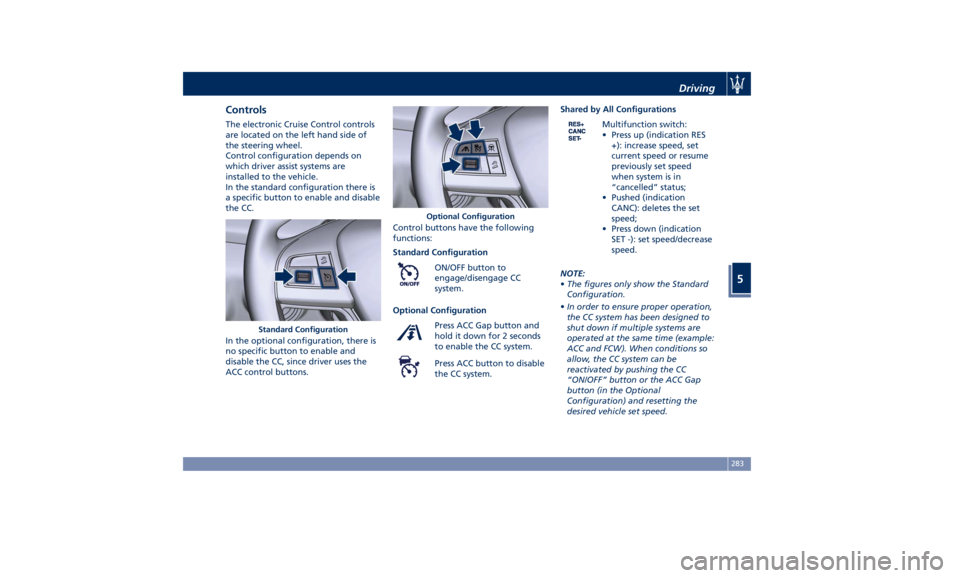
Controls The electronic Cruise Control controls
are located on the left hand side of
the steering wheel.
Control configuration depends on
which driver assist systems are
installed to the vehicle.
In the standard configuration there is
a specific button to enable and disable
the CC.
In the optional configuration, there is
no specific button to enable and
disable the CC, since driver uses the
ACC control buttons. Control buttons have the following
functions:
Standard Configuration
ON/OFF button to
engage/disengage CC
system.
Optional Configuration
Press ACC Gap button and
hold it down for 2 seconds
to enable the CC system.
Press ACC button to disable
the CC system. Shared by All Configurations
Multifunction switch:
• Press up (indication RES
+): increase speed, set
current speed or resume
previously set speed
when system is in
“cancelled” status;
• Pushed (indication
CANC): deletes the set
speed;
• Press down (indication
SET -): set speed/decrease
speed.
NOTE:
• The figures only show the Standard
Configuration.
• In order to ensure proper operation,
the CC system has been designed to
shut down if multiple systems are
operated at the same time (example:
ACC and FCW). When conditions so
allow, the CC system can be
reactivated by pushing the CC
“ON/OFF” button or the ACC Gap
button (in the Optional
Configuration) and resetting the
desired vehicle set speed.Standard Configuration Optional Configuration Driving
5
283
Page 292 of 436

Apart from the image at the center of
the display, CC, ACC, HDC, LKA and
HAS systems status is represented by
icons at the top left and right. These
icons remain displayed even when
exiting the “Driver Assist” screen.
The vehicle(s) and horizontal bars
represent the ACC status as ready
(white) or with sensed vehicle ahead
(green); the white, grey or yellow lines
represent the LKA and HAS systems.
The ACC screen can be displayed any
time driver changes system status or
settings. After 5 seconds of ACC
inactivity, the display goes back to last
screen.
ACC Controls and Activation
Conditions The buttons on the LH side of the
steering wheel control the ACC
operations and the other
functions/driver assist systems installed
to this vehicle. 1 Multifunction control shared by all
driver assist functions/systems:
• Press up (indication “RES +”):
increase speed, set current speed
or resume previously set speed
when system is in “cancelled”
status.
• Pushed (indication “CANC”):
cancel the function if it was in
“set” status, going in a ready
condition but remembering the
previous set speed.
• Press down (indication “SET -”):
set speed/decrease speed. 2 Two functions button with ACC
activated:
• ACC Gap: pressed and released;
set the distance to sensed vehicle
ahead as horizontal bars (setting
cycle starts to 3 bars).
• CC On: pressed for 2 seconds
activates the CC system.
• Press it to switch from CC to
ACC.
3 ACC ON/OFF button. If enabled,
pressing this button will disable CC.
4 HAS ON/OFF button with ACC set
only . See "Highway Assist - HAS" in
this section for further details.
NOTE:
Any change made to tire dimensions
affects performance of Adaptive Cruise
Control and Front Collision Warning
(FCW), if equipped.
The ACC is not activated in the
following conditions:
• When braking.
• When parking brake is activated.
• When automatic transmission is in P
(Park), R (Reverse) or N (Neutral).
• When vehicle speed is out of preset
speed range.
• When brakes are overheated.Driving
5
288
Page 319 of 436

• Vehicle speed must be between 0 to
90 mph (0 and 145 km/h).
• No faults in the forward facing
camera, radar, EPS, or MTC+.
• Lane width between 3 to 4.6 yd (2.8
and 4.2 m).
• Turn signal not activated.
• No faults related to this system.
Speed Range of Use Speed mph (km/h)
Minimum 0 (0)
Engaged/activated
(with ACC engaged) 0 (0)
Engaged/activated
(with ACC not
engaged) 18 (30)
Maximum 90 (145)
• If set above the maximum speed,
HAS will not function after the
vehicle speed will reach the
maximum speed.
• If set below the maximum speed and
the ACC target speed is increased,
HAS will function up to the
maximum speed and then the system
will turn off automatically.
• When the ACC target speed is
reduce and speed is lower than the maximum speed, the system will
start automatically.
• If the ACC target speed is set under
the maximum speed, HAS is active
and vehicle speed increases above
the maximum speed due to slope,
HAS will continue to function.
HAS Monitoring on Instrument
Cluster HAS and the other ADAS systems
conditions can be monitored on
instrument cluster display by accessing
the “Driver Assist” page with the
buttons on the steering wheel (see
“Instrument Cluster” in section
“Dashboard Instruments and
Controls”).
The
symbol in grey indicates that
the HAS system is active, but not
engaged and is shown at the centre of
the TFT display when the “Driver
Assist” page is displayed. When
exiting the "Driver Assist" page, on
TFT display top left corner, the
grey symbol will appear in the
multiple light of active ADAS systems. In addition to these symbols, on the
TFT top and bottom edge a coloured
glow may appear (further referred to
as "attention level colour"). Attention
level colour together with the outline
of the symbol
represent a further
indication of the system status. Driver Assist Page
Non-Driver Assist PageDriving
5
315
Page 387 of 436

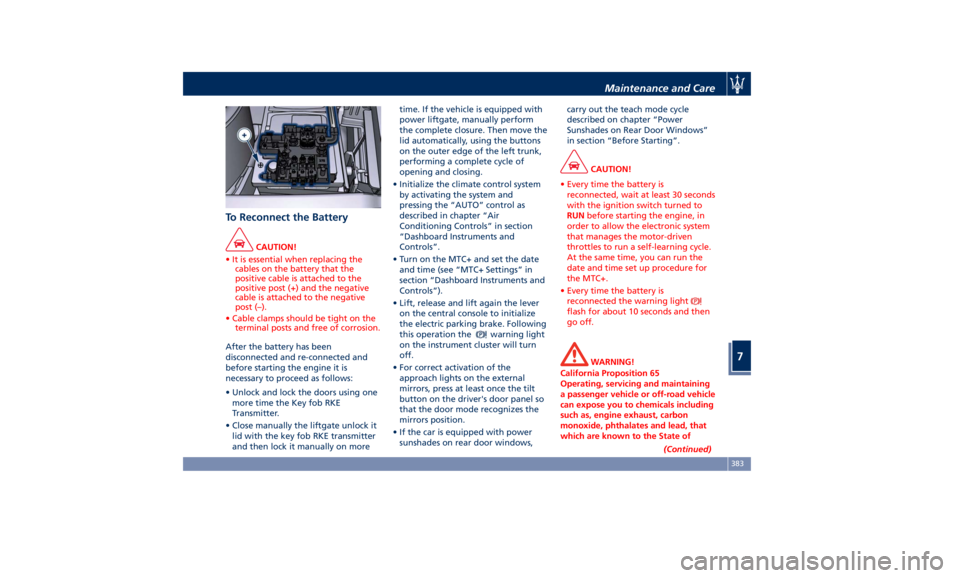
To Reconnect the Battery CAUTION!
• It is essential when replacing the
cables on the battery that the
positive cable is attached to the
positive post (+) and the negative
cable is attached to the negative
post (–).
• Cable clamps should be tight on the
terminal posts and free of corrosion.
After the battery has been
disconnected
and re-connected and
before starting the engine it is
necessary to proceed as follows:
• Unlock and lock the doors using one
more time the Key fob RKE
Transmitter.
• Close manually the liftgate unlock it
lid with the key fob RKE transmitter
and then lock it manually on more time. If the vehicle is equipped with
power liftgate, manually perform
the complete closure. Then move the
lid automatically, using the buttons
on the outer edge of the left trunk,
performing a complete cycle of
opening and closing.
• Initialize the climate control system
by activating the system and
pressing the “AUTO” control as
described in chapter “Air
Conditioning Controls” in section
“Dashboard Instruments and
Controls”.
• Turn on the MTC+ and set the date
and time (see “MTC+ Settings” in
section “Dashboard Instruments and
Controls”).
• Lift, release and lift again the lever
on the central console to initialize
the electric parking brake. Following
this operation the
warning light
on the instrument cluster will turn
off.
• For correct activation of the
approach lights on the external
mirrors, press at least once the tilt
button on the driver's door panel so
that the door mode recognizes the
mirrors position.
• If the car is equipped with power
sunshades on rear door windows, carry out the teach mode cycle
described on chapter “Power
Sunshades on Rear Door Windows”
in section “Before Starting”.
CAUTION!
• Every time the battery is
reconnected, wait at least 30 seconds
with the ignition switch turned to
RUN before starting the engine, in
order to allow the electronic system
that manages the motor-driven
throttles to run a self-learning cycle.
At the same time, you can run the
date and time set up procedure for
the MTC+.
• Every time the battery is
reconnected the warning light
flash for about 10 seconds and then
go off.
WARNING!
California Proposition 65
Operating, servicing and maintaining
a passenger vehicle or off-road vehicle
can expose you to chemicals including
such as, engine exhaust, carbon
monoxide, phthalates and lead, that
which are known to the State of
(Continued)Maintenance and Care
7
383