2019 MASERATI LEVANTE buttons
[x] Cancel search: buttonsPage 155 of 436
For more efficient programming and
accurate transmission of the
radio-frequency signal it is
recommended that a new battery be
placed in the hand-held transmitter of
the device that is being programmed
to the HomeLink ®
system.
Before starting programming it is
necessary to erase the standard codes
memorized on the HomeLink ®
device
during the production phase. To erase
such codes:
• place the ignition device in the RUN
position without starting the engine;
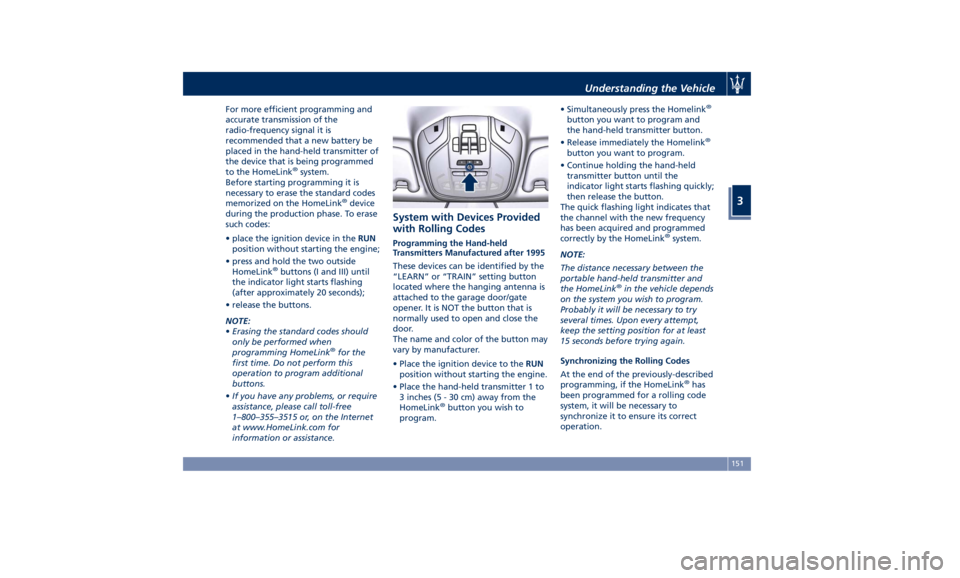
• press and hold the two outside
HomeLink ®
buttons (I and III) until
the indicator light starts flashing
(after approximately 20 seconds);
• release the buttons.
NOTE:
• Erasing the standard codes should
only be performed when
programming HomeLink ®
for the
first time. Do not perform this
operation to program additional
buttons.
• If you have any problems, or require
assistance, please call toll-free
1–800–355–3515 or, on the Internet
at www.HomeLink.com for
information or assistance. System with Devices Provided
with Rolling Codes Programming the Hand-held
Transmitters Manufactured after 1995
These devices can be identified by the
“LEARN” or “TRAIN” setting button
located where the hanging antenna is
attached to the garage door/gate
opener. It is NOT the button that is
normally used to open and close the
door.
The name and color of the button may
vary by manufacturer.
• Place the ignition device to the RUN
position without starting the engine.
• Place the hand-held transmitter 1 to
3 inches (5 - 30 cm) away from the
HomeLink ®
button you wish to
program. • Simultaneously press the Homelink ®
button you want to program and
the hand-held transmitter button.
• Release immediately the Homelink ®
button you want to program.
• Continue holding the hand-held
transmitter button until the
indicator light starts flashing quickly;
then release the button.
The quick flashing light indicates that
the channel with the new frequency
has been acquired and programmed
correctly by the HomeLink ®
system.
NOTE:
The distance necessary between the
portable hand-held transmitter and
the HomeLink ®
in the vehicle depends
on the system you wish to program.
Probably it will be necessary to try
several times. Upon every attempt,
keep the setting position for at least
15 seconds before trying again.
Synchronizing the Rolling Codes
At the end of the previously-described
programming, if the HomeLink ®
has
been programmed for a rolling code
system, it will be necessary to
synchronize it to ensure its correct
operation.Understanding the Vehicle
3
151
Page 156 of 436
• Locate the “LEARN” or “TRAINING”
setting button of the opening motor.
Firmly press it and then release it. On
some garage door openers/devices
there may be a light that blinks
when the garage door opener/device
is in the LEARN/TRAIN mode.
NOTE:
You have 30 seconds to initiate the
next step after the setting button has
been pressed.
• Return to the vehicle and press the
programmed HomeLink ®
button for
two seconds and then release it.
• Repeat this operation a second time.
If the garage door opening device
activates, the programming/
synchronization phase is complete.
NOTE:
If the garage door opening device
does not activate, press the button a
third time for two seconds and then
release it to complete the
programming/synchronization phase.
• To program the remaining two
HomeLink ®
buttons, repeat the same
step for each remaining button. DO
NOT erase the channels. Reprogramming a Single HomeLink ®
Button
To reprogram a channel that has been
previously trained, follow these steps:
• Place the ignition device to the RUN
position without starting the engine.
• Press and hold the desired
HomeLink ®
button.
• Without releasing the button
proceed with “Programming the
hand-held transmitters” from second
step and follow all remaining steps.
System with Devices Without
Rolling Code Programming the Hand-held
Transmitters Manufactured before
1995
• Turn the ignition device to the RUN
position without starting the engine.
• Place the hand-held transmitter 1 to
3 inches (5 to 30 cm) away from the
HomeLink ®
button you wish to
program.
• Simultaneously press and hold both
buttons until the indicator light
starts flashing quickly; then release
both buttons.
The quick flashing light indicates that
the channel with the new frequency has been acquired and programmed
correctly by the HomeLink ®
system.
NOTE:
The distance necessary between the
portable hand-held transmitter and
the HomeLink ®
in the vehicle depends
on the system you wish to program.
Probably it will be necessary to try
several times. Upon every attempt,
keep the setting position for at least
15 seconds before trying again.
• Press and hold the programmed
HomeLink ®
button.
If the garage door opener/device
activates, programming is complete. To
program the remaining two
HomeLink ®
buttons, repeat each step
for the same remaining button. Do not
erase the channels.
Reprogramming a Single HomeLink ®
Button
To reprogram a channel that has been
previously trained, follow these steps:
• Place the ignition device to the RUN
position without starting the engine.
• Press and hold the desired
HomeLink ®
button.
• Without releasing the button
proceed with “Programming theUnderstanding the Vehicle
3
152
Page 157 of 436

hand-held transmitters” from second
step and follow all remaining steps.
Using HomeLink ®
To operate, press and release the
programmed HomeLink ®
button.
Activation will now occur for the
programmed device (i.e., garage door
opener, gate operator, security system,
entry door lock, home/office lighting,
etc.). The hand-held transmitter of the
device may also be used at any time.
Security It is advisable to erase all channels
before you sell or turn in your vehicle.
To erase the channels press and hold
the two outside HomeLink ®
buttons (I
and III) until the indicator light starts
flashing (after approximately 20
seconds).
The HomeLink ®
Universal Transceiver
is disabled when the vehicle security
alarm is active (see “Vehicle security
alarm” in section “Before Starting”).
Troubleshooting Tips If you are having trouble while
programming HomeLink ®
, here are
some of the most common solutions:
• Replace the battery in the original
hand-held transmitter. • Press the LEARN button on the
garage door opener to complete the
training for a rolling code.
• Did you unplug the device for
programming and forgot to plug it
back in?
If you have any problems, or require
assistance, please call toll-free
1–800–355–3515 or, on the Internet at
www.HomeLink.com for information
or assistance.
Radio Frequency Device -
Regulatory Information The “Regulatory Information” for all
the radio frequency and radar devices
can be consulted by accessing the
"Services" section on the website
www.maserati.com. Understanding the Vehicle
3
153
Page 172 of 436
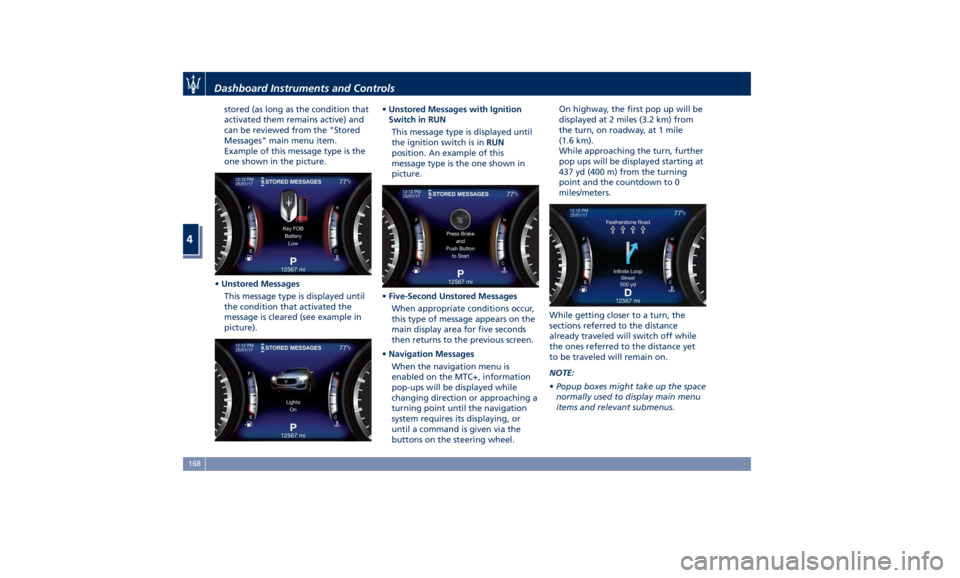
stored (as long as the condition that
activated them remains active) and
can be reviewed from the "Stored
Messages" main menu item.
Example of this message type is the
one shown in the picture.
• Unstored Messages
This message type is displayed until
the condition that activated the
message is cleared (see example in
picture). • Unstored Messages with Ignition
Switch in RUN
This message type is displayed until
the ignition switch is in RUN
position. An example of this
message type is the one shown in
picture.
• Five-Second Unstored Messages
When appropriate conditions occur,
this type of message appears on the
main display area for five seconds
then returns to the previous screen.
• Navigation Messages
When the navigation menu is
enabled on the MTC+, information
pop-ups will be displayed while
changing direction or approaching a
turning point until the navigation
system requires its displaying, or
until a command is given via the
buttons on the steering wheel. On highway, the first pop up will be
displayed at 2 miles (3.2 km) from
the turn, on roadway, at 1 mile
(1.6 km).
While approaching the turn, further
pop ups will be displayed starting at
437 yd (400 m) from the turning
point and the countdown to 0
miles/meters.
While getting closer to a turn, the
sections referred to the distance
already traveled will switch off while
the ones referred to the distance yet
to be traveled will remain on.
NOTE:
• Popup boxes might take up the space
normally used to display main menu
items and relevant submenus.Dashboard Instruments and Controls
4
168
Page 196 of 436
Audio Controls The vehicle is equipped with audio
controls that allow both driver and
front passenger to operate the audio
system. These controls can be used to
adjust audio volume, change radio
station or mode (FM, AM, USB, etc).
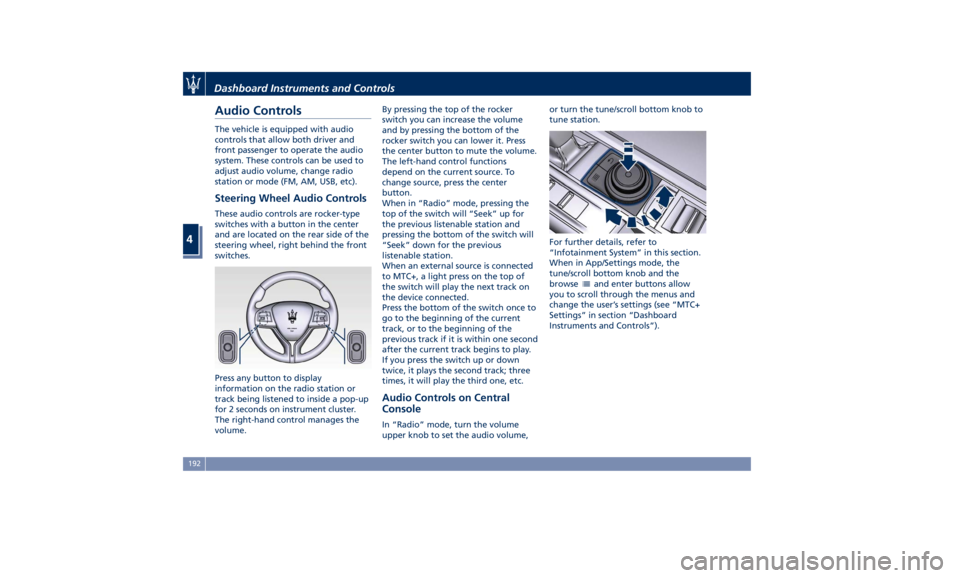
Steering Wheel Audio Controls These audio controls are rocker-type
switches with a button in the center
and are located on the rear side of the
steering wheel, right behind the front
switches.
Press any button to display
information on the radio station or
track being listened to inside a pop-up
for 2 seconds on instrument cluster.
The right-hand control manages the
volume. By pressing the top of the rocker
switch you can increase the volume
and by pressing the bottom of the
rocker switch you can lower it. Press
the center button to mute the volume.
The left-hand control functions
depend on the current source. To
change source, press the center
button.
When in “Radio” mode, pressing the
top of the switch will “Seek” up for
the previous listenable station and
pressing the bottom of the switch will
“Seek” down for the previous
listenable station.
When an external source is connected
to MTC+, a light press on the top of
the switch will play the next track on
the device connected.
Press the bottom of the switch once to
go to the beginning of the current
track, or to the beginning of the
previous track if it is within one second
after the current track begins to play.
If you press the switch up or down
twice, it plays the second track; three
times, it will play the third one, etc.
Audio Controls on Central
Console In “Radio” mode, turn the volume
upper knob to set the audio volume, or turn the tune/scroll bottom knob to
tune station.
For further details, refer to
“Infotainment System” in this section.
When in App/Settings mode, the
tune/scroll bottom knob and the
browse
and enter buttons allow
you to scroll through the menus and
change the user’s settings (see “MTC+
Settings” in section “Dashboard
Instruments and Controls”).Dashboard Instruments and Controls
4
192
Page 209 of 436
horn will sound when the doors are
locked with the key fob RKE
transmitter. You can choose from
the following options: “Off” (no
sound), “1st Press” (sound on the
first press of the
button) and
“2nd Press” (sound on the second
press of the
button).
• Sound Horn with Remote Start
When this feature is selected, the
horn will sound when you use the
key fob RKE transmitter to start the
engine. The feature can be set to
“On” or “Off”. See “Remote Start
System” in section “Before Starting”
for further details.
• Remote Unlock Sequence
By selecting this feature you may set
up only the driver's door or all
doors mode will unlock on the first
press of the key fob RKE transmitter
button. When “Driver Door” is
selected, you must press the key fob
RKE transmitter
button twice to
unlock also the passenger's doors.
When unlocking “All Doors” by first
press selection mode, all doors will unlock on the first press of the key
fob RKE transmitter
button.
If the vehicle is programmed on “1st
Press of Key Fob Unlocks”:
• all doors will unlock no matter
which “Passive Entry” equipped
door handle is grasped;
• only the driver’s door will unlock
when the driver’s door is grasped;
• with “Passive Entry”, touching the
handle more than once will only
result in the driver’s door opening.
If driver door first is selected, once
the driver door is opened, the
interior door lock/unlock switch can
be used to unlock all doors (or use
key fob RKE transmitter).
• Passive Entry
This feature allows you to lock and
unlock the vehicle door(s) without
having to push the key fob RKE
transmitter
or buttons. By
selecting this feature, “Passive
Entry” may be set to “On” or “Off”.
The default status is “On”. With
“Passive Entry” deactivated, also the
“Pre-Short Drop” function is
disabled (for further information,
refer to “Bodywork Maintenance
and Care” in section “Maintenance
and Care”). • Personal Settings Linked to Key Fob
This selected mode enables to
combine the key fob to personal
driver’s position settings. These
settings will be implemented when
pressing the
button on the key
fob RKE transmitter with ignition
device in RUN position.
• Power Liftgate Alert
When this feature is available, if it
selected, further to turn indicators
flashing, an acoustic warning will
also be triggered when opening
and closing the liftgate and also
when the fully open position of the
liftgate is set by the user. The
feature can be set to “On” or “Off”.
• Hands Free Power Liftgate
To prevent the accidental opening
of the power liftgate/Hand free
(optional) with the movement of
the foot, it is possible to disable the
“Hand Free” function. The feature
can be set to “On” or “Off”. This
operation is recommended when
you have to wash the car (for
further information, refer to
“Power Liftgate Operation” in
section “Before Starting”).Dashboard Instruments and Controls
4
205
Page 213 of 436
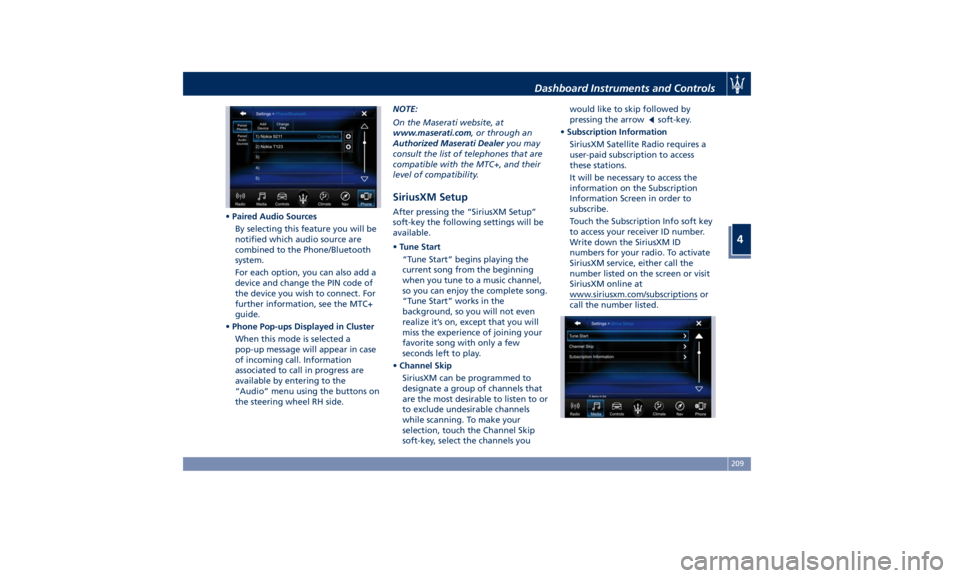
• Paired Audio Sources
By selecting this feature you will be
notified which audio source are
combined to the Phone/Bluetooth
system.
For each option, you can also add a
device and change the PIN code of
the device you wish to connect. For
further information, see the MTC+
guide.
• Phone Pop-ups Displayed in Cluster
When this mode is selected a
pop-up message will appear in case
of incoming call. Information
associated to call in progress are
available by entering to the
“Audio” menu using the buttons on
the steering wheel RH side. NOTE:
On the Maserati website, at
www.maserati.com , or through an
Authorized Maserati Dealer you may
consult the list of telephones that are
compatible with the MTC+, and their
level of compatibility.
SiriusXM Setup After pressing the “SiriusXM Setup”
soft-key the following settings will be
available.
• Tune Start
“Tune Start” begins playing the
current song from the beginning
when you tune to a music channel,
so you can enjoy the complete song.
“Tune Start” works in the
background, so you will not even
realize it’s on, except that you will
miss the experience of joining your
favorite song with only a few
seconds left to play.
• Channel Skip
SiriusXM can be programmed to
designate a group of channels that
are the most desirable to listen to or
to exclude undesirable channels
while scanning. To make your
selection, touch the Channel Skip
soft-key, select the channels you would like to skip followed by
pressing the arrow
soft-key.
• Subscription Information
SiriusXM Satellite Radio requires a
user-paid subscription to access
these stations.
It will be necessary to access the
information on the Subscription
Information Screen in order to
subscribe.
Touch the Subscription Info soft key
to access your receiver ID number.
Write down the SiriusXM ID
numbers for your radio. To activate
SiriusXM service, either call the
number listed on the screen or visit
SiriusXM online at
www.siriusxm.com/subscriptions or
call the number listed.Dashboard Instruments and Controls
4
209
Page 220 of 436
NOTE:
For vehicles equipped with Remote
Start, the Air Conditioning System will
not function during Remote Start
operation if the climate control is left
in “OFF”.
2. A/C
Touch the "A/C" soft-key to change
the current air conditioning setting;
the soft-key illuminates when the A/C
is on. Operating this function will
cause the automatic feature to switch
into manual mode and the “AUTO”
LED on the buttons and MTC+ soft-key
will turn off.
3. Driver temperature control
Provides the driver with independent
temperature control. Touch the blue
soft-key for cooler temperature.
Touch the red
soft-key for warmer
temperature. The driver's temperature
setting will be displayed on the MTC+
between the soft-key
and . The
MTC+ display can also be used to
adjust the temperature by touching
and sliding the bar towards soft-key
, to increase temperature, or
towards soft-keys
to decrease it.
During this phase, a small pop-up on
the side will show the corresponding
temperature. You can increase or decrease the
temperature using the rocker switch
on the climate control panel.
NOTE:
In “SYNC” mode, this control will also
automatically and simultaneously
adjust the passenger temperature.
4. Passenger temperature control
Provides the passenger with
independent temperature control.
Touch the
soft-key for cooler
temperature. Touch the
soft-key for
warmer temperature. The passenger's
temperature setting will be displayed
on the MTC+ screen between the
soft-keys
and .
You can increase or decrease the
temperature using the rocker switch
on the climate control panel.
NOTE:
Pressing the 4 button/soft-key while in
“SYNC” mode will automatically exit
“SYNC”.
5. Recirculation
Press to change the current setting,
the LED indicator on the button and
the relevant soft-key illuminates to
indicate which recirculation function is
activated. For further details, see paragraph “Dual zone Climate Control
Functions” in this chapter.
6. Blower control
Blower control is used to adjust the
amount of air forced through the
climate system. Eight levels of blower
speed can be selected. Adjusting the
blower will cause automatic mode to
switch to manual.
On the climate control panel, push the
rocker switch up to increase fan speed.
Push the rocker switch down to
decrease fan speed. Pushing down the
rocker switch when set blower is at the
first speed, causes the A/C system
shutdown (OFF condition).
On the MTC+ display, touch the small
icon of the blower to decrease the
speed, or the big icon to increase it.
Between the two icons, bars will
appear to show the number of the
corresponding selected speed.
The blower can also be activated/
regulated by touching the bars
between the two blower icons.
When the MTC+ is displayed in any
mode other than “Climate”, the
blower speed is indicated by the bright
segments in the climate icon.
7-8. AUTO
This function automatically controls
the interior temperature by adjustingDashboard Instruments and Controls
4
216