2019 MASERATI LEVANTE buttons
[x] Cancel search: buttonsPage 105 of 436
Driver Memory Seat This feature allows the driver to store
up to two different memory profiles
for easy recall through a memory
switch. Each memory profile contains
desired position settings for the driver
seat, external side mirrors, adjustable
pedals (optional), and power tilt and
telescopic steering column and a set of
programmed radio stations.
Your key fob RKE transmitter can also
be set to recall the same positions by
pressing the
button.
NOTE:
• Only one key fob RKE transmitter
can be linked to each of the memory
positions.
• “Passive Entry” door handles cannot
be linked to the memory function.
Use either the memory recall switch
or the key fob RKE transmitter (if
linked to the memory feature) to
recall memory positions 1 or 2.
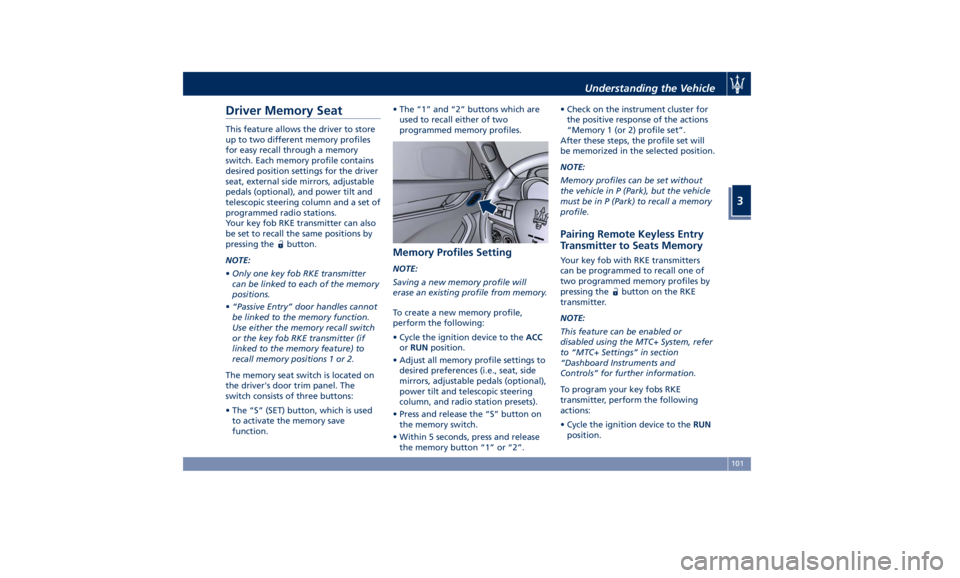
The memory seat switch is located on
the driver's door trim panel. The
switch consists of three buttons:
• The “S” (SET) button, which is used
to activate the memory save
function. • The “1” and “2” buttons which are
used to recall either of two
programmed memory profiles.
Memory Profiles Setting NOTE:
Saving a new memory profile will
erase an existing profile from memory.
To create a new memory profile,
perform the following:
• Cycle the ignition device to the ACC
or RUN position.
• Adjust all memory profile settings to
desired preferences (i.e., seat, side
mirrors, adjustable pedals (optional),
power tilt and telescopic steering
column, and radio station presets).
• Press and release the “S” button on
the memory switch.
• Within 5 seconds, press and release
the memory button “1” or “2”. • Check on the instrument cluster for
the positive response of the actions
“Memory 1 (or 2) profile set”.
After these steps, the profile set will
be memorized in the selected position.
NOTE:
Memory profiles can be set without
the vehicle in P (Park), but the vehicle
must be in P (Park) to recall a memory
profile.
Pairing Remote Keyless Entry
Transmitter to Seats Memory Your key fob with RKE transmitters
can be programmed to recall one of
two programmed memory profiles by
pressing the
button on the RKE
transmitter.
NOTE:
This feature can be enabled or
disabled using the MTC+ System, refer
to “MTC+ Settings” in section
“Dashboard Instruments and
Controls” for further information.
To program your key fobs RKE
transmitter, perform the following
actions:
• Cycle the ignition device to the RUN
position.Understanding the Vehicle
3
101
Page 106 of 436
• Move the seat and/or the other
adjustable devices in the position
that you wish to memorize, or recall
a previously memorized profile,
pressing the corresponding memory
button “1” or “2”.
• Cycle the ignition device to the OFF
position.
• Press and release the “S” button.
• Within 5 seconds, press and release
the memory button “1” or “2”.
• Press and release the
button on
key fob RKE transmitter.
• Within 3 seconds, press and release
the
button on the key fob RKE
transmitter.
To check if the system has memorized
the correct profile, you can move the
seat and press the
button: the seat
will move to the memorized position.
NOTE:
Your key fobs RKE transmitter can be
unlinked to your memory settings by
pressing the “S” button followed by
the
button on the key fob RKE
transmitter. Memory Position Recall NOTE:
The vehicle must be in P (Park) to recall
memory positions. If a recall is
attempted when the vehicle is not in P
(Park), a message will display in the
instrument cluster.
To recall the memory settings for
driver, press memory button number
“1” or “2” on the driver's door trim
panel or the
button on the RKE
transmitter linked to memory position
“1” or “2” with ignition device in the
RUN position.
A recall can be canceled by pressing
any of the buttons (“S”, “1”, or “2”)
during a recall. When a recall is
canceled, the driver seat, external side
mirrors, adjustable pedals (optional),
and power tilt and telescopic steering
column stop moving.
A delay of at least one second will
occur before selecting a new recall. Easy Entry/Exit Driver Seat This feature provides automatic driver
seat positioning to enhance driver
mobility when entering and exiting
the vehicle.
The distance the driver seat moves
depends on where you have the driver
seat positioned when you place the
ignition device to the OFF position.
• When you cycle the ignition device
to the OFF position the driver seat:
• will move about 2.36 in (60 mm)
rearward if the driver seat position
is greater than or equal to ca. 5.51
in (140 mm) forward of the rear
stop;
• will move to a position of ca. 3.15
in (80 mm) rearward of the rear
stop if the driver seat position is
between 5.51 in (140 mm) and 3.15
in (80 mm) forward of the rear
stop.
• The seat will return to its previously
set position when you place the
ignition device into the ACC or RUN
position.
• The Easy Entry/Exit feature is
disabled when the driver seat
position is less than 3.15 in (80 mm)
forward of the rear stop. In this
position, there would be no benefitUnderstanding the Vehicle
3
102
Page 112 of 436
• Tilt the seat back to the upright
position (see “CArgo Area” in this
section).
• Reposition the head restraint to the
appropriate height for the passenger.
WARNING!
• A loose head restraint thrown
forward in a collision or hard stop
could cause serious injury or death
to occupants of the vehicle. Always
securely stow removed head
restraints in a location outside the
occupant compartment.
• ALL the head restraints MUST be
reinstalled in the vehicle to properly
protect the occupants. Follow the
re-installation instructions above
prior to operating the vehicle or
occupying a seat. Steering Wheel
Adjustment This feature allows you to tilt the
steering column upward or downward
or to lengthen or shorten it in order to
adjust the steering wheel to an
optimized position.
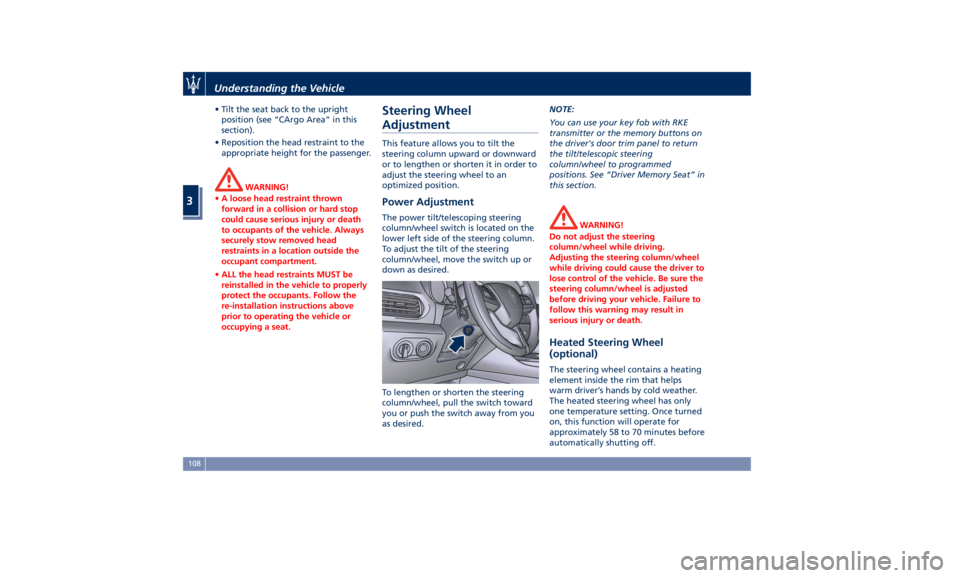
Power Adjustment The power tilt/telescoping steering
column/wheel switch is located on the
lower left side of the steering column.
To adjust the tilt of the steering
column/wheel, move the switch up or
down as desired.
To lengthen or shorten the steering
column/wheel, pull the switch toward
you or push the switch away from you
as desired. NOTE:
You can use your key fob with RKE
transmitter or the memory buttons on
the driver's door trim panel to return
the tilt/telescopic steering
column/wheel to programmed
positions. See “Driver Memory Seat” in
this section.
WARNING!
Do not adjust the steering
column/wheel while driving.
Adjusting the steering column/wheel
while driving could cause the driver to
lose control of the vehicle. Be sure the
steering column/wheel is adjusted
before driving your vehicle. Failure to
follow this warning may result in
serious injury or death.
Heated Steering Wheel
(optional) The steering wheel contains a heating
element inside the rim that helps
warm driver’s hands by cold weather.
The heated steering wheel has only
one temperature setting. Once turned
on, this function will operate for
approximately 58 to 70 minutes before
automatically shutting off.Understanding the Vehicle
3
108
Page 114 of 436
Adjustable Pedals (if
equipped) The adjustable pedals system is
designed to allow greater range of
pedals positions enabling driver
comfort with regard to the steering
wheel tilt and the seat position.
This feature allows the brake and
accelerator pedals to move toward or
away from the driver’s feet.
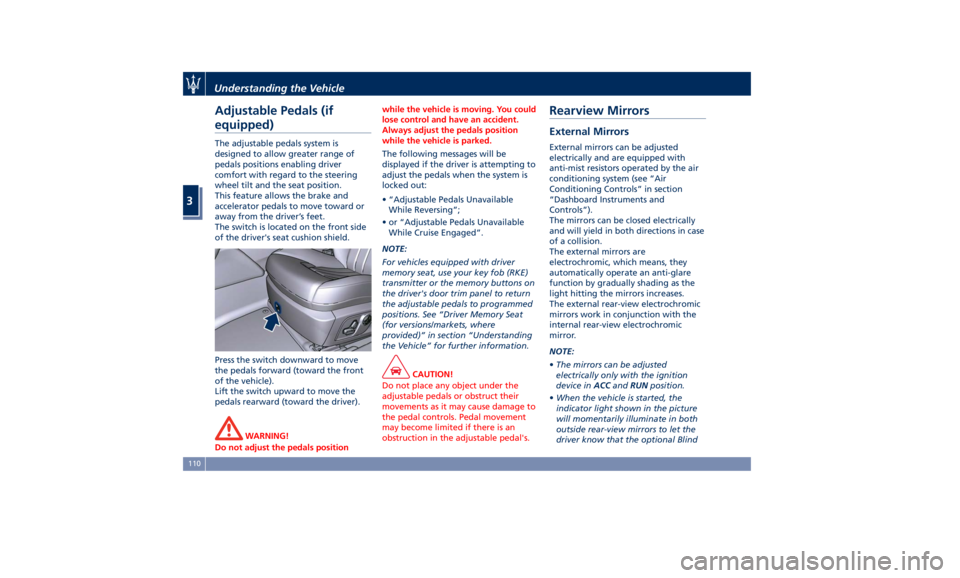
The switch is located on the front side
of the driver's seat cushion shield.
Press the switch downward to move
the pedals forward (toward the front
of the vehicle).
Lift the switch upward to move the
pedals rearward (toward the driver).
WARNING!
Do not adjust the pedals position while the vehicle is moving. You could
lose control and have an accident.
Always adjust the pedals position
while the vehicle is parked.
The following messages will be
displayed
if the driver is attempting to
adjust the pedals when the system is
locked out:
• “Adjustable Pedals Unavailable
While Reversing”;
• or “Adjustable Pedals Unavailable
While Cruise Engaged”.
NOTE:
For vehicles equipped with driver
memory seat, use your key fob (RKE)
transmitter or the memory buttons on
the driver's door trim panel to return
the adjustable pedals to programmed
positions. See “Driver Memory Seat
(for versions/markets, where
provided)” in section “Understanding
the Vehicle” for further information.
CAUTION!
Do not place any object under the
adjustable pedals or obstruct their
movements as it may cause damage to
the pedal controls. Pedal movement
may become limited if there is an
obstruction in the adjustable pedal's.Rearview Mirrors External Mirrors External mirrors can be adjusted
electrically and are equipped with
anti-mist resistors operated by the air
conditioning system (see “Air
Conditioning Controls” in section
“Dashboard Instruments and
Controls”).
The mirrors can be closed electrically
and will yield in both directions in case
of a collision.
The external mirrors are
electrochromic, which means, they
automatically operate an anti-glare
function by gradually shading as the
light hitting the mirrors increases.
The external rear-view electrochromic
mirrors work in conjunction with the
internal rear-view electrochromic
mirror.
NOTE:
• The mirrors can be adjusted
electrically only with the ignition
device in ACC and RUN position.
• When the vehicle is started, the
indicator light shown in the picture
will momentarily illuminate in both
outside rear-view mirrors to let the
driver know that the optional BlindUnderstanding the Vehicle
3
110
Page 115 of 436
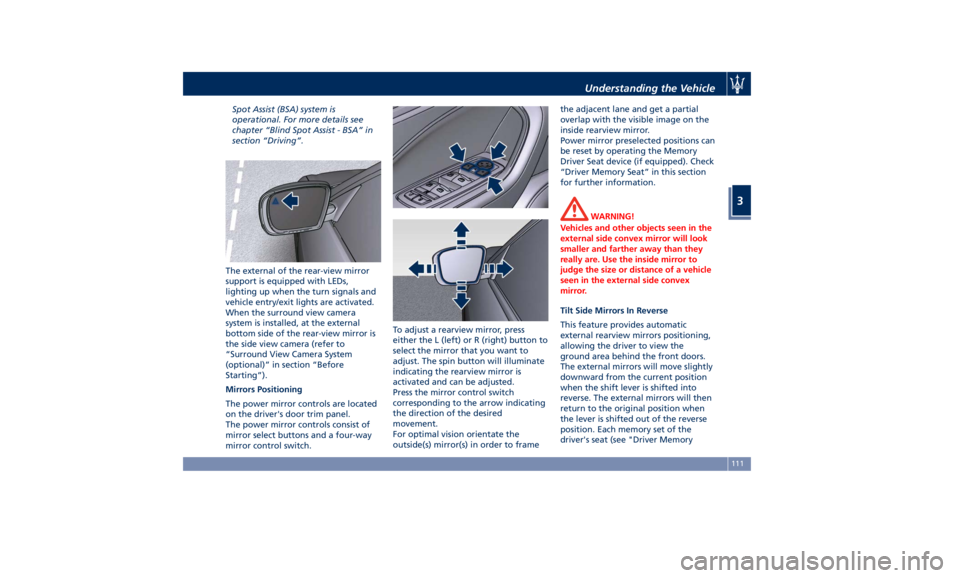
Spot Assist (BSA) system is
operational. For more details see
chapter “Blind Spot Assist - BSA” in
section “Driving”.
The external of the rear-view mirror
support is equipped with LEDs,
lighting up when the turn signals and
vehicle entry/exit lights are activated.
When the surround view camera
system is installed, at the external
bottom side of the rear-view mirror is
the side view camera (refer to
“Surround View Camera System
(optional)” in section “Before
Starting”).
Mirrors Positioning
The power mirror controls are located
on the driver's door trim panel.
The power mirror controls consist of
mirror select buttons and a four-way
mirror control switch. To adjust a rearview mirror, press
either the L (left) or R (right) button to
select the mirror that you want to
adjust. The spin button will illuminate
indicating the rearview mirror is
activated and can be adjusted.
Press the mirror control switch
corresponding to the arrow indicating
the direction of the desired
movement.
For optimal vision orientate the
outside(s) mirror(s) in order to frame the adjacent lane and get a partial
overlap with the visible image on the
inside rearview mirror.
Power mirror preselected positions can
be reset by operating the Memory
Driver Seat device (if equipped). Check
“Driver Memory Seat” in this section
for further information.
WARNING!
Vehicles and other objects seen in the
external side convex mirror will look
smaller and farther away than they
really are. Use the inside mirror to
judge the size or distance of a vehicle
seen in the external side convex
mirror.
Tilt Side Mirrors In Reverse
This
feature provides automatic
external rearview mirrors positioning,
allowing the driver to view the
ground area behind the front doors.
The external mirrors will move slightly
downward from the current position
when the shift lever is shifted into
reverse. The external mirrors will then
return to the original position when
the lever is shifted out of the reverse
position. Each memory set of the
driver's seat (see "Driver MemoryUnderstanding the Vehicle
3
111
Page 129 of 436
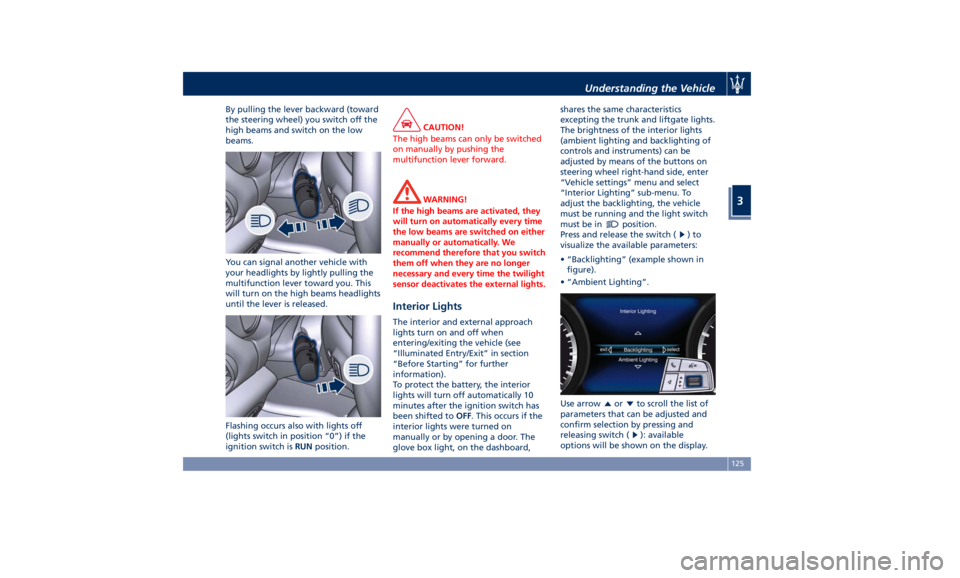
By pulling the lever backward (toward
the steering wheel) you switch off the
high beams and switch on the low
beams.
You can signal another vehicle with
your headlights by lightly pulling the
multifunction lever toward you. This
will turn on the high beams headlights
until the lever is released.
Flashing occurs also with lights off
(lights switch in position “0”) if the
ignition switch is RUN position. CAUTION!
The high beams can only be switched
on manually by pushing the
multifunction lever forward.
WARNING!
If the high beams are activated, they
will turn on automatically every time
the low beams are switched on either
manually or automatically. We
recommend therefore that you switch
them off when they are no longer
necessary and every time the twilight
sensor deactivates the external lights.
Interior Lights The interior and external approach
lights turn on and off when
entering/exiting the vehicle (see
“Illuminated Entry/Exit” in section
“Before Starting” for further
information).
To protect the battery, the interior
lights will turn off automatically 10
minutes after the ignition switch has
been shifted to OFF . This occurs if the
interior lights were turned on
manually or by opening a door. The
glove box light, on the dashboard, shares the same characteristics
excepting the trunk and liftgate lights.
The brightness of the interior lights
(ambient lighting and backlighting of
controls and instruments) can be
adjusted by means of the buttons on
steering wheel right-hand side, enter
“Vehicle settings” menu and select
“Interior Lighting” sub-menu. To
adjust the backlighting, the vehicle
must be running and the light switch
must be in
position.
Press and release the switch (
)to
visualize the available parameters:
• “Backlighting” (example shown in
figure).
• “Ambient Lighting”.
Use arrow
or to scroll the list of
parameters that can be adjusted and
confirm selection by pressing and
releasing switch (
): available
options will be shown on the display.Understanding the Vehicle
3
125
Page 130 of 436

A check mark will remain next to the
previously-selected item until a new
selection is made.
Press and release the switch (
)to
select the option. A selection notice
pops up for 2 seconds and then the
display reverts to the last modified
parameter.
The dimmable lights are the following:
• instrument cluster dials and display;
• dome light (front/rear); • LED in correspondence of the
internal door handle;
• doors and steering wheel backlight
controls LED;
• front footrest light;
• front seats night lighting.
Automatic Headlights Leveling A correct headlights leveling is crucial
for the safety of the vehicle’s
occupants and of people in the street.
Moreover it is included in the road
regulation law.
In order to obtain the best visibility
conditions while driving with
headlights on, the headlight beam
must be properly leveled, under any
vehicle load condition.
The vehicle is equipped with a system
that automatically adjusts headlight
leveling according to ground clearance
and vehicle load conditions. Dome Lights The dome lights integrated into the
front dome console, include a central
and two reading lights.
The central light automatically turns
on when one of the doors is opened
and turns off when the door is closed
(timed switching off). The light may be
switched on manually by pressing the
central button.
The reading lights are controlled by
the respective side buttons.
If they are turned on by pressing the
button, both central and reading lights
will stay on for about 10 minutes after
turning the engine off, and will then
turn off gradually.
When the exterior lights are switched
on, the two night LEDs fitted on the
side of the power buttons on the
overhead console will light up toUnderstanding the Vehicle
3
126
Page 154 of 436
open, then adjust the sunroof opening
to minimize the buffeting.
Ignition Off Operation The power sunroof controls will
remain active for up to approximately
ten minutes after the ignition switch is
in OFF position. Opening either front
door will cancel this feature. The
ignition system timing can be set using
the MTC+ System (see “MTC+ Settings”
in section “Dashboard Instruments and
Controls”).
Sunroof Maintenance Use only a nonabrasive cleaner and a
soft cloth to clean the glass panel. HomeLink ®
(optional) HomeLink ®
replaces up to three
hand-held transmitters operating the
automatic devices that open garage
doors and gates, enable/disable the
lighting or security systems. The
HomeLink ®
unit is powered by your
vehicle's 12 Volt battery. The
HomeLink ®
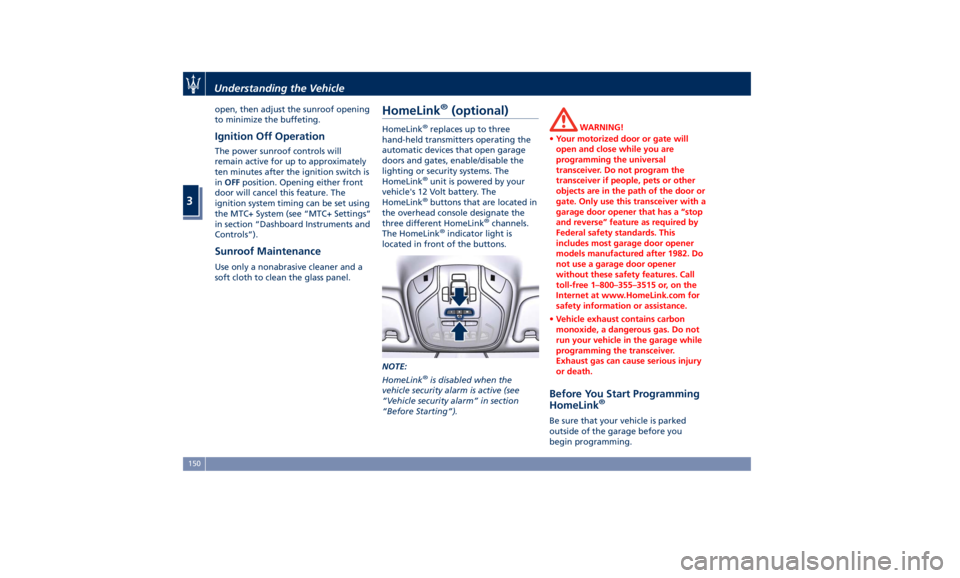
buttons that are located in
the overhead console designate the
three different HomeLink ®
channels.
The HomeLink ®
indicator light is
located in front of the buttons.
NOTE:
HomeLink ®
is disabled when the
vehicle security alarm is active (see
“Vehicle security alarm” in section
“Before Starting”). WARNING!
• Your motorized door or gate will
open and close while you are
programming the universal
transceiver. Do not program the
transceiver if people, pets or other
objects are in the path of the door or
gate. Only use this transceiver with a
garage door opener that has a “stop
and reverse” feature as required by
Federal safety standards. This
includes most garage door opener
models manufactured after 1982. Do
not use a garage door opener
without these safety features. Call
toll-free 1–800–355–3515 or, on the
Internet at www.HomeLink.com for
safety information or assistance.
• Vehicle exhaust contains carbon
monoxide, a dangerous gas. Do not
run your vehicle in the garage while
programming the transceiver.
Exhaust gas can cause serious injury
or death.
Before You Start Programming
HomeLink ®
Be sure that your vehicle is parked
outside of the garage before you
begin programming.Understanding the Vehicle
3
150