2019 MASERATI LEVANTE coolant temperature
[x] Cancel search: coolant temperaturePage 235 of 436

remain in “AutoStop” with engine off.
Pressing the brake pedal and shifting
transmission into D (Drive) or R
(Reverse) will deactivate the
“AutoStop” condition and restart the
engine.
Start&Stop Deactivated Start&Stop function is deactivated
under the following conditions:
• When SPORT drive mode is activated.
• When
(ESC OFF) drive mode is
activated.
• When ride height is set to Off Road 1
or Off Road 2.
• If it has been disabled through the
main menu item “Start & Stop” via
the controls on the right side of the
steering wheel (see chapter
“Instrument cluster” in section
“Dashboard Instruments and
Controls”) or via the MTC+ in the “Controls” page (see “MTC+
"Controls" Screen” in section
“Dashboard Instruments and
Controls”).
Start&Stop Not Active For keeping driving safety, interior
comfort and a correct functioning of
engine and vehicle, the Start&Stop
function does not activate under the
following conditions:
• When the driver’s seat belt is
unbuckled (see example in picture).
• When the driver door is open.
• When the fuel level is too low.
• When the vehicle is stopped on a
very steep road.
• When the vehicle is stopped with
steered wheels (over 135° of steering
wheel angle for each part). • When the vehicle is maneuvering:
shift lever in R (Reverse).
• When the temperature conditions
inside the vehicle do not correspond
to the air conditioning setting.
• When the front and rear “defroster”
function is activated.
• When the engine coolant and the
engine oil temperature are not on
proper functioning level.
• When the external temperature is
too cold.
• When the battery charge is below
safety value.
• When the previous stop had just
happened (few seconds) and the
minimum speed has not yet been
achieved.
• Shortly after R (Reverse) has been set
or when driving under a certain
speed level.
• When the hood is open.
• The sensors managing the
Start&Stop have been damaged.
• Start&Stop system faults are present.
• When Adaptive Cruise Control (ACC)
and/or Highway Assist (HAS) system
are engaged.Driving
5
231
Page 263 of 436

the selector and in the dedicated area
at top right of the display.
The table below shows the possible
selector positions and the relevant
symbols.
Off Road 2
Off Road 1
Normal
Aero 1
Aero 2
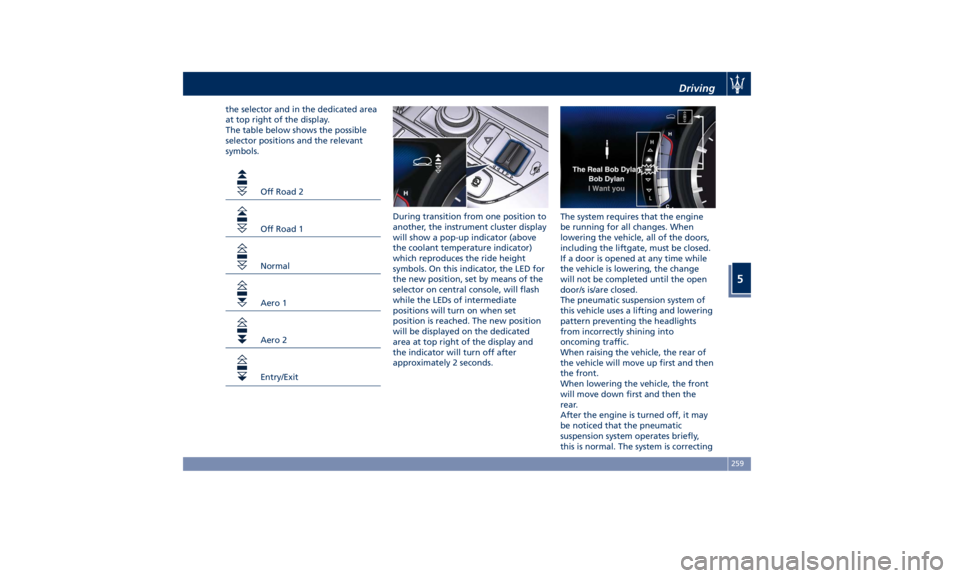
Entry/Exit During transition from one position to
another, the instrument cluster display
will show a pop-up indicator (above
the coolant temperature indicator)
which reproduces the ride height
symbols. On this indicator, the LED for
the new position, set by means of the
selector on central console, will flash
while the LEDs of intermediate
positions will turn on when set
position is reached. The new position
will be displayed on the dedicated
area at top right of the display and
the indicator will turn off after
approximately 2 seconds. The system requires that the engine
be running for all changes. When
lowering the vehicle, all of the doors,
including the liftgate, must be closed.
If a door is opened at any time while
the vehicle is lowering, the change
will not be completed until the open
door/s is/are closed.
The pneumatic suspension system of
this vehicle uses a lifting and lowering
pattern preventing the headlights
from incorrectly shining into
oncoming traffic.
When raising the vehicle, the rear of
the vehicle will move up first and then
the front.
When lowering the vehicle, the front
will move down first and then the
rear.
After the engine is turned off, it may
be noticed that the pneumatic
suspension system operates briefly,
this is normal. The system is correctingDriving
5
259
Page 285 of 436

Use of the Engine Breaking-In Today's most modern production
methods are designed to provide
extremely precise construction and
assembly of components. However,
moving parts do undergo a settling
process, basically in the first hours of
vehicle operation.
Do not drive keeping at a constant
high speed rate for a prolonged time.
While cruising, brief full-throttle
acceleration within the limits of local
traffic laws contributes to a good
break-in. Wide-open throttle
acceleration in low gear can be
detrimental and should be avoided.
The engine oil installed in the engine
at the factory is a high-quality energy
conserving type lubricant. Oil changes
should be consistent with anticipated
climate conditions under which vehicle
operations will occur. For the
recommended viscosity and quality
grades, see “Refillings” in section
“Features and Specifications”.
A new engine may consume some oil
during its first few thousand
miles/kilometers of operation. This
should be considered as a normal part of the break-in and not interpreted as
an indication of malfunction.
Specific Requirements
Avoid exceeding 5000 rpm for the first
620 mi trip (1000 km).
After starting the vehicle, do not
exceed 4000 rpm until the engine has
warmed up sufficiently (coolant
temperature: 149-158°F /65 70°).
Trailer Towing
During the first 620 mi (1000 km) of a
new vehicle it is advisable not to tow a
trailer. This allows to limit the load on
the engine and on the other parts of
the vehicle.
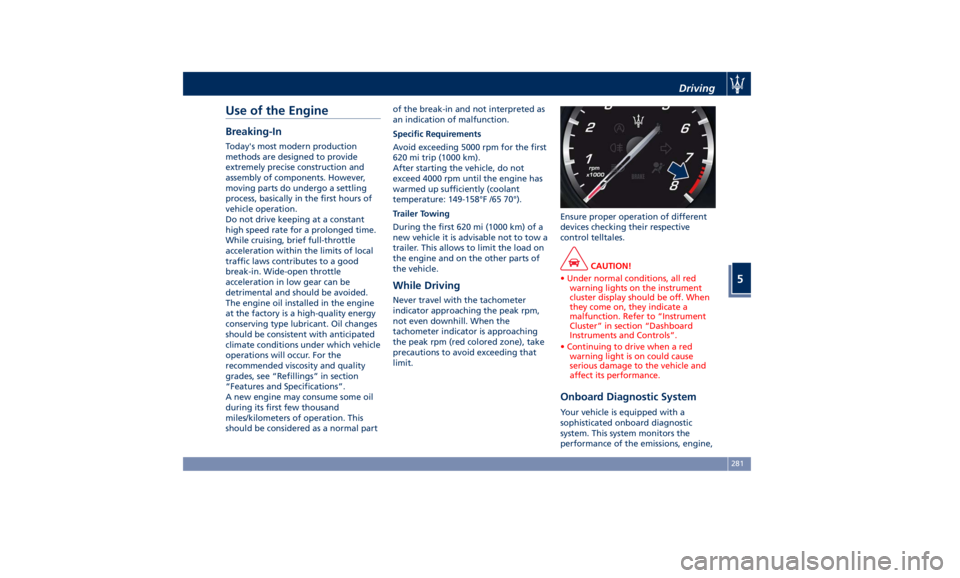
While Driving Never travel with the tachometer
indicator approaching the peak rpm,
not even downhill. When the
tachometer indicator is approaching
the peak rpm (red colored zone), take
precautions to avoid exceeding that
limit. Ensure proper operation of different
devices checking their respective
control telltales.
CAUTION!
• Under normal conditions, all red
warning lights on the instrument
cluster display should be off. When
they come on, they indicate a
malfunction. Refer to “Instrument
Cluster” in section “Dashboard
Instruments and Controls”.
• Continuing to drive when a red
warning light is on could cause
serious damage to the vehicle and
affect its performance.
Onboard Diagnostic System Your vehicle is equipped with a
sophisticated onboard diagnostic
system. This system monitors the
performance of the emissions, engine,Driving
5
281
Page 378 of 436

Level Checks ENVIRONMENTAL!
• The engine oils and fluids used
contain substances that are
dangerous to the environment. For
replacement you are advised to
contact the Authorized Maserati
Dealer, where all the necessary
equipment is available to dispose of
the used oil and fluids in compliance
with the regulations in force and in
an environment-friendly manner.
• All equipment used for fluids
replacement (gloves, cloths,
containers, etc) must be disposed of
in compliance with the regulations in
force.
Engine Coolant Level Check
Your vehicle has been equipped with
an improved engine coolant
(antifreeze) that offers high protection
against corrosion, freezing and allows
extended maintenance intervals. To
prevent reducing extended
maintenance periods, it is important to
use original engine coolant
(antifreeze) when adding coolant
throughout the life of your vehicle. When adding engine coolant
(antifreeze) use pure water only, such
as distilled or deionized water when
mixing the water/engine coolant
(antifreeze) solution. The use of
impure water will reduce the amount
of corrosion protection in the engine
cooling system.
• Mix a minimum solution of 50%
engine coolant (antifreeze) and
distilled water. Use higher
concentrations (do not exceed 70%)
if temperatures below −35°F (−37°C)
are forecast.
Please note that it is the owner's
responsibility to maintain the proper
level of protection against freezing
according to the temperatures
occurring in the circulation area of the
vehicle.
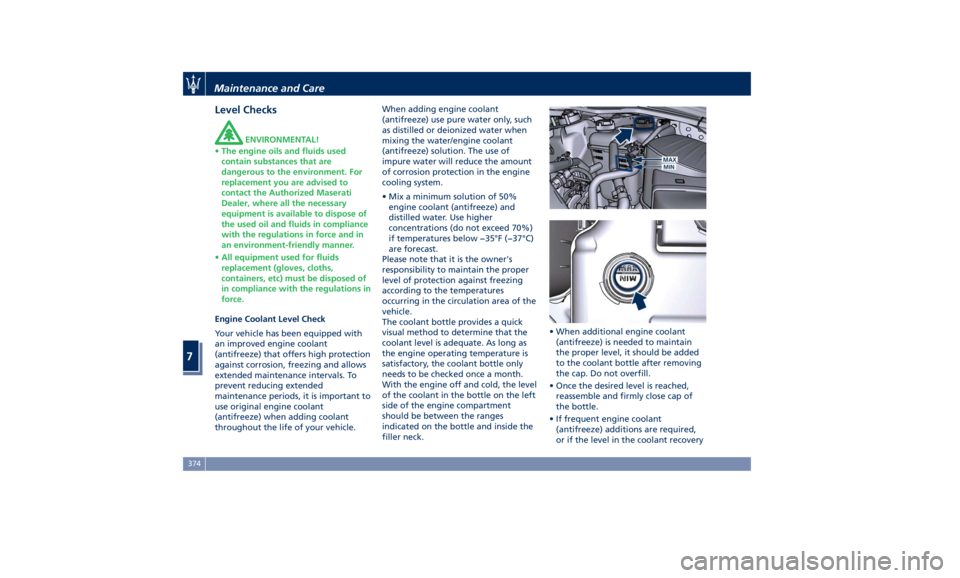
The coolant bottle provides a quick
visual method to determine that the
coolant level is adequate. As long as
the engine operating temperature is
satisfactory, the coolant bottle only
needs to be checked once a month.
With the engine off and cold, the level
of the coolant in the bottle on the left
side of the engine compartment
should be between the ranges
indicated on the bottle and inside the
filler neck. • When additional engine coolant
(antifreeze) is needed to maintain
the proper level, it should be added
to the coolant bottle after removing
the cap. Do not overfill.
• Once the desired level is reached,
reassemble and firmly close cap of
the bottle.
• If frequent engine coolant
(antifreeze) additions are required,
or if the level in the coolant recoveryMaintenance and Care
7
374