2019 MASERATI LEVANTE Operation
[x] Cancel search: OperationPage 109 of 436
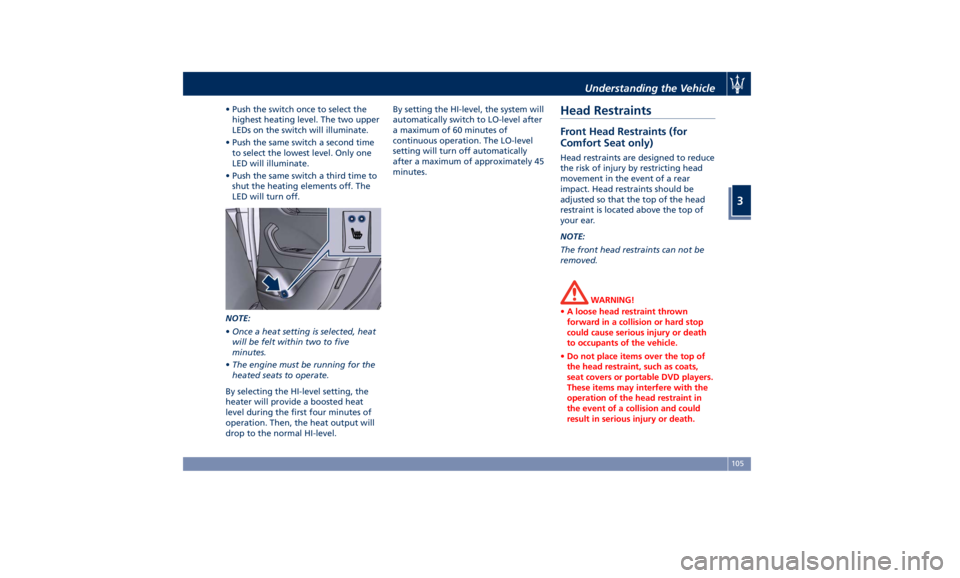
• Push the switch once to select the
highest heating level. The two upper
LEDs on the switch will illuminate.
• Push the same switch a second time
to select the lowest level. Only one
LED will illuminate.
• Push the same switch a third time to
shut the heating elements off. The
LED will turn off.
NOTE:
• Once a heat setting is selected, heat
will be felt within two to five
minutes.
• The engine must be running for the
heated seats to operate.
By selecting the HI-level setting, the
heater will provide a boosted heat
level during the first four minutes of
operation. Then, the heat output will
drop to the normal HI-level. By setting the HI-level, the system will
automatically switch to LO-level after
a maximum of 60 minutes of
continuous operation. The LO-level
setting will turn off automatically
after a maximum of approximately 45
minutes.
Head Restraints Front Head Restraints (for
Comfort Seat only) Head restraints are designed to reduce
the risk of injury by restricting head
movement in the event of a rear
impact. Head restraints should be
adjusted so that the top of the head
restraint is located above the top of
your ear.
NOTE:
The front head restraints can not be
removed.
WARNING!
• A loose head restraint thrown
forward in a collision or hard stop
could cause serious injury or death
to occupants of the vehicle.
• Do not place items over the top of
the head restraint, such as coats,
seat covers or portable DVD players.
These items may interfere with the
operation of the head restraint in
the event of a collision and could
result in serious injury or death.Understanding the Vehicle
3
105
Page 115 of 436
Spot Assist (BSA) system is
operational. For more details see
chapter “Blind Spot Assist - BSA” in
section “Driving”.
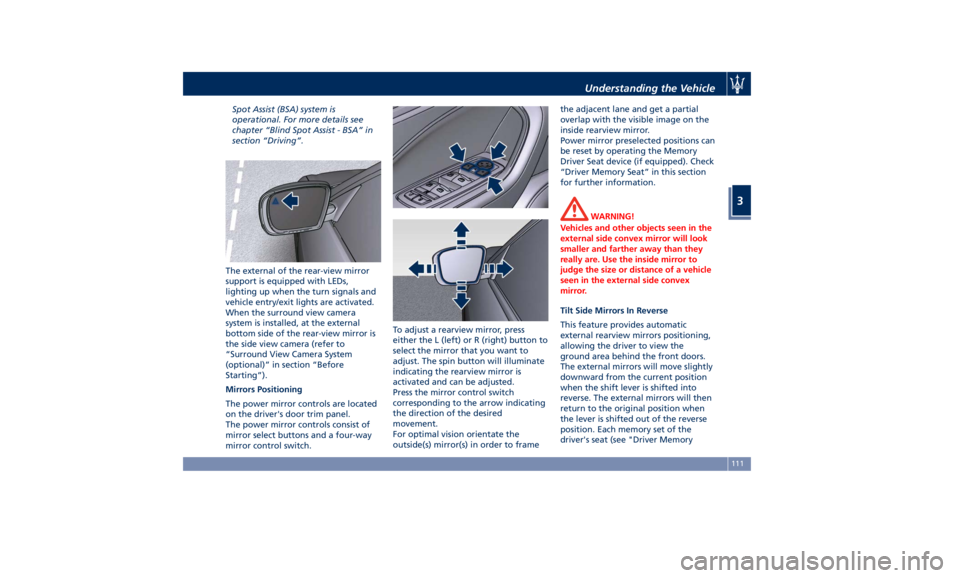
The external of the rear-view mirror
support is equipped with LEDs,
lighting up when the turn signals and
vehicle entry/exit lights are activated.
When the surround view camera
system is installed, at the external
bottom side of the rear-view mirror is
the side view camera (refer to
“Surround View Camera System
(optional)” in section “Before
Starting”).
Mirrors Positioning
The power mirror controls are located
on the driver's door trim panel.
The power mirror controls consist of
mirror select buttons and a four-way
mirror control switch. To adjust a rearview mirror, press
either the L (left) or R (right) button to
select the mirror that you want to
adjust. The spin button will illuminate
indicating the rearview mirror is
activated and can be adjusted.
Press the mirror control switch
corresponding to the arrow indicating
the direction of the desired
movement.
For optimal vision orientate the
outside(s) mirror(s) in order to frame the adjacent lane and get a partial
overlap with the visible image on the
inside rearview mirror.
Power mirror preselected positions can
be reset by operating the Memory
Driver Seat device (if equipped). Check
“Driver Memory Seat” in this section
for further information.
WARNING!
Vehicles and other objects seen in the
external side convex mirror will look
smaller and farther away than they
really are. Use the inside mirror to
judge the size or distance of a vehicle
seen in the external side convex
mirror.
Tilt Side Mirrors In Reverse
This
feature provides automatic
external rearview mirrors positioning,
allowing the driver to view the
ground area behind the front doors.
The external mirrors will move slightly
downward from the current position
when the shift lever is shifted into
reverse. The external mirrors will then
return to the original position when
the lever is shifted out of the reverse
position. Each memory set of the
driver's seat (see "Driver MemoryUnderstanding the Vehicle
3
111
Page 117 of 436
solution directly onto the mirror.
Apply the solution onto a clean cloth
and wipe the mirror clean.
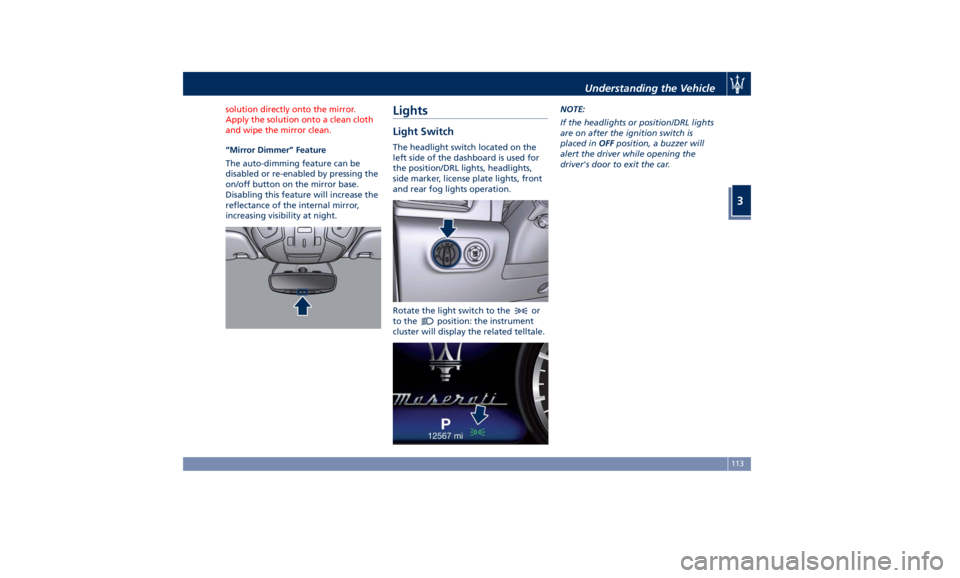
“Mirror Dimmer” Feature
The
auto-dimming feature can be
disabled or re-enabled by pressing the
on/off button on the mirror base.
Disabling this feature will increase the
reflectance of the internal mirror,
increasing visibility at night.
Lights Light Switch The headlight switch located on the
left side of the dashboard is used for
the position/DRL lights, headlights,
side marker, license plate lights, front
and rear fog lights operation.
Rotate the light switch to the
or
to the
position: the instrument
cluster will display the related telltale. NOTE:
If the headlights or position/DRL lights
are on after the ignition switch is
placed in OFF position, a buzzer will
alert the driver while opening the
driver's door to exit the car.
Understanding the Vehicle
3
113
Page 126 of 436
the “Auto High Beam Assist” soft-key,
as shown in the previous paragraph
"Automatic High Beams".
The “Glare Free” feature will be
engaged after the following actions:
• Engine run.
• Feature enabled by MTC+.
• Low beam on.
• Interior light switch in position
“Auto”.
• Multifunction lever in “High beam”
activated position.
The “Glare Free” feature will work if:
• The vehicle speed is equal or greater
than 21.7 mph (35 km/h) in the
engagement phase of the feature.
• Environmental brightness is not
sufficient for a safe and comfortable
drive.
• Traffic scenario out of urban context.
Once the system will be active, there
will be two indicators on the
instrument cluster, showed in the same
time: one blue and one green.
The green indicator indicates that the
“Auto High Beam Assist” feature is
activated on MYC+; the blue indicator
indicates that all or only some high
beam LEDs are physically on in that
moment. When instead there is the needing to
switch off the whole high beam
module to obtain the no glaring
effect, on the instrument cluster there
will be just one indicator on: the green
one.
When the scenario allows the partial
or full use of high beam with no
glaring disturbance, the blue indicator
will appear again.
NOTE:
• Some unpredictable conditions, such
as dirt, dust, film or any other
obstruction on camera lens zone
events could affect “Glare Free”
feature making it working
improperly.
• Heavy rainy and foggy weather could
affect system performance, leaving
the full beam switched on for longer
time than the nominal working
condition. This could cause a glaring disturbance for other vehicles, to
avoid this the driver has to switch off
the high beam manually.
• In phase of disengagement of the
feature, the minimum operating
speed is 15.5 mph (25 km/h).
• “Glare Free” feature proper
operation is guaranteed if vehicle
speed is less than, or at least equal to
155 mph (250 km/h).
Automatic High Beams/Glare Free
High Beams Failure
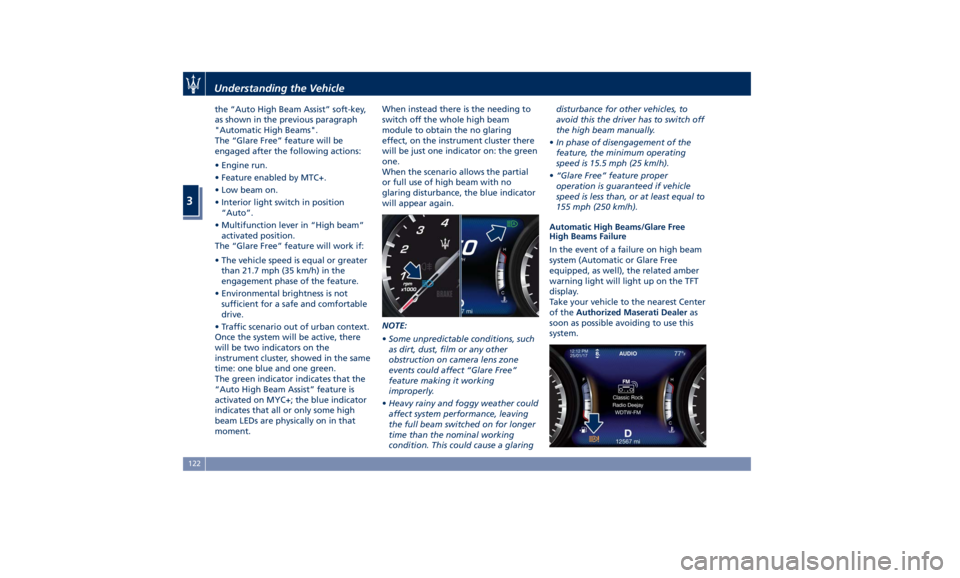
In the event of a failure on high beam
system (Automatic or Glare Free
equipped, as well), the related amber
warning light will light up on the TFT
display.
Take your vehicle to the nearest Center
of the Authorized Maserati Dealer as
soon as possible avoiding to use this
system.Understanding the Vehicle
3
122
Page 128 of 436

Multifunction Lever The multifunction lever controls the
operation of the turn signals,
headlight beam selection and
overtaking lights, wipers and washers
acting on the windshield and on the
liftgate (for this content see the
chapter “Wipers and Washers” of this
section).
The multifunction lever is fitted on the
left side of the steering column.
Turn Signals
Move the multifunction lever all the
way up or down until the stop
triggers.
The left or right arrow on the
speedometer and tachometer
instrument cluster respectively, flashes
to show proper operation of the front
and rear turn signal lights. To activate lane change function, tap
the lever up or down once, without
moving beyond the detent. The turn
signals (right or left) will flash three
times then automatically turn off.
This function is useful when
overtaking or changing lanes. NOTE:
• If either light remains on and does
not flash, or flashes at a fast rate,
check for a defective outside light. If
an indicator on the instrument
cluster fails while moving the lever,
then the turn indicator is probably
defective.
• The message that a turn signal is on
will appear in the instrument cluster
and a continuous chime will sound if
the vehicle is driven more than 1 mile
(1.6 km) with either turn signal on.
High Beams and Flashing
To switch on the high beams with the
light switch in headlamp
or
“AUTO” position, shift the
multifunction lever onward.
The blue telltale
will illuminate on
the tachometer.Understanding the Vehicle
3
124
Page 132 of 436
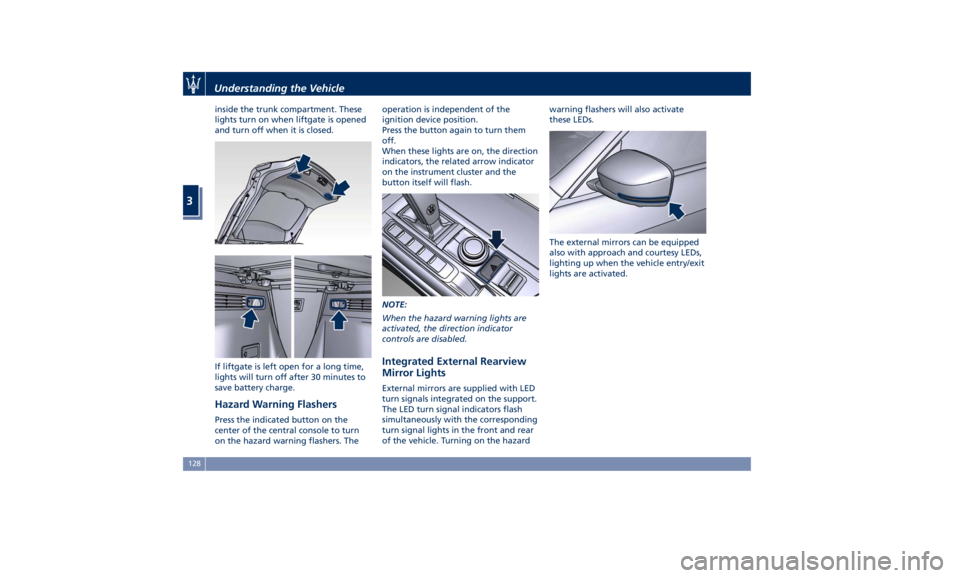
inside the trunk compartment. These
lights turn on when liftgate is opened
and turn off when it is closed.
If liftgate is left open for a long time,
lights will turn off after 30 minutes to
save battery charge.
Hazard Warning Flashers Press the indicated button on the
center of the central console to turn
on the hazard warning flashers. The operation is independent of the
ignition device position.
Press the button again to turn them
off.
When these lights are on, the direction
indicators, the related arrow indicator
on the instrument cluster and the
button itself will flash.
NOTE:
When the hazard warning lights are
activated, the direction indicator
controls are disabled.
Integrated External Rearview
Mirror Lights External mirrors are supplied with LED
turn signals integrated on the support.
The LED turn signal indicators flash
simultaneously with the corresponding
turn signal lights in the front and rear
of the vehicle. Turning on the hazard warning flashers will also activate
these LEDs.
The external mirrors can be equipped
also with approach and courtesy LEDs,
lighting up when the vehicle entry/exit
lights are activated.Understanding the Vehicle
3
128
Page 133 of 436
Wipers and Washers The multifunction lever operates the
wipers and washers acting on the
windshield and on the window of the
liftgate when the ignition switch is
placed in RUN or ACC position. The
multifunction lever is located on the
left side of the steering column.
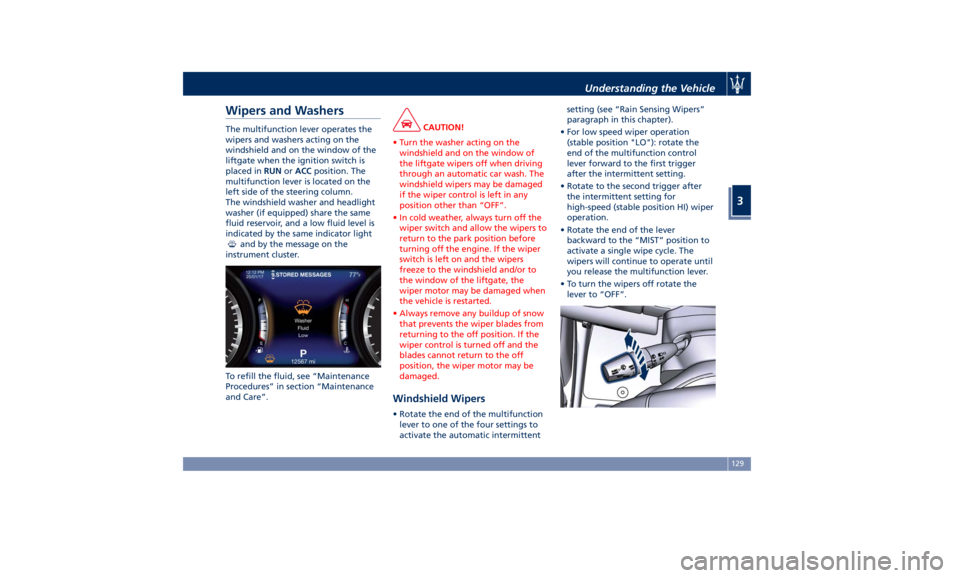
The windshield washer and headlight
washer (if equipped) share the same
fluid reservoir, and a low fluid level is
indicated by the same indicator light
and by the message on the
instrument cluster.
To refill the fluid, see “Maintenance
Procedures” in section “Maintenance
and Care”. CAUTION!
• Turn the washer acting on the
windshield and on the window of
the liftgate wipers off when driving
through an automatic car wash. The
windshield wipers may be damaged
if the wiper control is left in any
position other than “OFF”.
• In cold weather, always turn off the
wiper switch and allow the wipers to
return to the park position before
turning off the engine. If the wiper
switch is left on and the wipers
freeze to the windshield and/or to
the window of the liftgate, the
wiper motor may be damaged when
the vehicle is restarted.
• Always remove any buildup of snow
that prevents the wiper blades from
returning to the off position. If the
wiper control is turned off and the
blades cannot return to the off
position, the wiper motor may be
damaged.
Windshield Wipers • Rotate the end of the multifunction
lever to one of the four settings to
activate the automatic intermittent setting (see “Rain Sensing Wipers”
paragraph in this chapter).
• For low speed wiper operation
(stable position "LO"): rotate the
end of the multifunction control
lever forward to the first trigger
after the intermittent setting.
• Rotate to the second trigger after
the intermittent setting for
high-speed (stable position HI) wiper
operation.
• Rotate the end of the lever
backward to the “MIST” position to
activate a single wipe cycle. The
wipers will continue to operate until
you release the multifunction lever.
• To turn the wipers off rotate the
lever to “OFF”.Understanding the Vehicle
3
129
Page 136 of 436
(Continued)
washer use.
WARNING!
California Proposition 65
Operating, servicing and maintaining
a passenger vehicle or off-road vehicle
can expose you to chemicals including
such as, engine exhaust, carbon
monoxide, phthalates and lead, that
which are known to the State of
California to cause cancer and birth
defects or other reproductive harm. To
minimize exposure, avoid breathing
exhaust, do not idle the engine except
as necessary, service your vehicle in a
well-ventilated area and wear gloves
or wash your hands frequently when
servicing your vehicle. For more
information go to:
www.P65Warnings.ca.gov/passenger-
vehicle
Headlight Washers (if provided)
The
multifunction lever also
operates
the headlight washers when the
ignition switch is in RUN position and
the headlights are turned on.
The headlight washers will spray a
timed high-pressure spray of washer fluid onto each headlight lens every 11
windshield wipers cycles.
Heated Windshield Washer Nozzles
(optional)
To avoid fluid freezing inside at low
external temperatures, a fluid supply
nozzles can be heated by internal
resistors.
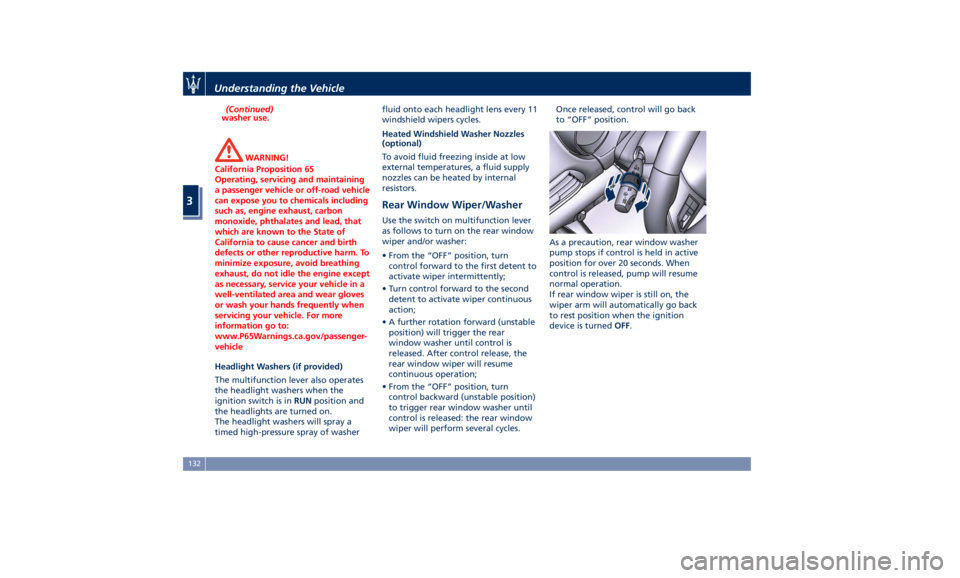
Rear Window Wiper/Washer Use the switch on multifunction lever
as follows to turn on the rear window
wiper and/or washer:
• From the “OFF” position, turn
control forward to the first detent to
activate wiper intermittently;
• Turn control forward to the second
detent to activate wiper continuous
action;
• A further rotation forward (unstable
position) will trigger the rear
window washer until control is
released. After control release, the
rear window wiper will resume
continuous operation;
• From the “OFF” position, turn
control backward (unstable position)
to trigger rear window washer until
control is released: the rear window
wiper will perform several cycles. Once released, control will go back
to “OFF” position.
As a precaution, rear window washer
pump stops if control is held in active
position for over 20 seconds. When
control is released, pump will resume
normal operation.
If rear window wiper is still on, the
wiper arm will automatically go back
to rest position when the ignition
device is turned OFF .Understanding the Vehicle
3
132