Page 177 of 485

3-93
Convenient features of your vehicle
3
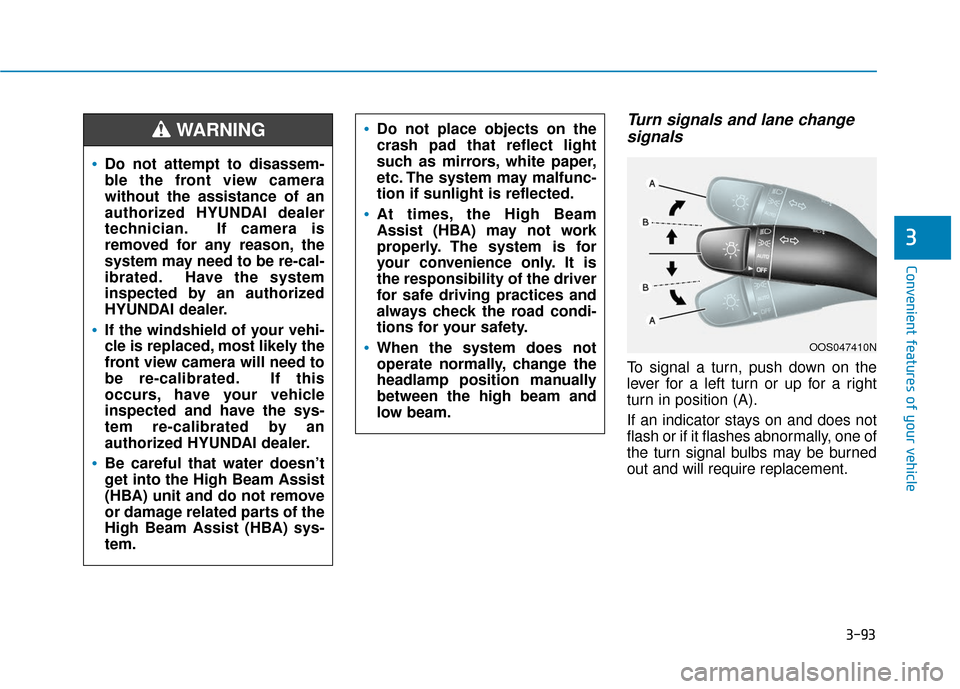
Turn signals and lane changesignals
To signal a turn, push down on the
lever for a left turn or up for a right
turn in position (A).
If an indicator stays on and does not
flash or if it flashes abnormally, one of
the turn signal bulbs may be burned
out and will require replacement.
OOS047410N
Do not attempt to disassem-
ble the front view camera
without the assistance of an
authorized HYUNDAI dealer
technician. If camera is
removed for any reason, the
system may need to be re-cal-
ibrated. Have the system
inspected by an authorized
HYUNDAI dealer.
If the windshield of your vehi-
cle is replaced, most likely the
front view camera will need to
be re-calibrated. If this
occurs, have your vehicle
inspected and have the sys-
tem re-calibrated by an
authorized HYUNDAI dealer.
Be careful that water doesn’t
get into the High Beam Assist
(HBA) unit and do not remove
or damage related parts of the
High Beam Assist (HBA) sys-
tem.
Do not place objects on the
crash pad that reflect light
such as mirrors, white paper,
etc. The system may malfunc-
tion if sunlight is reflected.
At times, the High Beam
Assist (HBA) may not work
properly. The system is for
your convenience only. It is
the responsibility of the driver
for safe driving practices and
always check the road condi-
tions for your safety.
When the system does not
operate normally, change the
headlamp position manually
between the high beam and
low beam.
WARNING
Page 178 of 485

3-94
Convenient features of your vehicle
Onetouch turn signal function
To activate the One Touch Turn
Signal function, push the turn signal
lever up or down to position (B) and
then release it.
The lane change signals will blink 3,
5 or 7 times.
You can activate or deactivate the
One Touch Turn Signal function or
choose the number of blinks (3, 5, or
7) from the User Settings mode in
the LCD display.
For more information, refer to the
"LCD Display" section in this
chapter.
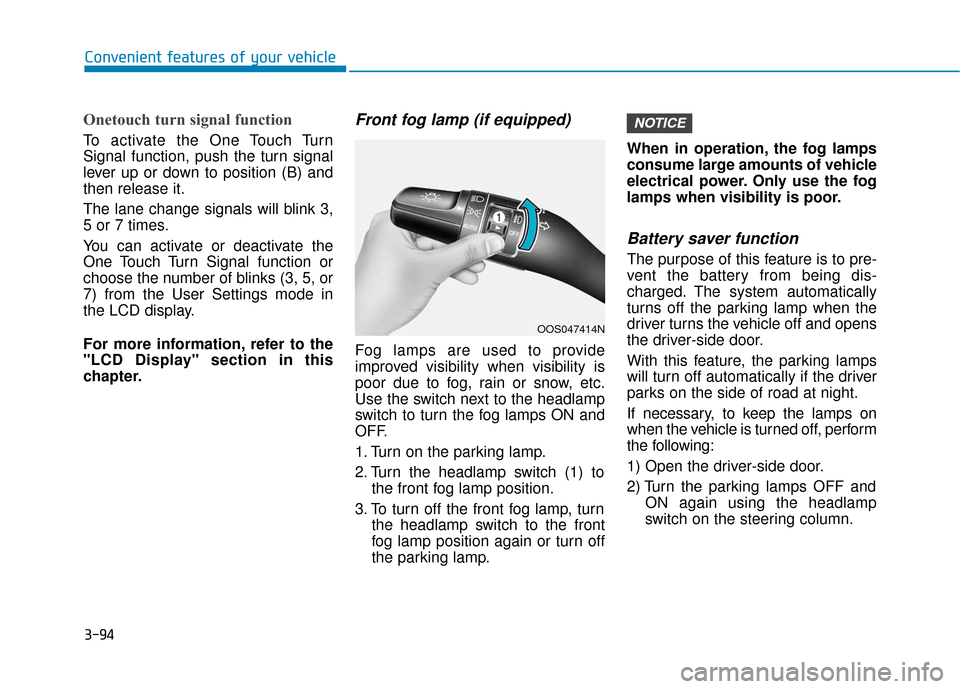
Front fog lamp (if equipped)
Fog lamps are used to provide
improved visibility when visibility is
poor due to fog, rain or snow, etc.
Use the switch next to the headlamp
switch to turn the fog lamps ON and
OFF.
1. Turn on the parking lamp.
2. Turn the headlamp switch (1) tothe front fog lamp position.
3. To turn off the front fog lamp, turn the headlamp switch to the front
fog lamp position again or turn off
the parking lamp. When in operation, the fog lamps
consume large amounts of vehicle
electrical power. Only use the fog
lamps when visibility is poor.
Battery saver function
The purpose of this feature is to pre-
vent the battery from being dis-
charged. The system automatically
turns off the parking lamp when the
driver turns the vehicle off and opens
the driver-side door.
With this feature, the parking lamps
will turn off automatically if the driver
parks on the side of road at night.
If necessary, to keep the lamps on
when the vehicle is turned off, perform
the following:
1) Open the driver-side door.
2) Turn the parking lamps OFF and
ON again using the headlamp
switch on the steering column.
NOTICE
OOS047414N
Page 179 of 485

3-95
Convenient features of your vehicle
3
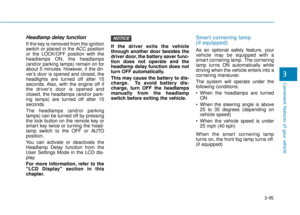
Headlamp delay function
If the key is removed from the ignition
switch or placed in the ACC position
or the LOCK/OFF position with the
headlamps ON, the headlamps
(and/or parking lamps) remain on for
about 5 minutes. However, if the dri-
ver’s door is opened and closed, the
headlights are turned off after 15
seconds. Also, with the engine off if
the driver's door is opened and
closed, the headlamps (and/or park-
ing lamps) are turned off after 15
seconds.
The headlamps (and/or parking
lamps) can be turned off by pressing
the lock button on the remote key or
smart key twice or turning the head-
lamp switch to the OFF or AUTO
position.
You can activate or deactivate the
Headlamp Delay function from the
User Settings Mode in the LCD dis-
play.
For more information, refer to the
"LCD Display" section in this
chapter.If the driver exits the vehicle
through another door besides the
driver door, the battery saver func-
tion does not operate and the
headlamp delay function does not
turn OFF automatically.
This may cause the battery to dis-
charge. To avoid battery dis-
charge, turn OFF the headlamps
manually from the headlamp
switch before exiting the vehicle.
Smart cornering lamp
(if equipped)
As an optional safety feature, your
vehicle may be equipped with a
smart cornering lamp. The cornering
lamp turns ON automatically while
driving when the vehicle enters into a
cornering maneuver.
The system will operate under the
following conditions:
When the headlamps are turned
ON
When the steering angle is above 25 to 35 degrees (depending on
vehicle speed)
When the vehicle speed is under 25 mph (40 kph)
When the smart cornering lamp
turns on, the front fog lamp turns off.
(if equipped)
NOTICE
Page 180 of 485

3-96
Convenient features of your vehicle
Interior Lights
Do not use the interior lights for
extended periods when the vehi-
cle is turned off or the battery will
discharge.
Interior lamp AUTO cut
The interior lamps will automatically
go off approximately 20 minutes after
the engine is turned off and the
doors are closed. If a door is opened,
the lamp will go off 40 minutes after
the engine is turned off. If the doors
are locked by the remote key or
smart key and the vehicle enters the
armed stage of the theft alarm sys-
tem, the lamps will go off five sec-
onds later.
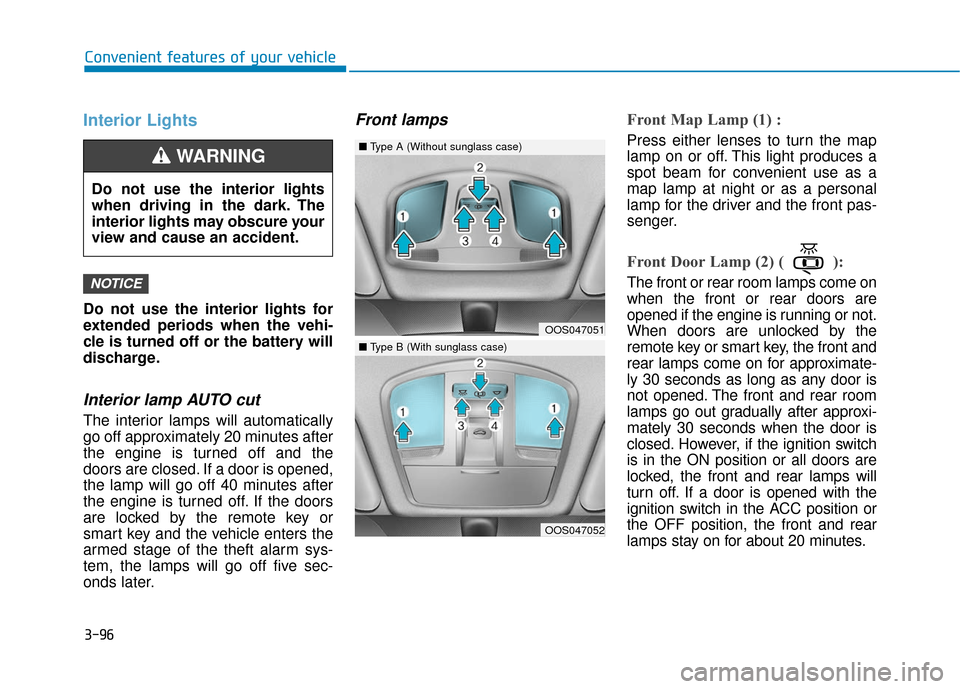
Front lampsFront Map Lamp (1) :
Press either lenses to turn the map
lamp on or off. This light produces a
spot beam for convenient use as a
map lamp at night or as a personal
lamp for the driver and the front pas-
senger.
Front Door Lamp (2) ( ):
The front or rear room lamps come on
when the front or rear doors are
opened if the engine is running or not.
When doors are unlocked by the
remote key or smart key, the front and
rear lamps come on for approximate-
ly 30 seconds as long as any door is
not opened. The front and rear room
lamps go out gradually after approxi-
mately 30 seconds when the door is
closed. However, if the ignition switch
is in the ON position or all doors are
locked, the front and rear lamps will
turn off. If a door is opened with the
ignition switch in the ACC position or
the OFF position, the front and rear
lamps stay on for about 20 minutes.NOTICE
OOS047051
OOS047052
■Type A (Without sunglass case)
■Type B (With sunglass case)
Do not use the interior lights
when driving in the dark. The
interior lights may obscure your
view and cause an accident.
WARNING
Page 181 of 485
3-97
Convenient features of your vehicle
3
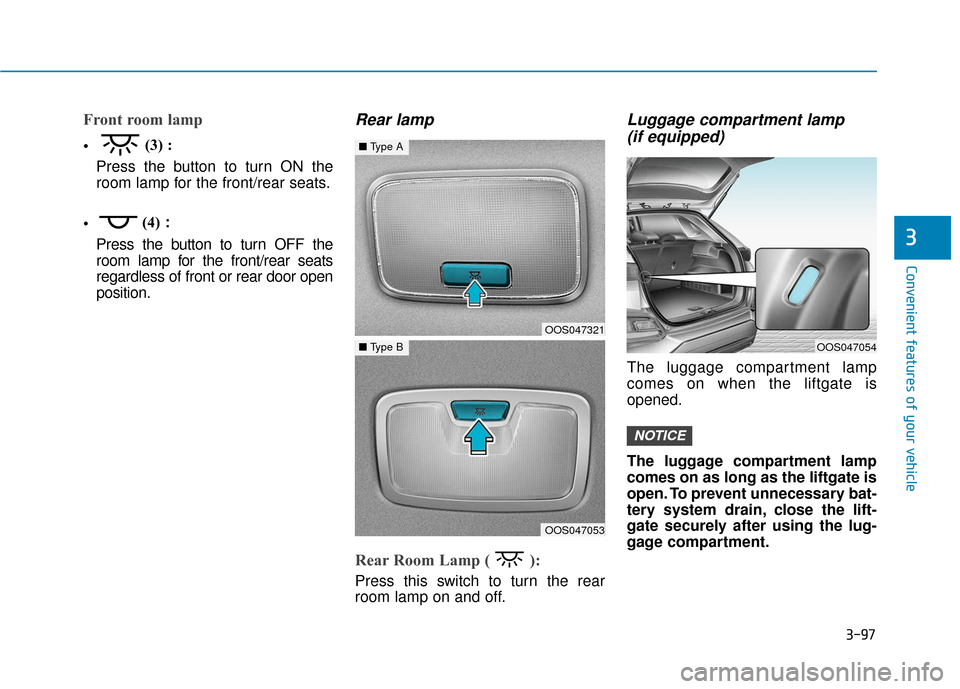
Front room lamp
(3) :
Press the button to turn ON the
room lamp for the front/rear seats.
(4)
:
Press the button to turn OFF the
room lamp for the front/rear seats
regardless of front or rear door open
position.
Rear lamp
Rear Room Lamp ( ):
Press this switch to turn the rear
room lamp on and off.
Luggage compartment lamp (if equipped)
The luggage compartment lamp
comes on when the liftgate is
opened.
The luggage compartment lamp
comes on as long as the liftgate is
open. To prevent unnecessary bat-
tery system drain, close the lift-
gate securely after using the lug-
gage compartment.
NOTICE
OOS047321
OOS047053
■ Type A
■Type BOOS047054
Page 182 of 485
3-98
Convenient features of your vehicle
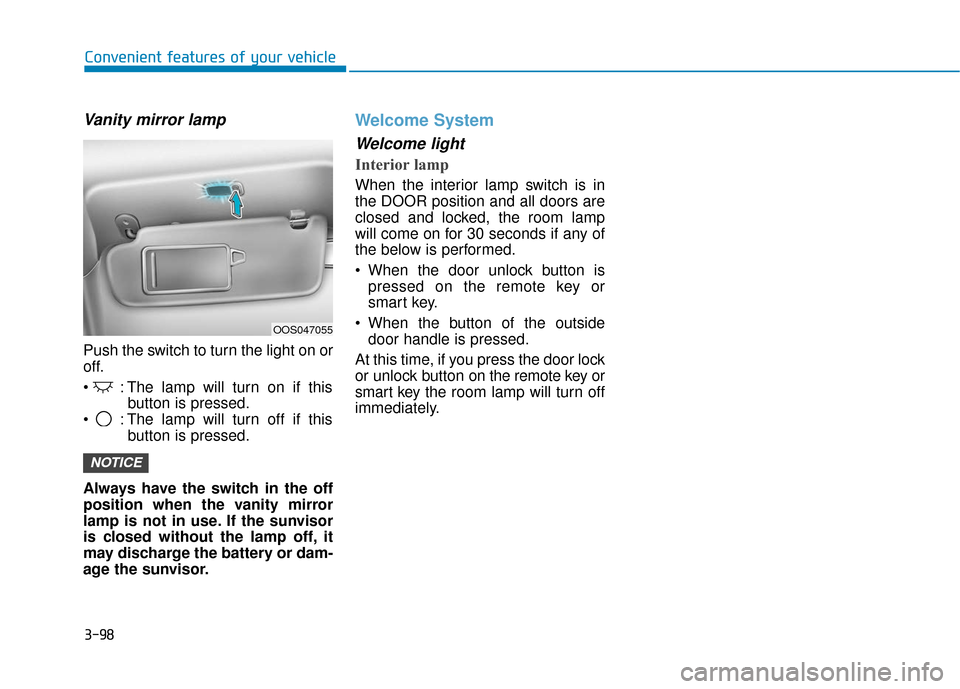
Vanity mirror lamp
Push the switch to turn the light on or
off.
: The lamp will turn on if thisbutton is pressed.
: The lamp will turn off if this button is pressed.
Always have the switch in the off
position when the vanity mirror
lamp is not in use. If the sunvisor
is closed without the lamp off, it
may discharge the battery or dam-
age the sunvisor.
Welcome System
Welcome light
Interior lamp
When the interior lamp switch is in
the DOOR position and all doors are
closed and locked, the room lamp
will come on for 30 seconds if any of
the below is performed.
When the door unlock button is pressed on the remote key or
smart key.
When the button of the outside door handle is pressed.
At this time, if you press the door lock
or unlock button on the remote key or
smart key the room lamp will turn off
immediately.
NOTICE
OOS047055
Page 183 of 485

3-99
Convenient features of your vehicle
3
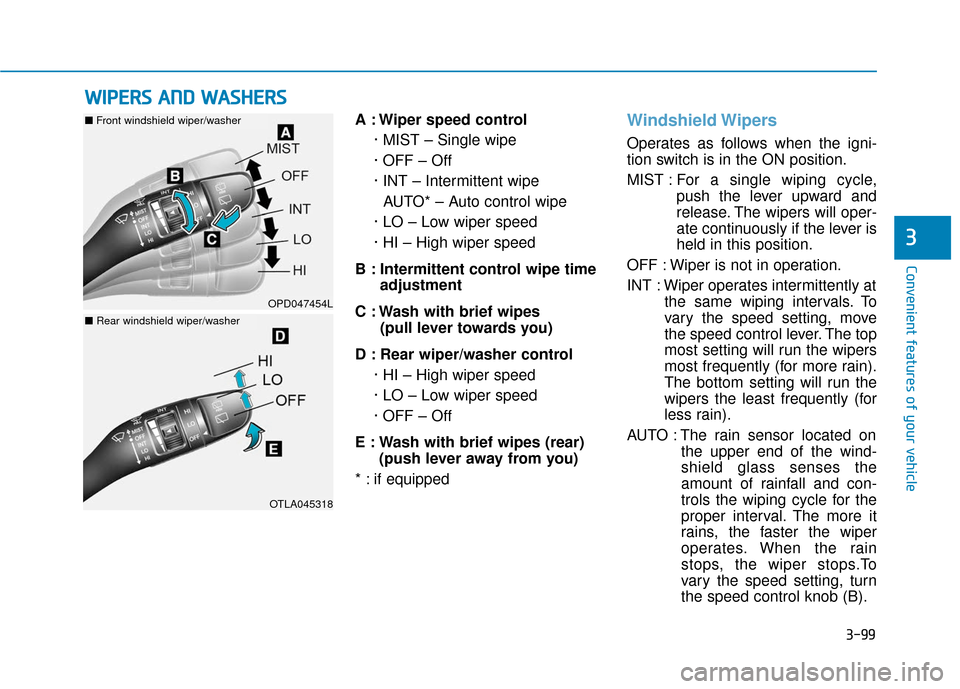
A : Wiper speed control· MIST – Single wipe
· OFF – Off
· INT – Intermittent wipeAUTO* – Auto control wipe
· LO – Low wiper speed
· HI – High wiper speed
B : Intermittent control wipe time adjustment
C : Wash with brief wipes (pull lever towards you)
D : Rear wiper/washer control · HI – High wiper speed
· LO – Low wiper speed
· OFF – Off
E : Wash with brief wipes (rear) (push lever away from you)
* : if equippedWindshield Wipers
Operates as follows when the igni-
tion switch is in the ON position.
MIST : For a single wiping cycle,
push the lever upward and
release. The wipers will oper-
ate continuously if the lever is
held in this position.
OFF : Wiper is not in operation.
INT : Wiper operates intermittently at the same wiping intervals. To
vary the speed setting, move
the speed control lever. The top
most setting will run the wipers
most frequently (for more rain).
The bottom setting will run the
wipers the least frequently (for
less rain).
AUTO : The rain sensor located on the upper end of the wind-
shield glass senses the
amount of rainfall and con-
trols the wiping cycle for the
proper interval. The more it
rains, the faster the wiper
operates. When the rain
stops, the wiper stops.To
vary the speed setting, turn
the speed control knob (B).
W WI
IP
P E
ER
R S
S
A
A N
N D
D
W
W A
AS
SH
H E
ER
R S
S
OPD047454L
OTLA045318
■ Front windshield wiper/washer
■Rear windshield wiper/washer
Page 184 of 485

3-100
Convenient features of your vehicle
LO : The wiper runs at a lower speed.
HI : The wiper runs at a higher speed.
Information
If there is heavy accumulation of snow
or ice on the windshield, defrost the
windshield for about 10 minutes, or
until the snow and/or ice is removed
before using the windshield wipers to
ensure proper operation.
If you do not remove the snow and/or
ice before using the wiper and washer,
it may damage the wiper and washer
system.
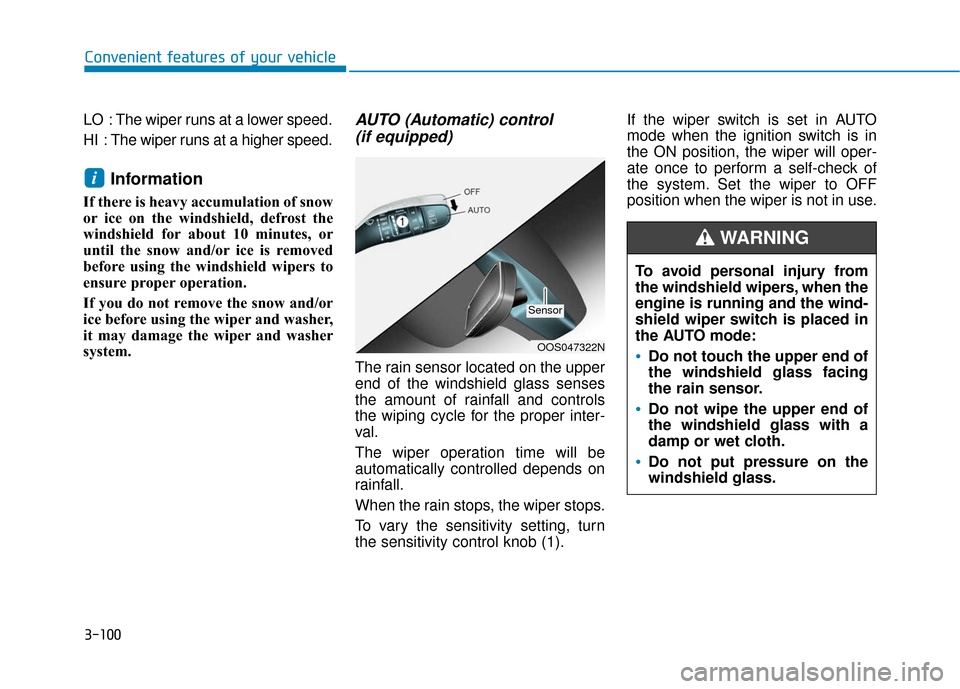
AUTO (Automatic) control (if equipped)
The rain sensor located on the upper
end of the windshield glass senses
the amount of rainfall and controls
the wiping cycle for the proper inter-
val.
The wiper operation time will be
automatically controlled depends on
rainfall.
When the rain stops, the wiper stops.
To vary the sensitivity setting, turn
the sensitivity control knob (1). If the wiper switch is set in AUTO
mode when the ignition switch is in
the ON position, the wiper will oper-
ate once to perform a self-check of
the system. Set the wiper to OFF
position when the wiper is not in use.
i
To avoid personal injury from
the windshield wipers, when the
engine is running and the wind-
shield wiper switch is placed in
the AUTO mode:
Do not touch the upper end of
the windshield glass facing
the rain sensor.
Do not wipe the upper end of
the windshield glass with a
damp or wet cloth.
Do not put pressure on the
windshield glass.
WARNING
OOS047322N
Sensor