Page 231 of 555
Information
There may also be additional unfore-
seen circumstances leading to recep-
tion problems with the SiriusXM
®
satellite radio signal.
Advisory Messages, such as 'CH
Unavailable' may occur when starting
SiriusXM
®Radio.
Using a cellular phone or a two-way radio
When a cellular phone is used inside
the vehicle, noise may be produced
from the audio system. This does not
mean that something is wrong with
the audio equipment. In such a case,
try to operate mobile devices as far
from the audio equipment as possible.
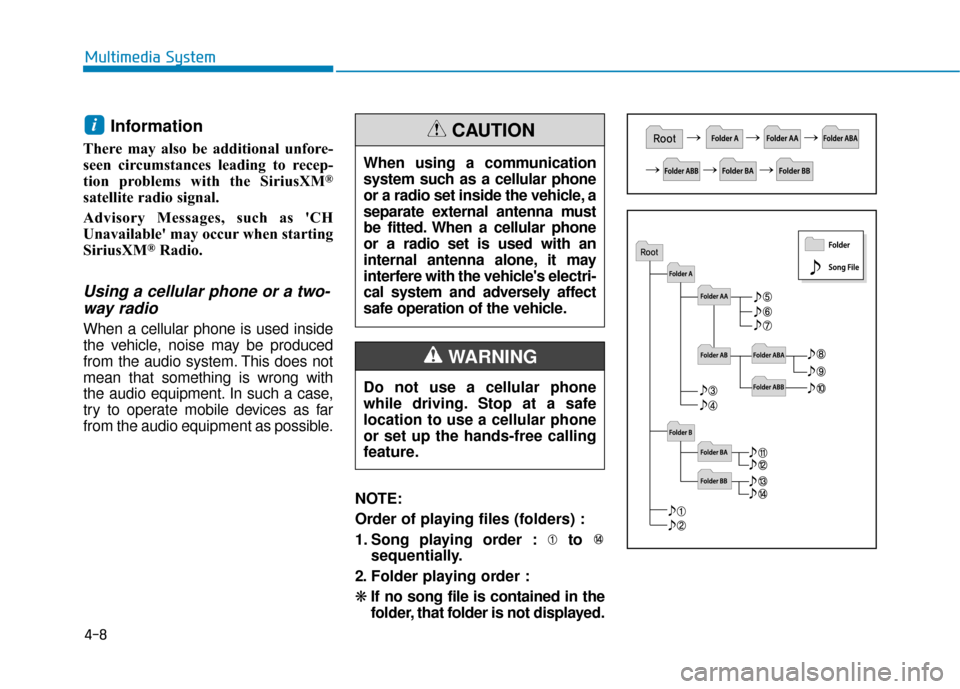
NOTE:
Order of playing files (folders) :
1. Song playing order : to sequentially.
2. Folder playing order :
❋ If no song file is contained in the
folder, that folder is not displayed.
i
4-8
Multimedia System
When using a communication
system such as a cellular phone
or a radio set inside the vehicle, a
separate external antenna must
be fitted. When a cellular phone
or a radio set is used with an
internal antenna alone, it may
interfere with the vehicle's electri-
cal system and adversely affect
safe operation of the vehicle.
CAUTION
Do not use a cellular phone
while driving. Stop at a safe
location to use a cellular phone
or set up the hands-free calling
feature.
WARNING
Page 244 of 555
4-21
Multimedia System
4
Information
-
Using the USB Devices
• Starting the vehicle while a USB device is connected can damage the
device. Please disconnect USB
devices before starting the vehicle.
• Starting the vehicle or stopping the engine while an external USB device
is connected can result in failure of
the external USB device to operate.
• Be cautious of static electricity when connecting/disconnecting external
USB devices.
• An encrypted MP3 player is not rec- ognized when connected as an exter-
nal device.
• External USB devices may not be recognized, depending on the state
of the external USB device.
• Only products with byte/sectors for- matted at 4 KB or lower are recog-
nized.
• Only USB devices in FAT12/16/32 format are recognized; NTFS and
ExFAT file systems are not recog-
nized.
(Continued)(Continued)
• Some USB devices are not recog-
nized due to compatibility issues.
• Do not touch the USB connections.
• Connecting and disconnecting USB devices rapidly over a short period
of time can cause equipment failure.
• Abnormal sounds may be audible when the USB device is disconnected.
• Turn the audio off before connecting or disconnecting external USB
devices.
• Recognition may take longer depending on the type, capacity or
file format of the external USB
device. This is not a product mal-
function.
• Use of USB devices for purposes other than playing music files is pro-
hibited.
• Image display and video playback are not supported.
(Continued)(Continued)
• Use of USB accessories, including
charge and heat though the USB I/F,
can lead to reduced product per-
formance or malfunctions. Do not
use USB devices or accessories for
these purposes.
• Use of aftermarket USB hubs and extension cables can result in the
vehicle’s audio system failing to rec-
ognize your USB device. Connect
the USB device directly to the multi-
media port of your vehicle.
• When using high-capacity USB devices with logical drive divisions,
only files saved on the highest level
logical drive can be played.
If applications are loaded on a USB
drive, file playback may fail.
• Some MP3 players, cell phones, dig- ital cameras, etc. (USB devices that
are not recognized as mobile stor-
age) may not operate normally
when connected.
• USB charging may not be supported by some mobile devices.
(Continued)
i
Page 263 of 555
![Hyundai Ioniq Electric 2019 Owners Manual 4-40
Multimedia System
Dial
Press the [PHONE]button on the
audio ➟Select [Dial].
(1) Phone number entry window: The phone number entered using the
keypad is displayed.
(2) Clear - Press to delete i Hyundai Ioniq Electric 2019 Owners Manual 4-40
Multimedia System
Dial
Press the [PHONE]button on the
audio ➟Select [Dial].
(1) Phone number entry window: The phone number entered using the
keypad is displayed.
(2) Clear - Press to delete i](/manual-img/35/14897/w960_14897-262.png)
4-40
Multimedia System
Dial
Press the [PHONE]button on the
audio ➟Select [Dial].
(1) Phone number entry window: The phone number entered using the
keypad is displayed.
(2) Clear - Press to delete individual digits.
- Press and hold to delete theentire phone number.
(3) Keypad: Enter phone number.
(4)
Bluetooth®Wireless Technology
Phone name
- The name of the connected
Bluetooth®Wireless Technology
device is displayed.
- Contacts matching the keypad number/letter input are displayed.(5) Call
- Enter and select a phone num-ber to call.
- Select without entering a phone number to see the most recent
dialed call.
Settings
Press the [PHONE]button on the
audio ➟Select [Settings].
- For phone Setup, refer to Setup page ➟Select [Bluetooth].
Siri
Information -
Using Siri
• If you want to use Siri, you have to connect your iOS device to multime-
dia system through Bluetooth
®
Wireless Technology. (Please check
whether your iOS device supports
Siri and turning Siri On)
• If the iOS version is changed, the functions and response may be dif-
ferent according to the iOS device
and the latest version.
• Siri automatically stops in the fol- lowing events.
1)Outgoing and incoming phonecalls.
2)Media (USB, etc.) is connected. (Siri mode is maintained when
iPod
®s are connected)
3)Rear view monitor is activated (option).
4)Vehicle is started or engine is turned off.
5)Screen transition buttons, such as RADIO or MEDIA, are selected.
(Continued)
i
Page 276 of 555
5-9
Driving your vehicle
5
To prevent damage to the vehicle:
If the " " indicator turns off
while you are in motion, do not
attempt to shift to the P (Park)
position.
To prevent damage to the vehicle:
When the stop lamp fuse is blown,
you cannot normally start the
vehicle. Replace the fuse with a
new one. If you are not able to
replace the fuse, you can start the
vehicle by pressing and holding
the POWER button for 10 seconds
with the POWER button in the ACC
position.
Do not press the POWER button
for more than 10 seconds except
when the stop lamp fuse is blown.
For your safety always depress
the brake pedal before starting the
vehicle.
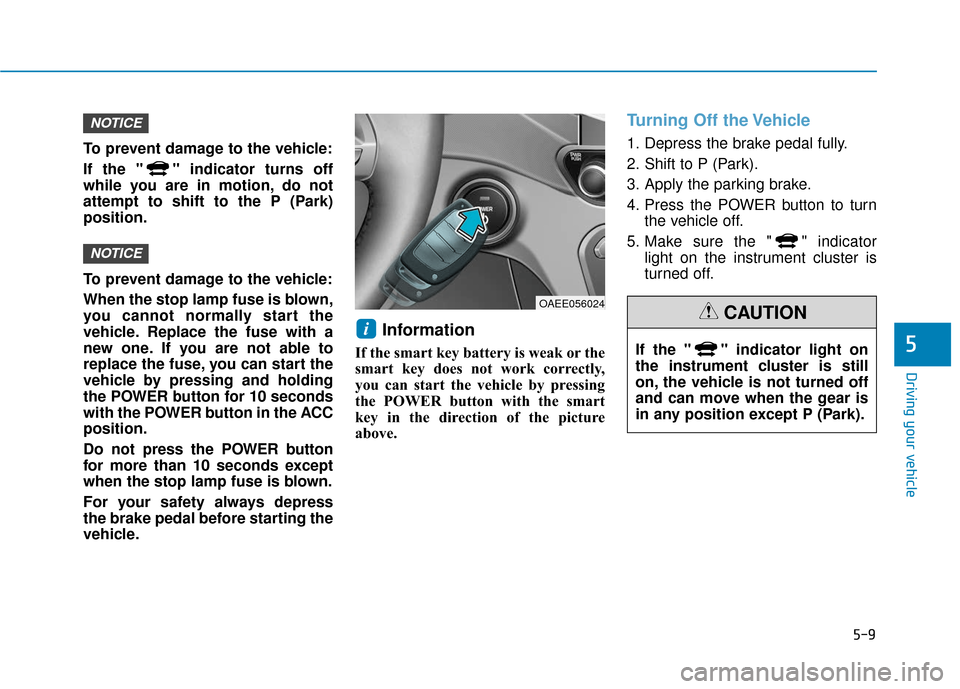
Information
If the smart key battery is weak or the
smart key does not work correctly,
you can start the vehicle by pressing
the POWER button with the smart
key in the direction of the picture
above.
Turning Off the Vehicle
1. Depress the brake pedal fully.
2. Shift to P (Park).
3. Apply the parking brake.
4. Press the POWER button to turnthe vehicle off.
5. Make sure the " " indicator light on the instrument cluster is
turned off.
i
NOTICE
NOTICE
OAEE056024
If the " " indicator light on
the instrument cluster is still
on, the vehicle is not turned off
and can move when the gear is
in any position except P (Park).
CAUTION
Page 279 of 555
5-12
Driving your vehicle
Shift-lock system
For your safety, your vehicle has a
shift-lock system which prevents
shifting the gear from P (Park) or N
(Neutral) into R (Reverse) or D
(Drive) unless the brake pedal is
depressed.
To shift from P (Park) or N (Neutral)
into R (Reverse) or D (Drive) :
1. Depress and hold the brake pedal.
2. Start the vehicle or place thePOWER button in the ON position.
3. Press the R (Reverse) or D (Drive) button.
When the battery (12 V) is dis-charged
You cannot shift the gear when the
battery is discharged.
Jump start your vehicle (refer to
“Jump Starting” in chapter 6) or con-
tact an authorized HYUNDAI dealer.
Parking
Always come to a complete stop and
continue to depress the brake pedal.
Shift to the P (Park) position, apply
the parking brake, and place the
POWER button in the OFF position.
Take the Key with you when exiting
the vehicle.
LCD Display Messages
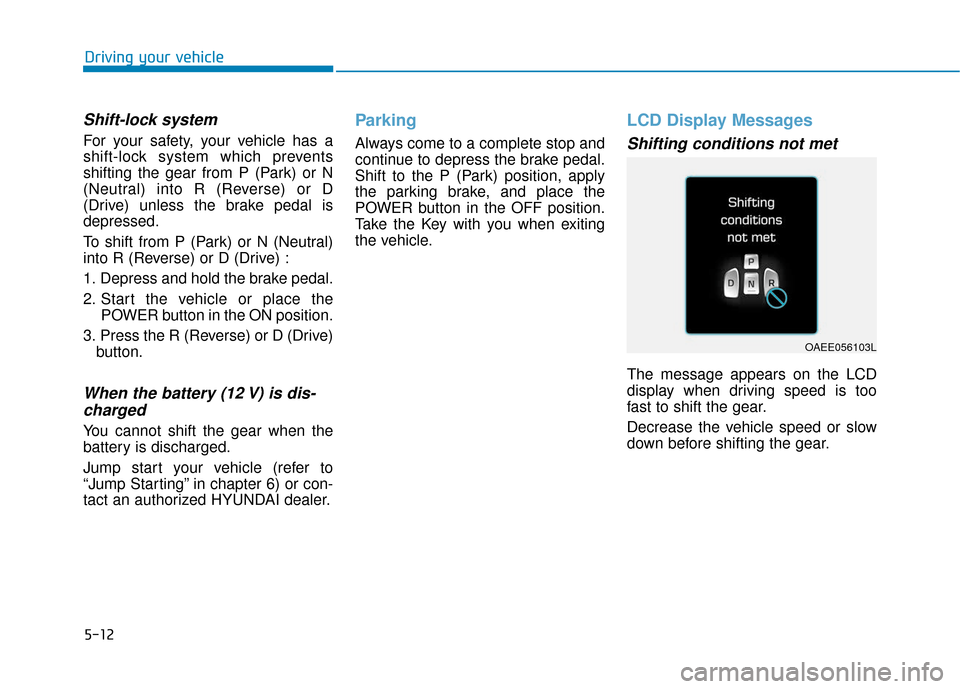
Shifting conditions not met
The message appears on the LCD
display when driving speed is too
fast to shift the gear.
Decrease the vehicle speed or slow
down before shifting the gear.
OAEE056103L
Page 291 of 555
![Hyundai Ioniq Electric 2019 Owners Manual 5-24
Driving your vehicle
Set up
1. With the drivers door and hoodclosed, fasten the drivers seat
belt or depress the brake pedal
and then press the [AUTO HOLD]
switch. The white AUTO HOLD
indicator Hyundai Ioniq Electric 2019 Owners Manual 5-24
Driving your vehicle
Set up
1. With the drivers door and hoodclosed, fasten the drivers seat
belt or depress the brake pedal
and then press the [AUTO HOLD]
switch. The white AUTO HOLD
indicator](/manual-img/35/14897/w960_14897-290.png)
5-24
Driving your vehicle
Set up
1. With the driver's door and hoodclosed, fasten the driver's seat
belt or depress the brake pedal
and then press the [AUTO HOLD]
switch. The white AUTO HOLD
indicator will come on and the sys-
tem will be in the standby position. 2. When you stop the vehicle com-
pletely by depressing the brake
pedal, the AUTO HOLD indicator
changes from white to green.
3. The vehicle will remain stationary even if you release the brake
pedal.
4. If EPB is applied, Auto Hold will be released.
Leaving
If you press the accelerator pedalwith the gear in D (Drive) or N
(Neutral), the Auto Hold will be
released automatically and the
vehicle will start to move. The
AUTO HOLD indicator changes
from green to white.
If the vehicle is restarted using the cruise control toggle switch (RES+
or SET-) while Auto Hold and cruise
control is operating, the Auto Hold
will be released regardless of
accelerator pedal operation. The
AUTO HOLD indicator changes
from green to white. (if equipped
with cruise control system)
When driving off from Auto
Hold by depressing the acceler-
ator pedal, always check the
surrounding area near your
vehicle.
Slowly depress the accelerator
pedal for a smooth start.
WARNING
OAEE056007
OAEE056008
W
W
W
W
h
h
h
h
i
i
i
i
t
t
t
t
e
e
e
e W
W
W
W
h
h
h
h
i
i
i
i
t
t
t
t
e
e
e
e
G
G
G
G
r
r
r
r
e
e
e
e
e
e
e
e
n
n
n
n
Page 301 of 555
5-34
Driving your vehicle
VSM OFF condition
To cancel VSM operation, press the
ESC OFF button. ESC OFF indicator
light ( ) will illuminate.
To turn on VSM, press the ESC OFF
button again. The ESC OFF indicator
light will go out.Driving with wheels and tires with
different sizes may cause the VSM
system to malfunction. Before
replacing tires, make sure all four
tires and wheels are the same
size. Never drive the vehicle with
different sized tires and wheels
installed.
Hill-Start Assist Control (HAC)
The Hill-Start Assist Control (HAC)
helps prevent the vehicle from rolling
backwards when starting a vehicle
from a stop on a hill. The system
operates the brakes automatically for
approximately 2 seconds and releas-
es the brake after 2 seconds or when
the accelerator pedal is depressed.
Information
• The HAC does not operate when the
gear is in P (Park) or N (Neutral).
• The HAC activates even when the ESC (Electronic Stability Control) is
off. However, it does not activate,
when the ESC does not operate nor-
mally.
i
NOTICE
If the ESC indicator light ( ) or
EPS warning light ( ) stays
on or blinks, your vehicle may
have a malfunction with the
VSM system. When the warning
light illuminates, have the vehi-
cle checked by an authorized
HYUNDAI dealer as soon as
possible.
WARNING
Always be ready to depress the
accelerator pedal when starting
off on a incline. The HAC acti-
vates only for approximately 2
seconds.
WARNING
Page 337 of 555
5-70
Resetting the System
The last break time is set to 00:00and the driver's attention level is
set to 5 (very attentive) when the
driver resets the Driver Attention
Warning (DAW) system.
The Driver Attention Warning (DAW) system resets in the follow-
ing situations.
- The vehicle is turned OFF.
- The driver unfastens the seat beltand then opens the driver's door.
- The vehicle is stopped for more than 10 minutes.
The Driver Attention Warning (DAW) system operates again,
when the driver restarts driving.
System Standby
The Driver Attention Warning (DAW)
system enters the ready status and
displays the 'Standby' screen in the
following situations.
- The camera does not detect thelanes.
- Driving speed remains under 40 mph (64 km/h) or over 110 mph
(177 km/h).
Driving your vehicle
If any other warning sound
such as seat belt warning chime
is already generated, the Driver
Attention Warning (DAW) sys-
tem warning may not sound.
CAUTION
OAEE058259L