2019 Hyundai Ioniq Electric key battery
[x] Cancel search: key batteryPage 90 of 555
3-5
Convenient features of your vehicle
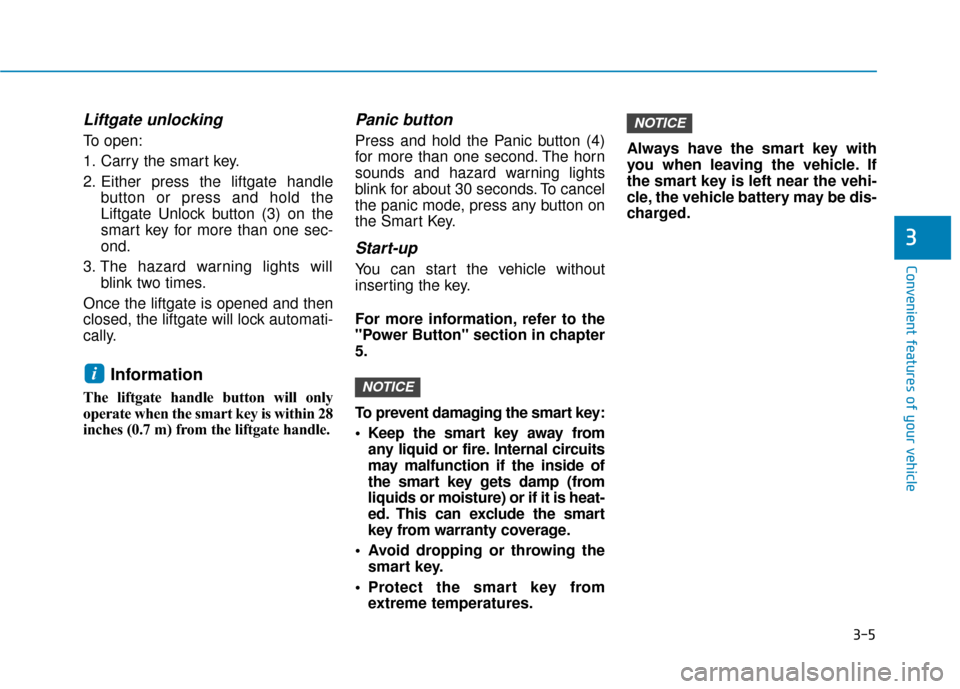
Liftgate unlocking
To open:
1. Carry the smart key.
2. Either press the liftgate handlebutton or press and hold the
Liftgate Unlock button (3) on the
smart key for more than one sec-
ond.
3. The hazard warning lights will blink two times.
Once the liftgate is opened and then
closed, the liftgate will lock automati-
cally.
Information
The liftgate handle button will only
operate when the smart key is within 28
inches (0.7 m) from the liftgate handle.
Panic button
Press and hold the Panic button (4)
for more than one second. The horn
sounds and hazard warning lights
blink for about 30 seconds. To cancel
the panic mode, press any button on
the Smart Key.
Start-up
You can start the vehicle without
inserting the key.
For more information, refer to the
"Power Button" section in chapter
5.
To prevent damaging the smart key:
• Keep the smart key away from any liquid or fire. Internal circuits
may malfunction if the inside of
the smart key gets damp (from
liquids or moisture) or if it is heat-
ed. This can exclude the smart
key from warranty coverage.
Avoid dropping or throwing the smart key.
Protect the smart key from extreme temperatures. Always have the smart key with
you when leaving the vehicle. If
the smart key is left near the vehi-
cle, the vehicle battery may be dis-
charged.
NOTICE
NOTICEi
3
Page 92 of 555
3-7
Convenient features of your vehicle
Information
This device complies with Part 15 of
the FCC rules.
Operation is subject to the following
three conditions:
1. This device may not cause harmfulinterference, and
2. This device must accept any inter- ference received, including interfer-
ence that may cause undesired
operation.
3. Changes or modifications not expressly approved by the party
responsible for compliance could
void the user's authority to operate
the device.
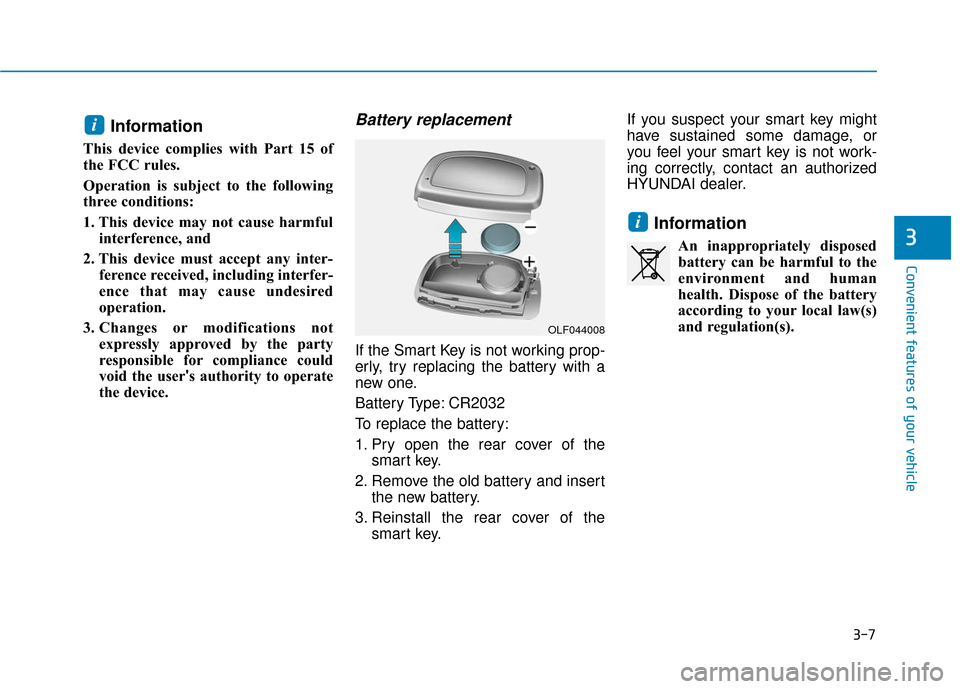
Battery replacement
If the Smart Key is not working prop-
erly, try replacing the battery with a
new one.
Battery Type: CR2032
To replace the battery:
1. Pry open the rear cover of the smart key.
2. Remove the old battery and insert the new battery.
3. Reinstall the rear cover of the smart key. If you suspect your smart key might
have sustained some damage, or
you feel your smart key is not work-
ing correctly, contact an authorized
HYUNDAI dealer.
Information
An inappropriately disposed
battery can be harmful to the
environment and human
health. Dispose of the battery
according to your local law(s)
and regulation(s).
i
i
3
OLF044008
Page 121 of 555
3-36
Convenient features of your vehicle
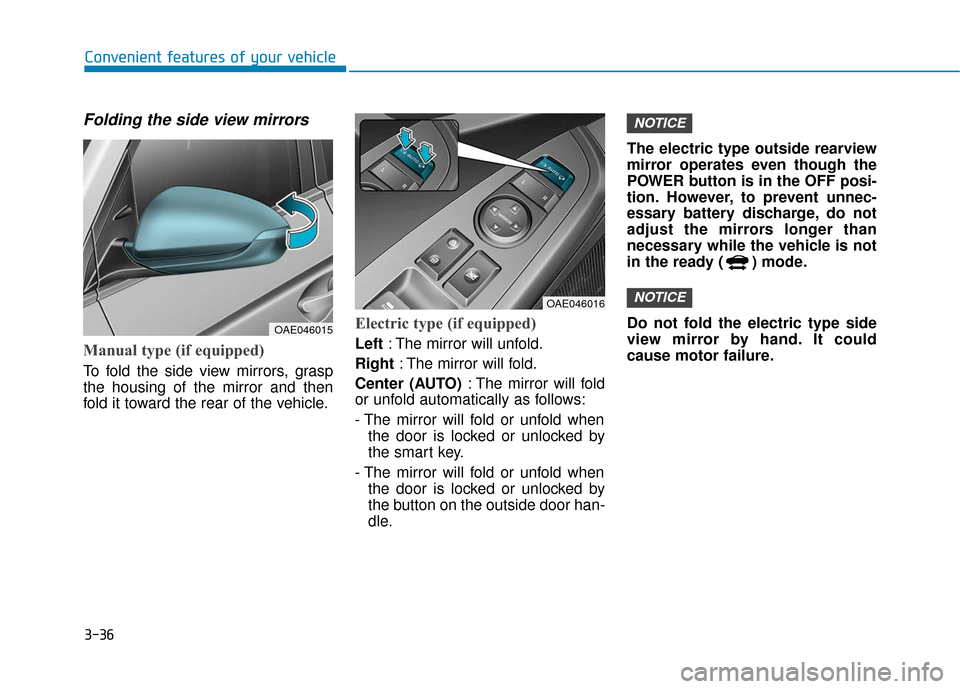
Folding the side view mirrors
Manual type (if equipped)
To fold the side view mirrors, grasp
the housing of the mirror and then
fold it toward the rear of the vehicle.
Electric type (if equipped)
Left: The mirror will unfold.
Right : The mirror will fold.
Center (AUTO) : The mirror will fold
or unfold automatically as follows:
- The mirror will fold or unfold when
the door is locked or unlocked by
the smart key.
- The mirror will fold or unfold when the door is locked or unlocked by
the button on the outside door han-
dle. The electric type outside rearview
mirror operates even though the
POWER button is in the OFF posi-
tion. However, to prevent unnec-
essary battery discharge, do not
adjust the mirrors longer than
necessary while the vehicle is not
in the ready ( ) mode.
Do not fold the electric type side
view mirror by hand. It could
cause motor failure.
NOTICE
NOTICE
OAE046015
OAE046016
Page 153 of 555
3-68
Convenient features of your vehicle
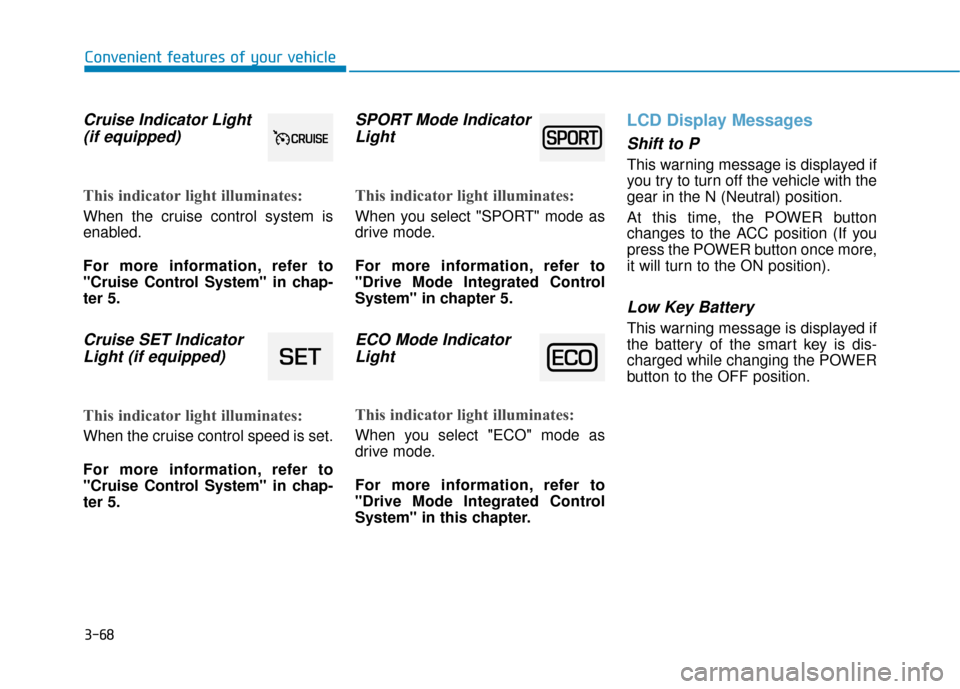
Cruise Indicator Light(if equipped)
This indicator light illuminates:
When the cruise control system is
enabled.
For more information, refer to
"Cruise Control System" in chap-
ter 5.
Cruise SET IndicatorLight (if equipped)
This indicator light illuminates:
When the cruise control speed is set.
For more information, refer to
"Cruise Control System" in chap-
ter 5.
SPORT Mode IndicatorLight
This indicator light illuminates:
When you select "SPORT" mode as
drive mode.
For more information, refer to
"Drive Mode Integrated Control
System" in chapter 5.
ECO Mode IndicatorLight
This indicator light illuminates:
When you select "ECO" mode as
drive mode.
For more information, refer to
"Drive Mode Integrated Control
System" in this chapter.
LCD Display Messages
Shift to P
This warning message is displayed if
you try to turn off the vehicle with the
gear in the N (Neutral) position.
At this time, the POWER button
changes to the ACC position (If you
press the POWER button once more,
it will turn to the ON position).
Low Key Battery
This warning message is displayed if
the battery of the smart key is dis-
charged while changing the POWER
button to the OFF position.
Page 186 of 555
3-101
Convenient features of your vehicle
Onetouch turn signal function
To activate the One Touch Turn
Signal function, push the turn signal
lever up or down to position (B) and
then release it.
The lane change signals will blink 3,
5 or 7 times.
You can activate or deactivate the
One Touch Turn Signal function or
choose the number of blinking (3, 5,
or 7) from the User Settings mode
(Light) on the LCD display.
For more information, refer to the
"LCD Display" section in this
chapter.
Battery saver function
The purpose of this feature is to pre-
vent the battery from being dis-
charged. The system automatically
turns off the parking lamp when the
driver turns the vehicle off and opens
the driver-side door.
With this feature, the parking lamps
will turn off automatically if the driver
parks on the side of road at night.
If necessary, to keep the lamps on
when the the vehicle is turned off, per-
form the following:
1) Open the driver-side door.
2) Turn the parking lamps OFF andON again using the light switch on
the steering column.
Headlamp delay function (if equipped)
If the POWER button is placed in the
ACC position or the OFF position
with the headlamps ON, the head-
lamps (and/or parking lamps) remain
on for about 5 minutes. However, if
the driver’s door is opened and
closed, the headlights are turned off
after 15 seconds. Also, with the vehi-
cle off if the driver's door is opened
and closed, the headlamps (and/or
parking lamps) are turned off after 15
seconds.
The headlamps (and/or parking
lamps) can be turned off by pressing
the lock button on the smart key
twice or turning the light switch to the
OFF or AUTO position.
You can activate or deactivate the
Headlamp Delay function from the
User Settings mode (Light) on the
LCD display.
For more information, refer to the
"LCD Display" section in this
chapter.
3
Page 188 of 555
3-103
Convenient features of your vehicle
3
Interior Lights
Do not use the interior lights for
extended periods when the vehi-
cle is turned off or the battery will
discharge.
Interior lamp AUTO cut
The interior lamps will automatically
go off approximately 20 minutes after
the vehicle is turned off and the
doors closed. If a door is opened, the
lamp will go off 40 minutes after the
vehicle is turned off. If the doors are
locked by the smart key and the vehi-
cle enters the armed stage of the
theft alarm system, the lamps will go
off five seconds later.
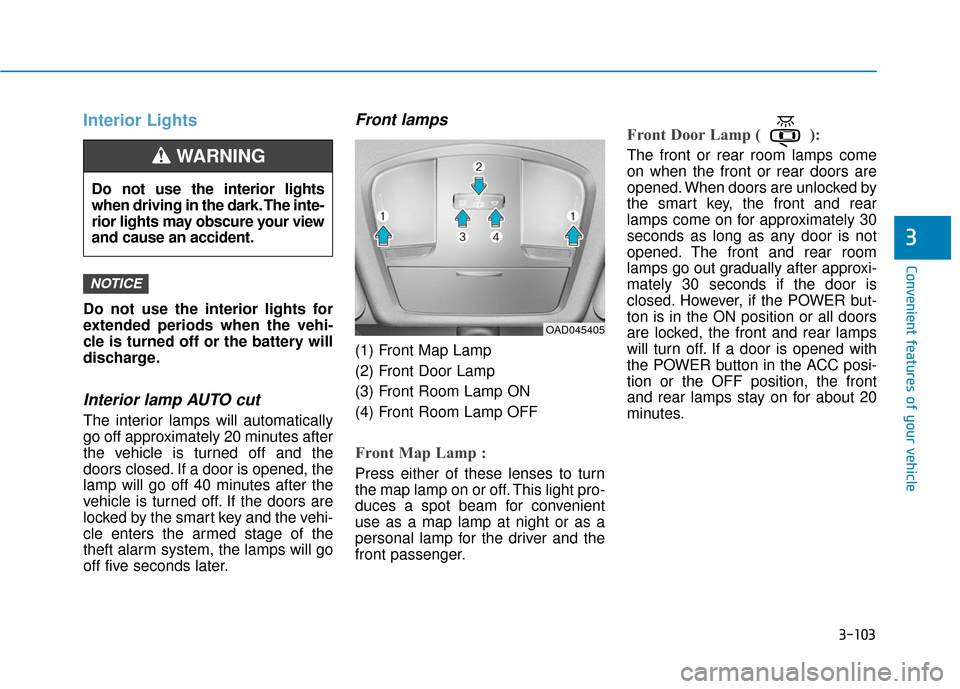
Front lamps
(1) Front Map Lamp
(2) Front Door Lamp
(3) Front Room Lamp ON
(4) Front Room Lamp OFF
Front Map Lamp :
Press either of these lenses to turn
the map lamp on or off. This light pro-
duces a spot beam for convenient
use as a map lamp at night or as a
personal lamp for the driver and the
front passenger.
Front Door Lamp ( ):
The front or rear room lamps come
on when the front or rear doors are
opened. When doors are unlocked by
the smart key, the front and rear
lamps come on for approximately 30
seconds as long as any door is not
opened. The front and rear room
lamps go out gradually after approxi-
mately 30 seconds if the door is
closed. However, if the POWER but-
ton is in the ON position or all doors
are locked, the front and rear lamps
will turn off. If a door is opened with
the POWER button in the ACC posi-
tion or the OFF position, the front
and rear lamps stay on for about 20
minutes.
NOTICE
Do not use the interior lights
when driving in the dark. The inte-
rior lights may obscure your view
and cause an accident.
WARNING
OAD045405
Page 190 of 555
3-105
Convenient features of your vehicle
3
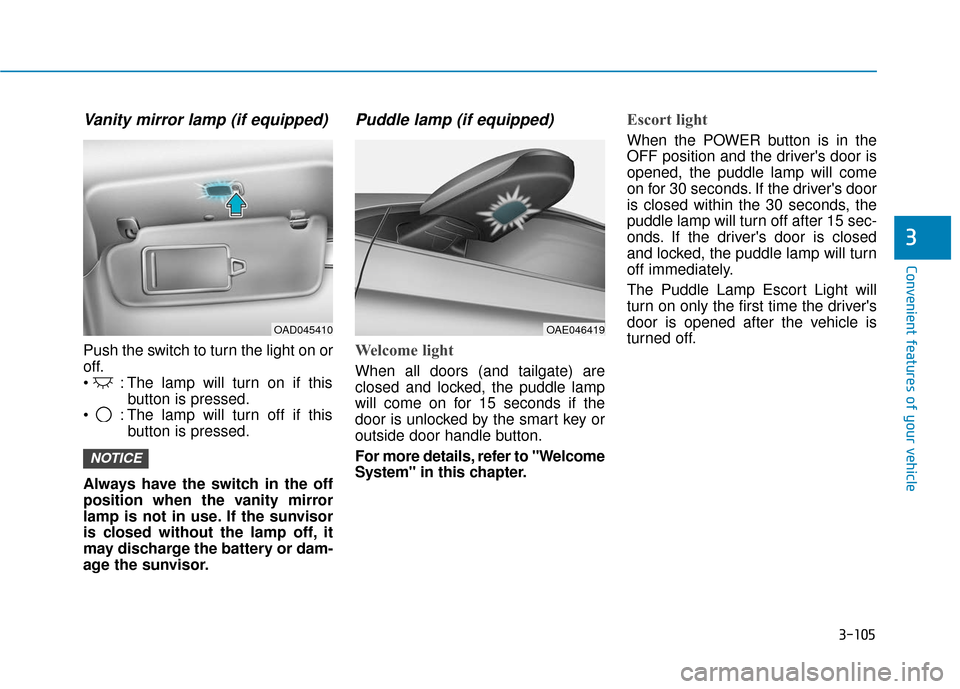
Vanity mirror lamp (if equipped)
Push the switch to turn the light on or
off.
: The lamp will turn on if thisbutton is pressed.
: The lamp will turn off if this button is pressed.
Always have the switch in the off
position when the vanity mirror
lamp is not in use. If the sunvisor
is closed without the lamp off, it
may discharge the battery or dam-
age the sunvisor.
Puddle lamp (if equipped)
Welcome light
When all doors (and tailgate) are
closed and locked, the puddle lamp
will come on for 15 seconds if the
door is unlocked by the smart key or
outside door handle button.
For more details, refer to "Welcome
System" in this chapter.
Escort light
When the POWER button is in the
OFF position and the driver's door is
opened, the puddle lamp will come
on for 30 seconds. If the driver's door
is closed within the 30 seconds, the
puddle lamp will turn off after 15 sec-
onds. If the driver's door is closed
and locked, the puddle lamp will turn
off immediately.
The Puddle Lamp Escort Light will
turn on only the first time the driver's
door is opened after the vehicle is
turned off.
NOTICE
OAD045410OAE046419
Page 257 of 555
4-34
Multimedia System
Even if your device supports
Bluetooth®Wireless Technology, a
Bluetooth®Wireless Technology con-
nection cannot be established if
the device’s
Bluetooth®Wireless
Technology function is switched off.
Search and connect with the
Bluetooth®Wireless Technology
function enabled.
Pair or connect
Bluetooth®Wireless
Technology de vices to the audio
system with the vehicle at a stand-
still.
If a
Bluetooth®Wireless Technology
connection is lost due to abnormal
conditions while a
Bluetooth®
Wireless Technology de vice is con-
nected (communication range
exceeded, device power OFF,
communication errors, etc.), the
disconnected
Bluetooth®Wireless
Technology de vice is searched for
and automatically reconnected.
If you want to disable the
Bluetooth®
Wireless Technology device auto-
connect function, turn the
Bluetooth®
Wireless Technology function OFF on
your device. Consult the user manu-
als for individual devices to see
whether
Bluetooth®Wireless
Technology is supported. Handsfree call quality and volume
may vary depending on the type of
Bluetooth®Wireless Technology
device.
Some
Bluetooth®Wireless
Technology de vices are subject to
intermittent
Bluetooth®Wireless
Technology connection failures. In
this case, use the following
method.
1) Turn the
Bluetooth®Wireless
Technology function off on your
Bluetooth®Wireless Technology
device ➟Turn it on and try again.
2) Delete the paired device from both the audio system and
Bluetooth®Wireless Technology
device, then pair again.
3) Power down your
Bluetooth®
Wireless Technology de vice ➟
Turn it on and try again.
4) Completely remove the battery from your
Bluetooth®Wireless
Technology de vice; reinsert it,
reboot, and attempt connection.
5) Restart the vehicle and reat- tempt connection.
Pairing a Bluetooth®Wireless
Technology device
Information on pairing Bluetooth®
Wireless Technology devices
Pairing refers to the process of pair-
ing
Bluetooth®Wireless Technology
cell phones or devices with the sys-
tem prior to connection. This is a nec-
essary procedure for
Bluetooth®
Wireless Technology connection and
usage.
Up to five devices can be paired.
Pairing Bluetooth
®device is not
allowed while vehicle is moving.
Pairing the first Bluetooth®Wireless
Technology device
Press the [PHONE]button on the
audio system or the [CALL] button
on the steering wheel remote control
➟ Search for the vehicle from the
Bluetooth®Wireless Technology
device, and pair ➟ Enter the passkey
on the
Bluetooth®Wireless Technology
device or approve passkey ➟
Bluetooth®Wireless Technologypair-
ing completed.