2019 Hyundai Ioniq Electric ready indicator
[x] Cancel search: ready indicatorPage 77 of 555
2-62
Safety system of your vehicle
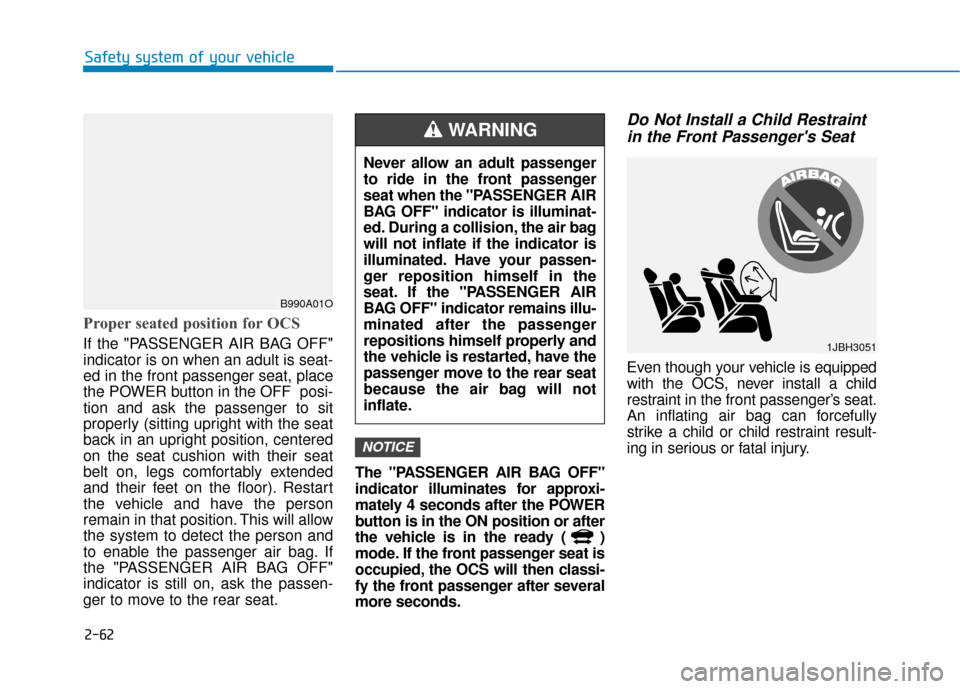
Proper seated position for OCS
If the "PASSENGER AIR BAG OFF"
indicator is on when an adult is seat-
ed in the front passenger seat, place
the POWER button in the OFF posi-
tion and ask the passenger to sit
properly (sitting upright with the seat
back in an upright position, centered
on the seat cushion with their seat
belt on, legs comfortably extended
and their feet on the floor). Restart
the vehicle and have the person
remain in that position. This will allow
the system to detect the person and
to enable the passenger air bag. If
the "PASSENGER AIR BAG OFF"
indicator is still on, ask the passen-
ger to move to the rear seat.The "PASSENGER AIR BAG OFF"
indicator illuminates for approxi-
mately 4 seconds after the POWER
button is in the ON position or after
the vehicle is in the ready ( )
mode. If the front passenger seat is
occupied, the OCS will then classi-
fy the front passenger after several
more seconds.
Do Not Install a Child Restraint
in the Front Passenger's Seat
Even though your vehicle is equipped
with the OCS, never install a child
restraint in the front passenger’s seat.
An inflating air bag can forcefully
strike a child or child restraint result-
ing in serious or fatal injury.
NOTICE
B990A01O
Never allow an adult passenger
to ride in the front passenger
seat when the "PASSENGER AIR
BAG OFF" indicator is illuminat-
ed. During a collision, the air bag
will not inflate if the indicator is
illuminated. Have your passen-
ger reposition himself in the
seat. If the "PASSENGER AIR
BAG OFF" indicator remains illu-
minated after the passenger
repositions himself properly and
the vehicle is restarted, have the
passenger move to the rear seat
because the air bag will not
inflate.
WARNING
1JBH3051
Page 102 of 555
3-17
Convenient features of your vehicle
3
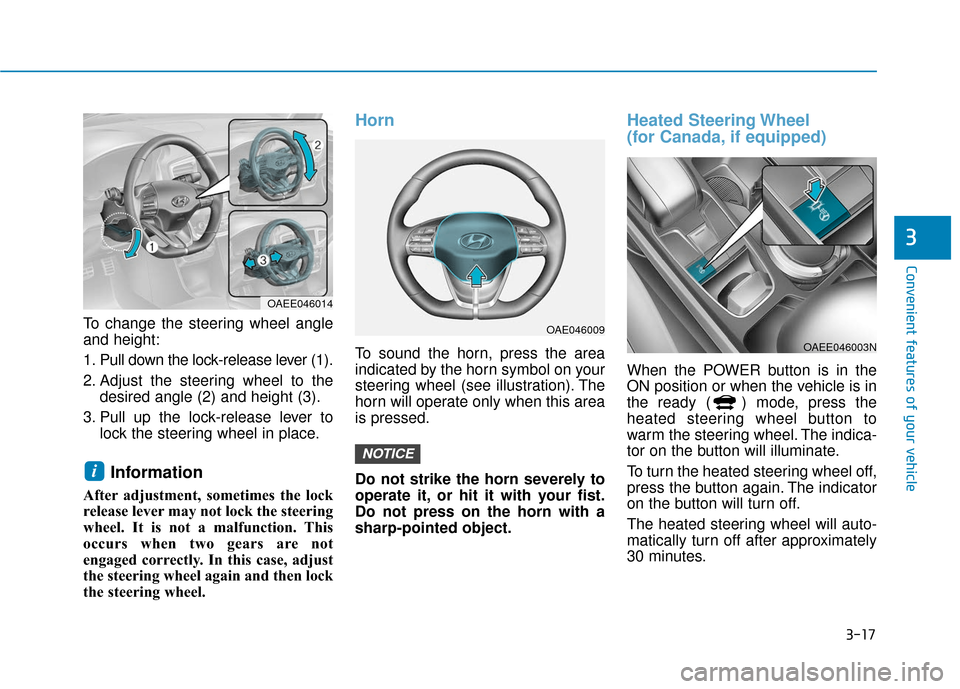
To change the steering wheel angle
and height:
1. Pull down the lock-release lever (1).
2. Adjust the steering wheel to thedesired angle (2) and height (3).
3. Pull up the lock-release lever to lock the steering wheel in place.
Information
After adjustment, sometimes the lock
release lever may not lock the steering
wheel. It is not a malfunction. This
occurs when two gears are not
engaged correctly. In this case, adjust
the steering wheel again and then lock
the steering wheel.
Horn
To sound the horn, press the area
indicated by the horn symbol on your
steering wheel (see illustration). The
horn will operate only when this area
is pressed.
Do not strike the horn severely to
operate it, or hit it with your fist.
Do not press on the horn with a
sharp-pointed object.
Heated Steering Wheel
(for Canada, if equipped)
When the POWER button is in the
ON position or when the vehicle is in
the ready ( ) mode, press the
heated steering wheel button to
warm the steering wheel. The indica-
tor on the button will illuminate.
To turn the heated steering wheel off,
press the button again. The indicator
on the button will turn off.
The heated steering wheel will auto-
matically turn off after approximately
30 minutes.
NOTICE
i
OAEE046014
OAE046009
OAEE046003N
Page 130 of 555
3-45
Convenient features of your vehicle
3
Resetting the sunroof
Sunroof needs to be reset if the fol-
lowing occurs :
- Battery is discharged or discon-nected or the related fuse has been
replaced or disconnected
- The one-touch sliding function of the sunroof does not normally oper-
ate
Reset procedure :
1. Place the POWER button to the ON position or start the vehicle
( indicator ON). It is recom-
mended to reset the sunroof while
the vehicle is in the ready ( )
mode.
2. Push the control lever forward. The sunroof will close completely or tilt
depending on the condition of the
sunroof.
3. Release the control lever when the sunroof stops moving. 4. Push the control lever forward
about 10 seconds.
- When the sunroof is in the closed position :
The glass will tilt and slightly move up and down.
- When the sunroof is in the tilt position:
The glass will slightly move up and down.
Do not release the lever until the
operation is completed.
If you release the lever during opera-
tion, start the procedure again from
step 2.
5. Within 3 seconds, push and hold the control lever forward until the
sunroof operates as follows:
Tilt down → Slide Open → Slide
Close. Do not release the lever until the
operation is completed.
If you release the lever during opera-
tion, start the procedure again from
step 2.
6. Release the sunroof control lever
after all steps have completed. The
sunroof system has been reset.
Information
• If the sunroof is not reset when thevehicle battery is disconnected or
discharged, or the sunroof fuse is
blown, the sunroof may not operate
normally.
• For more detailed information, con- tact an authorized HYUNDAI deal-
er.
i
Page 143 of 555
3-58
Convenient features of your vehicle
Warning and Indicator lightsInformation
Make sure that all warning lights are
OFF after starting the vehicle. If any
light is still ON, this indicates a situa-
tion that needs attention.
Ready Indicator
This indicator illuminates:
When the vehicle is ready to be driven.
- ON : Normal driving is possible.
- OFF : Nor mal driving is not possible,
or a problem has occurred.
- Blinking : Emergency driving.
When the ready indicator goes OFF
or blinks, there is a problem with the
system. In this case, have your vehi-
cle inspected by an authorized
HYUNDAI dealer.
Service Warning Light
This warning light illuminates:
• When the POWER button is in the ON position.
- It illuminates for approximately 3seconds and then goes off.
When there is a problem with relat- ed parts of the electric vehicle con-
trol system, such as sensors, etc.
When the warning light illuminates
while driving, or does not go OFF
after starting the vehicle, have your
vehicle inspected by an authorized
HYUNDAI dealer.
Power Down Warning Light
This warning light illuminates:
When the power is limited for the
safety of the electric vehicle.
The power is limited for the following
reasons.
- The high voltage battery level is
below a certain level or voltage is
decreasing
- The temperature of the motor or high voltage battery is too high or
too low
- There is a problem with the cooling system, or a failure that may inter-
rupt normal driving
Do not accelerate or start the vehi-
cle suddenly when the power
down warning light is ON.
Charge the battery immediately
when the high voltage battery
level is not enough.
NOTICE
i
Page 187 of 555
3-102
Convenient features of your vehicle
If the driver gets out of the vehicle
through other doors (except dri-
ver’s door), the battery saver func-
tion does not operate and the
headlamp delay function does not
turn off automatically. Therefore, It
causes the battery to be dis-
charged. In this case, make sure
to turn off the lamp before getting
out of the vehicle.
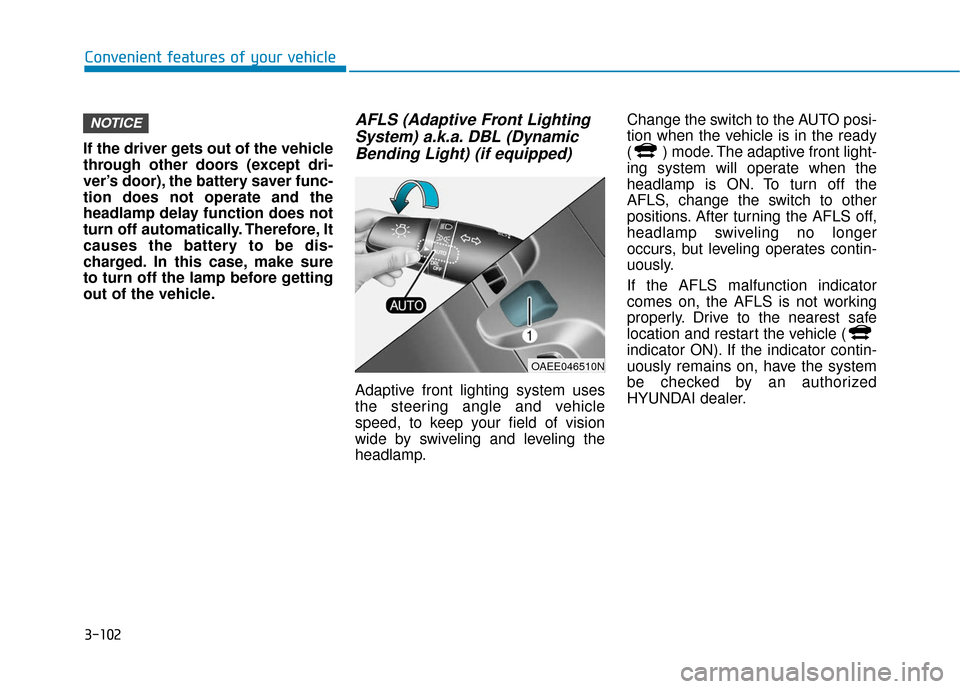
AFLS (Adaptive Front Lighting System) a.k.a. DBL (DynamicBending Light) (if equipped)
Adaptive front lighting system uses
the steering angle and vehicle
speed, to keep your field of vision
wide by swiveling and leveling the
headlamp. Change the switch to the AUTO posi-
tion when the vehicle is in the ready
( ) mode. The adaptive front light-
ing system will operate when the
headlamp is ON. To turn off the
AFLS, change the switch to other
positions. After turning the AFLS off,
headlamp swiveling no longer
occurs, but leveling operates contin-
uously.
If the AFLS malfunction indicator
comes on, the AFLS is not working
properly. Drive to the nearest safe
location and restart the vehicle (
indicator ON). If the indicator contin-
uously remains on, have the system
be checked by an authorized
HYUNDAI dealer.
NOTICE
OAEE046510N
Page 196 of 555
3-111
Convenient features of your vehicle
3
D
DE
EF
FR
R O
O S
ST
T E
ER
R
To prevent damage to the conduc-
tors bonded to the inside surface
of the rear window, never use
sharp instruments or window
cleaners containing abrasives to
clean the window.
If you want to defrost and defog
the front windshield, refer to
the "Windshield Defrosting and
Defogging" section in this chapter.
Rear Window Defroster
The defroster heats the window to
remove frost, fog and thin ice from
the interior and exterior of the rear
window while the vehicle is in the
ready ( ) mode.
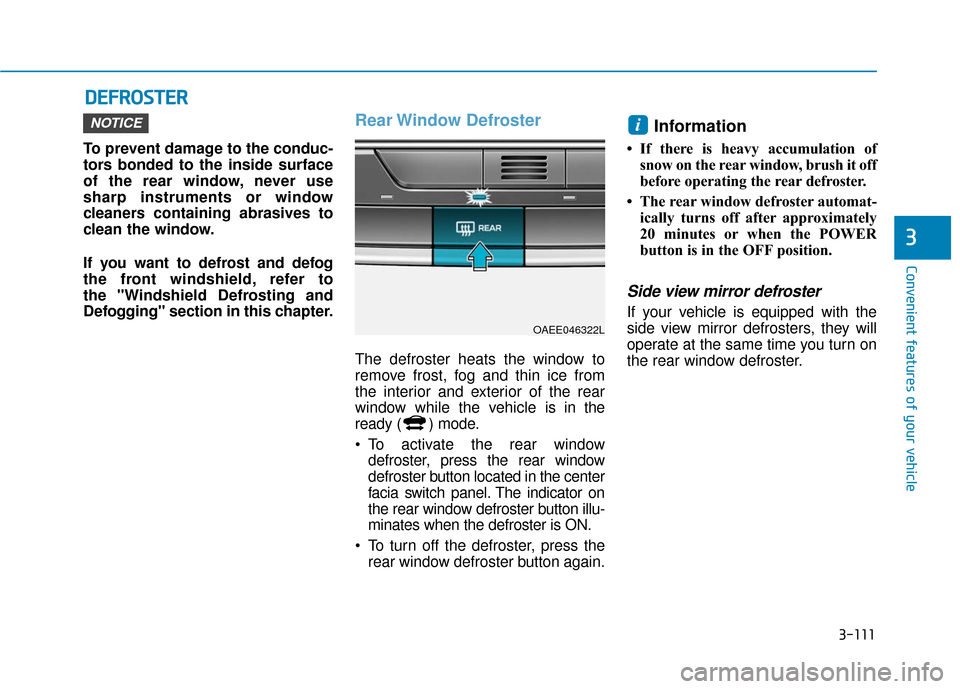
To activate the rear window
defroster, press the rear window
defroster button located in the center
facia switch panel. The indicator on
the rear window defroster button illu-
minates when the defroster is ON.
To turn off the defroster, press the rear window defroster button again.
Information
• If there is heavy accumulation ofsnow on the rear window, brush it off
before operating the rear defroster.
• The rear window defroster automat- ically turns off after approximately
20 minutes or when the POWER
button is in the OFF position.
Side view mirror defroster
If your vehicle is equipped with the
side view mirror defrosters, they will
operate at the same time you turn on
the rear window defroster.
iNOTICE
OAEE046322L
Page 275 of 555
5-8
Driving your vehicle
Starting the VehicleInformation
• The vehicle will start by pressing the
POWER button, only when the
smart key is in the vehicle.
• Even if the smart key is in the vehi- cle, and when it is far away from the
driver, the vehicle may not start.
• When the POWER button is in the ACC or ON position, any door is
open, the system checks for the
smart key. When the smart key is
not in the vehicle, the " " indica-
tor will blink and the warning "Key
not in vehicle" will come on. When
all doors are closed, the chime will
also sound for about 5 seconds.
Keep the smart key in the vehicle
when in the ACC position or if the
vehicle is in the ready ( ) mode. 1. Always carry the smart key with
you.
2. Make sure the parking brake is applied.
3. Make sure the gear is in P (Park).
4. Depress the brake pedal.
5. Press the POWER button. If the vehicle starts, the " " indicator
will come on.
Information
• Always start the vehicle with yourfoot on the brake pedal.
• If ambient temperature is low, the " " indicator may remain illumi-
nated longer than the normal amount
of time.
i
i
Always wear appropriate shoes
when operating your vehicle.
Unsuitable shoes, such as high
heels, ski boots, sandals, flip-
flops, etc., may interfere with
your ability to use the brake
and accelerator pedals.
Do not start the vehicle with the
accelerator pedal depressed.
The vehicle can move and
lead to an accident.
WARNING
Page 301 of 555
5-34
Driving your vehicle
VSM OFF condition
To cancel VSM operation, press the
ESC OFF button. ESC OFF indicator
light ( ) will illuminate.
To turn on VSM, press the ESC OFF
button again. The ESC OFF indicator
light will go out.Driving with wheels and tires with
different sizes may cause the VSM
system to malfunction. Before
replacing tires, make sure all four
tires and wheels are the same
size. Never drive the vehicle with
different sized tires and wheels
installed.
Hill-Start Assist Control (HAC)
The Hill-Start Assist Control (HAC)
helps prevent the vehicle from rolling
backwards when starting a vehicle
from a stop on a hill. The system
operates the brakes automatically for
approximately 2 seconds and releas-
es the brake after 2 seconds or when
the accelerator pedal is depressed.
Information
• The HAC does not operate when the
gear is in P (Park) or N (Neutral).
• The HAC activates even when the ESC (Electronic Stability Control) is
off. However, it does not activate,
when the ESC does not operate nor-
mally.
i
NOTICE
If the ESC indicator light ( ) or
EPS warning light ( ) stays
on or blinks, your vehicle may
have a malfunction with the
VSM system. When the warning
light illuminates, have the vehi-
cle checked by an authorized
HYUNDAI dealer as soon as
possible.
WARNING
Always be ready to depress the
accelerator pedal when starting
off on a incline. The HAC acti-
vates only for approximately 2
seconds.
WARNING