Page 469 of 526
7-21
7
Maintenance
Battery recharging
By battery charger
Your vehicle has a maintenance-free,
calcium-based battery.
If the battery becomes dischargedin a short time (because, for exam-
ple, the headlights or interior lights
were left on whilst the vehicle was
not in use), recharge it by slow
charging (trickle) for 10 hours.
If the battery gradually discharges because of high electric load whilst
the vehicle is being used, recharge
it at 20-30A for two hours. Always follow these instructions
when recharging your vehicle’s
battery to avoid the risk of SERI-
OUS INJURY or DEATH from
explosions or acid burns:
Before performing mainte-
nance or recharging the bat-
tery, turn off all accessories
and place the POWER button
to the OFF position.
Keep all flames, sparks, or
smoking materials away from
the battery.
Always work outdoors or in an
area with plenty of ventilation.
Wear eye protection when
checking the battery during
charging.
The battery must be removed
from the vehicle and placed in
a well ventilated area.
(Continued)
WARNING (Continued)
Watch the battery during
charging, and stop or reduce
the charging rate if the battery
cells begin boiling violently.
The negative battery cable
must be removed first and
installed last when the battery
is disconnected. Disconnect
the battery charger in the fol-
lowing order:
(1) Turn off the battery chargermain switch.
(2) Unhook the negative
clamp from the negative
battery terminal.
(3) Unhook the positive clamp from the positive battery
terminal.
Always use a genuine HYUNDAI
approved battery when you
replace the battery.
Page 483 of 526
7-35
7
Maintenance
Instrument panel fuse replace-
ment
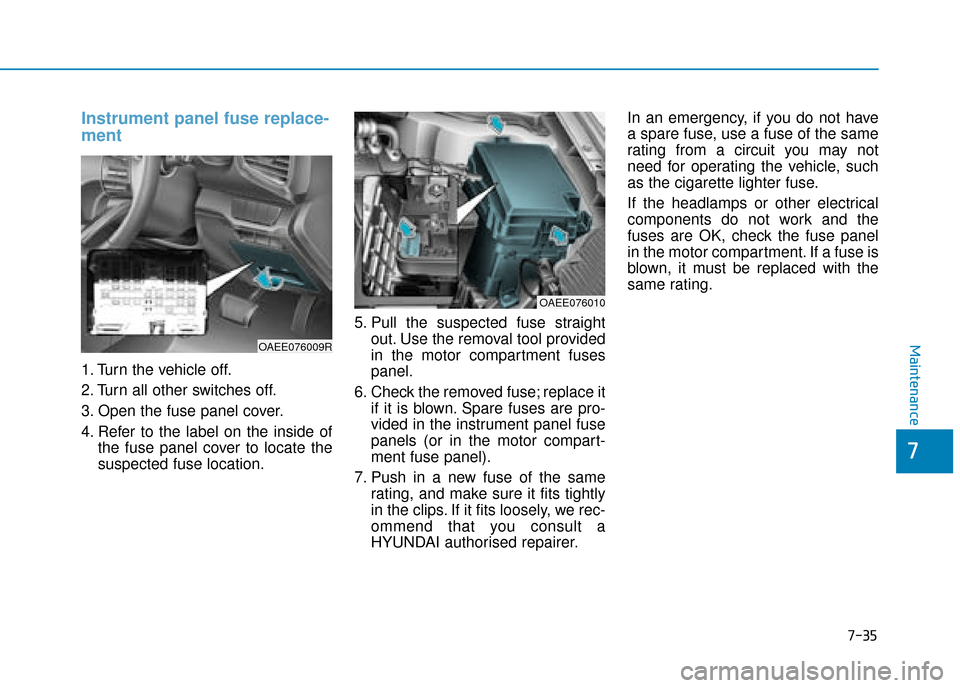
1. Turn the vehicle off.
2. Turn all other switches off.
3. Open the fuse panel cover.
4. Refer to the label on the inside ofthe fuse panel cover to locate the
suspected fuse location. 5. Pull the suspected fuse straight
out. Use the removal tool provided
in the motor compartment fuses
panel.
6. Check the removed fuse; replace it if it is blown. Spare fuses are pro-
vided in the instrument panel fuse
panels (or in the motor compart-
ment fuse panel).
7. Push in a new fuse of the same rating, and make sure it fits tightly
in the clips. If it fits loosely, we rec-
ommend that you consult a
HYUNDAI authorised repairer. In an emergency, if you do not have
a spare fuse, use a fuse of the same
rating from a circuit you may not
need for operating the vehicle, such
as the cigarette lighter fuse.
If the headlamps or other electrical
components do not work and the
fuses are OK, check the fuse panel
in the motor compartment. If a fuse is
blown, it must be replaced with the
same rating.
OAEE076009R
OAEE076010
Page 487 of 526
7-39
7
Maintenance
Instrument panel fuse panel
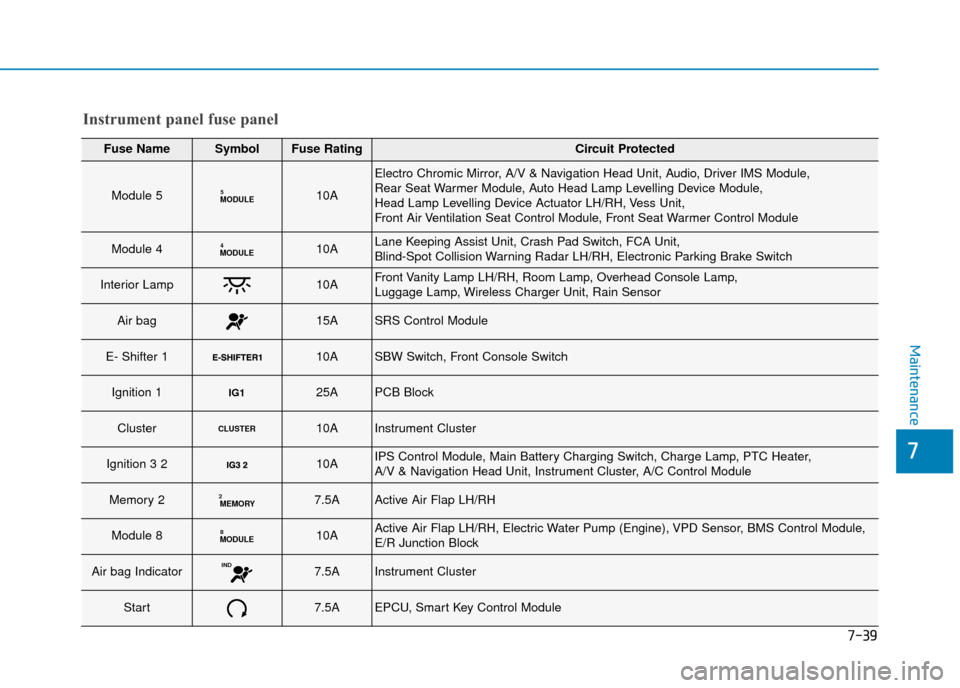
Fuse NameSymbolFuse RatingCircuit Protected
Module 5MODULE510A
Electro Chromic Mirror, A/V & Navigation Head Unit, Audio, Driver IMS Module,
Rear Seat Warmer Module, Auto Head Lamp Levelling Device Module,
Head Lamp Levelling Device Actuator LH/RH, Vess Unit,
Front Air Ventilation Seat Control Module, Front Seat Warmer Control Module
Module 4MODULE410ALane Keeping Assist Unit, Crash Pad Switch, FCA Unit,
Blind-Spot Collision Warning Radar LH/RH, Electronic Parking Brake Switch
Interior Lamp10AFront Vanity Lamp LH/RH, Room Lamp, Overhead Console Lamp,
Luggage Lamp, Wireless Charger Unit, Rain Sensor
Air bag15ASRS Control Module
E- Shifter 1 10ASBW Switch, Front Console Switch
Ignition 1IG125APCB Block
ClusterCLUSTER10AInstrument Cluster
Ignition 3 2 10AIPS Control Module, Main Battery Charging Switch, Charge Lamp, PTC Heater,
A/V & Navigation Head Unit, Instrument Cluster, A/C Control Module
Memory 2MEMORY27.5AActive Air Flap LH/RH
Module 8MODULE810AActive Air Flap LH/RH, Electric Water Pump (Engine), VPD Sensor, BMS Control Module,
E/R Junction Block
Air bag IndicatorIND7.5AInstrument Cluster
Start7.5AEPCU, Smart Key Control Module
Page 489 of 526
7-41
7
Maintenance
Fuse NameSymbolFuse RatingCircuit Protected
Heated Steering15ABCM
Sunroof20ASunroof Motor
Power WindowRight-handRH25APower Window (RH) Relay, Passenger Power Window Switch, Driver Safety Power Window
Power Window Left-handLH25APower Window (LH) Relay, Driver Power Window Switch,
Passenger Safety Power Window Module
Button Start 227.5AImmobiliser Module, Smart Key Control Module, Start/Stop Button Switch
Brake SwitchBRAKE
SWITCH7.5AStop Lamp Switch, Smart Key Control Module
OBC10AOBC
Air conditioner7.5AIonizer, A/C Control Module, Electronic A/C Compressor, E/R Junction Block
Washer15AMultifunction Switch
Seat Heater RearRR25ARear Seat Warmer Module
Charger10ACCM Unit(for Europe), Normal Charging Connector Lamp(except Europe),
ICM Relay Box (Charging Connector Lock/Unlock Relay)
Power Seat DriverDRV30ADriver Seat Manual Switch, Driver IMS Module
Instrument panel fuse panel
Page 497 of 526
7-49
7
Maintenance
L
LI
IG
G H
H T
T
B
B U
U L
LB
B S
S
Consult a HYUNDAI authorised
repairer to replace most vehicle light
bulbs. It is difficult to replace vehicle
light bulbs because other parts of the
vehicle must be removed before you
can get to the bulb. This is especially
true for removing the headlamp
assembly to get to the bulb(s).
Removing/installing the headlamp
assembly can result in damage to
the vehicle.
Information
After heavy driving rain or washing,
the lamps could appear frosty. This
condition is caused by the temperature
difference between the lamp inside and
the outside temperature. This is similar
to the condensation on your windows
inside your vehicle when raining and
doesn’t indicate a problem with your
vehicle. If the water leaks into the light
bulb circuitry, we recommend you to
have your vehicle checked by a
HYUNDAI authorised repairer.
Information
• A normally functioning lamp may
flicker momentarily to stabilize the
vehicle’s electrical control system.
However, if the lamp goes out after
flickering momentarily, or contin-
ues to flicker, we recommend the
system be checked by a HYUNDAI
authorised repairer.
• The position lamp may not turn on when the position lamp switch is
turned on, but the position lamp and
headlamp switch may turn on when
the headlamp switch is turned on.
This may be caused by network fail-
ure or vehicle electrical control sys-
tem malfunction. If this occurs, we
recommend the system be checked
by a HYUNDAI authorised repairer.
i
i
Prior to replacing a lamp,
depress the foot brake, shift
to P (Park), apply the parking
brake, place the POWER but-
ton in the OFF position and
take the key with you when
leaving the vehicle to avoid
sudden movement of the vehi-
cle and to prevent possible
electric shock.
Be aware the bulbs may be hot
and may burn your fingers.
WARNING
Page 498 of 526
7-50
Maintenance
Headlamp, position lamp,
turn signal lamp bulb replace-
ment
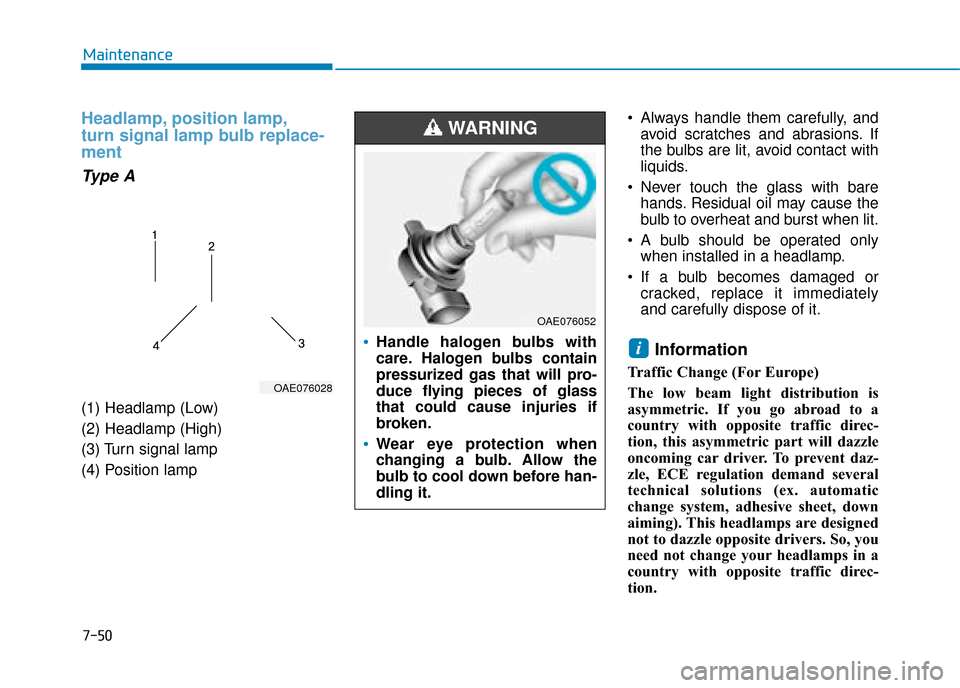
Type A
(1) Headlamp (Low)
(2) Headlamp (High)
(3) Turn signal lamp
(4) Position lamp Always handle them carefully, and
avoid scratches and abrasions. If
the bulbs are lit, avoid contact with
liquids.
Never touch the glass with bare hands. Residual oil may cause the
bulb to overheat and burst when lit.
A bulb should be operated only when installed in a headlamp.
If a bulb becomes damaged or cracked, replace it immediately
and carefully dispose of it.
Information
Traffic Change (For Europe)
The low beam light distribution is
asymmetric. If you go abroad to a
country with opposite traffic direc-
tion, this asymmetric part will dazzle
oncoming car driver. To prevent daz-
zle, ECE regulation demand several
technical solutions (ex. automatic
change system, adhesive sheet, down
aiming). This headlamps are designed
not to dazzle opposite drivers. So, you
need not change your headlamps in a
country with opposite traffic direc-
tion.
i
OAE076028
Handle halogen bulbs with
care. Halogen bulbs contain
pressurized gas that will pro-
duce flying pieces of glass
that could cause injuries if
broken.
Wear eye protection when
changing a bulb. Allow the
bulb to cool down before han-
dling it.
WARNING
OAE076052
Page 499 of 526
7-51
7
Maintenance
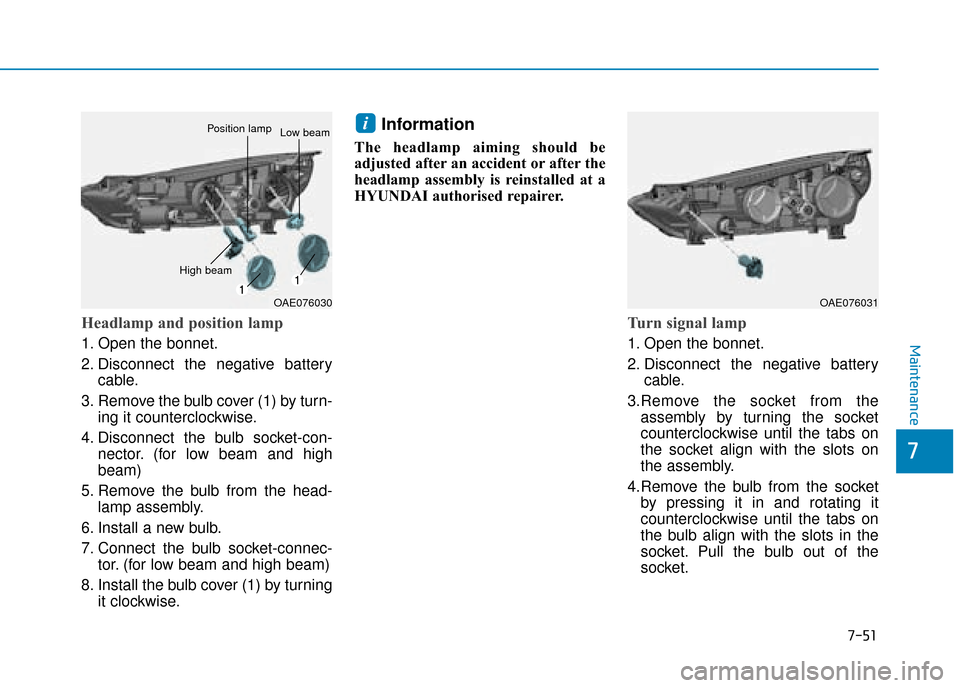
Headlamp and position lamp
1. Open the bonnet.
2. Disconnect the negative batterycable.
3. Remove the bulb cover (1) by turn- ing it counterclockwise.
4. Disconnect the bulb socket-con- nector. (for low beam and high
beam)
5. Remove the bulb from the head- lamp assembly.
6. Install a new bulb.
7. Connect the bulb socket-connec- tor. (for low beam and high beam)
8. Install the bulb cover (1) by turning it clockwise.
Information
The headlamp aiming should be
adjusted after an accident or after the
headlamp assembly is reinstalled at a
HYUNDAI authorised repairer.
Turn signal lamp
1. Open the bonnet.
2. Disconnect the negative batterycable.
3.Remove the socket from the assembly by turning the socket
counterclockwise until the tabs on
the socket align with the slots on
the assembly.
4.Remove the bulb from the socket by pressing it in and rotating it
counterclockwise until the tabs on
the bulb align with the slots in the
socket. Pull the bulb out of the
socket.
i
OAE076031OAE076030
Position lampLow beam
High beam
Page 500 of 526
7-52
Maintenance
5.Insert a new bulb by inserting it into the socket and rotating it until it
locks into place.
6.Install the socket into the assembly by aligning the tabs on the socket
with the slots in the assembly.
7.Push the socket into the assembly and turn the socket clockwise.
Type B
(1) Headlamp (Low)
(2) Headlamp (High)
(3) Position/Turn signal lamp
Headlamp (Low) and Position/Turn
signal lamp
If the light bulb does not operate, we
recommend that you have the vehi-
cle checked by a HYUNDAI autho-
rised repairer.
OAEE076021Handle halogen bulbs with
care. Halogen bulbs contain
pressurized gas that will pro-
duce flying pieces of glass
that could cause injuries if
broken.
Wear eye protection when
changing a bulb. Allow the
bulb to cool down before han-
dling it.
WARNING
OAE076052