Page 203 of 526
3-56
Convenient features of your vehicle
Turn on "FUSE SWITCH"
This warning message is displayed if
the fuse switch located on the fuse
box under the steering wheel is OFF.
You should turn the fuse switch on.
For more details, refer to “Fuses”
in chapter 7.
Lights Mode
This indicator displays which exterior
light is selected using the lighting
control.
Wiper
This indicator displays which wiper
speed is selected using the wiper
control.
OLFH044149LOAE046182LOAE046183L
Page 220 of 526
3-73
Convenient features of your vehicle
3
T
TR
R I
IP
P
C
C O
O M
M P
PU
U T
TE
ER
R
The trip computer is a microcomput-
er-controlled driver information sys-
tem that displays information related
to driving.
Information
Some driving information stored in the
trip computer resets if the battery is
disconnected.
Trip modes
To change the trip mode, toggle the
“ , ” switch on the steering wheel.
i
Digital Speedometer
Energy Flow
OAE046402
■
■
■
■
T
T
T
T
y
y
y
y
p
p
p
p
e
e
e
e
A
A
A
A
■
■
■
■
T
T
T
T
y
y
y
y
p
p
p
p
e
e
e
e
B
B
B
B
■
■
■
■
T
T
T
T
y
y
y
y
p
p
p
p
e
e
e
e
C
C
C
C
Page 221 of 526
3-74
Convenient features of your vehicle
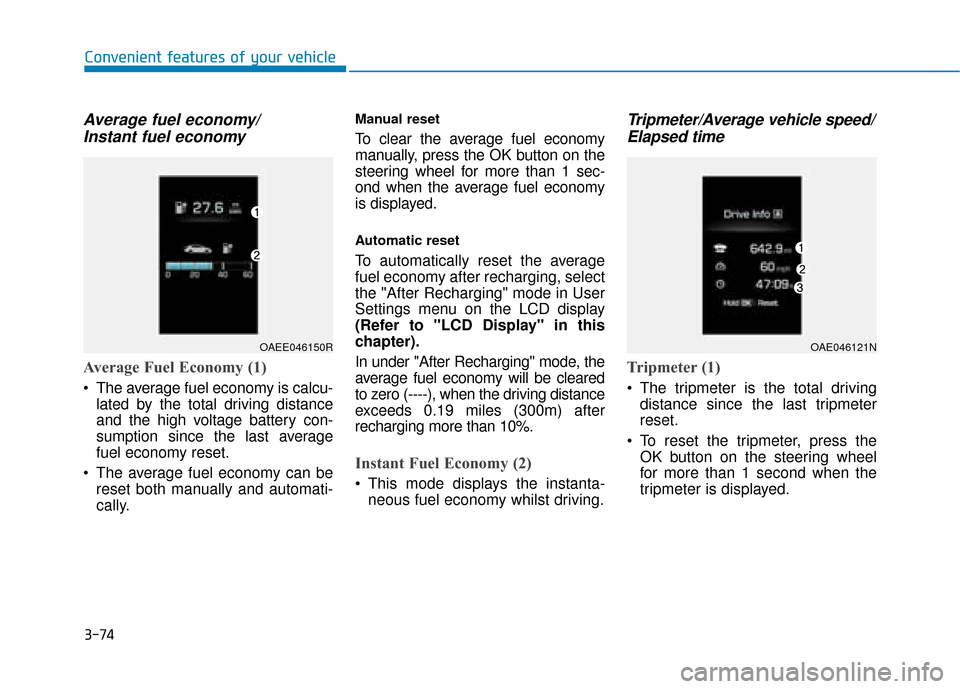
Average fuel economy/Instant fuel economy
Average Fuel Economy (1)
The average fuel economy is calcu-
lated by the total driving distance
and the high voltage battery con-
sumption since the last average
fuel economy reset.
The average fuel economy can be reset both manually and automati-
cally.
Manual reset
To clear the average fuel economy
manually, press the OK button on the
steering wheel for more than 1 sec-
ond when the average fuel economy
is displayed.
Automatic reset
To automatically reset the average
fuel economy after recharging, select
the "After Recharging" mode in User
Settings menu on the LCD display
(Refer to "LCD Display" in this
chapter).
In under "After Recharging" mode, the
average fuel economy will be cleared
to zero (----), when the driving distance
exceeds 0.19 miles (300m) after
recharging more than 10%.
Instant Fuel Economy (2)
This mode displays the instanta-neous fuel economy whilst driving.
Tripmeter/Average vehicle speed/Elapsed time
Tripmeter (1)
The tripmeter is the total driving
distance since the last tripmeter
reset.
To reset the tripmeter, press the OK button on the steering wheel
for more than 1 second when the
tripmeter is displayed.
OAEE046150ROAE046121N
Page 222 of 526
3-75
Convenient features of your vehicle
3
Average Vehicle Speed (2)
The average vehicle speed is cal-culated by the total driving dis-
tance and driving time since the
last average vehicle speed reset.
To reset the average vehicle speed, press the OK button on the steering
wheel for more than 1 second when
the average vehicle speed is dis-
played.
Information
• The average vehicle speed is not dis-played if the driving distance is less
than 0.19 miles (300 meters) or the
driving time is less than 10 seconds,
after resetting the vehicle speed.
• The average vehicle speed will con- tinue to be calculated and will start
to decrease if the vehicle is stopped
whilst the vehicle is in the ready
( ) mode.
Elapsed Time (3)
The elapsed time is the total driv-ing time since the last elapsed time
reset.
To reset the elapsed time, press the OK button on the steering
wheel for more than 1 second
when the elapsed time is dis-
played.
Information
The elapsed time will continue to be
counted whilst the vehicle is in the
ready ( ) mode.
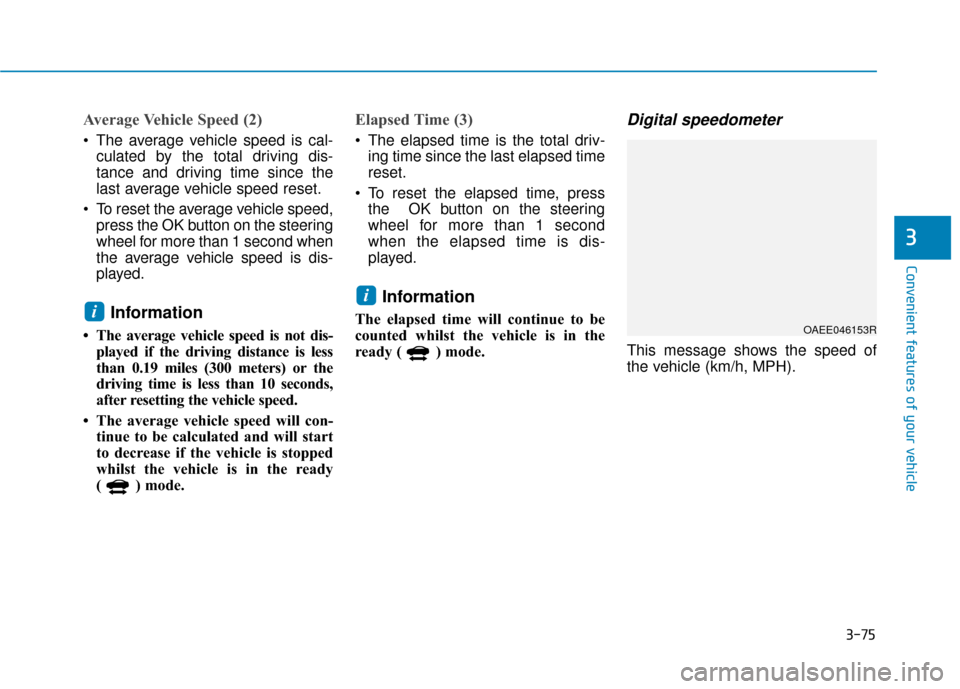
Digital speedometer
This message shows the speed of
the vehicle (km/h, MPH).
i
i
OAEE046153R
Page 228 of 526
3-81
Convenient features of your vehicle
3
Battery saver function
The purpose of this feature is to pre-
vent the battery from being dis-
charged. The system automatically
turns off the position lamp when the
driver turns the vehicle off and opens
the driver-side door.
With this feature , the position lamps
will turn off automatically if the driver
parks on the side of road at night.
If necessary, to keep the lamps on
when the vehicle is turned off, perform
the following:
1) Open the driver-side door.
2) Turn the position lamps OFF and
ON again using the light switch on
the steering column.
Headlamp delay function (if equipped)
If you place the POWER button in to
the ACC or OFF position with the
headlamps ON, the headlamps
(and/or position l amps) remain on for
about 5 minutes. However, with the
vehicle off if the driver’s door is
opened and closed, the headlamps
(and/or position lamp s) are turned off
after 15 seconds.
The headlamps (and/or position
lamps) can be turned off by pressing
the lock button on the smart key
twice or turning the light switch to the
OFF or AUTO position. However, if
you turn the light switch to the AUTO
position when it is dark outside, the
headlamps will not be turned off.
You can activate or deactivate the
Headlamp Delay function from the
User Settings Mode on the LCD dis-
play. For more details, refer to
"LCD Display" in this chapter. If the driver gets out of the vehicle
through other doors (except dri-
ver's door), the battery saver func-
tion does not operate and the
headlamp delay function does not
turn off automatically. Therefore, It
causes the battery to be dis-
charged. In this case, make sure to
turn off the lamp before getting out
of the vehicle.
Daytime running light (DRL)
The Daytime Running Lights (DRL)
can make it easier for others to see
the front of your vehicle during the
day, especially after dawn and before
sunset.
The DRL system will turn the dedi-
cated lamp OFF when:
1. The headlights are in the ON posi-
tion.
2. the vehicle is turned off.
NOTICE
Page 275 of 526
Multimedia System
Multimedia system .................................................4-2
AUX, USB and iPod®port ...............................................4-2
Antenna ........................................................................\
.......4-2
Steering wheel audio control .........................................4-3
Bluetooth
®Wireless Technology hands-free ...........4-4
Audio / Video / Navigation system (AVN) ..................4-5
How vehicle radio works .................................................4-5
AUDIO (With Touch Screen) .................................4-8
Feature of Your Audio .....................................................4-9
Radio........................................................................\
...........4-16
Media........................................................................\
..........4-18
Information - Using MP3 ..............................................4-20
Phone ........................................................................\
.........4-32
Setup ........................................................................\
..........4-40
Declaration of Conformity ..................................4-42
CE for EU ........................................................................\
..4-42
4
Page 277 of 526
4-3
Multimedia System
4
Before entering a place with a lowheight clearance or a car wash,
remove the antenna by rotating it
counterclockwise. If not, the
antenna may be damaged.
When reinstalling your antenna, it is important that it is fully
tightened and adjusted to the
upright position to ensure prop-
er reception.
Shark fin antenna (Type B)
The shark fin antenna receives
transmitted data. (for example:
AM/FM, DAB, GPS/ GNSS)
Steering wheel audio control
(if equipped)
The steering wheel audio control
switches are installed for your con-
venience.
OAE046437
OAE046474L
NOTICE
■ Type A
■Type B
■Type C
OAE046321L
Page 287 of 526
4-13
Multimedia System
4
Multimedia System
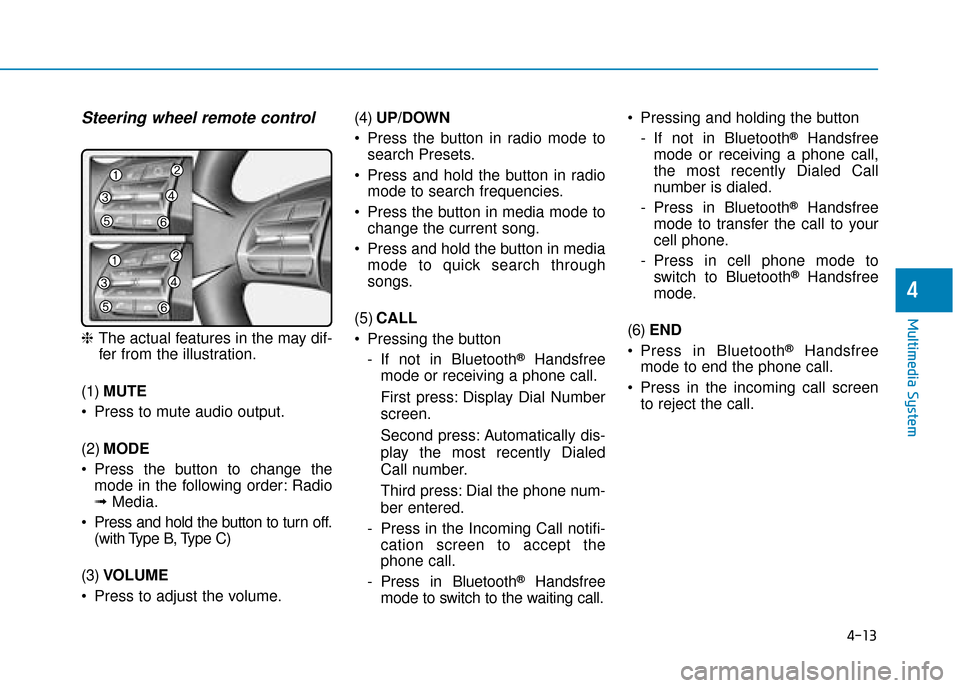
Steering wheel remote control
❈The actual features in the may dif-
fer from the illustration.
(1) MUTE
Press to mute audio output.
(2) MODE
Press the button to change the mode in the following order: Radio
➟ Media.
Press and hold the button to turn off. (with Type B, Type C)
(3) VOLUME
Press to adjust the volume. (4)
UP/DOWN
Press the button in radio mode to search Presets.
Press and hold the button in radio mode to search frequencies.
Press the button in media mode to change the current song.
Press and hold the button in media mode to quick search through
songs.
(5) CALL
Pressing the button - If not in Bluetooth
®Handsfree
mode or receiving a phone call.
First press: Display Dial Number
screen.
Second press: Automatically dis-
play the most recently Dialed
Call number.
Third press: Dial the phone num-
ber entered.
- Press in the Incoming Call notifi- cation screen to accept the
phone call.
- Press in Bluetooth
®Handsfree
mode to switch to the waiting call. Pressing and holding the button
- If not in Bluetooth
®Handsfree
mode or receiving a phone call,
the most recently Dialed Call
number is dialed.
- Press in Bluetooth
®Handsfree
mode to transfer the call to your
cell phone.
- Press in cell phone mode to switch to Bluetooth
®Handsfree
mode.
(6) END
Press in Bluetooth
®Handsfree
mode to end the phone call.
Press in the incoming call screen to reject the call.