Page 129 of 284
 SPEED LIMITER
DESCRIPTION
This device allows the speed of the
vehicle to be limited to values which
can be set by the driver.
The maximum speed can be set both
with vehicle stationary and in motion.
T")
SPEED LIMITER
DESCRIPTION
This device allows the speed of the
vehicle to be limited to values which
can be set by the driver.
The maximum speed can be set both
with vehicle stationary and in motion.
The minimum speed that can be set is
30 km/h.
When the device is active, the vehicle
speed depends on the pressure at the
accelerator pedal, until the
programmed speed limit is reached
(see "Speed limit programming"
paragraph).
ACTIVATING THE DEVICE
To activate the device press button A
fig. 96 on the steering wheel.
The activation of the device is indicated
by the
symbol on the display (white
on versions with reconfigurable
multifunction display), together with a
dedicated message and the last speed
value stored.
DEVICE ACTIVATION/
DEACTIVATION
Device activation: press the SET + or
SET – buttons. The activation of the
device is signalled by the displaying of
the
symbol (green on reconfigurable
multifunction display).
Device deactivation: press the CANC
button. The deactivation of the device is
signalled by the displaying of the
symbol (white).Device reactivation: press the RES
button.
AUTOMATIC
DEACTIVATION OF THE
DEVICE
The device deactivates automatically in
the event of fault in the system. In this
case, contact a Fiat Dealership.
96F1B0727
127
Page 130 of 284
 ELECTRONIC
CRUISE CONTROL
This is an electronically controlled
driving assistance device that allows the
desired vehicle speed to be maintained,
without having to press the accelerator
pedal. This dev")
ELECTRONIC
CRUISE CONTROL
This is an electronically controlled
driving assistance device that allows the
desired vehicle speed to be maintained,
without having to press the accelerator
pedal. This device can be used at a
speed above 30 km/h on long stretches
of dry, straight roads with few variations
(e.g. motorways).
It is therefore not recommended to use
this device on extra-urban roads with
traffic. Do not use it in town.
ACTIVATING THE DEVICE
120) 121) 122)
To activate the device press button A
fig. 97.
Activation of the device is indicated by
the
symbol on the display switching
on and, on some versions, by a
dedicated message.
If the Speed Limiter is activated, button
A fig. 97 must be pressed twice to
activate the Cruise Control (because the
first press deactivates the Speed
Limiter, and the second press activates
the Cruise Control).The device cannot be engaged in 1
st
gear, reverse gear or neutral: it is
advisable to engage it in 3rdgear or
higher.
IMPORTANT It is dangerous to leave
the device on when it is not used. There
is a risk of inadvertently activating it and
losing control of the car due to
unexpected excessive speed.
SETTING THE DESIRED
SPEED
Proceed as follows:
to activate the device press button A
fig. 97;
when the vehicle has reached the
desired speed, press button SET + (or
SET –) and release it to activate the
device. When the accelerator is
released, the vehicle will keep the
selected speed automatically.If needed (e.g. when overtaking), you
can increase speed simply by pressing
the accelerator; when you release the
pedal, the vehicle goes back to the
speed stored previously.
When travelling downhill with the device
active, the vehicle speed may slightly
exceed the set one.
IMPORTANT Before pressing the SET +
or SET – buttons, the vehicle must be
travelling at a constant speed on a flat
surface.
SPEED INCREASE
Once the electronic Cruise Control has
been activated, the speed can be
increased by pressing button SET +.
SPEED DECREASE
With the device activated, the speed
can be decreased by pressing button
SET – .
RECALLING THE SPEED
For versions with automatic
transmission operating in D mode (Drive
- automatic), press and release the RES
button to recall the previously set
speed.
For versions with manual gearbox or
automatic transmission in Autostick
(sequential) mode, before recalling the
previously set speed you should
accelerate until getting close to it, then
press and release the RES button.
97F1B0727
128
STARTING AND DRIVING
Page 131 of 284
 DEACTIVATING THE
DEVICE
Lightly pressing the brake pedal or
pressing the CANC button deactivates
the electronic Cruise Control without
deleting the stored speed.
The Cruise Control may be deactivated")
DEACTIVATING THE
DEVICE
Lightly pressing the brake pedal or
pressing the CANC button deactivates
the electronic Cruise Control without
deleting the stored speed.
The Cruise Control may be deactivated
also by applying the electric parking
brake (EPB) or when the braking
system is operated (e.g. operation of
the ESC system).
DEACTIVATING THE
DEVICE
The electronic Cruise Control is
deactivated by pressing button A
fig. 97 or bringing the ignition device to
STOP.
WARNING
120)When travelling with the device active,
never move the gear lever to neutral.
121)In case of a malfunction or failure of
the device, contact a Fiat Dealership.
122)The electronic Cruise Control can be
dangerous if the system cannot keep a
constant speed. In specific conditions
speed may be excessive, resulting in the
risk of losing control of the vehicle and
causing accidents. Do not use the device
in heavy traffic or on winding, icy, snowy or
slippery roads.
ADAPTIVE CRUISE
CONTROL (ACC)
(where provided)
123) 124) 125) 126) 127) 128)
47) 48) 49) 50) 51) 52) 53)
DESCRIPTION
The Adaptive Cruise Control (ACC) is a
driver assist device which combines the
Cruise Control functions with one for
controlling the distance from the vehicle
ahead.
The Adaptive Cruise Control (ACC) uses
a radar sensor, located behind the front
bumper fig. 98 and a camera, located
in the middle of the windscreen fig. 99,
to detect the presence of a vehicle
close ahead.There are two operating modes:
“Adaptive Cruise Control”mode
to maintain an adequate distance
between vehicles (the message
“Adaptive Cruise Control” is shown on
the instrument panel display);
electronic “Cruise Control” mode
to hold the vehicle at a constant
preset speed.
To change the operating mode, use the
button on the steering wheel (see that
described on the following pages).
ADAPTIVE CRUISE
CONTROL ACTIVATION/
DEACTIVATION
Activation
To activate the device, press and
release the
button (see fig. 100 ).
98F1B0720
99F1B0656
129
Page 132 of 284
 IMPORTANT It is dangerous to leave
the device activated when it is not
used. There is a risk of inadvertently
activating it and losing control of the
vehicle due to unexpected excessive
speed.
Deactiv")
IMPORTANT It is dangerous to leave
the device activated when it is not
used. There is a risk of inadvertently
activating it and losing control of the
vehicle due to unexpected excessive
speed.
Deactivation
With the device active, to deactivate it
press and release the
button. The
display will show a dedicated message.
SETTING THE DESIRED
SPEED
The device can only be set when the
speed is over 30 km/h (or equivalent
in mph) and under 180 km/h (or
equivalent in mph).
When the vehicle reaches the desired
speed, press and release the button
SET + or SET to set the speed to the
current speed.The display will show the set speed.
Then take your foot off the accelerator
pedal.
When the system has been set, the
dedicated icon on the display (see
paragraph above) is grey on models
with a monochrome display, and green
on versions with a colour display.
IMPORTANT Press the accelerator
pedal to make the car go faster than
the set speed.
While the accelerator pedal is pressed:
a dedicated message is displayed for
a few seconds;
the device will not be able to control
the distance between the vehicle and
the one ahead. In this case the speed
will be determined only by the position
of the accelerator pedal.
The device will return to normal
operation as soon as the accelerator
pedal is released.
The systemcannotbe set
when pressing the brake pedal;
when the brakes are overheated;
when the electric parking brake is
engaged;
when the shift lever is in the P (park),
R (reverse) or N (neutral) positions
(versions with automatic transmission or
automatic transmission with double
clutch);
when the shift lever is in the R
(reverse), neutral or in 1st(first gear
engaged) positions (versions with
manual transmission);
when the clutch is pressed (versions
with manual transmission);
when the engine speed exceeds a
maximum threshold (versions with
manual transmission and versions with
automatic transmission/automatic
transmission with double clutch) or
goes below a minimum threshold (only
versions with manual transmission);
when the car speed is not within the
settable speed range;
when the ESC (or ABS or other
stability control systems) are operating
or have just operated;
during automatic braking by the Full
Brake Control system (where provided);
when the Speed Limiter is active;
when the electronic Cruise Control is
active;
in case of failure of the device;
when the engine is off;
in case of obstruction of the radar
sensor (in this case the bumper area
where it is located must be cleaned).
In case of system set, the conditions
described above also cause a
cancellation or deactivation of the
system with times that may vary
according to the conditions.
100F1B0729
130
STARTING AND DRIVING
Page 133 of 284
 IMPORTANT With the device set, it is
possible to reach speeds higher than
those set in the system by pressing the
accelerator pedal. In this condition, the
device does not turn off automatically,
but")
IMPORTANT With the device set, it is
possible to reach speeds higher than
those set in the system by pressing the
accelerator pedal. In this condition, the
device does not turn off automatically,
but the device functions are limited: it is
therefore recommended to turn it off.
CHANGING SPEED
Speed increase
After having set the device, the stored
speed can be stored by holding the
SET + button pressed.
Press the SET + button once: the set
speed will increase by 1 km/h (or the
equivalent in mph). Each touch of the
button once will increase the speed by
1 km/h (or the equivalent in mph).
Hold the SET + button down: the set
speed will increase in 5 km/h steps (or
the equivalent in mph) until the button is
released. The set speed increase is
shown on the display.
Decreasing speed
After having set the device, the stored
speed can be reduced by holding the
SET – button pressed.
Press the SET – button once: the set
speed will decrease by 1 km/h (or the
equivalent in mph). Each touch of the
button once will reduce the speed by
1 km/h (or the equivalent in mph).Hold the SET – button down: the set
speed will decrease in 5 km/h steps (or
the equivalent in mph) until the button is
released. The set speed decrease is
shown on the display.
NOTE If “Sport” mode is chosen on the
Drive Mode Selector, the ACC will be
switch to sport mode: the system will
become more reactive in case of
acceleration.
ACCELERATING WHEN
OVERTAKING
When driving with the device active and
following a vehicle, the device provides
additional acceleration to facilitate
overtaking, when travelling over a given
speed and switches on the left direction
indicator on roads with right-hand traffic
(of the right indicator for roads with
left-hand traffic).
RECALLING THE SPEED
Once the system has been cancelled
but not deactivated, if a speed was
previously set simply press the RES
button and remove your foot from the
accelerator to recall it.
The system will be set to the last stored
speed.
Before returning to the previously set
speed, bring the speed close to that
value, then press the RES button and
release it.
SETTING THE DISTANCE
BETWEEN CARS
The distance between your vehicle and
the vehicle ahead may be set to 1 bar
(short), 2 bars (medium), 3 bars (long),
4 bars (maximum) fig. 101.
The distances from the vehicle ahead
are proportional to speed. The interval
of time with respect to the vehicle
ahead remains constant and varies
from 1 second (for the short distance
101F1B0299C
131
Page 134 of 284
 1-bar setting) to 2 seconds (for the
maximum distance 4-bar setting).
The setting is 4 (maximum) the first time
the device is used. After the distance
has been modified by the driver, the
new distance")
1-bar setting) to 2 seconds (for the
maximum distance 4-bar setting).
The setting is 4 (maximum) the first time
the device is used. After the distance
has been modified by the driver, the
new distance will be stored also after
the system is deactivated and
reactivated.
To decrease the distance
Press and release the
button to
decrease the distance setting.
The distance setting decreases by one
bar (shorter) every time the button is
pressed.
The set speed is held if there are no
cars ahead. Once the shortest distance
has been reached, a further press of
the button will set the longest distance.
The car holds the set distance until:
the vehicle ahead accelerates to a
speed higher than the set speed;
the vehicle ahead leaves the lane or
the detection field of the Adaptive
Cruise Control device sensor;
the distance setting is changed;
the Adaptive Cruise Control device is
deactivated/cancelled.
IMPORTANT The maximum breaking
applied by the device is limited. The
driver may apply the brakes in all cases
if needed.IMPORTANT If the device predicts that
the braking level is not sufficient to hold
the set distance, the driver is warned by
a message indicating that the vehicle
ahead is too close appears on the
display. An acoustic warning is also
emitted. In this case, it is advisable to
brake immediately as necessary to hold
a safe distance from the vehicle ahead.
IMPORTANT The driver is responsible
for ensuring that there are no
pedestrians, other cars or objectives
along the direction of the car. Failure to
comply with these precautions may
cause serious accidents and injuries.
IMPORTANT The driver is fully
responsible for holding a safe distance
from the vehicle ahead respecting the
highway code in force in the respective
country.
DEACTIVATION
The device is deactivated and the set
speed is cancelled if:
thebutton is pressed on the
Adaptive Cruise Control;
thebutton is pressed on the
electronic Cruise Control;
the Speed Limiter button is pressed;
the ignition device is in the STOP
position.
The device is cancelled (the set speed
and distance are stored):
when the CANC button is pressed;
when the conditions shown in the
“Setting the desired speed” paragraph
occur;
when the car speed drops under the
minimum set speed (e.g. in presence of
slow cars).
If these conditions occur while the
system is decelerating with respect to a
vehicle ahead, the system could
continue the deceleration, if necessary,
also after it is cancelled or deactivated
within the minimum speed settable on
the system.
ELECTRONIC CRUISE
CONTROL MODE
Electronic Cruise Control mode is
available for travelling at constant speed
in addition to the Adaptive Cruise
Control (ACC) mode.
If the Adaptive Cruise Control (ACC)
function is implemented on the vehicle,
the electronic Cruise Control works in
the same manner as the ACC (by
pressing the
button of the Cruise
Control) with the difference that:
it does not hold the distance from the
vehicle ahead;
the device keeps working if the radar
sensor is obstructed.
Before returning to the previously set
speed, bring the speed close to that
value, then press the RES button and
release it.
132
STARTING AND DRIVING
Page 135 of 284
 WARNING
123)Pay the utmost attention while driving
at all times and be always ready to press
the brakes if needed.
124)The system is an aid for the driver,
who must always pay full attention while
dri")
WARNING
123)Pay the utmost attention while driving
at all times and be always ready to press
the brakes if needed.
124)The system is an aid for the driver,
who must always pay full attention while
driving. The responsibility always rests with
the driver, who must take into account the
traffic conditions in order to drive in
complete safety. The driver must always
maintain a safe distance from the vehicle in
front.
125)The device is not activated in
presence of pedestrians, oncoming
vehicles in the opposite direction of travel
or moving in the crosswise direction and
stationary objects (e.g. a vehicle standing
in a queue or a broken down vehicle).
126)The device cannot take account of
road, traffic and weather conditions, and
conditions of poor visibility (e.g. fog).
127)The device does not always fully
recognise complex driving conditions that
could cause it to determine the safe
distance to be held incorrectly or not at all.
128)The device cannot apply the
maximum braking force: the car will not be
stopped completely.
IMPORTANT
47)The system may have limited or absent
operation due to weather conditions such
as: heavy rain, hail, thick fog, heavy snow.48)
49)Operation can be adversely affected by
any structural change made to the vehicle,
such as a modification to the front
geometry, tyre change, or a heavier load
than the standard load of the vehicle.
50)Incorrect repairs made on the front part
of the car (e.g. bumper, chassis) may alter
the position of the radar sensor, and
adversely affect its operation. Go to a Fiat
Dealership for any operation of this type.
51)Do not tamper with or carry out any
intervention on the radar sensor or on the
camera on the windscreen. In the event of
a sensor fault, contact a Fiat Dealership.
52)Do not wash with high-pressure jets in
the bumper lower area: in particular do not
operate on the system's electrical
connector.
53)Be careful in the case of repairs and
new paintings in the area around the
sensor (panel covering the sensor on the
left side of the bumper). In the event of a
frontal impact the sensor may automatically
deactivate and display a warning to indicate
that the sensor needs to be repaired. Even
without a malfunction warning, deactivate
the system operation if you think that the
position of the radar sensor has changed
(e.g. due to low-speed frontal impact as
during parking manoeuvres). In these
cases, go to a Fiat Dealership to have the
radar sensor realigned or replaced.
DRIVE MODE
SELECTOR
(where provided)
This device allows drivers to select
three different driving modes ("car
response") according to their needs and
to the road and traffic conditions, by
manually adjusting the knob ring A
fig. 102 on the central tunnel.
- "Auto" mode
- "All Weather” mode
- "Sport" mode.
Via the on board electronics, the device
acts on the car's dynamic control
system: engine, steering wheel, ESC
system, 4x4 system, transmission,
interfacing the instrument panel as well.
The rotating ring nut is monostable
type. In other words, it always returns
to the central position when released.
102F1B0721
133
The section of the bumper before the
sensor must not be covered with
adhesives, auxiliary headlights or any other
object.
Page 136 of 284
 The acceptance by the system of the
requested driving mode is signalled by
the LED, located besides the symbol,
coming on, and by the corresponding
symbol appearing on the instrument
panel display.
Wh")
The acceptance by the system of the
requested driving mode is signalled by
the LED, located besides the symbol,
coming on, and by the corresponding
symbol appearing on the instrument
panel display.
When the engine is started, the system
usually maintains the driving mode that
was active before the engine was
stopped. For versions/markets where
provided, on start-up, the system is set
to the "Auto" mode.
"Auto" MODE
Recommended mode for normal
driving, aimed at comfort and safety in
normal grip and driving conditions. This
mode also reduces fuel consumption,
since it automatically disconnects the
transmission from the rear wheels if the
road and driving conditions allow it, in
addition to changing drive torque
distribution between the front and rear
axles.
Activation
Starting with the "All Weather" mode
active, turn the ring-nut anticlockwise
and hold it in this position for at least
half a second, until the relative LED
illuminates and the selected mode
appears on the display. The LED of the
mode selected previously will go out atthe same time. Once released, the
ring-nut returns to the central position.
Starting with the "Sport" mode active,
turn the ring-nut clockwise and hold it
in this position for at least half a
second, until the relative LED
illuminates and the selected mode
appears on the display. The LED of the
mode selected previously will go out at
the same time. Once released, the
ring-nut returns to the central position.
“All Weather” MODE
This driving mode is intended for safety
in poor vehicle grip conditions
(wet/slippery road surface, rain, snow).
It is also recommended for driving on
unpaved roads or off-road.
Activation
Starting with the "Auto" mode active,
turn the ring-nut clockwise and hold it
in this position for at least half a
second, until the relative LED
illuminates and the selected mode
appears on the display. The LED of the
mode selected previously will go out at
the same time. Once released, the
ring-nut returns to the central position.
Starting from the active "Sport" mode,
turn the ring nut anticlockwise, keeping
it in this position for at least half a
second, and in any case until the
relevant LED turns on, and the selectedmode is shown on the display. The LED
of the mode selected previously will go
out at the same time. Once released,
the ring-nut returns to the central
position.
"Sport" MODE
This mode gives the most enjoyable
sporty driving experience, however, it
increases fuel consumption. Traction is
optimised to improve the car's
road-holding, also when cornering.
Activation
Starting with the "Auto" mode active,
turn the ring-nut anticlockwise and hold
it in this position for at least half a
second, until the relative LED
illuminates and the selected mode
appears on the display. The LED of the
mode selected previously will go out at
the same time. Once released, the
ring-nut returns to the central position.
Starting with the "All Weather" mode
active, turn the ring nut clockwise,
keeping it in this position for at least half
a second, and in any case until the
relevant LED turns on, and the selected
mode is shown on the display. The LED
of the mode selected previously will go
out at the same time. Once released,
the ring-nut returns to the central
position.
134
STARTING AND DRIVING
 1
1 2
2 3
3 4
4 5
5 6
6 7
7 8
8 9
9 10
10 11
11 12
12 13
13 14
14 15
15 16
16 17
17 18
18 19
19 20
20 21
21 22
22 23
23 24
24 25
25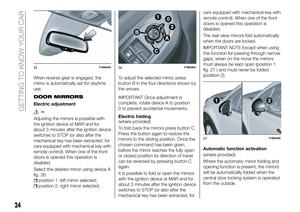 26
26 27
27 28
28 29
29 30
30 31
31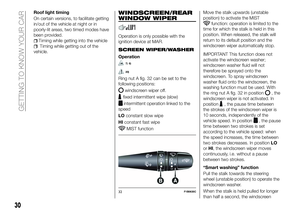 32
32 33
33 34
34 35
35 36
36 37
37 38
38 39
39 40
40 41
41 42
42 43
43 44
44 45
45 46
46 47
47 48
48 49
49 50
50 51
51 52
52 53
53 54
54 55
55 56
56 57
57 58
58 59
59 60
60 61
61 62
62 63
63 64
64 65
65 66
66 67
67 68
68 69
69 70
70 71
71 72
72 73
73 74
74 75
75 76
76 77
77 78
78 79
79 80
80 81
81 82
82 83
83 84
84 85
85 86
86 87
87 88
88 89
89 90
90 91
91 92
92 93
93 94
94 95
95 96
96 97
97 98
98 99
99 100
100 101
101 102
102 103
103 104
104 105
105 106
106 107
107 108
108 109
109 110
110 111
111 112
112 113
113 114
114 115
115 116
116 117
117 118
118 119
119 120
120 121
121 122
122 123
123 124
124 125
125 126
126 127
127 128
128 129
129 130
130 131
131 132
132 133
133 134
134 135
135 136
136 137
137 138
138 139
139 140
140 141
141 142
142 143
143 144
144 145
145 146
146 147
147 148
148 149
149 150
150 151
151 152
152 153
153 154
154 155
155 156
156 157
157 158
158 159
159 160
160 161
161 162
162 163
163 164
164 165
165 166
166 167
167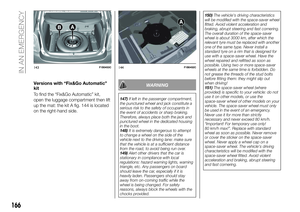 168
168 169
169 170
170 171
171 172
172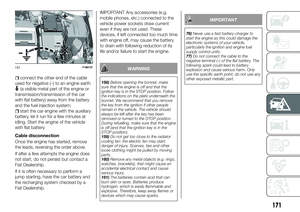 173
173 174
174 175
175 176
176 177
177 178
178 179
179 180
180 181
181 182
182 183
183 184
184 185
185 186
186 187
187 188
188 189
189 190
190 191
191 192
192 193
193 194
194 195
195 196
196 197
197 198
198 199
199 200
200 201
201 202
202 203
203 204
204 205
205 206
206 207
207 208
208 209
209 210
210 211
211 212
212 213
213 214
214 215
215 216
216 217
217 218
218 219
219 220
220 221
221 222
222 223
223 224
224 225
225 226
226 227
227 228
228 229
229 230
230 231
231 232
232 233
233 234
234 235
235 236
236 237
237 238
238 239
239 240
240 241
241 242
242 243
243 244
244 245
245 246
246 247
247 248
248 249
249 250
250 251
251 252
252 253
253 254
254 255
255 256
256 257
257 258
258 259
259 260
260 261
261 262
262 263
263 264
264 265
265 266
266 267
267 268
268 269
269 270
270 271
271 272
272 273
273 274
274 275
275 276
276 277
277 278
278 279
279 280
280 281
281 282
282 283
283