Page 258 of 490
WARNING!
Speed Control can be dangerous where the system
cannot maintain a constant speed. Your vehicle could
go too fast for the conditions, and you could lose
control and have an accident. Do not use Speed Control
in heavy traffic or on roads that are winding, icy,
snow-covered or slippery.
To Activate
Push the ON/OFF button. The Cruise Indicator Light in
the instrument cluster display will illuminate. To turn the
system off, push the ON/OFF button a second time. The
Cruise Indicator Light will turn off. The system should be
turned off when not in use.
WARNING!
Leaving the Speed Control system on when not in use
is dangerous. You could accidentally set the system or
cause it to go faster than you want. You could lose
control and have an accident. Always leave the system
off when you are not using it.
To Set A Desired Speed
Turn the Speed Control on. When the vehicle has reached
the desired speed, push the SET (-) button and release.
Release the accelerator and the vehicle will operate at the
selected speed.
NOTE:The vehicle should be traveling at a steady speed
and on level ground before pushing the SET (-) button.
To Vary The Speed Setting
To Increase Speed
When the Speed Control is set, you can increase speed by
pushing the RES (+) button.
The driver ’s preferred units can be selected through the
instrument panel settings if equipped. Refer to “Getting To
Know Your Instrument Panel” for more information. The
speed decrement shown is dependant on the chosen speed
unit of U.S. (mph) or Metric (km/h):
U.S. Speed (mph)
• Pushing the RES (+) button once will result ina1mph
increase in set speed. Each subsequent tap of the button
results in an increase of 1 mph.
256 STARTING AND OPERATING
Page 259 of 490
•If the button is continually pushed, the set speed will
continue to increase until the button is released, then the
new set speed will be established.
Metric Speed (km/h)
• Pushing the RES (+) button once will result in a 1 km/h
increase in set speed. Each subsequent tap of the button
results in an increase of 1 km/h.
• If the button is continually pushed, the set speed will
continue to increase until the button is released, then the
new set speed will be established.
To Decrease Speed
When the Speed Control is set, you can decrease speed by
pushing the SET (-) button.
The driver ’s preferred units can be selected through the
instrument panel settings if equipped. Refer to “Getting To
Know Your Instrument Panel” for more information. The
speed decrement shown is dependant on the chosen speed
unit of U.S. (mph) or Metric (km/h):
U.S. Speed (mph)
• Pushing the SET (-) button once will result ina1mph
decrease in set speed. Each subsequent tap of the button
results in a decrease of 1 mph. •
If the button is continually pushed, the set speed will
continue to decrease until the button is released, then the
new set speed will be established.
Metric Speed (km/h)
• Pushing the SET (-) button once will result in a 1 km/h
decrease in set speed. Each subsequent tap of the button
results in a decrease of 1 km/h.
• If the button is continually pushed, the set speed will
continue to decrease until the button is released, then the
new set speed will be established.
To Accelerate For Passing
Press the accelerator as you would normally. When the
pedal is released, the vehicle will return to the set speed.
Using Speed Control On Hills
The transmission may downshift on hills to maintain the
vehicle set speed.
NOTE: The Speed Control system maintains speed up and
down hills. A slight speed change on moderate hills is
normal.
On steep hills, a greater speed loss or gain may occur so it
may be preferable to drive without Speed Control.
6
STARTING AND OPERATING 257
Page 269 of 490
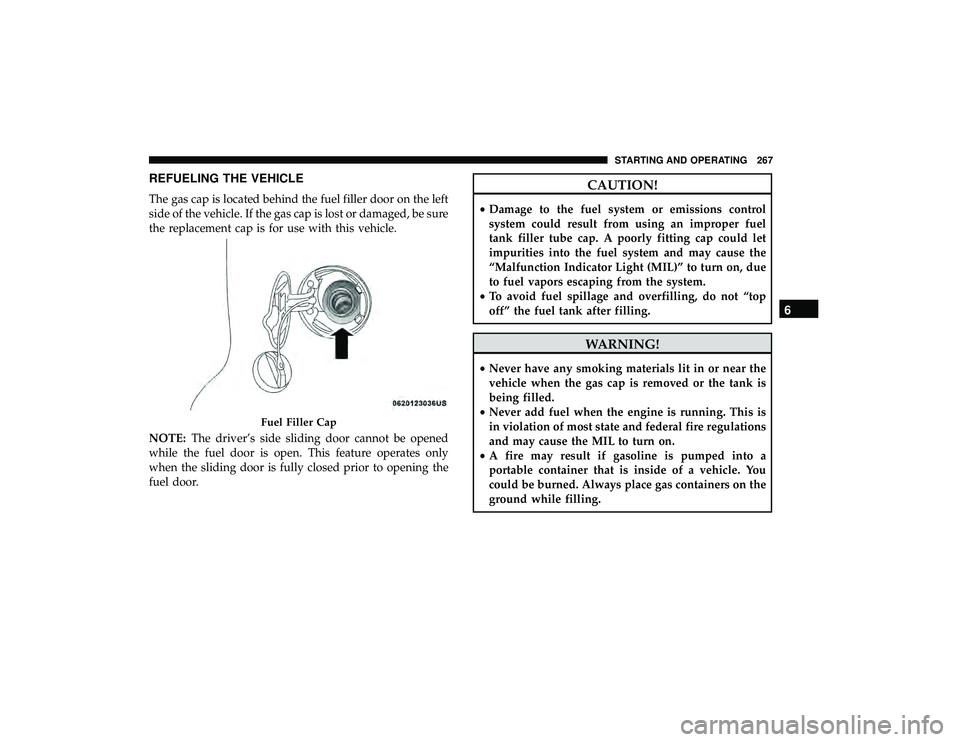
REFUELING THE VEHICLE
The gas cap is located behind the fuel filler door on the left
side of the vehicle. If the gas cap is lost or damaged, be sure
the replacement cap is for use with this vehicle.
NOTE:The driver’s side sliding door cannot be opened
while the fuel door is open. This feature operates only
when the sliding door is fully closed prior to opening the
fuel door.
CAUTION!
• Damage to the fuel system or emissions control
system could result from using an improper fuel
tank filler tube cap. A poorly fitting cap could let
impurities into the fuel system and may cause the
“Malfunction Indicator Light (MIL)” to turn on, due
to fuel vapors escaping from the system.
• To avoid fuel spillage and overfilling, do not “top
off” the fuel tank after filling.
WARNING!
• Never have any smoking materials lit in or near the
vehicle when the gas cap is removed or the tank is
being filled.
• Never add fuel when the engine is running. This is
in violation of most state and federal fire regulations
and may cause the MIL to turn on.
• A fire may result if gasoline is pumped into a
portable container that is inside of a vehicle. You
could be burned. Always place gas containers on the
ground while filling.
Fuel Filler Cap
6
STARTING AND OPERATING 267
Page 275 of 490
Trailer Hitch Classification
The following chart provides the industry standard for the
maximum trailer weight a given trailer hitch class can tow
and should be used to assist you in selecting the correct
trailer hitch for your intended towing condition.
Trailer Hitch Classification Definitions
Class Max. Trailer Hitch Industry Standards
Class I - Light Duty 2,000 lbs (907 kg)
Class II - Medium Duty 3,500 lbs (1,587 kg)
Class III - Heavy Duty 5,000 lbs (2,267 kg)
Class IV - Extra Heavy Duty 10,000 lbs (4,535 kg)
Refer to the “Trailer Towing Weights (Maximum Trailer Weight Ratings)” chart for the Maximum Gross Trailer Weight
(GTW) towable for your given drivetrain.
All trailer hitches should be professionally installed on your vehicle.
6
STARTING AND OPERATING 273
Page 280 of 490
Towing Requirements — Trailer Brakes
•Do not interconnect the hydraulic brake system or
vacuum system of your vehicle with that of the trailer.
This could cause inadequate braking and possible per-
sonal injury.
• An electronically actuated trailer brake controller is
required when towing a trailer with electronically actu-
ated brakes. When towing a trailer equipped with a
hydraulic surge actuated brake system, an electronic
brake controller is not required.
• Trailer brakes are recommended for trailers over
1,000 lbs (453 kg) and required for trailers in excess of
2,000 lbs (907 kg).
WARNING!
• Do not connect trailer brakes to your vehicle’s hy-
draulic brake lines. It can overload your brake sys-
tem and cause it to fail. You might not have brakes
when you need them and could have an accident.
• Towing any trailer will increase your stopping dis-
tance. When towing, you should allow for additional
space between your vehicle and the vehicle in front
of you. Failure to do so could result in an accident.
CAUTION!
If the trailer weighs more than 1,000 lbs (453 kg)
loaded, it should have its own brakes and they should
be of adequate capacity. Failure to do this could lead to
accelerated brake lining wear, higher brake pedal
effort, and longer stopping distances.
Towing Requirements — Trailer Lights And Wiring
Whenever you pull a trailer, regardless of the trailer size,
stoplights and turn signals on the trailer are required for
motoring safety.
The Trailer Tow Package may include a four- and seven-pin
wiring harness. Use a factory approved trailer harness and
connector.
NOTE: Do not cut or splice wiring into the vehicle’s wiring
harness.
The electrical connections are all complete to the vehicle
but you must mate the harness to a trailer connector. Refer
to the following illustrations.
278 STARTING AND OPERATING
Page 282 of 490

Automatic Transmission
The DRIVE range can be selected when towing. However,
if frequent shifting occurs while in DRIVE, use the Elec-
tronic Range Select (ERS) shift control to manually select a
lower gear range.
NOTE:Using a lower gear range while operating the
vehicle under heavy loading conditions, will improve
performance and extend transmission life by reducing
excessive shifting and heat buildup. This action will also
provide better engine braking.
If you REGULARLY tow a trailer for more than 45 minutes
of continuous operation, then change the transmission
fluid and filter as specified for �police, taxi, fleet, or
frequent trailer towing.� Refer to the “Maintenance Plan”
for the proper maintenance intervals.
Electronic Range Select (ERS)
• When using the ERS shift control, select the highest gear
that allows for adequate performance and avoids fre-
quent downshifts. For example, choose “4” if the desired
speed can be maintained. Choose “3” or “2” if needed to
maintain the desired speed. •
To prevent excess heat generation, avoid continuous
driving at high RPM. Reduce vehicle speed as necessary
to avoid extended driving at high RPM. Return to a
higher gear range or vehicle speed when grade and road
conditions allow.
Speed Control — If Equipped
• Do not use on hilly terrain or with heavy loads.
• When using the speed control, if you experience speed
drops greater than 10 mph (16 km/h), disengage until
you can get back to cruising speed.
• Use speed control in flat terrain and with light loads to
maximize fuel efficiency.
Cooling System
To reduce potential for engine and transmission overheat-
ing, take the following actions:
City Driving
• In city traffic — while stopped, place the transmission in
NEUTRAL, but do not increase engine idle speed.
Highway Driving
• Reduce speed.
• Temporarily turn off air conditioning.
280 STARTING AND OPERATING
Page 285 of 490
•Maintain sufficient distance between your vehicle and
the vehicle in front of you to avoid a collision in a
sudden stop.
Driving Through Water
Driving through water more than a few inches/centimeters
deep will require extra caution to ensure safety and pre-
vent damage to your vehicle.
Flowing/Rising Water
WARNING!
Do not drive on or across a road or path where water is
flowing and/or rising (as in storm run-off). Flowing
water can wear away the road or path’s surface and
cause your vehicle to sink into deeper water. Further-
more, flowing and/or rising water can carry your ve-
hicle away swiftly. Failure to follow this warning may
result in injuries that are serious or fatal to you, your
passengers, and others around you.
Shallow Standing Water
Although your vehicle is capable of driving through shal-
low standing water, consider the following Cautions and
Warnings before doing so.
WARNING!
• Driving through standing water limits your vehicle’s
traction capabilities. Do not exceed 5 mph (8 km/h)
when driving through standing water.
• Driving through standing water limits your vehicle’s
braking capabilities, which increases stopping dis-
tances. Therefore, after driving through standing
water, drive slowly and lightly press on the brake
pedal several times to dry the brakes.
• Failure to follow these warnings may result in inju-
ries that are serious or fatal to you, your passengers,
and others around you.
6
STARTING AND OPERATING 283
Page 289 of 490
BULB REPLACEMENT
Replacement Bulbs
Interior Bulbs
Bulb Number
Center & Rear Dome Lamp 578
Center & Rear Reading Lamps 578
Front Door Courtesy Lamp 578
Front Header Reading Lamps – If Equipped 578
Instrument Cluster Lamps PC74
Liftgate Lamp(s) 578
Overhead Console Reading Lamps PC579
Removable Console Lamp – If Equipped 194
Visor Vanity Lamps 6501966
NOTE: For lighted switches, see an authorized dealer for
replacement instructions.
7
IN CASE OF EMERGENCY 287