Page 415 of 490

Using The Touchscreen Radio Controls
1. Push the MENU button on the radio faceplate.
2. Press the Rear VES button on the touchscreen to displaythe Rear VES Controls. If a channel list is displayed,
press the HIDE LIST button on the touchscreen to
display the Rear VES Controls screen.
3. Press the 1 button on the touchscreen and then press either AUX 1 or AUX 2 in the VES column (depending
which AUX input is used). To exit press the back arrow
button at the top of the touchscreen.
Play A DVD Using The Touchscreen Radio
NOTE: Headunit DVD player does not play Blu-ray Discs.
1. Push the OPEN/CLOSE or LOAD button on the radio faceplate (Touchscreen).
2. Insert the DVD with the label facing up. The radio automatically selects the appropriate mode after the disc
is recognized and displays the menu screen or starts
playing the first track.
Using The Remote Control
1. Push the SOURCE button on the Remote Control.
2. Highlight DISC by either pushing Up/Down/Left/Right buttons or by repeatedly pushing the SOURCE
button, then push ENTER/OK.
NOTE: The VES will retain the last setting when turned off.
Rear VES Button On The Touchscreen
10
MULTIMEDIA 413
Page 417 of 490
Using The Remote Control
1. Push the SOURCE button on the Remote Control.
2. Highlight VES DISC by either pushing Up/Down/Left/Right buttons or by repeatedly pushing the SOURCE
button, then push ENTER/OK on the Remote Control.
NOTE: The VES will retain the last setting when turned off.
Using The Touchscreen Radio Controls
1. Push the MENU button on the radio faceplate.
2. Press the Rear VES button on the touchscreen to display
the Rear VES Controls. If a channel list is displayed,
press the HIDE LIST button on the touchscreen to
display the Rear VES Controls screen. 3. Press the DISC button on the touchscreen in the VES
column. To exit press the back arrow button on the
touchscreen at the top left of the screen.
Rear VES Button On The Touchscreen
10
MULTIMEDIA 415
Page 419 of 490
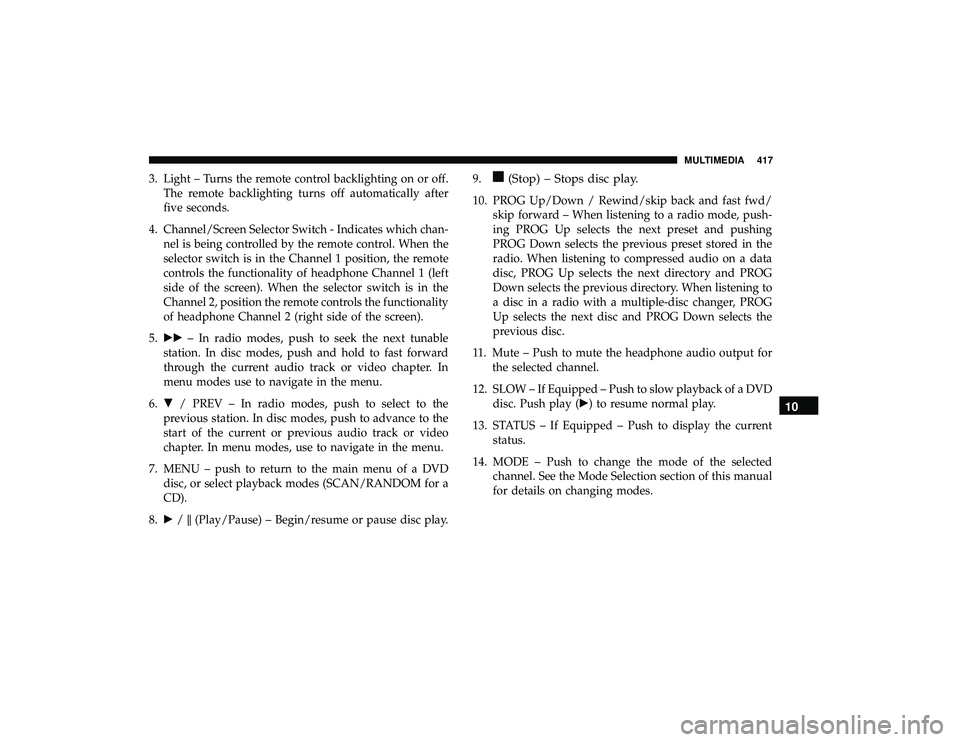
3. Light – Turns the remote control backlighting on or off.The remote backlighting turns off automatically after
five seconds.
4. Channel/Screen Selector Switch - Indicates which chan- nel is being controlled by the remote control. When the
selector switch is in the Channel 1 position, the remote
controls the functionality of headphone Channel 1 (left
side of the screen). When the selector switch is in the
Channel 2, position the remote controls the functionality
of headphone Channel 2 (right side of the screen).
5. �� – In radio modes, push to seek the next tunable
station. In disc modes, push and hold to fast forward
through the current audio track or video chapter. In
menu modes use to navigate in the menu.
6. � / PREV – In radio modes, push to select to the
previous station. In disc modes, push to advance to the
start of the current or previous audio track or video
chapter. In menu modes, use to navigate in the menu.
7. MENU – push to return to the main menu of a DVD disc, or select playback modes (SCAN/RANDOM for a
CD).
8. �/�(Play/Pause) – Begin/resume or pause disc play. 9.(Stop) – Stops disc play.
10. PROG Up/Down / Rewind/skip back and fast fwd/
skip forward – When listening to a radio mode, push-
ing PROG Up selects the next preset and pushing
PROG Down selects the previous preset stored in the
radio. When listening to compressed audio on a data
disc, PROG Up selects the next directory and PROG
Down selects the previous directory. When listening to
a disc in a radio with a multiple-disc changer, PROG
Up selects the next disc and PROG Down selects the
previous disc.
11. Mute – Push to mute the headphone audio output for the selected channel.
12. SLOW – If Equipped – Push to slow playback of a DVD disc. Push play (�) to resume normal play.
13. STATUS – If Equipped – Push to display the current status.
14. MODE – Push to change the mode of the selected channel. See the Mode Selection section of this manual
for details on changing modes.
10
MULTIMEDIA 417
Page 420 of 490
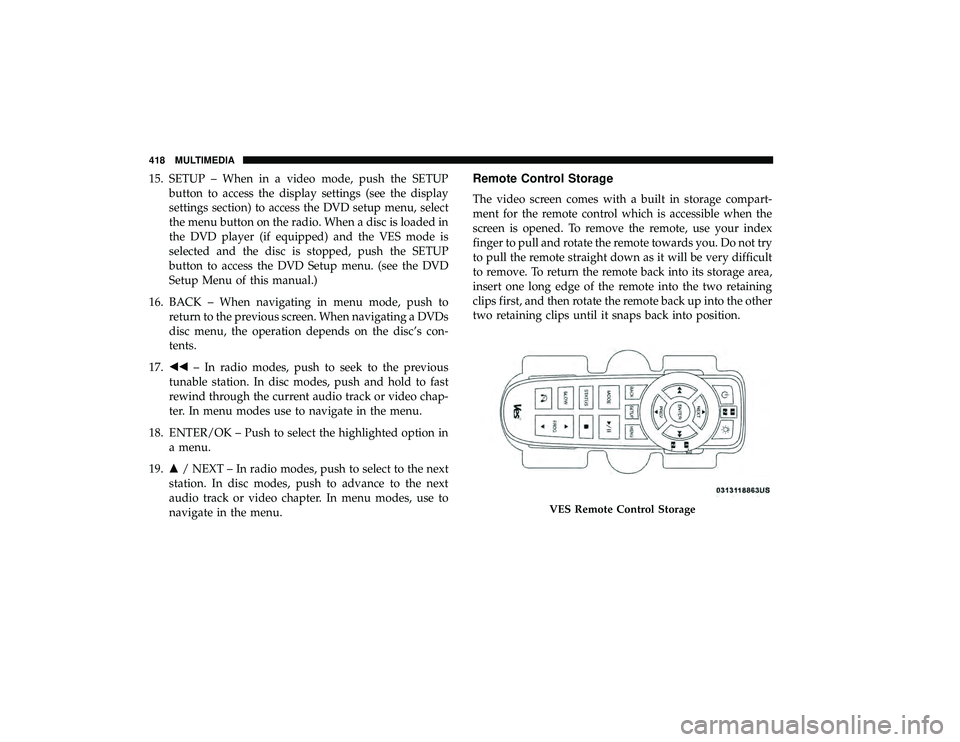
15. SETUP – When in a video mode, push the SETUPbutton to access the display settings (see the display
settings section) to access the DVD setup menu, select
the menu button on the radio. When a disc is loaded in
the DVD player (if equipped) and the VES mode is
selected and the disc is stopped, push the SETUP
button to access the DVD Setup menu. (see the DVD
Setup Menu of this manual.)
16. BACK – When navigating in menu mode, push to return to the previous screen. When navigating a DVDs
disc menu, the operation depends on the disc’s con-
tents.
17. �� – In radio modes, push to seek to the previous
tunable station. In disc modes, push and hold to fast
rewind through the current audio track or video chap-
ter. In menu modes use to navigate in the menu.
18. ENTER/OK – Push to select the highlighted option in a menu.
19. �/ NEXT – In radio modes, push to select to the next
station. In disc modes, push to advance to the next
audio track or video chapter. In menu modes, use to
navigate in the menu.Remote Control Storage
The video screen comes with a built in storage compart-
ment for the remote control which is accessible when the
screen is opened. To remove the remote, use your index
finger to pull and rotate the remote towards you. Do not try
to pull the remote straight down as it will be very difficult
to remove. To return the remote back into its storage area,
insert one long edge of the remote into the two retaining
clips first, and then rotate the remote back up into the other
two retaining clips until it snaps back into position.
VES Remote Control Storage
418 MULTIMEDIA
Page 429 of 490
Display
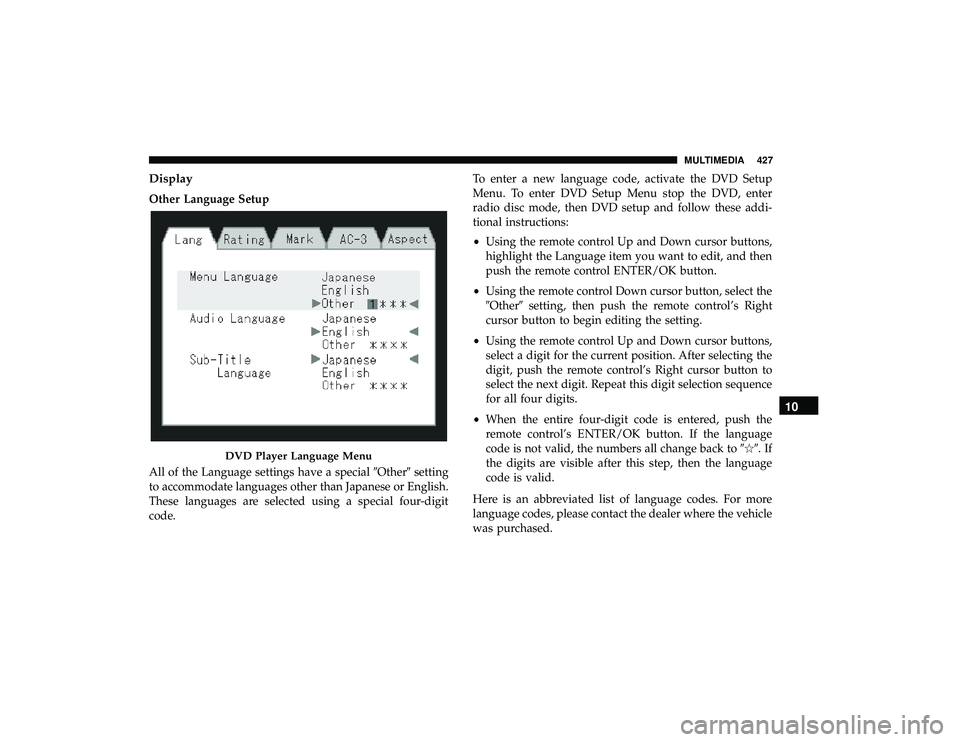
Other Language Setup
All of the Language settings have a special�Other�setting
to accommodate languages other than Japanese or English.
These languages are selected using a special four-digit
code. To enter a new language code, activate the DVD Setup
Menu. To enter DVD Setup Menu stop the DVD, enter
radio disc mode, then DVD setup and follow these addi-
tional instructions:
•
Using the remote control Up and Down cursor buttons,
highlight the Language item you want to edit, and then
push the remote control ENTER/OK button.
• Using the remote control Down cursor button, select the
�Other� setting, then push the remote control’s Right
cursor button to begin editing the setting.
• Using the remote control Up and Down cursor buttons,
select a digit for the current position. After selecting the
digit, push the remote control’s Right cursor button to
select the next digit. Repeat this digit selection sequence
for all four digits.
• When the entire four-digit code is entered, push the
remote control’s ENTER/OK button. If the language
code is not valid, the numbers all change back to ���.If
the digits are visible after this step, then the language
code is valid.
Here is an abbreviated list of language codes. For more
language codes, please contact the dealer where the vehicle
was purchased.
DVD Player Language Menu
10
MULTIMEDIA 427
Page 431 of 490
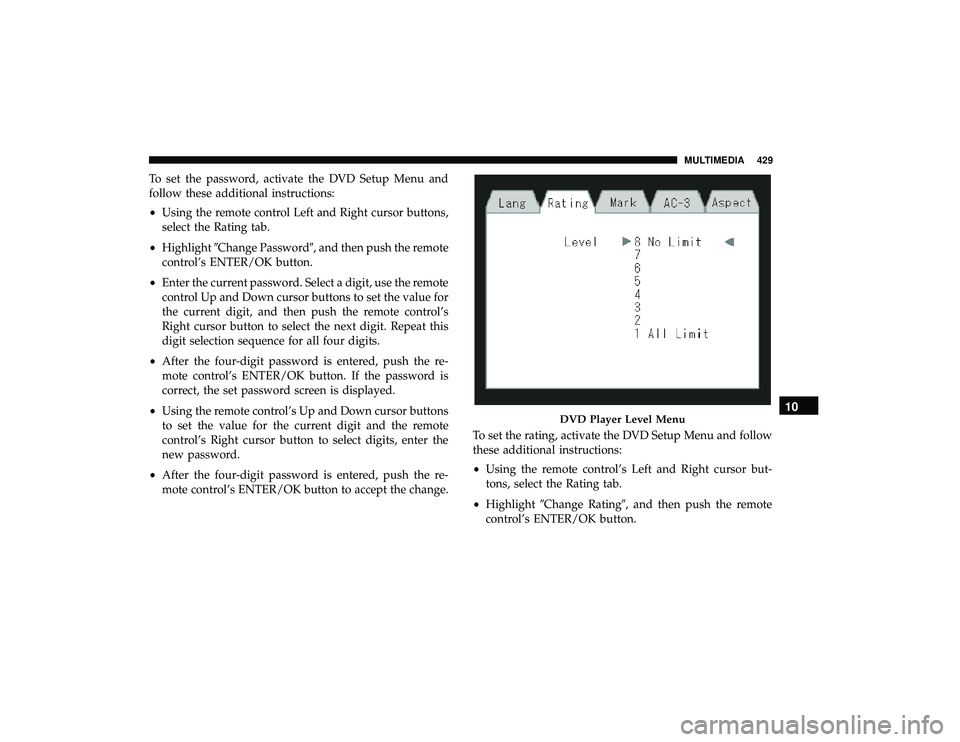
To set the password, activate the DVD Setup Menu and
follow these additional instructions:
•Using the remote control Left and Right cursor buttons,
select the Rating tab.
• Highlight �Change Password�, and then push the remote
control’s ENTER/OK button.
• Enter the current password. Select a digit, use the remote
control Up and Down cursor buttons to set the value for
the current digit, and then push the remote control’s
Right cursor button to select the next digit. Repeat this
digit selection sequence for all four digits.
• After the four-digit password is entered, push the re-
mote control’s ENTER/OK button. If the password is
correct, the set password screen is displayed.
• Using the remote control’s Up and Down cursor buttons
to set the value for the current digit and the remote
control’s Right cursor button to select digits, enter the
new password.
• After the four-digit password is entered, push the re-
mote control’s ENTER/OK button to accept the change. To set the rating, activate the DVD Setup Menu and follow
these additional instructions:
•
Using the remote control’s Left and Right cursor but-
tons, select the Rating tab.
• Highlight �Change Rating�, and then push the remote
control’s ENTER/OK button.
DVD Player Level Menu10
MULTIMEDIA 429
Page 445 of 490
NOTE:After every Uconnect Phone language change
operation, only the language-specific 32-name phonebook
is usable. The paired phone name is not language-specific
and usable across all languages.
Emergency Assistance
If you are in an emergency and the mobile phone is
reachable:
• Pick up the phone and manually dial the emergency
number for your area.
If the phone is not reachable and the Uconnect Phone is
operational, you may reach the emergency number as
follows:
• Push the Phone
button to begin.
•After the “Ready” prompt and the following beep, say
“Emergency” and the Uconnect Phone will instruct the
paired mobile phone to call the emergency number. NOTE:
•
The emergency number dialed is based on the country
where the vehicle is purchased (911 for the U.S. and
Canada and 060 for Mexico). The number dialed may
not be applicable with the available mobile service and
area.
• If supported, this number may be programmable on
some systems. To do this, push the Phone
button and
say “Setup,” followed by “Emergency.”
• The Uconnect Phone does slightly lower your chances of
successfully making a phone call as to that for the
mobile phone directly.
WARNING!
To use your Uconnect Phone System in an emergency,
your mobile phone must be:
• Turned on.
• Paired to the Uconnect System.
• Have network coverage.10
MULTIMEDIA 443
Page 465 of 490
CD/DVD DISC MAINTENANCE
To keep a CD/DVD in good condition, take the following
precautions:
•Handle the disc by its edge; avoid touching the surface.
• If the disc is stained, clean the surface with a soft cloth,
wiping from center to edge.
• Do not apply paper or tape to the disc; avoid scratching
the disc.
• Do not use solvents such as benzene, thinner, cleaners,
or anti-static sprays.
• Store the disc in its case after playing.
• Do not expose the disc to direct sunlight.
• Do not store the disc where temperatures may become
too high. NOTE:
If you experience difficulty in playing a particular
disc, it may be damaged (e.g., scratched, reflective coating
removed, a hair, moisture or dew on the disc), oversized, or
have protection encoding. Try a known good disc before
considering disc player service.
10
MULTIMEDIA 463