2018 VOLVO V90 CROSS COUNTRY ECU
[x] Cancel search: ECUPage 583 of 662
MAINTENANCE AND SERVICE
}}
581
Opening and closing the hood To open the hood, pull the lever in the passen- ger compartment and then turn the handle underthe hood.
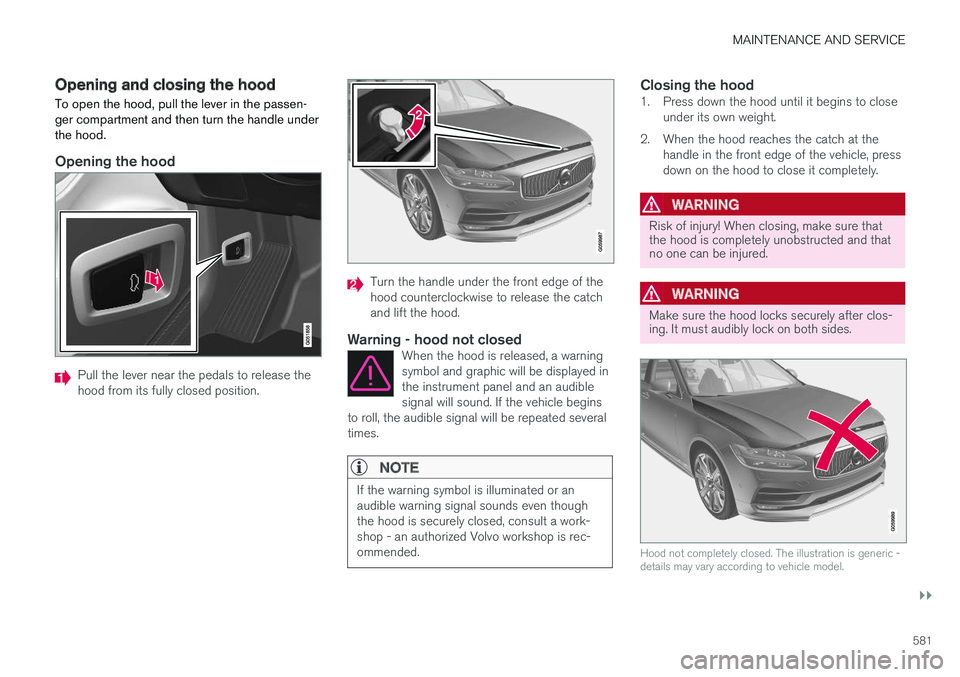
Opening the hood
Pull the lever near the pedals to release the hood from its fully closed position.
Turn the handle under the front edge of the hood counterclockwise to release the catchand lift the hood.
Warning - hood not closedWhen the hood is released, a warningsymbol and graphic will be displayed inthe instrument panel and an audiblesignal will sound. If the vehicle begins
to roll, the audible signal will be repeated severaltimes.
NOTE
If the warning symbol is illuminated or an audible warning signal sounds even thoughthe hood is securely closed, consult a work-shop - an authorized Volvo workshop is rec-ommended.
Closing the hood1. Press down the hood until it begins to close under its own weight.
2. When the hood reaches the catch at the handle in the front edge of the vehicle, press down on the hood to close it completely.
WARNING
Risk of injury! When closing, make sure that the hood is completely unobstructed and thatno one can be injured.
WARNING
Make sure the hood locks securely after clos- ing. It must audibly lock on both sides.
Hood not completely closed. The illustration is generic - details may vary according to vehicle model.
Page 584 of 662
||
MAINTENANCE AND SERVICE
* Option/accessory.
582
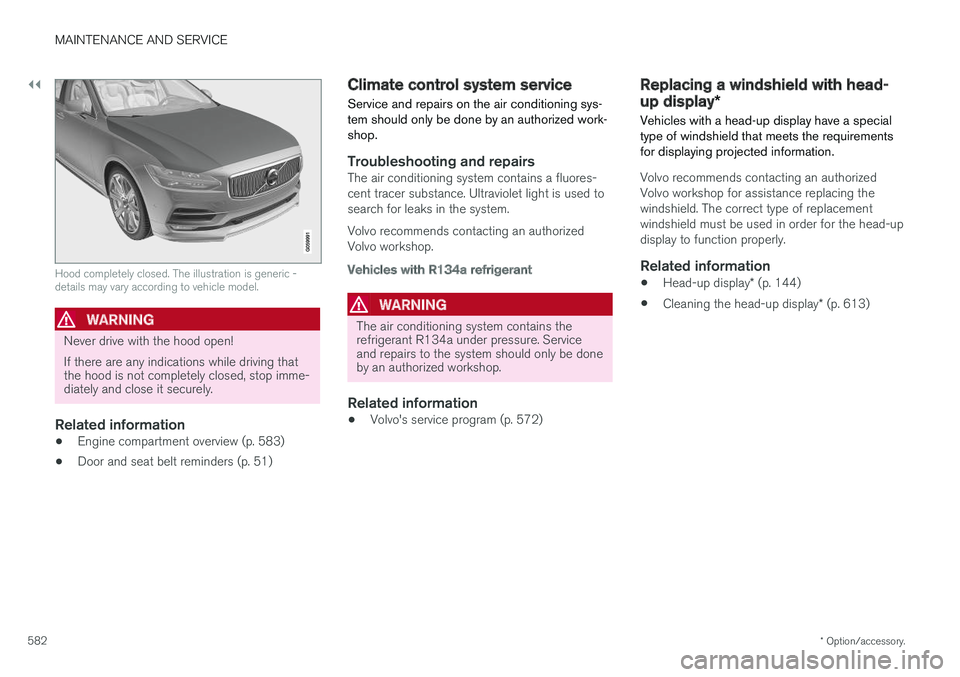
Hood completely closed. The illustration is generic - details may vary according to vehicle model.
WARNING
Never drive with the hood open! If there are any indications while driving that the hood is not completely closed, stop imme-diately and close it securely.
Related information
• Engine compartment overview (p. 583)
• Door and seat belt reminders (p. 51)
Climate control system service Service and repairs on the air conditioning sys- tem should only be done by an authorized work-shop.
Troubleshooting and repairsThe air conditioning system contains a fluores- cent tracer substance. Ultraviolet light is used tosearch for leaks in the system. Volvo recommends contacting an authorized Volvo workshop.
Vehicles with R134a refrigerant
WARNING
The air conditioning system contains the refrigerant R134a under pressure. Serviceand repairs to the system should only be doneby an authorized workshop.
Related information
•Volvo's service program (p. 572)
Replacing a windshield with head-
up display
*
Vehicles with a head-up display have a special type of windshield that meets the requirementsfor displaying projected information.
Volvo recommends contacting an authorized Volvo workshop for assistance replacing thewindshield. The correct type of replacementwindshield must be used in order for the head-updisplay to function properly.
Related information
• Head-up display
* (p. 144)
• Cleaning the head-up display
* (p. 613)
Page 595 of 662
MAINTENANCE AND SERVICE
}}
593
Replacing backup lights The light bulb for the backup light is located behind the panel in the tailgate.
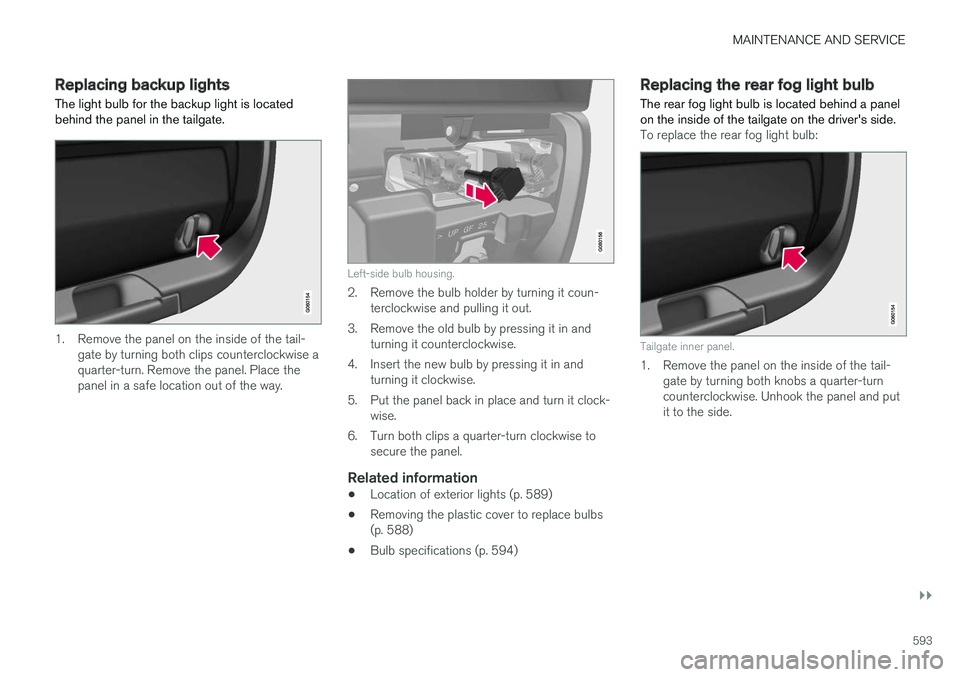
1. Remove the panel on the inside of the tail-gate by turning both clips counterclockwise a quarter-turn. Remove the panel. Place thepanel in a safe location out of the way.
Left-side bulb housing.
2. Remove the bulb holder by turning it coun-terclockwise and pulling it out.
3. Remove the old bulb by pressing it in and turning it counterclockwise.
4. Insert the new bulb by pressing it in and turning it clockwise.
5. Put the panel back in place and turn it clock- wise.
6. Turn both clips a quarter-turn clockwise to secure the panel.
Related information
• Location of exterior lights (p. 589)
• Removing the plastic cover to replace bulbs (p. 588)
• Bulb specifications (p. 594)
Replacing the rear fog light bulb The rear fog light bulb is located behind a panel on the inside of the tailgate on the driver's side.
To replace the rear fog light bulb:
Tailgate inner panel.
1. Remove the panel on the inside of the tail-
gate by turning both knobs a quarter-turn counterclockwise. Unhook the panel and putit to the side.
Page 596 of 662
||
MAINTENANCE AND SERVICE
594
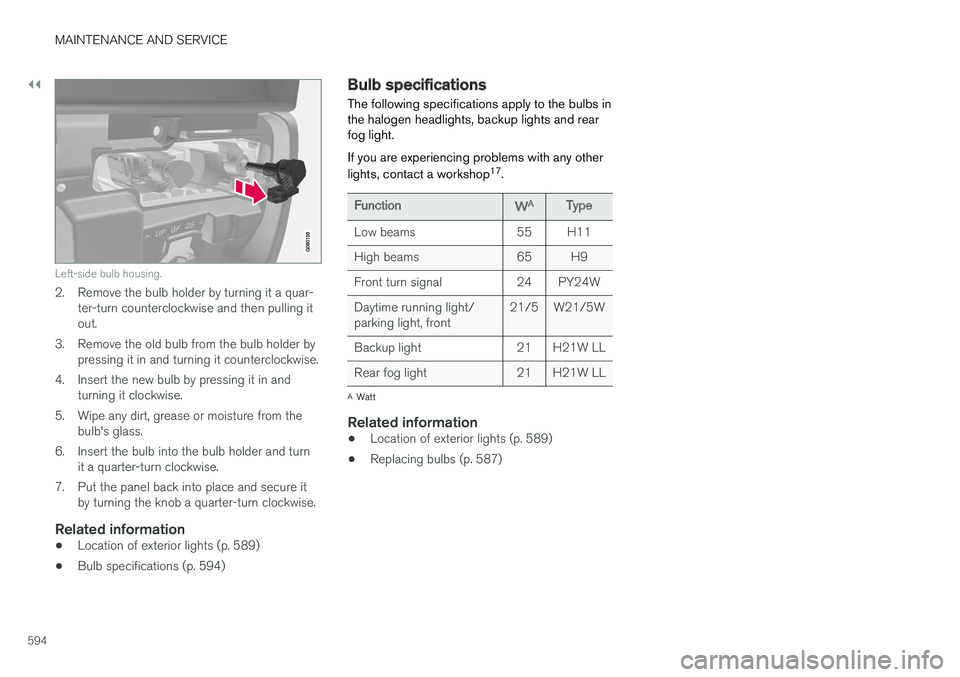
Left-side bulb housing.
2. Remove the bulb holder by turning it a quar-ter-turn counterclockwise and then pulling it out.
3. Remove the old bulb from the bulb holder by pressing it in and turning it counterclockwise.
4. Insert the new bulb by pressing it in and turning it clockwise.
5. Wipe any dirt, grease or moisture from the bulb's glass.
6. Insert the bulb into the bulb holder and turn it a quarter-turn clockwise.
7. Put the panel back into place and secure it by turning the knob a quarter-turn clockwise.
Related information
• Location of exterior lights (p. 589)
• Bulb specifications (p. 594)
Bulb specifications The following specifications apply to the bulbs in the halogen headlights, backup lights and rearfog light. If you are experiencing problems with any other lights, contact a workshop 17
.
FunctionWAType
Low beams 55 H11
High beams 65 H9
Front turn signal 24 PY24WDaytime running light/ parking light, front 21/5 W21/5W
Backup light 21 H21W LL
Rear fog light 21 H21W LL
A Watt
Related information
• Location of exterior lights (p. 589)
• Replacing bulbs (p. 587)
Page 597 of 662
MAINTENANCE AND SERVICE
}}
595
Start battery
The vehicle has a single-pole electrical system that uses the chassis and engine mount as con-ductors. The start battery is used to start the electrical system and power the starter motor and otherelectrical equipment in the vehicle. The start battery should only be replaced by a workshop 18
.
The vehicle has a voltage-regulated alternating current generator. The starter battery is a 12 V battery, designed for the carbon dioxide reducing functions Start/Stopand regenerative charging, and to support thefunctionality of the car's different systems. The service life and performance of the start bat- tery are affected by factors such as driving style,driving conditions, climate, battery discharges,number of starts, etc.
• Never disconnect the start battery while theengine is running.
• Make sure the cables to the start battery arecorrectly connected and the clamps aresecurely tightened.
WARNING
•Batteries generate hydrogen gas, which is flammable and explosive.
• Do not connect the jumper cable to anypart of the fuel system or to any movingparts. Avoid touching hot manifolds.
• Battery fluid contains sulfuric acid. Do notallow battery fluid to contact eyes, skin,fabrics or painted surfaces.
• If contact occurs, flush the affected areaimmediately with water. Obtain medicalhelp immediately if eyes are affected.
• Never expose the battery to open flameor electric spark. Do not smoke near thebattery. Failure to follow the instructionsfor jump starting can lead to injury.
Connection points
WARNING
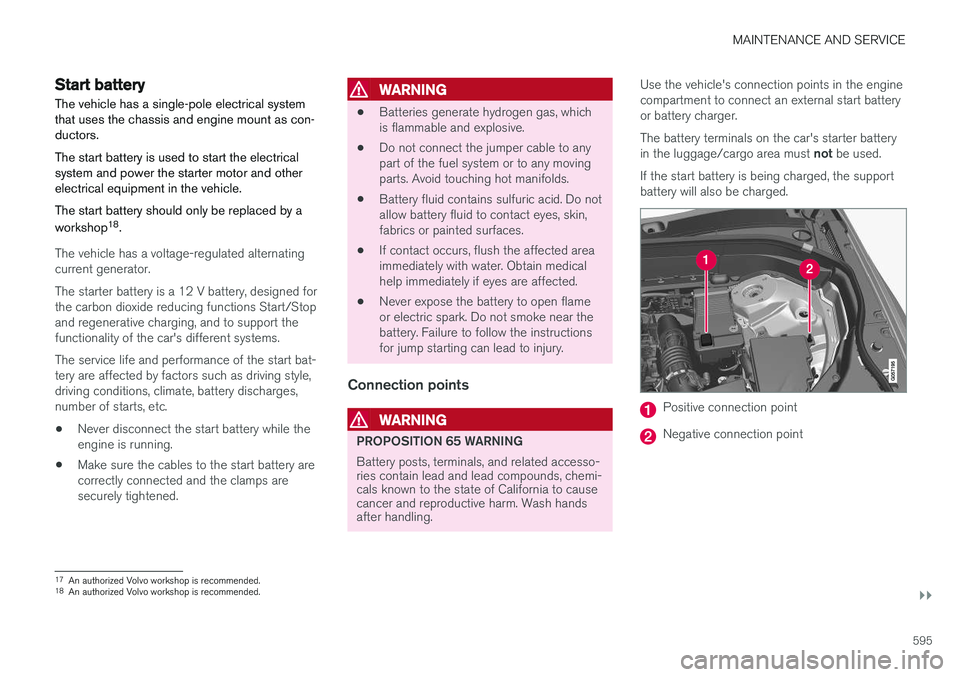
PROPOSITION 65 WARNING Battery posts, terminals, and related accesso- ries contain lead and lead compounds, chemi-cals known to the state of California to causecancer and reproductive harm. Wash handsafter handling. Use the vehicle's connection points in the engine compartment to connect an external start batteryor battery charger. The battery terminals on the car's starter battery in the luggage/cargo area must
not be used.
If the start battery is being charged, the support battery will also be charged.
Positive connection point
Negative connection point
17 An authorized Volvo workshop is recommended.
18 An authorized Volvo workshop is recommended.
Page 598 of 662
||
MAINTENANCE AND SERVICE
596
CAUTION
Only a modern battery charger with controlled charge voltage should be used to charge thestarter battery and support battery. The rapidcharging function should not be used as thiscould damage the battery.
CAUTION
Failure to observe the following could cause the infotainment energy save mode to tempo-rarily stop working and/or a message in thedriver's display regarding the state of chargeof the starter battery may be temporarilyincorrect after an external starter battery orbattery charger has been connected:
• The negative battery terminal of the vehi- cle's starter battery must
never be used
to connect an external starter battery orbattery charger – only the vehicle's neg-
ative charging point should be used as
a grounding point.
NOTE
If the starter battery becomes discharged too many times, it will shorten its service life. The service life of the starter battery is affec- ted by several factors, such as driving condi-tions and climate. The starting capacity of thebattery reduces gradually over time. The bat-tery must therefore be recharged if the vehi-cle is not used or a long period of time or if itis only driven short distances. Severe cold fur-ther limits the starting capacity. To keep the starter battery in a good condi- tion, the vehicle should be driven at least15 minutes per week or the battery should beconnected to a battery charger with automatictrickle charging. A starter battery that is always kept fully charged has the maximum service life.
Location
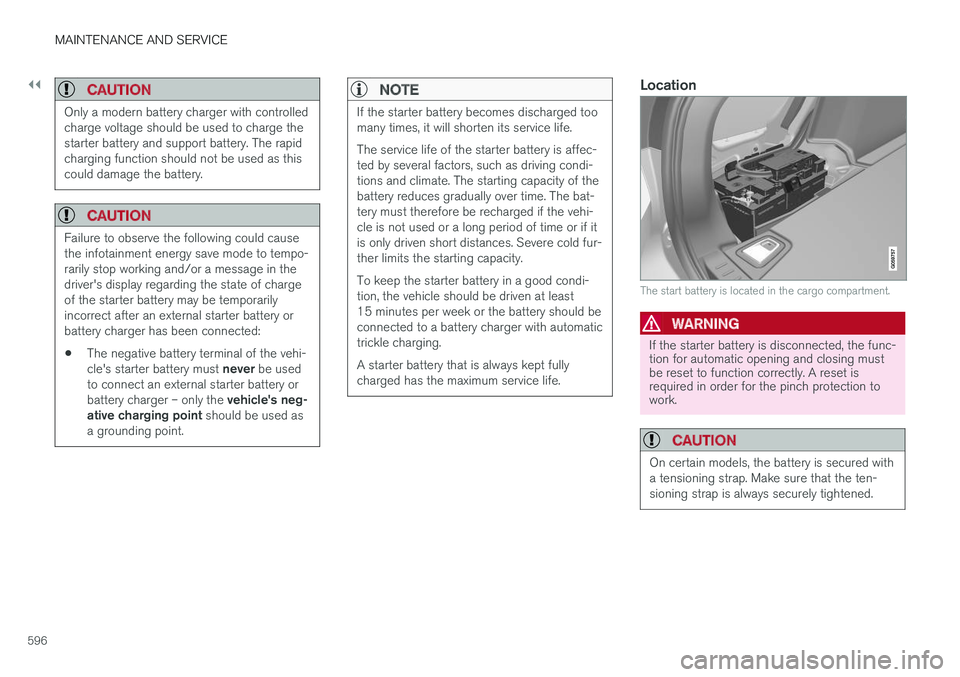
The start battery is located in the cargo compartment.
WARNING
If the starter battery is disconnected, the func- tion for automatic opening and closing mustbe reset to function correctly. A reset isrequired in order for the pinch protection towork.
CAUTION
On certain models, the battery is secured with a tensioning strap. Make sure that the ten-sioning strap is always securely tightened.
Page 616 of 662
MAINTENANCE AND SERVICE
614
Cleaning fabric upholstery andceiling liner Only use cleaning agents and car care products recommended by Volvo. Clean regularly andtreat stains immediately for best results. It isimportant to vacuum before using a cleaningagent.
Fabric upholstery and ceiling linerNever scrape or rub a stain, as this could damage the upholstery. Never use strong stain removers,as this could change the color of the upholstery. Use soapy water or a similar detergent. For more difficult stains caused by oil, ice cream, shoe pol-ish, etc., use a stain remover. Consult with yourVolvo retailer.
Related information
•Cleaning the interior (p. 612)
• Cleaning the center display (p. 612)
• Cleaning the seat belt (p. 614)
• Cleaning floor mats and inlay mats (p. 614)
• Cleaning leather upholstery (p. 615)
• Cleaning the leather steering wheel(p. 616)
• Cleaning interior plastic, metal and wood sur-faces (p. 617)
Cleaning the seat belt
Only use cleaning agents and car care products recommended by Volvo. Clean regularly andtreat stains immediately for best results. It isimportant to vacuum before using a cleaningagent.
Seat beltsUse water and a synthetic soap solution. Spe- cially designed textile cleaning agents are availa-ble for purchase at Volvo retailers. Make sure thebelt is dry before it is retracted.
Related information
• Cleaning the interior (p. 612)
• Cleaning the center display (p. 612)
• Cleaning fabric upholstery and ceiling liner(p. 614)
• Cleaning floor mats and inlay mats (p. 614)
• Cleaning leather upholstery (p. 615)
• Cleaning the leather steering wheel(p. 616)
• Cleaning interior plastic, metal and wood sur-faces (p. 617)
Cleaning floor mats and inlay mats
Only use cleaning agents and car care products recommended by Volvo. Clean regularly andtreat stains immediately for best results. It isimportant to vacuum before using a cleaningagent.
Inlay mats and floor matsRemove the inlay mats to clean the floor mats and inlay mats separately. Use a vacuum toremove dust and dirt. Each inlay mat is securedinto place with pins. Remove the inlay mat by grasping the inlay mat at each pin and lifting the mat straight up. Put the inlay mat back into place by pressing it in at each pin.
Page 617 of 662
MAINTENANCE AND SERVICE
}}
* Option/accessory.615
WARNING
•Never use more than one inlay mat at a time on the driver's floor. If any other typeof floor mat is used, remove the originalmat from the driver's seat floor beforedriving. All types of mats must be securelyanchored in the attachment points in thefloor. Make sure the floor mat does notimpede the movement of the brake pedalor accelerator pedal in any way, as thiscould be a serious safety hazard.
• Volvo's floor mats are specially manufac-tured for your vehicle. They must be prop-erly secured in the attachment points inthe floor to help ensure they cannot slideand become trapped under the pedals.
After vacuuming, a specially designed textilecleaning agent should be used to remove stainson floor mats. Floor mats should be cleaned withproducts recommended by Volvo retailers.
Related information
• Cleaning the interior (p. 612)
• Cleaning the center display (p. 612)
• Cleaning fabric upholstery and ceiling liner(p. 614)
• Cleaning the seat belt (p. 614)
• Cleaning leather upholstery (p. 615) •
Cleaning the leather steering wheel(p. 616)
• Cleaning interior plastic, metal and wood sur-faces (p. 617)
Cleaning leather upholstery
Only use cleaning agents and car care products recommended by Volvo. Clean regularly andtreat stains immediately for best results. It isimportant to vacuum before using a cleaningagent.
Leather upholstery *Volvo's leather upholstery is treated to protect its original appearance. Over time, sunlight, grease,dirt, etc. could break down the protective layer.This could result in scratches and cracking. Leather upholstery is a natural product that changes and acquires a beautiful patina overtime. Regular cleaning and treatments arerequired to preserve the qualities and color of theleather. Volvo offers a comprehensive product,Volvo Leather Care Kit/Wipes, for cleaning andtreating leather upholstery that, when used asdirected, preserves the leather's protective coa-ting. For best results, Volvo recommends cleaning and applying protective cream one to four times ayear (or more as needed). Volvo Leather Care Kit951 0251 and Volvo Leather Softener 9437429 are available for purchase at Volvo retailers.