Page 451 of 672
4516-4. Using the other interior features
6
Interior features
The clock is displayed on the
screen.
■Setting the clock
Vehicles with Entune Audio (Multimedia system types: P. 322)
P. 3 3 1
Vehicles with Entune Audio P lus or Entune Premium Audio
(Multimedia system types: P. 322)
Refer to the “NAVIGATION AND MULTIMEDIA SYSTEM
OWNER’S MANUAL”.
■ The clock is displayed when
The engine switch is in the “ACC” or “ON” position.
■ When disconnecting and reco nnecting battery terminals
The clock data will be reset.
Clock
Page 487 of 672

4877-3. Do-it-yourself maintenance
7
Maintenance and care
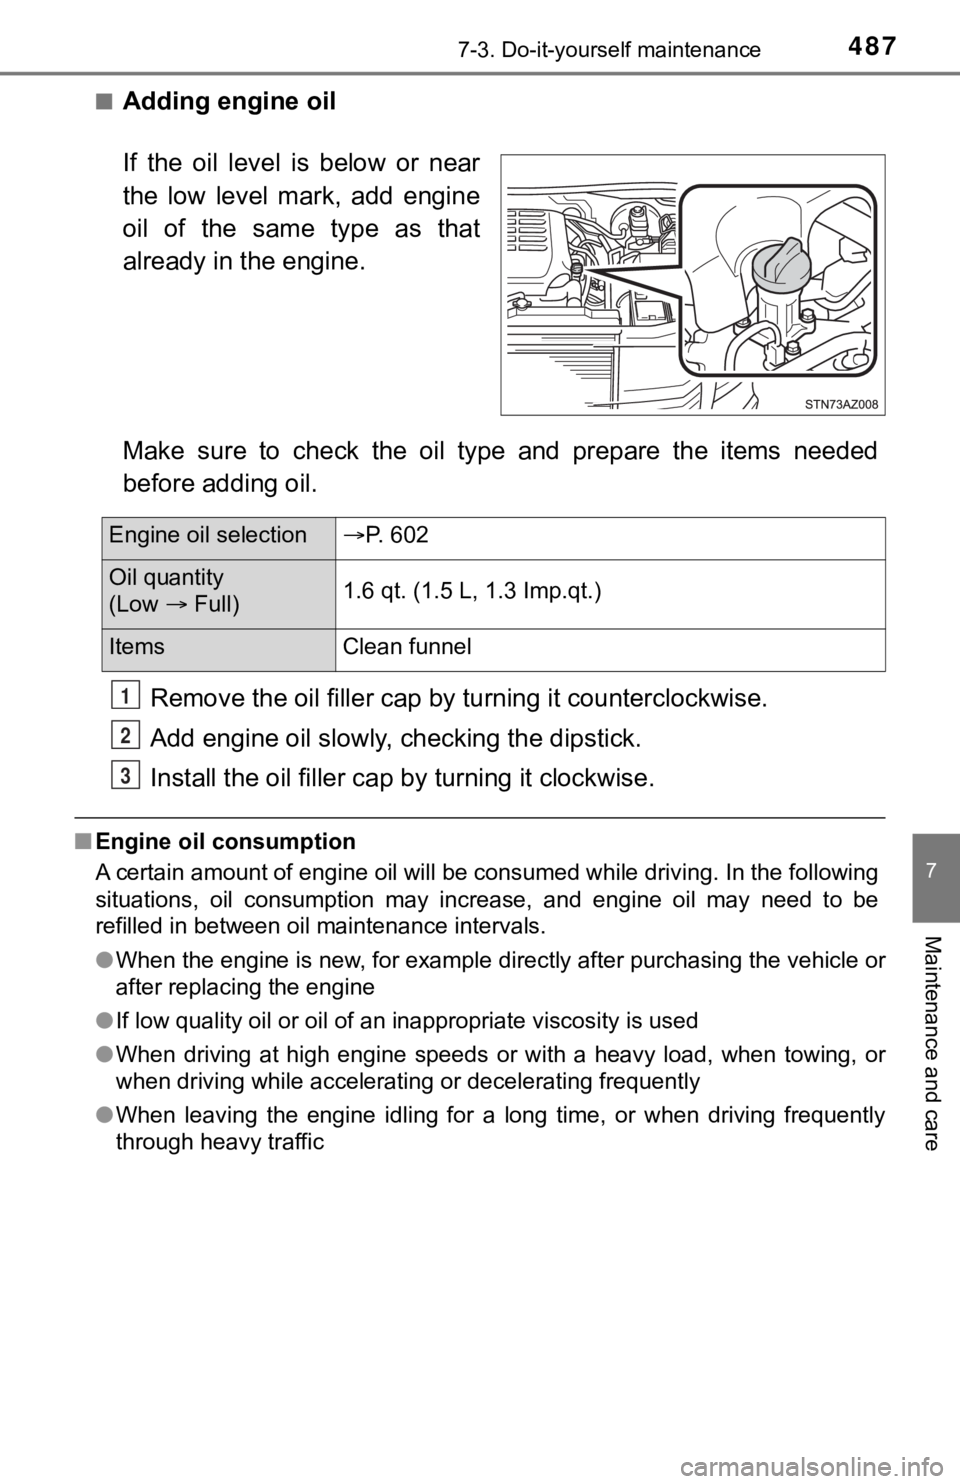
■Adding engine oil
Make sure to check the oil type and prepare the items needed
before adding oil.Remove the oil fille r cap by turning it counterclockwise.
Add engine oil slowly, checking the dipstick.
Install the oil filler cap by turning it clockwise.
■Engine oil consumption
A certain amount of engine oil will be consumed while driving. In the following
situations, oil consumption may increase, and engine oil may ne ed to be
refilled in between oil maintenance intervals.
● When the engine is new, for example directly after purchasing t he vehicle or
after replacing the engine
● If low quality oil or oil of an inappropriate viscosity is used
● When driving at high engine speeds or with a heavy load, when t owing, or
when driving while accelerating or decelerating frequently
● When leaving the engine idling for a long time, or when driving frequently
through heavy traffic
If the oil level is below or near
the low level mark, add engine
oil of the same type as that
already in the engine.
Engine oil selection P. 602
Oil quantity
(Low Full) 1.6 qt. (1.5 L, 1.3 Imp.qt.)
Items
Clean funnel
1
2
3
Page 492 of 672
4927-3. Do-it-yourself maintenance
■Checking the fluid level
Make sure to check the fluid type and prepare the necessary items.
Clean all dirt off the reservoir.
Remove the cap by turni ng it counterclockwise.
Wipe the dipstick clean.
Reinstall the cap and remove it again.
Check the fluid level.
Check the battery as follows:
■Battery exterior
Make sure that the battery terminals are not corroded and that
there are no loose connections, cracks, or loose clamps.
Terminals
Hold-down clamp
Fluid type Automatic transmission fluid DEXRON® II or III
Items Rag or paper, clean funnel (only for adding fluid)
WARNING
■Checking the fluid level
Take care, as the reservoir may be hot.
NOTICE
■When adding fluid
Avoid overfilling, or the power steering may be damaged.
■ After replacing the reservoir cap
Check the steering box case, vane pump and hose connections for leaks or
damage.
Battery
1
2
3
4
5
1
2
Page 527 of 672
5277-3. Do-it-yourself maintenance
7
Maintenance and care
■Front turn signal/parking lights (bulb type headlights)
Turn the bulb base counter-
clockwise.
Remove the light bulb.
■Front turn signal lights (LED type headlights)
Turn the bulb base counter-
clockwise.
Remove the light bulb.
1
2
1
2
Page 528 of 672
5287-3. Do-it-yourself maintenance
■Front side marker lightsTo allow enough working
space, turn the steering
wheel to the opposite side of
the bulb to be replaced.
Remove the screws and
fender liner clip, and remove
the fender liner.
Turn the steering wheel to the
left when replacing the right side
light bulb, and turn the steering
wheel to the right when replac-
ing the left side light bulb.
Open the fender liner and
turn the bulb base counter-
clockwise.
1
2
Page 530 of 672
5307-3. Do-it-yourself maintenance
■Front fog lights-bulb type (if equipped)To allow enough working
space, turn the steering
wheel to the opposite side of
the bulb to be replaced.
Remove the screws and
fender liner clip, and remove
the fender liner.
Turn the steering wheel to the
left when replacing the right side
light bulb, and turn the steering
wheel to the right when replac-
ing the left side light bulb.
Unplug the connector while
depressing the lock release.
Turn the bulb counterclock-
wise.
1
2
3
Page 531 of 672
5317-3. Do-it-yourself maintenance
7
Maintenance and care
Set the new light bulb.
Align the 3 tabs on the light bulb
with the mounting, and insert.
Turn it clockwise to set.
Install the connector.
Shake the bulb base gently to
check that it is not loose, turn
the fog lights, on once and visu-
ally confirm that no light is leak-
ing through the mounting.
Reinstall the fender liner and
install the screws and clip.
4
5
6
Page 532 of 672
5327-3. Do-it-yourself maintenance
■Stop/tail and rear side marker lights, back-up lights and rear
turn signal lightsRemove the bolts and rear
combination assembly.
Turn the bulb bases counter-
clockwise.Rear turn signal light
Back-up light
Stop/tail and rear side
marker light
Remove the light bulb. Rear turn signal light
Back-up light
Stop/tail and rear side
marker light
1
2
1
2
3
3
1
2
3