2018 PEUGEOT 5008 tow
[x] Cancel search: towPage 137 of 364
135
Deactivating the front passenger
airbag
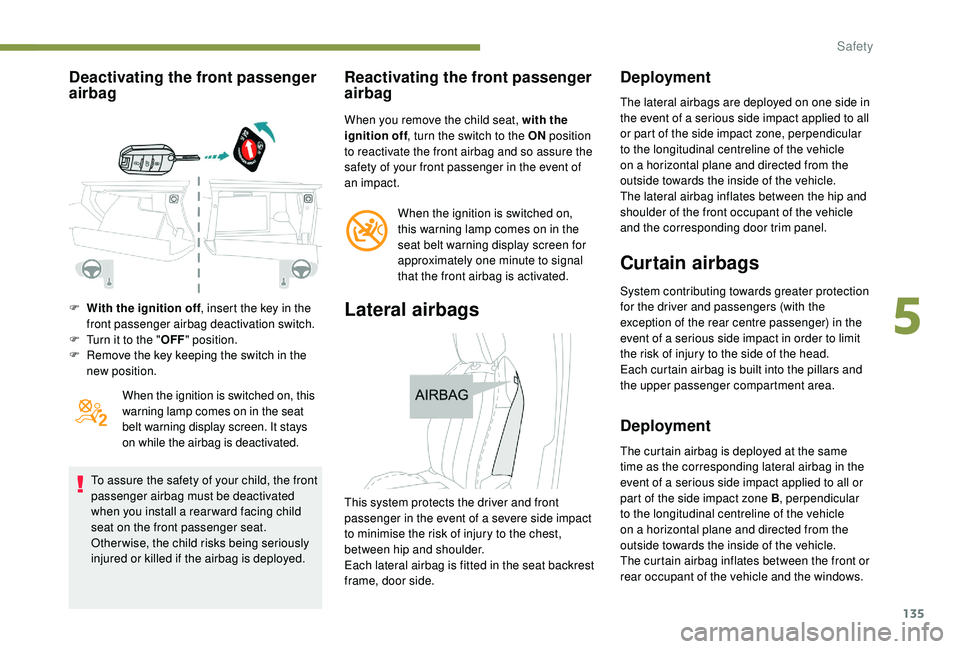
F With the ignition off, insert the key in the
front passenger airbag deactivation switch.
F
T
urn it to the " OFF" position.
F
R
emove the key keeping the switch in the
new position.
When the ignition is switched on, this
warning lamp comes on in the seat
belt warning display screen. It stays
on while the airbag is deactivated.
To assure the safety of your child, the front
passenger airbag must be deactivated
when you install a
rear ward facing child
seat on the front passenger seat.
Otherwise, the child risks being seriously
injured or killed if the airbag is deployed.
Reactivating the front passenger
airbag
When you remove the child seat, with the
ignition off , turn the switch to the ON position
to reactivate the front airbag and so assure the
safety of your front passenger in the event of
an impact.
When the ignition is switched on,
this warning lamp comes on in the
seat belt warning display screen for
approximately one minute to signal
that the front airbag is activated.
Lateral airbags
Deployment
The lateral airbags are deployed on one side in
the event of a serious side impact applied to all
or part of the side impact zone, perpendicular
to the longitudinal centreline of the vehicle
on a
horizontal plane and directed from the
outside towards the inside of the vehicle.
The lateral airbag inflates between the hip and
shoulder of the front occupant of the vehicle
and the corresponding door trim panel.
Curtain airbags
System contributing towards greater protection
for the driver and passengers (with the
exception of the rear centre passenger) in the
event of a
serious side impact in order to limit
the risk of injury to the side of the head.
Each curtain airbag is built into the pillars and
the upper passenger compartment area.
Deployment
The curtain airbag is deployed at the same
time as the corresponding lateral airbag in the
event of a
serious side impact applied to all or
part of the side impact zone B , perpendicular
to the longitudinal centreline of the vehicle
on a
horizontal plane and directed from the
outside towards the inside of the vehicle.
The curtain airbag inflates between the front or
rear occupant of the vehicle and the windows.
This system protects the driver and front
passenger in the event of a
severe side impact
to minimise the risk of injury to the chest,
between hip and shoulder.
Each lateral airbag is fitted in the seat backrest
frame, door side.
5
Safety
Page 140 of 364

138
General points relating to
child seats
The regulations on carrying children are
specific to each country. Refer to the
legislation in force in your country.
For maximum safety, please obser ve the
following recommendations:
-
I
n accordance with European regulations,
all children under the age of 12
or less
than one and a
half metres tall must
travel in approved child seats suited to
their weight , on seats fitted with a
seat belt
or ISOFIX mountings.
-
S
tatistically, the safest seats in your
vehicle for carr ying children are the rear
seats.
-
A c
hild weighing less than 9 kg must
travel in the rear ward facing position
both in the front and in the rear.
It is recommended that children travel on
the rear seats of your vehicle:
-
"rearward facing " up to the age of 3,
-
"forward facing " over the age of 3. Ensure that the seat belt is positioned and
tightened correctly.
For child seats with a
support leg, ensure
that the latter is in firm and steady contact
with the floor.
In the front: if necessary, adjust the
passenger seat.
At the rear: if necessary, adjust the
relevant front seat.
Remove and stow the head restraint
before installing a
child seat with backrest
on a
passenger seat.
Refit the head restraint once the child seat
has been removed.
Child seat at the front
"Rearward facing"
When a "rear ward facing" child seat is installed
o n the front passenger seat , adjust the
vehicle seat to the fully back and highest
position, with the backrest straightened.
The front passenger airbag must be
deactivated. Otherwise, the child risks
being seriously injured or killed if the
airbag is deployed .
"Forward facing "
When a "for ward facing" child seat is installed
on the front passenger seat , adjust the
vehicle seat to the fully back and highest
position, with the backrest straightened. Leave
the front passenger airbag active.
Safety
Page 148 of 364

146
ISOFIX mountings
The seats, shown below, are fitted with ISOFIX
compliant mountings:
There are three rings for each seat:This arrangement reduces forward tipping of
the child seat in the event of a
front impact.
The ISOFIX mounting system ensures fast,
reliable and safe fitting of the child seat in your
vehicle.
ISOFIX child seats are fitted with two latches
which are secured on the two rings A .
Some seats also have an upper strap which is
attached to ring B . F
p
ass the upper strap of the child seat behind
the seat backrest, between the apertures
for the head restraint rods,
F
f
ix the hook of the upper strap to ring B,
F
t
ighten the upper strap.
When fitting an ISOFIX child seat to the
left-hand rear seat of the bench seat,
before fitting the seat, first move the
centre rear seat belt towards the middle
of the vehicle, so as to avoid the seat
interfering with the operation of the seat
belt.
The incorrect installation of a
child seat
in a
vehicle compromises the child's
protection in the event of an accident.
Strictly obser ve the fitting instructions
provided with the child seat.
For information on the possibilities for
installing ISOFIX child seats in your
vehicle, refer to the summary table.
-
t
wo rings A , located between the vehicle's
seat backrest and cushion, indicated by
a
marking, -
a r
ing B, located behind the seat and
indicated by a
marking, referred to as the
TOP TETHER , for fixing the upper strap.
To secure the child seat to the TOP TETHER :
F
r
emove and stow the head restraint before
installing the child seat on the seat (refit it
once the child seat has been removed),
Safety
Page 157 of 364
155
Driving recommendations
Observe the driving regulations and remain
vigilant whatever the traffic conditions.
Pay close attention to the traffic and keep your
hands on the wheel so that you are ready to
react at any time to any eventuality.
As a safety measure, the driver should only
carry out any operations that require close
attention when the vehicle is stationary.
On a
long journey, a break every two hours is
strongly recommended.
In difficult weather, drive smoothly, anticipate
the need to brake and increase the distance
from other vehicles.
Never leave the engine running in
an enclosed area without adequate
ventilation: internal combustion engines
emit toxic exhaust gases, such as carbon
monoxide. There is a
risk of poisoning and
death!
In very severe wintry conditions
(temperatures below -23°C), to guarantee
correct operation and the longevity of
the mechanical elements of your vehicle,
engine and gearbox, the engine must be
left running for 4
minutes before driving.
Important!
Never drive with the parking brake applied
– Risk of overheating and damage to the
braking system!
As the exhaust system of your vehicle
is very hot, even several minutes after
switching off the engine, never park or run
the engine on inflammable sur faces (dry
grass, fallen leaves, etc.): Risk of fire!
Never leave a vehicle unsuper vised with
the engine running. If you have to leave
your vehicle with the engine running, apply
the parking brake and put the gearbox into
neutral or position N or P , depending on
the type of gearbox.
Driving on flooded roads
We strongly advise against driving on flooded
roads, as this could cause serious damage
to the engine or gearbox, as well as to the
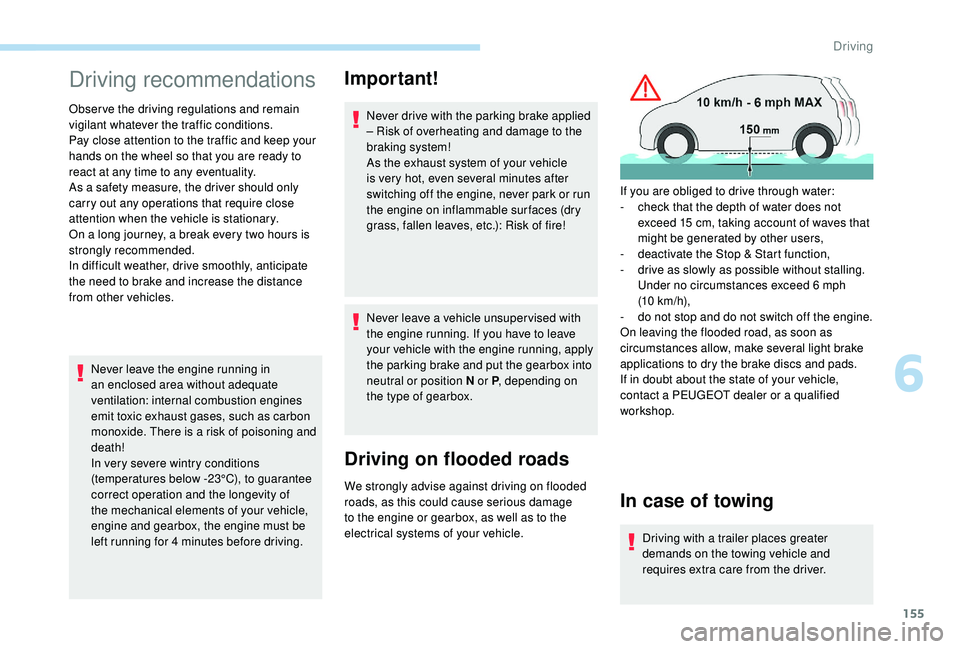
electrical systems of your vehicle. If you are obliged to drive through water:
-
c
heck that the depth of water does not
exceed 15 cm, taking account of waves that
might be generated by other users,
-
d
eactivate the Stop & Start function,
-
d
rive as slowly as possible without stalling.
Under no circumstances exceed 6 mph
(10
km/h),
-
d
o not stop and do not switch off the engine.
On leaving the flooded road, as soon as
circumstances allow, make several light brake
applications to dry the brake discs and pads.
If in doubt about the state of your vehicle,
contact a PEUGEOT dealer or a qualified
workshop.
In case of towing
Driving with a trailer places greater
d emands on the towing vehicle and
requires extra care from the driver.
6
Driving
Page 158 of 364
156
Side wind
F Take into account the increased sensitivity to wind.
Cooling
Towing a trailer on a slope increases the
t emperature of the coolant.
As the fan is electrically controlled, its cooling
capacity is not dependent on the engine speed.
F
T
o lower the engine speed, reduce your
speed.
The maximum towable load on an incline
depends on the gradient and the exterior
temperature.
In all cases, keep a
check on the coolant
temperature.
F
I
f this warning lamp and the
STOP warning lamp come on,
stop the vehicle and switch off
the engine as soon as possible.
New vehicle
Do not pull a trailer before having driven at least
approximately 620
miles (1,000
kilometres).
Braking
Towing a trailer increases the braking distance.
T o avoid overheating of the brakes, the use of
engine braking is recommended.
Ty r e s
F Check the tyre pressures of the towing vehicle and of the trailer, observing the
recommended pressures.
Lighting
F Check the electrical lighting and signalling on the trailer and the headlamp beam height
of your vehicle.
For more information on Headlamp
adjustment , refer to the corresponding
section.
The rear parking sensors will be
deactivated automatically to avoid the
audible signal if a
genuine PEUGEOT
towbar is used.
Anti-theft protection
Electronic immobiliser
The keys contain an electronic chip which has
a secret code. When the ignition is switched
on, this code must be recognised in order for
starting to be possible.
A few seconds after switching off the ignition,
this system locks the engine control system,
therefore preventing the engine from being
started in the event of a
break-in.
Starting/Switching off the
engine with the key
Key ignition switch
Ignition on position
If the system fails, as reported by a message,
t he engine will not start.
Contact a
PEUGEOT dealer.
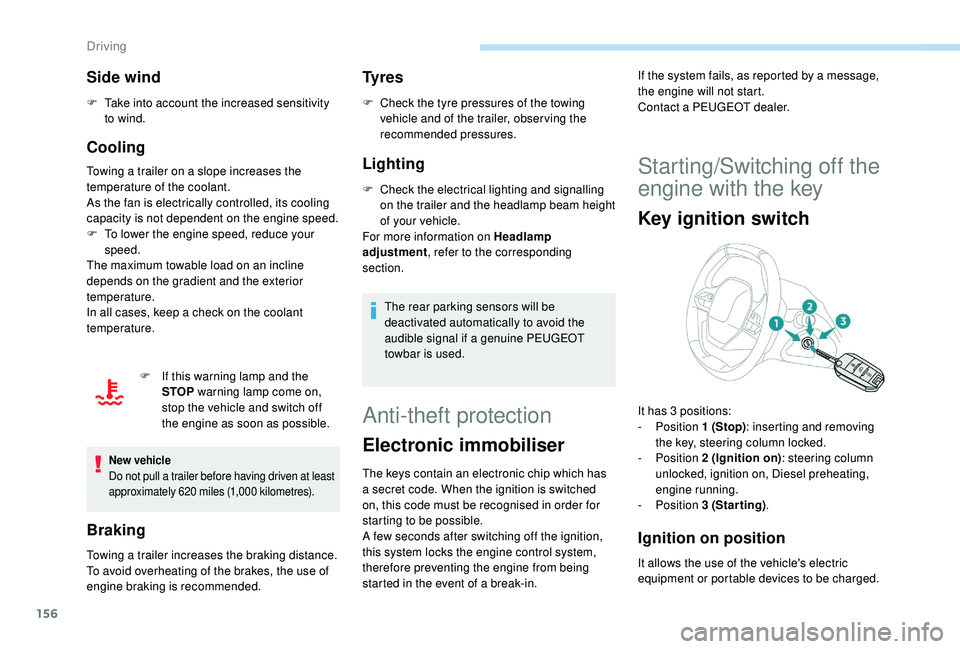
It has 3
positions:
-
Position 1 (Stop): inserting and removing
the key, steering column locked.
-
Position 2 (Ignition on) : steering column
unlocked, ignition on, Diesel preheating,
engine running.
-
Position 3 (Starting) .
It allows the use of the vehicle's electric
equipment or portable devices to be charged.
Driving
Page 164 of 364
162
When towing, parking on a steep slope,
o r if your vehicle is heavily laden, turn
the wheels towards the kerb and engage
a
gear with a
manual gearbox.
When towing, parking on a
steep slope,
or if your vehicle is heavily laden, turn the
wheels towards the kerb and select mode
P with an automatic gearbox.
For towing, your vehicle is approved for
parking on slopes of up to 12%.
Manual operation
Manual release
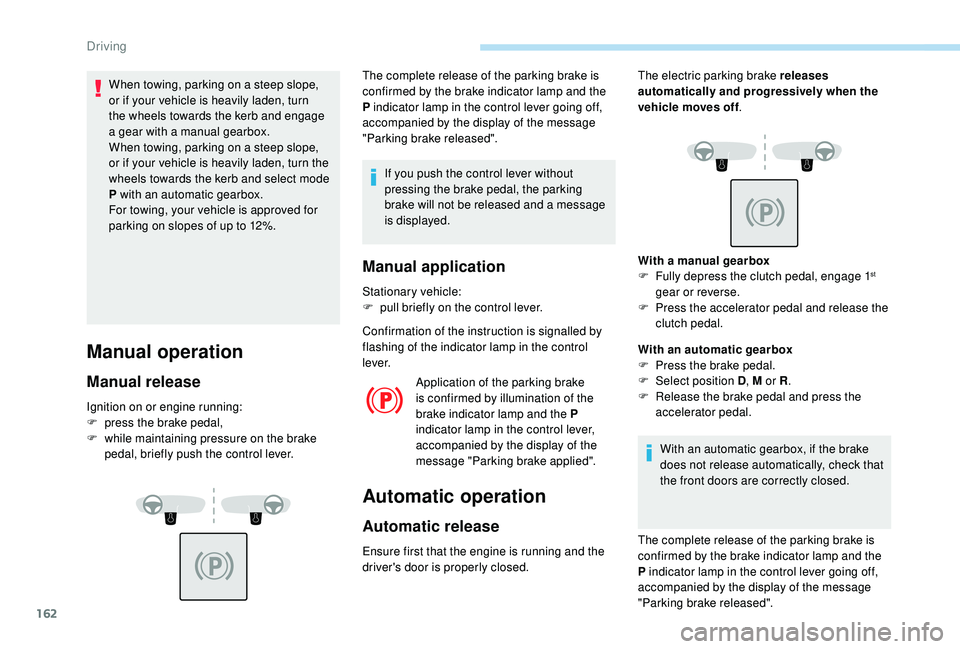
Ignition on or engine running:
F p ress the brake pedal,
F
w
hile maintaining pressure on the brake
pedal, briefly push the control lever. The complete release of the parking brake is
confirmed by the brake indicator lamp and the
P indicator lamp in the control lever going off,
accompanied by the display of the message
"Parking brake released".
If you push the control lever without
pressing the brake pedal, the parking
brake will not be released and a message
is displayed.
Manual application
Stationary vehicle:
F p ull briefly on the control lever.
Confirmation of the instruction is signalled by
flashing of the indicator lamp in the control
l eve r. Application of the parking brake
is confirmed by illumination of the
brake indicator lamp and the P
indicator lamp in the control lever,
accompanied by the display of the
message "Parking brake applied".
Automatic operation
Automatic release
The electric parking brake releases
automatically and progressively when the
vehicle moves off .
With a
manual gearbox
F
F
ully depress the clutch pedal, engage 1
st
gear or reverse.
F
P
ress the accelerator pedal and release the
clutch pedal.
With an automatic gearbox
F
P
ress the brake pedal.
F
Sel
ect position D , M or R.
F
R
elease the brake pedal and press the
accelerator pedal.
With an automatic gearbox, if the brake
does not release automatically, check that
the front doors are correctly closed.
The complete release of the parking brake is
confirmed by the brake indicator lamp and the
P indicator lamp in the control lever going off,
accompanied by the display of the message
"Parking brake released".
Ensure first that the engine is running and the
driver's door is properly closed.
Driving
Page 166 of 364
164
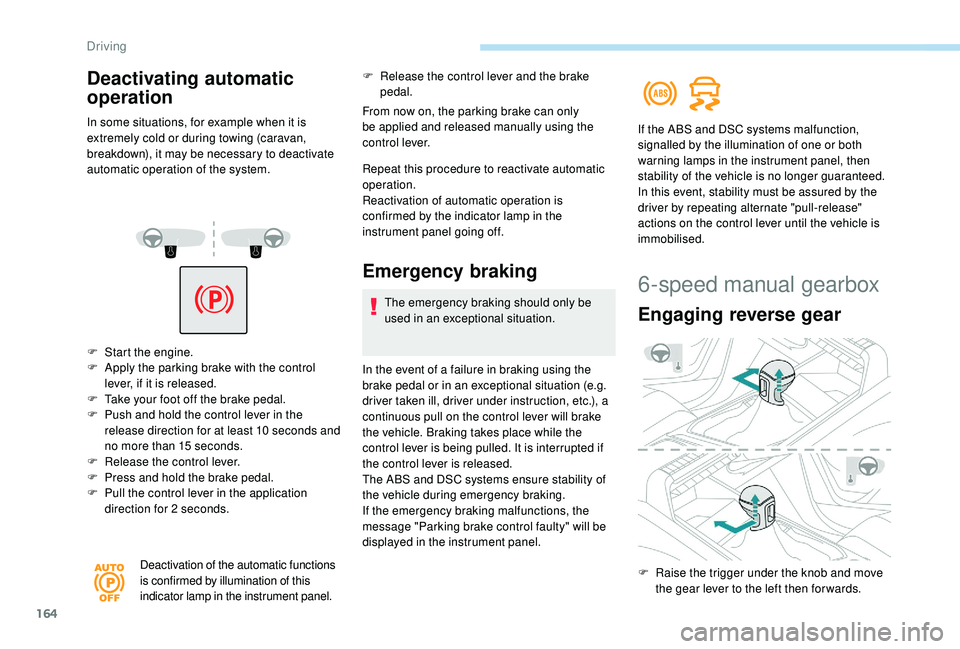
F Start the engine.
F A pply the parking brake with the control
lever, if it is released.
F
T
ake your foot off the brake pedal.
F
P
ush and hold the control lever in the
release direction for at least 10
seconds and
no more than 15
seconds.
F
R
elease the control lever.
F
P
ress and hold the brake pedal.
F
P
ull the control lever in the application
direction for 2
seconds.
Deactivation of the automatic functions
is confirmed by illumination of this
indicator lamp in the instrument panel.
F Release the control lever and the brake pedal.
From now on, the parking brake can only
be applied and released manually using the
control lever.
Repeat this procedure to reactivate automatic
operation.
Reactivation of automatic operation is
confirmed by the indicator lamp in the
instrument panel going off.
Emergency braking
The emergency braking should only be
used in an exceptional situation.
In the event of a
failure in braking using the
brake pedal or in an exceptional situation (e.g.
driver taken ill, driver under instruction, etc.), a
continuous pull on the control lever will brake
the vehicle. Braking takes place while the
control lever is being pulled. It is interrupted if
the control lever is released.
The ABS and DSC systems ensure stability of
the vehicle during emergency braking.
If the emergency braking malfunctions, the
message "Parking brake control faulty" will be
displayed in the instrument panel. If the ABS and DSC systems malfunction,
signalled by the illumination of one or both
warning lamps in the instrument panel, then
stability of the vehicle is no longer guaranteed.
In this event, stability must be assured by the
driver by repeating alternate "pull-release"
actions on the control lever until the vehicle is
immobilised.
Deactivating automatic
operation
In some situations, for example when it is
extremely cold or during towing (caravan,
breakdown), it may be necessary to deactivate
automatic operation of the system.
6-speed manual gearbox
Engaging reverse gear
F Raise the trigger under the knob and move
the gear lever to the left then for wards.
Driving
Page 167 of 364
165
Only engage reverse gear when the
vehicle is stationary with the engine at
idle.
As a safety precaution and to facilitate
starting of the engine, always select
neutral and depress the clutch pedal.
Engaging 5th or 6th gear
F Move the lever fully to the right to engage 5th
or 6th g e a r.
Failure to follow this advice may cause
permanent damage to the gearbox
(engagement of 3
rd or 4th gear by mistake).
Automatic gearbox (EAT6/
E AT 8)
Six or eight-speed automatic gearbox with push
selector. It also offers a manual mode with gear
changes via steering mounted paddles, located
behind the steering wheel.
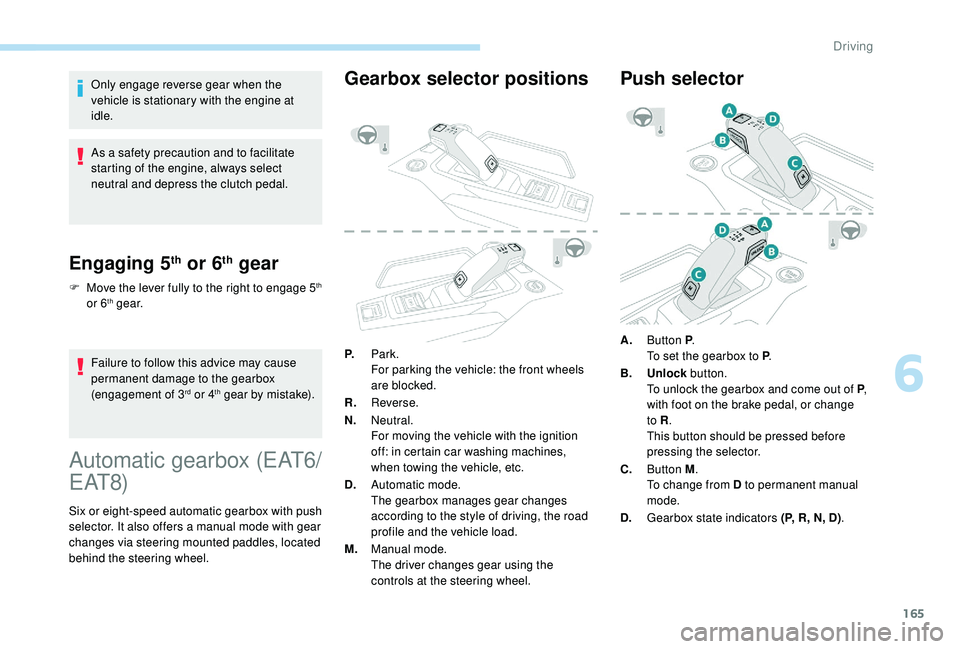
Gearbox selector positions
P. Park.
For parking the vehicle: the front wheels
are blocked.
R. Reverse.
N. Neutral.
For moving the vehicle with the ignition
off: in certain car washing machines,
when towing the vehicle, etc.
D. Automatic mode.
The gearbox manages gear changes
according to the style of driving, the road
profile and the vehicle load.
M. Manual mode.
The driver changes gear using the
controls at the steering wheel.
Push selector
A.Button P .
To set the gearbox to P .
B. Unlock button.
To unlock the gearbox and come out of P ,
with foot on the brake pedal, or change
to R .
This button should be pressed before
pressing the selector.
C. Button M .
To change from D to permanent manual
mode.
D. Gearbox state indicators (P, R, N, D) .
6
Driving