2018 Peugeot 308 air conditioning
[x] Cancel search: air conditioningPage 69 of 324
67
Temperature adjustment
F Press one of the buttons 1 to decrease or increase the value.
Air flow adjustment
F Press one of the buttons 2 to increase or decrease the speed of the air booster fan.
The symbol for air flow (a fan) fills progressively
according to the air flow setting made.
By reducing the air flow to a minimum, you are
stopping ventilation.
Avoid driving for too long with the
ventilation off (risk of misting and
deterioration of air quality).
Air distribution adjustment
These buttons are used to arrange
the distribution of air in the passenger
compartment by combining several air outlets. Windscreen.
Central and side air vents. Footwells.
The air distribution can be adapted by using
several buttons: illumination of the indicator
lamp confirms the presence of fan boosted air
in the direction indicated, the indicator lamp
being off indicates the absence of fan boosted
air in the direction indicated.
For a uniform distribution of air in the
passenger compartment, the three buttons can
be activated simultaneously.
Air conditioning on/off
The air conditioning is designed to operate
effectively in all seasons, with the windows
closed.
It enables you to:
-
l
ower the temperature, in summer,
-
i
ncrease the effectiveness of the demisting
in winter, above 3°C.
F
P
ress button 4 to activate/deactivate the air
conditioning system.
When the indicator lamp is on, the function is
activated.
The air conditioning does not operate
when the air flow adjustment is inhibited. Switching off the air conditioning may result in
some discomfort (humidity, condensation).
To obtain cool air sooner, you can use
recirculation of the interior air for a few
moments. Then return to the intake of exterior
a i r.
Dual-zone automatic
air conditioning (Touch
screen)
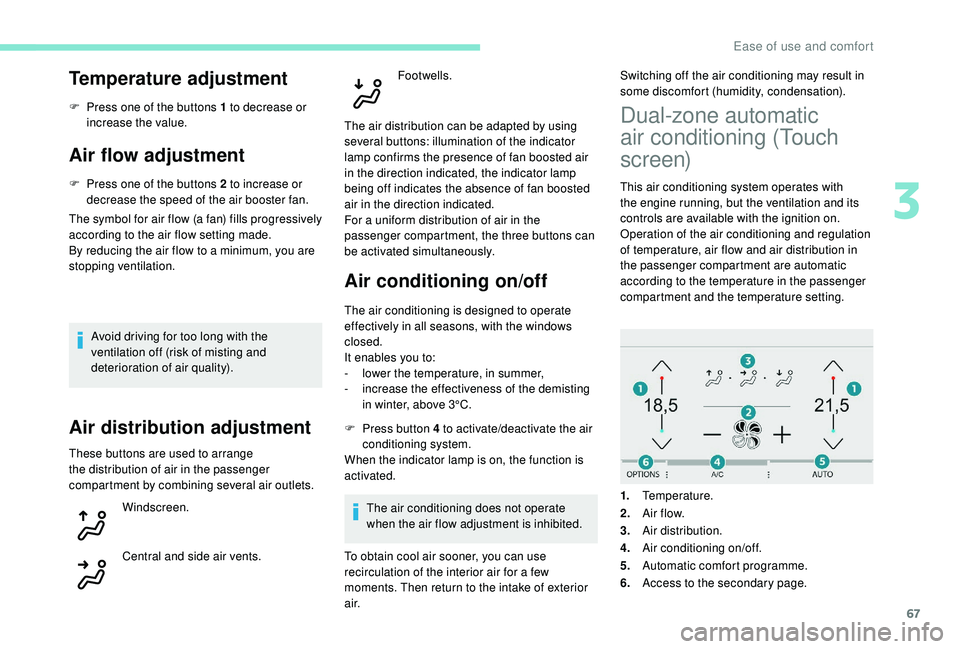
This air conditioning system operates with
the engine running, but the ventilation and its
controls are available with the ignition on.
Operation of the air conditioning and regulation
of temperature, air flow and air distribution in
the passenger compartment are automatic
according to the temperature in the passenger
compartment and the temperature setting.
1. Temperature.
2. A ir f low.
3. Air distribution.
4. Air conditioning on/off.
5. Automatic comfort programme.
6. Access to the secondary page.
3
Ease of use and comfort
Page 70 of 324

68
Press the "Air conditioning " menu
button to display the controls for the
air conditioning system.
Temperature adjustment
The driver and front passenger can each set
the temperature.
F
P
ress one of the buttons 1 to increase or
decrease the air flow.
The value displayed corresponds to a level of
comfort and not to a precise temperature.
It is recommended that you avoid a
difference between the left and right setting
of more than 3.
Automatic comfort
programme
F Press the button 5 to activate/deactivate the automatic mode of the air conditioning
system.
When the indicator lamp in the button is on, the
air conditioning system operates automatically:
the system manages the temperature, air
flow and air distribution in the passenger
compartment in an optimum way depending on
the comfort level you have selected. It is possible to modulate the
intensity of the automatic comfort
programme by choosing one of
three mode settings offered in
a secondary page of the "
Air
conditioning " menu.
To change the current setting, shown by the
green indicator lamp, press the button for the
desired mode:
"Soft": provides soft and quiet
operation by limiting air flow.
"Normal": offers the best
compromise between a comfortable
temperature and quiet operation
(default setting).
"Fast": provides strong and effective
air f low. This setting is associated with AUTO mode
only. However, on deactivation of AUTO mode,
the indicator for the last setting remains on.
Changing the setting does not reactivate AUTO
mode if deactivated.
In cold conditions and when the engine is
cold, to limit distribution of cold air in the
passenger compartment, the air flow will
change gradually until the comfort setting
is reached.
On entering the vehicle, if the interior
temperature is much colder or warmer
than the comfort value setting, there is
no need to alter the value displayed in
order to reach more quickly the required
level of comfort. The system automatically
corrects the temperature difference.
Manual control
You can manually adjust one or more of these
settings, while retaining automatic control of
the other functions:
-
a
ir flow,
-
a
ir distribution.
As soon as you modify a setting, the indicator
lamp in the " AUTO" button goes off.
Ease of use and comfort
Page 71 of 324

69
F Press the AUTO button again to activate the automatic comfort
programme again.
Air flow adjustment
F Press one of the buttons 2 to increase or decrease the speed of the fan.
The air flow symbol (a fan) is filled in
progressively as the speed of the fan is
increased.
By reducing the air flow to minimum, you are
stopping ventilation.
" OFF " is displayed alongside the fan.
Avoid driving for too long with the
ventilation off (risk of misting and
deterioration of air quality).
Air distribution adjustment
You can modulate the distribution of air in the
passenger compartment using these three buttons.
Windscreen.
Central and side air vents.
Footwells. Each press on a button activates or deactivates
the function. The indicator lamp is on when the
button is activated. For a uniform distribution in
the passenger compartment, all three buttons
can be pressed simultaneously.
In AUTO mode, the indicator lamps in all three
buttons are off.
Air conditioning on/off
The air conditioning is designed to operate
effectively in all seasons, with the windows
closed.
It enables you to:
-
l
ower the temperature, in summer,
-
i
ncrease the effectiveness of the demisting
in winter, above 3°C.
F
P
ress button 4 to activate/deactivate the air
conditioning system.
When the indicator lamp under the button is on,
the air conditioning function is activated.
The air conditioning does not operate when the
air flow adjustment is set to off.
Ventilation function with the
ignition on
When the ignition is switched on, you can use
the ventilation system to adjust the air flow
and air distribution settings in the passenger
compartment for a duration that depends on
the battery charge. This function does not operate the air
conditioning.
"Mono" function
The comfort setting for the passenger's side
can be indexed to the driver's comfort setting
(mono-zone).
From the secondary page of the "
Air
conditioning " menu:
F
P
ress this button to activate/
deactivate the "Mono" function.
The indicator lamp in the button
is on when the function is
activated.
The function is deactivated automatically when
the passenger uses their temperature setting
buttons.
Recirculation of interior air
The intake of exterior air prevents the formation
of mist on the windscreen and side windows.
3
Ease of use and comfort
Page 72 of 324
70
F Press this button to activate/deactivate the function.
When the indicator lamp is on, the function is
activated.
Avoid prolonged use of recirculation
of interior air – Risk of misting and
deterioration of air quality!
The system activates automatically when
reverse gear is engaged.
Front demist –
defrost
These markings on the control panel
indicate the control positions for
rapid demisting or defrosting of the
windscreen and side windows.
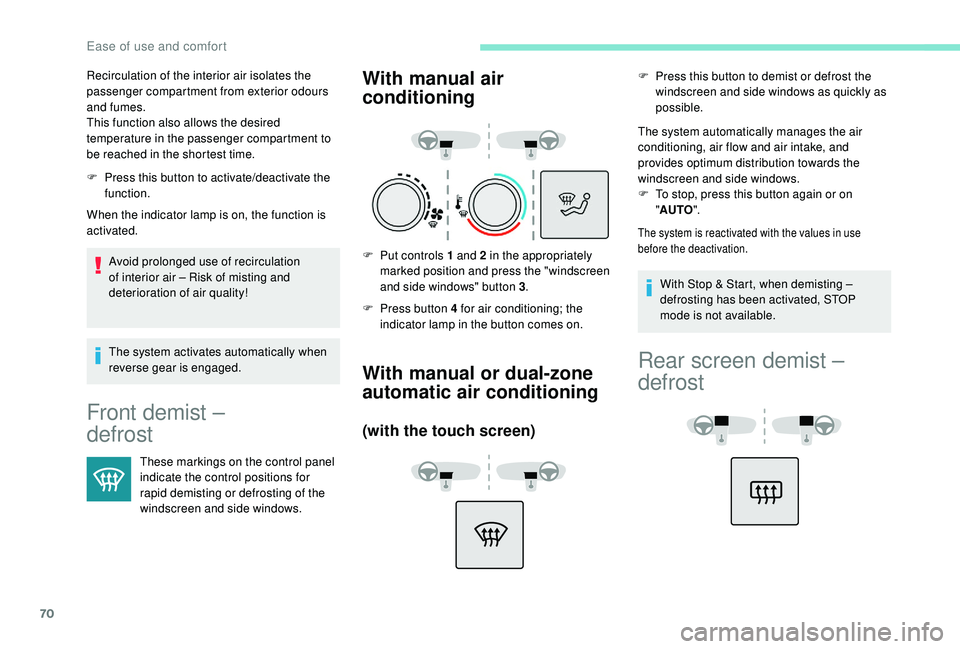
With manual air
conditioning
F Put controls 1 and 2 in the appropriately marked position and press the "windscreen
and side windows" button 3 .
F
P
ress button 4 for air conditioning; the
indicator lamp in the button comes on.
With manual or dual-zone
automatic air conditioning
(with the touch screen)
F Press this button to demist or defrost the windscreen and side windows as quickly as
possible.
The system automatically manages the air
conditioning, air flow and air intake, and
provides optimum distribution towards the
windscreen and side windows.
F
T
o stop, press this button again or on
" AUTO ".
The system is reactivated with the values in use
before the deactivation.
Recirculation of the interior air isolates the
passenger compartment from exterior odours
and fumes.
This function also allows the desired
temperature in the passenger compartment to
be reached in the shortest time.
With Stop & Start, when demisting –
defrosting has been activated, STOP
mode is not available.
Rear screen demist –
defrost
Ease of use and comfort
Page 83 of 324
81
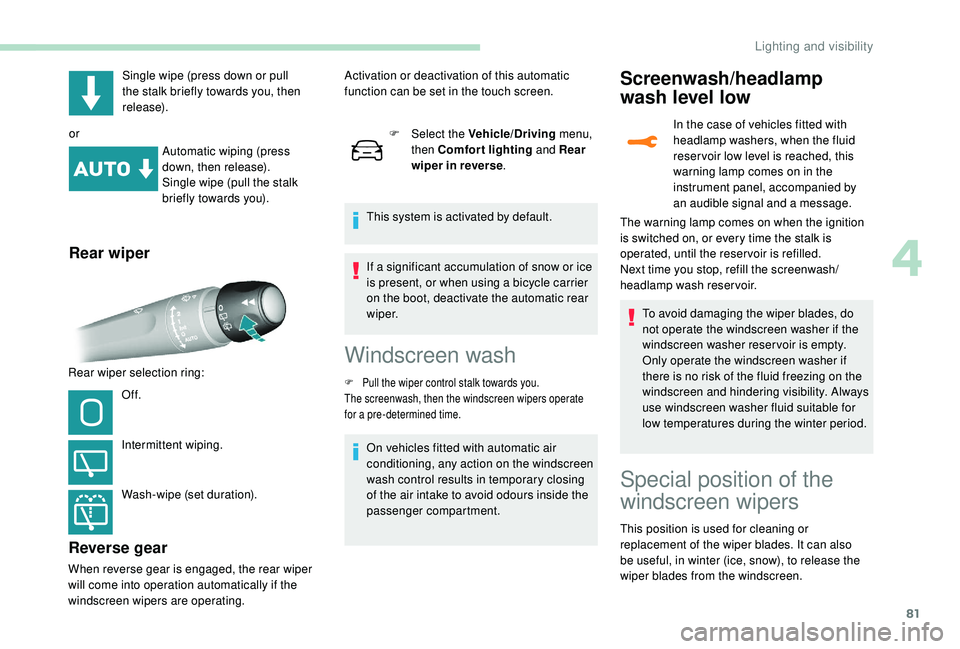
Single wipe (press down or pull
the stalk briefly towards you, then
release).
or Automatic wiping (press
down, then release).
Single wipe (pull the stalk
briefly towards you).
Rear wiper
Rear wiper selection ring:
Of f.
Intermittent wiping.
Wash-wipe (set duration).
Reverse gear
When reverse gear is engaged, the rear wiper
will come into operation automatically if the
windscreen wipers are operating. F
Sel
ect the Vehicle/Driving
menu,
then Comfort lighting and Rear
wiper in reverse .
This system is activated by default.
Activation or deactivation of this automatic
function can be set in the touch screen.
If a significant accumulation of snow or ice
is present, or when using a bicycle carrier
on the boot, deactivate the automatic rear
w i p e r.
Windscreen wash
F Pull the wiper control stalk towards you.
The screenwash, then the windscreen wipers operate
for a pre-determined time.
On vehicles fitted with automatic air
conditioning, any action on the windscreen
wash control results in temporary closing
of the air intake to avoid odours inside the
passenger compartment.
Screenwash/headlamp
wash level low
In the case of vehicles fitted with
headlamp washers, when the fluid
reser voir low level is reached, this
warning lamp comes on in the
instrument panel, accompanied by
an audible signal and a message.
To avoid damaging the wiper blades, do
not operate the windscreen washer if the
windscreen washer reservoir is empty.
Only operate the windscreen washer if
there is no risk of the fluid freezing on the
windscreen and hindering visibility. Always
use windscreen washer fluid suitable for
low temperatures during the winter period.
The warning lamp comes on when the ignition
is switched on, or every time the stalk is
operated, until the reser voir is refilled.
Next time you stop, refill the screenwash/
headlamp wash reservoir.
Special position of the
windscreen wipers
This position is used for cleaning or
replacement of the wiper blades. It can also
be useful, in winter (ice, snow), to release the
wiper blades from the windscreen.
4
Lighting and visibility
Page 127 of 324
125
Starting the vehicle
From mode P:
F P ress the brake pedal down fully.
F
S
tart the engine.
F
M
aintaining pressure on the brake pedal,
press the Unlock button.
F
P
ush once or twice rear ward to select the
automatic mode D , or for ward to engage
reverse R .
From neutral N :
F
P
ress the brake pedal down fully.
F
S
tart the engine.
F
M
aintaining pressure on the brake pedal,
push rear ward to select the automatic
mode D , or for ward, while pressing the
Unlock
button to engage reverse R .
Then, from D or R :
F
R
elease the brake pedal.
F
A
ccelerate progressively to automatically
release the electric parking brake.
F
W
ith the parking brake released, the vehicle
then moves off.
In severe wintry conditions (temperature
below -23°C), it is recommended that the
engine be allowed to run for a few minutes
before moving off, to ensure the correct
operation and durability of the engine and
gearbox. If your vehicle has an automatic gearbox,
never try to start the engine by pushing
the vehicle.
Stopping the vehicle
Whatever the state of the gearbox when the
ignition is switched off, mode P is engaged
automatically, with the exception of mode N
,
in which case mode P will be engaged after
a delay of 5
seconds (allowing the change to
free-wheel).
Check that mode P has been engaged and that
the electric parking brake has been applied
automatically; if not, apply it manually.
The corresponding indicator lamps for
the selector and the electric parking
brake control lever must be on, as well
as the ones in the instrument panel.
SPORT/ECO control
Driver Sport Pack
With the engine running, when the Driver
Spor t Pack is activated, the gearbox delays
changing up for a more dynamic driving style.
The programme is automatically deactivated
when the ignition is switched off.Eco mode
Activating this mode reduces fuel consumption
by optimising the operation of the heating and
air conditioning and, depending on version, the
pedals, the automatic gearbox and the gear
shift indicator. Activating the Driver Spor t Pack is not
recommended in the following situations:
-
A
SR system deactivated,
-
l
ow fuel level reached,
-
l
ow AdBlue level reached.
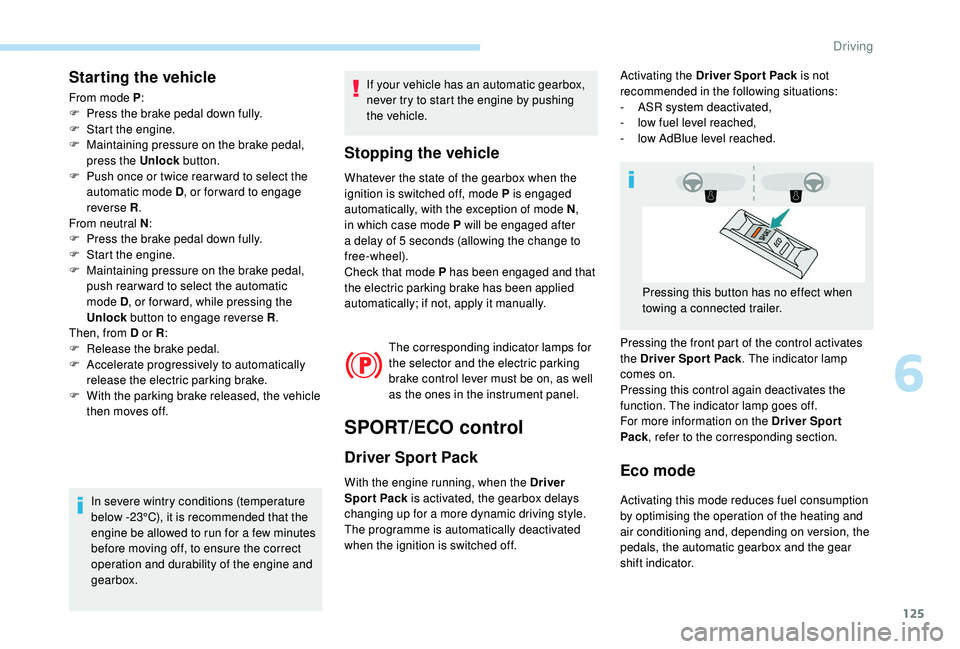
Pressing the front part of the control activates
the Driver Spor t Pack . The indicator lamp
comes on.
Pressing this control again deactivates the
function. The indicator lamp goes off.
For more information on the Driver Spor t
Pack , refer to the corresponding section.
Pressing this button has no effect when
towing a connected trailer.
6
Driving
Page 131 of 324
129
- With a manual gearbox, when you fully
depress the clutch pedal.
-
W
ith an automatic gearbox :
•
g
ear selector in position D or M , when
you release the brake pedal,
•
o
r gear selector in position N and brake
pedal released, when you place the gear
selector in position D or M ,
•
o
r when you engage reverse.
Special cases: START mode
activated automatically
START mode is activated automatically if:
- you open the driver's door,
-
y
ou unfasten the driver's seat belt,
-
t
he speed of the vehicle exceeds 2 mph
(3
km/h),
-
t
he electric parking brake is being
applied,
-
s
ome temporary conditions (battery
charge, engine temperature, braking
assistance, air conditioning setting,
etc.) require the engine to be running to
control the system or the vehicle.
In this case, this indicator lamp flashes
for a few seconds, then goes off.
This operation is perfectly normal.
Deactivation/Reactivation
In certain cases, such as the need to maintain
a comfortable temperature in the passenger
compartment, it may be useful to deactivate the
Stop & Start system.
The system can be deactivated at any time, once
the ignition is switched on.
If the engine is in STOP mode, it restarts
immediately.
The Stop & Start system is reactivated
automatically every time the ignition is switched on.
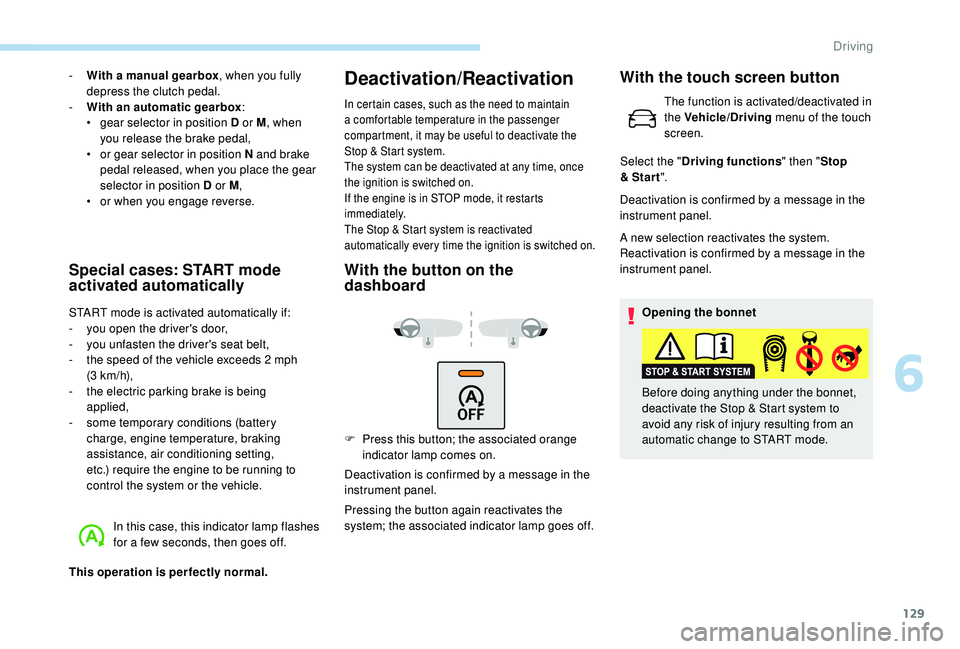
With the button on the
dashboard
F Press this button; the associated orange indicator lamp comes on.
Deactivation is confirmed by a message in the
instrument panel.
Pressing the button again reactivates the
system; the associated indicator lamp goes off. Deactivation is confirmed by a message in the
instrument panel.
A new selection reactivates the system.
Reactivation is confirmed by a message in the
instrument panel.
Opening the bonnet
Before doing anything under the bonnet,
deactivate the Stop & Start system to
avoid any risk of injury resulting from an
automatic change to START mode.
With the touch screen button
The function is activated/deactivated in
the Vehicle/Driving menu of the touch
screen.
Select the " Driving functions " then "Stop
& Star t ".
6
Driving
Page 183 of 324

181
F Press the trigger fully in and remove the towball by pulling it toward you.
F
O
n the towball, push the latch to the left and
hold it in this position.
F
A
t the same time, push the trigger for wards
to unlock the mechanism (position B ).
F
I
nstall and clip the protective plug in the
carrier located below the rear bumper.
F
S
tow the towball in its bag.
Energy economy mode
System which manages the duration of use of
certain functions to conser ve a sufficient level
of charge in the battery.
After the engine has stopped, you can still use
functions such as the audio and telematics
system, windscreen wipers, dipped beam
headlamps,
courtesy lamps, etc. for a
maximum combined duration of about forty
minutes.
Switching to this mode
A message appears in the instrument panel
screen indicating that the vehicle has switched
to economy mode and the active functions are
put on standby.
If a telephone call is being made at this
time, it will be maintained for around
10
minutes with the Bluetooth hands-free
kit of your audio system.
Exiting the mode
These functions will be automatically restored
the next time the vehicle is used.
In order to restore the use of these functions
immediately, start the engine and let it run:
-
f
or less than ten minutes, to use the
equipment for approximately five minutes, A flat battery prevents the engine from
starting.
For more information on the 12
V batter y
,
refer to the corresponding section.
Load reduction mode
System which manages the use of certain
functions according to the level of charge
remaining in the battery.
When the vehicle is being driven, the load
reduction function temporarily deactivates
certain functions, such as air conditioning,
heated rear screen, etc.
The deactivated functions are reactivated
automatically as soon as conditions permit. -
f
or more than ten minutes, to use the
equipment for up to approximately thirty
minutes.
Let the engine run for the duration specified to
ensure that the battery charge is sufficient.
Do not repeatedly and continuously restart the
engine in order to charge the battery.
7
Practical information