2018 Peugeot 308 turn signal
[x] Cancel search: turn signalPage 18 of 324

16
Warning/indicator lampState CauseActions/Observations
+
+ SCR emissions
control system
Fixed when the ignition is switched
on, accompanied by an audible signal
and a message. A fault with the SCR emissions
control system has been detected.
This alert disappears once the
exhaust emissions return to normal
levels.
AdBlue® warning lamp flashing, on
switching on the ignition, associated
with the fixed Ser vice and engine
diagnostic warning lamps, accompanied
by an audible signal and a message
indicating the remaining driving range.Depending on the message
displayed, you can continue driving
for up to 685
miles (1,100 km) before
the engine starting prevention system
is triggered. Carry out (3) as soon as possible to
avoid breaking down
.
AdBlue
® warning lamp flashing,
on switching on the ignition,
associated with the fixed Ser vice and
engine diagnostic warning lamps,
accompanied by an audible signal
and a message. An engine immobiliser prevents
the engine from restarting (over
the authorised driving limit after
confirmation of a fault with the
emissions control system).
To restart the engine, carry out (2).
Distance Alert/
Active Safety
Brake * Fixed, accompanied by a message.
The system has been deactivated via
the vehicle configuration menu.
*
O
nly with display screen 2 .Flashing.
The system is operating.The vehicle brakes briefly so as to
reduce the speed of collision with the
vehicle ahead.
Fixed, accompanied by a message
and an audible signal. The system has a fault.
Carry out (3).
Instruments
Page 47 of 324
45
Central locking not
functioning
Use these procedures in the following cases:
- c entral locking fault,
-
b
attery disconnected or discharged.
In the event of a malfunction with the
central locking system, the battery must
be disconnected to lock the boot and thus
ensure that the vehicle is locked fully.
Driver's door
F Insert the key in the door lock.
F T urn the key towards the front of the vehicle
to unlock it, or towards the rear to lock it.
If fitted to your vehicle, the alarm is not
activated/deactivated when the vehicle is
locked/unlocked.
Opening a door will trigger the alarm,
which can be stopped by switching the
ignition on.
Passenger doorsF Turn the key towards the rear again within 5 seconds to deadlock the vehicle.
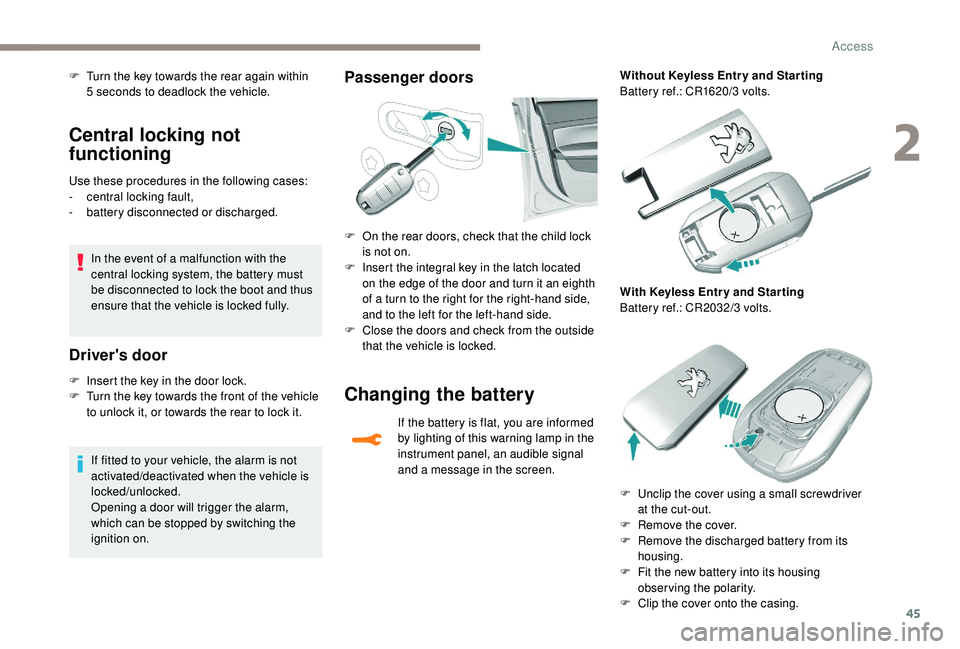
F
O
n the rear doors, check that the child lock
is not on.
F
I
nsert the integral key in the latch located
on the edge of the door and turn it an eighth
of a turn to the right for the right-hand side,
and to the left for the left-hand side.
F
C
lose the doors and check from the outside
that the vehicle is locked.
Changing the battery
If the battery is flat, you are informed
by lighting of this warning lamp in the
instrument panel, an audible signal
and a message in the screen. Without Keyless Entr y and Star ting
Battery ref.: CR1620/3 volts.
With Keyless Entr y and Star ting
Battery ref.: CR2032/3 volts.
F
U
nclip the cover using a small screwdriver
at the cut-out.
F
R
emove the cover.
F
R
emove the discharged battery from its
housing.
F
F
it the new battery into its housing
observing the polarity.
F
C
lip the cover onto the casing.
2
Access
Page 55 of 324
53
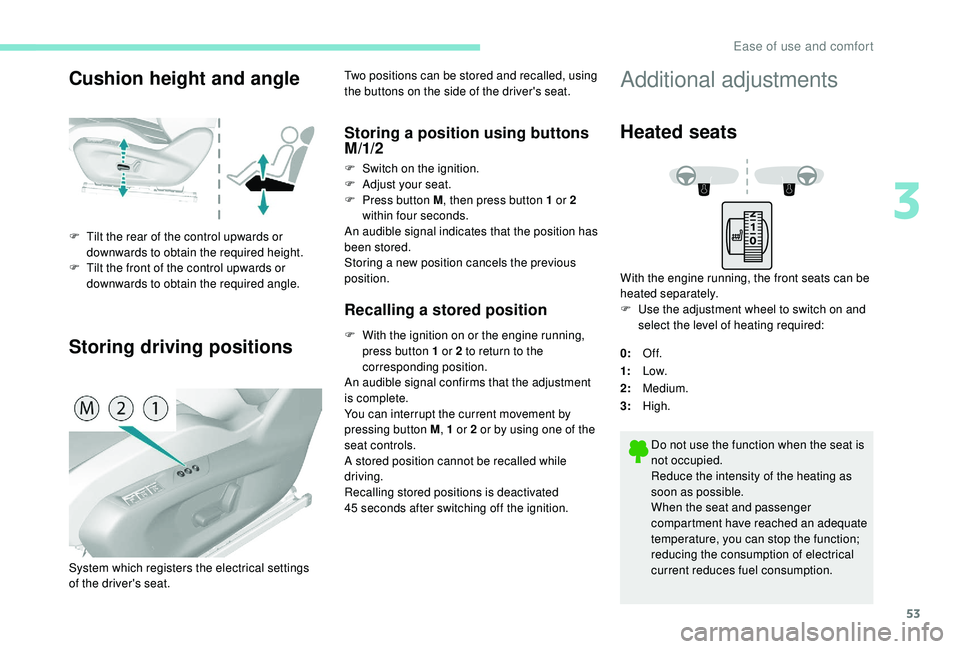
Cushion height and angle
Storing driving positions
F Tilt the rear of the control upwards or downwards to obtain the required height.
F
T
ilt the front of the control upwards or
downwards to obtain the required angle. Two positions can be stored and recalled, using
the buttons on the side of the driver's seat.
Storing a position using buttons
M/1/2
F Switch on the ignition.
F
Adj ust your seat.
F
P
ress button M , then press button 1 or 2
within four seconds.
An audible signal indicates that the position has
been stored.
Storing a new position cancels the previous
position.
Recalling a stored position
F With the ignition on or the engine running, press button 1 or 2 to return to the
corresponding position.
An audible signal confirms that the adjustment
is complete.
You can interrupt the current movement by
pressing button M , 1 or 2 or by using one of the
seat controls.
A stored position cannot be recalled while
driving.
Recalling stored positions is deactivated
45
seconds after switching off the ignition.
System which registers the electrical settings
of the driver's seat.
Additional adjustments
Heated seats
With the engine running, the front seats can be
heated separately.
F
U
se the adjustment wheel to switch on and
select the level of heating required:
0: Of f.
1: Low.
2: Medium.
3: High.
Do not use the function when the seat is
not occupied.
Reduce the intensity of the heating as
soon as possible.
When the seat and passenger
compartment have reached an adequate
temperature, you can stop the function;
reducing the consumption of electrical
current reduces fuel consumption.
3
Ease of use and comfort
Page 77 of 324
75
Front and rear foglamps
When the lighting is switched off automatically
(version with AUTO lighting), the foglamp goes
of f.
F
T
o switch it off, turn the ring rear wards.
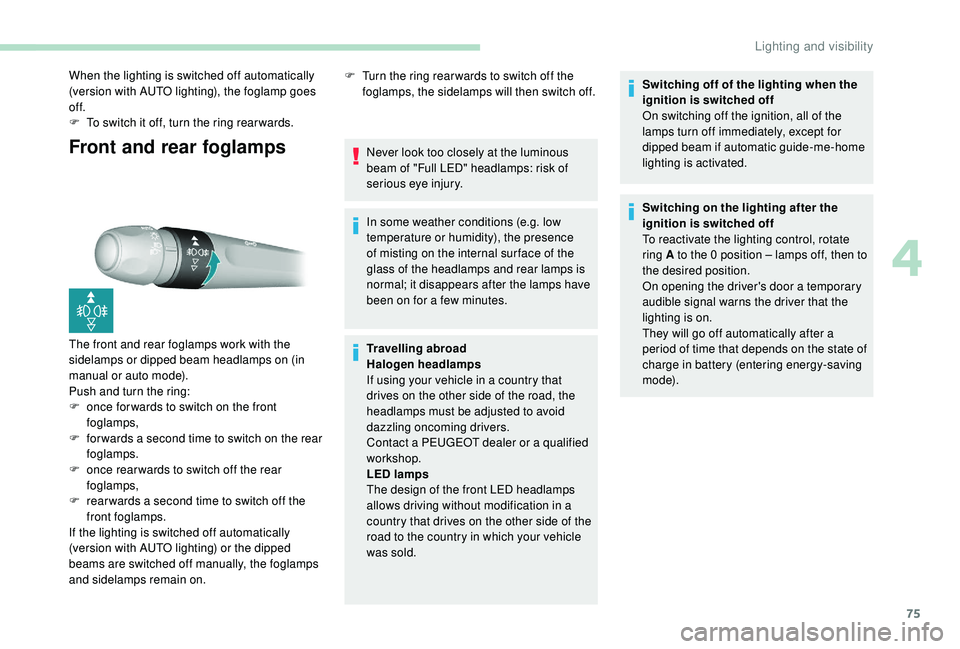
The front and rear foglamps work with the
sidelamps or dipped beam headlamps on (in
manual or auto mode).
Push and turn the ring:
F
o
nce for wards to switch on the front
foglamps,
F
f
or wards a second time to switch on the rear
foglamps.
F
o
nce rear wards to switch off the rear
foglamps,
F
r
ear wards a second time to switch off the
front foglamps.
If the lighting is switched off automatically
(version with AUTO lighting) or the dipped
beams are switched off manually, the foglamps
and sidelamps remain on. F
T urn the ring rear wards to switch off the
foglamps, the sidelamps will then switch off.
Never look too closely at the luminous
beam of "Full LED" headlamps: risk of
serious eye injury.
In some weather conditions (e.g. low
temperature or humidity), the presence
of misting on the internal sur face of the
glass of the headlamps and rear lamps is
normal; it disappears after the lamps have
been on for a few minutes.
Travelling abroad
Halogen headlamps
If using your vehicle in a country that
drives on the other side of the road, the
headlamps must be adjusted to avoid
dazzling oncoming drivers.
Contact a PEUGEOT dealer or a qualified
workshop.
LED lamps
The design of the front LED headlamps
allows driving without modification in a
country that drives on the other side of the
road to the country in which your vehicle
was sold. Switching off of the lighting when the
ignition is switched off
On switching off the ignition, all of the
lamps turn off immediately, except for
dipped beam if automatic guide-me-home
lighting is activated.
Switching on the lighting after the
ignition is switched off
To reactivate the lighting control, rotate
ring A to the 0 position – lamps off, then to
the desired position.
On opening the driver's door a temporary
audible signal warns the driver that the
lighting is on.
They will go off automatically after a
period of time that depends on the state of
charge in battery (entering energy-saving
m o d e).
4
Lighting and visibility
Page 78 of 324

76
Daytime running lamps/
Sidelamps
These lamps light up automatically when the
engine starts.
Automatic illumination of
headlamps
When a low level of ambient light is detected
by the sunshine sensor, the number plate
lamps,
sidelamps and dipped beam headlamps
are switched on automatically, without any
action on the part of the driver. They may also
Switching on
Switching off
F Turn the ring to another position. Deactivation of the function is accompanied
by the display of a message.
Operating fault
In the event of a malfunction of the
sunshine sensor, the lighting comes
on, this warning lamp is displayed in
the instrument panel, accompanied
by an audible signal and/or a
message.
Contact a PEUGEOT dealer or a qualified
workshop. In fog or snow, the sunshine sensor may
detect sufficient light. In this case, the
lighting will not come on automatically.
Do not cover the sunshine sensor,
integrated with the rain sensor and located
at the top of the windscreen behind the
rear view mirror; the associated functions
would no longer be controlled.
They provide the following functions:
-
D
aytime running lamps (lighting control
stalk at position " 0" or " AUTO " with
adequate light level).
-
S
idelamps (lighting control stalk at position
" AUTO " with low light levels or "Sidelamps
only" or "Dipped/main beam headlamps"). F
T
urn the ring to the AUTO position.
Activation of the function is accompanied by
the display of a message.
Automatic headlamp
dipping
System which automatically changes between
dipped and main beam according to the
exterior light level and the driving conditions,
using a camera located at the top of the
windscreen.
This system is a driving aid.
The driver remains responsible for the
vehicle's lighting, its correct use for the
prevailing conditions of light, visibility,
traffic and obser vation of driving and
vehicle regulations.
The system will be operational as soon as
you exceed 16
mph (25 km/h).
If the speed drops below 9
mph (15 km/h),
the system no longer operates.
come on if rain is detected, at the same time as
automatic operation of the windscreen wipers.
As soon as the light returns to a sufficient level
or after the windscreen wipers are switched off,
the lamps are switched off automatically.
Lighting and visibility
Page 89 of 324
87
Definitions
Anti-lock braking system (ABS)
and electronic brake force
distribution (EBFD)
This system improves the stability and
manoeuvrability of your vehicle when braking and
contributes towards improved control on corners, in
particular on poor or slippery road sur faces.
The ABS prevents wheel lock in the event of
emergency braking.
The EBFD manages the braking pressure wheel by
wheel.
Emergency braking assistance
(EBA)
In an emergency, this system permits the
optimum braking pressure to be reached
more quickly, therefore reducing the stopping
distance.
It is triggered in relation to the speed at which
the brake pedal is pressed. The effect of this is
a reduction in the resistance of the pedal and
an increase in braking efficiency.
Anti-slip regulation (ASR)
The ASR system (also known as Traction Control)
optimises traction in order to limit wheel slip by
acting on the brakes of the driving wheels and
on the engine. It also improves the directional
stability of the vehicle on acceleration.
Dynamic stability control (DSC)
If there is a difference between the path
followed by the vehicle and that required by
the driver, the DSC monitors each wheel and
automatically acts on the brake of one or more
wheels and on the engine to return the vehicle
to the required path, within the limits of the laws
of physics.
Trailer stability assist (TSA)
Depending on the version, your vehicle has
a system allowing control of the vehicle to be
retained when towing a trailer, so as to avoid
the risk of snaking.
Intelligent traction control
system
Depending on version, your vehicle has a
system to help driving on snow: intelligent
traction control.
This system detects situations of poor sur face
grip that could make it difficult to move off
or make progress on deep fresh snow or
compacted snow.
In these situations, the intelligent traction
control limits the amount of wheel spin to
provide the best traction and trajectory control
for your vehicle. The use of snow tyres is strongly
recommended on sur faces offering low
levels of grip.
Anti-lock braking system
(ABS) and electronic brake
force distribution (EBD)
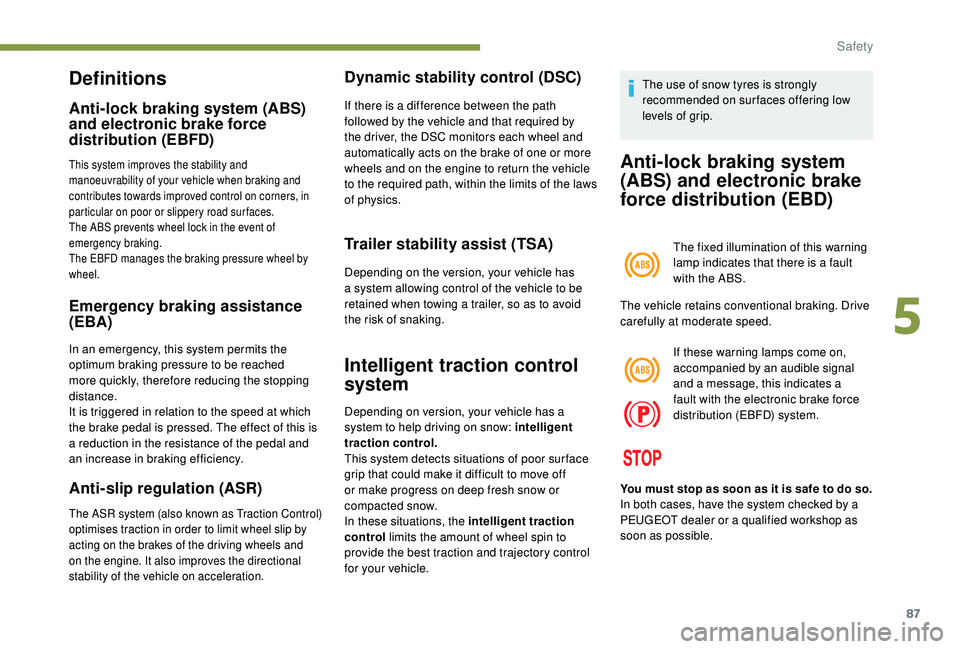
The fixed illumination of this warning
lamp indicates that there is a fault
with the ABS.
The vehicle retains conventional braking. Drive
carefully at moderate speed.
If these warning lamps come on,
accompanied by an audible signal
and a message, this indicates a
fault with the electronic brake force
distribution (EBFD) system.
You must stop as soon as it is safe to do so.
In both cases, have the system checked by a
PEUGEOT dealer or a qualified workshop as
soon as possible.
5
Safety
Page 101 of 324
99
Deactivating the front
passenger airbag
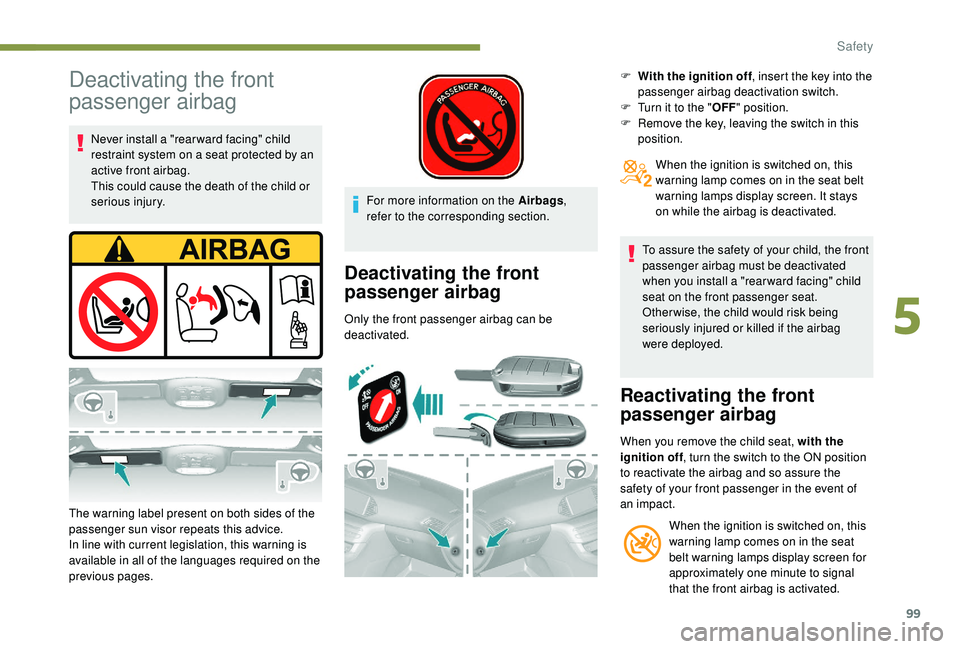
Never install a "rear ward facing" child
restraint system on a seat protected by an
active front airbag.
This could cause the death of the child or
serious injury.
The warning label present on both sides of the
passenger sun visor repeats this advice.
In line with current legislation, this warning is
available in all of the languages required on the
previous pages. For more information on the Airbags
,
refer to the corresponding section.
Deactivating the front
passenger airbag
Only the front passenger airbag can be
deactivated. F
W
ith the ignition off
, insert the key into the
passenger airbag deactivation switch.
F
T
urn it to the "
OFF" position.
F
R
emove the key, leaving the switch in this
position.
When the ignition is switched on, this
warning lamp comes on in the seat belt
warning lamps display screen. It stays
on while the airbag is deactivated.
To assure the safety of your child, the front
passenger airbag must be deactivated
when you install a "rear ward facing" child
seat on the front passenger seat.
Otherwise, the child would risk being
seriously injured or killed if the airbag
were deployed.
Reactivating the front
passenger airbag
When you remove the child seat, with the
ignition off , turn the switch to the ON position
to reactivate the airbag and so assure the
safety of your front passenger in the event of
an impact.
When the ignition is switched on, this
warning lamp comes on in the seat
belt warning lamps display screen for
approximately one minute to signal
that the front airbag is activated.
5
Safety
Page 117 of 324
115
When towing a trailer, parking on a steep
slope, or if your vehicle is heavily loaded,
turn the front wheels towards the kerb and
engage a gear.
When towing a trailer, your vehicle is
approved for parking on slopes of up to
12% .
The technology adopted for the electric
parking brake does not allow the fitment of
15-inch wheels.
Automatic release
Ensure first that the engine is running and the
driver's door is properly closed.
The electric parking brake releases
automatically and progressively when the
vehicle moves off.
With a manual gearbox : fully depress the
clutch pedal, engage first gear or reverse;
press the accelerator pedal and release the
clutch pedal.
With an automatic gearbox : select position D,
M or R then press the accelerator pedal. The complete release of the parking
brake is confirmed by the brake
indicator lamp and the P indicator
lamp in the control lever going off,
accompanied by the display of a
message.
When stationary with the engine running, do not
depress the accelerator pedal unnecessarily,
you risk releasing the parking brake.
Automatic application
With the vehicle stationary, the parking brake is
automatically applied when the ignition is
switched off
.
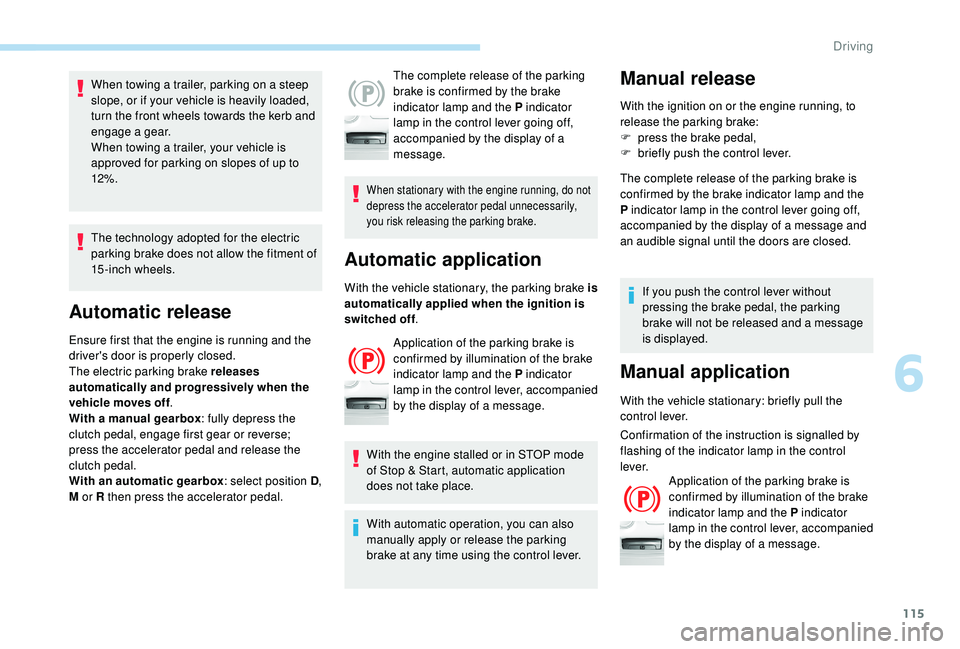
Application of the parking brake is
confirmed by illumination of the brake
indicator lamp and the P indicator
lamp in the control lever, accompanied
by the display of a message.
With the engine stalled or in STOP mode
of Stop & Start, automatic application
does not take place.
With automatic operation, you can also
manually apply or release the parking
brake at any time using the control lever.
Manual release
With the ignition on or the engine running, to
release the parking brake:
F
p
ress the brake pedal,
F
b
riefly push the control lever.
The complete release of the parking brake is
confirmed by the brake indicator lamp and the
P indicator lamp in the control lever going off,
accompanied by the display of a message and
an audible signal until the doors are closed.
If you push the control lever without
pressing the brake pedal, the parking
brake will not be released and a message
is displayed.
Manual application
With the vehicle stationary: briefly pull the
control lever.
Confirmation of the instruction is signalled by
flashing of the indicator lamp in the control
l eve r. Application of the parking brake is
confirmed by illumination of the brake
indicator lamp and the P indicator
lamp in the control lever, accompanied
by the display of a message.
6
Driving