2018 Peugeot 308 ignition
[x] Cancel search: ignitionPage 170 of 324

168
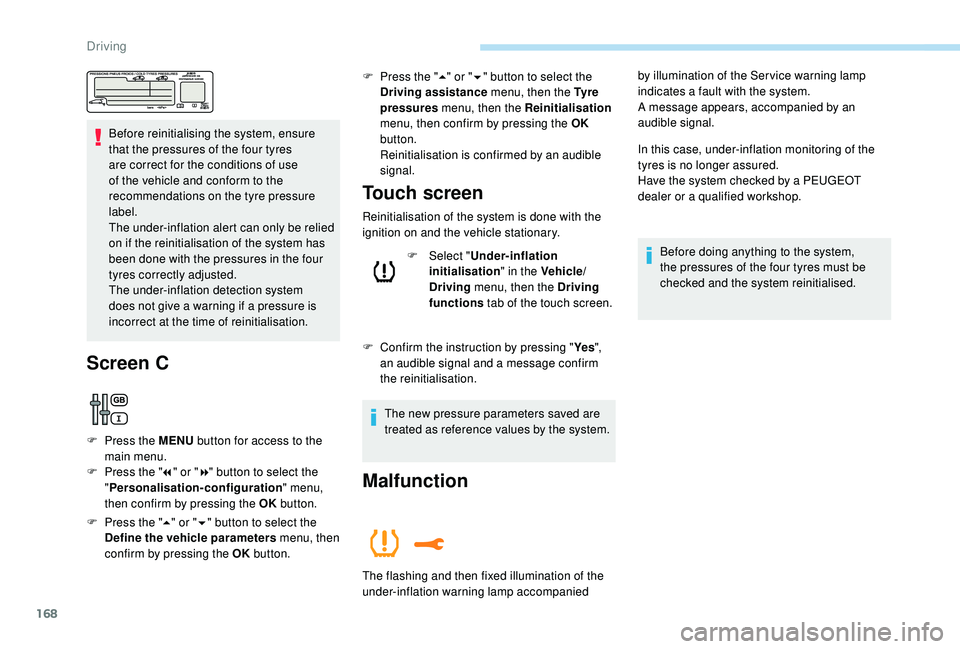
Before reinitialising the system, ensure
that the pressures of the four tyres
are correct for the conditions of use
of the vehicle and conform to the
recommendations on the tyre pressure
label.
The under-inflation alert can only be relied
on if the reinitialisation of the system has
been done with the pressures in the four
tyres correctly adjusted.
The under-inflation detection system
does not give a warning if a pressure is
incorrect at the time of reinitialisation.
Screen C
F Press the MENU button for access to the
main menu.
F
P
ress the " 7" or " 8" button to select the
" Personalisation-configuration " menu,
then confirm by pressing the OK button.
F
P
ress the " 5" or " 6" button to select the
Define the vehicle parameters menu, then
confirm by pressing the OK button.F
P
ress the "
5" or " 6" button to select the
Driving assistance menu, then the Ty r e
pressures menu, then the Reinitialisation
menu, then confirm by pressing the OK
button.
Reinitialisation is confirmed by an audible
signal.
Touch screen
Reinitialisation of the system is done with the
ignition on and the vehicle stationary.
F
Sel
ect "
Under-inflation
initialisation " in the Vehicle/
Driving menu, then the Driving
functions tab of the touch screen.
F
C
onfirm the instruction by pressing " Ye s",
an audible signal and a message confirm
the reinitialisation.
The new pressure parameters saved are
treated as reference values by the system.
Malfunction
In this case, under-inflation monitoring of the
tyres is no longer assured.
Have the system checked by a PEUGEOT
dealer or a qualified workshop.
Before doing anything to the system,
the pressures of the four tyres must be
checked and the system reinitialised.
The flashing and then fixed illumination of the
under-inflation warning lamp accompanied by illumination of the Ser vice warning lamp
indicates a fault with the system.
A message appears, accompanied by an
audible signal.
Driving
Page 173 of 324

171
When it first comes on, less than 6 litres of fuel
r emain in the tank.
You must refuel as soon as possible to avoid
running out of fuel.
Fuel cut- of f
Your vehicle is fitted with a safety system that
cuts off the supply of fuel in the event of an
impact.
If your vehicle is fitted with Stop & Start,
never refuel with the engine in STOP
mode; you must switch off the ignition.
Diesel misfuel prevention
Mechanical device which prevents filling the
tank of a Diesel vehicle with petrol. It helps
avoid the risk of engine damage that can result
from filling with the wrong fuel.
Located in the filler neck, the misfuel
prevention device appears when the filler cap
is removed. It is still possible to use a fuel can to fill the
t a n k s l ow l y.
In order to ensure a good flow of fuel,
do not place the nozzle of the fuel can in
direct contact with the flap of the misfuel
prevention device.Driving abroad
As Diesel fuel pump nozzles may be
different in other countries, the presence
of the misfuel prevention device may make
refuelling impossible.
Not all Diesel vehicles are fitted with
misfuel protection, so before travelling
abroad, we recommend that you check
with the PEUGEOT dealer network,
whether your vehicle is suitable for the
fuel pumps in the country in which you
intend to travel.
When a petrol filler nozzle is introduced into the
Diesel tank, it comes into contact with the flap.
The system remains closed and prevents filling.
Do not persist but introduce a Diesel type
filler nozzle.
7
Practical information
Page 186 of 324

184
1.Screenwash fluid reservoir.
2. Engine coolant reservoir.
3. Brake fluid reser voir.
4. Battery/Fuses.
5. Fusebox.
6. A i r f i l t e r.
7. Engine oil dipstick.
8. Engine oil filler cap.
9. Remote earth point.
10. Priming pump*
The Diesel circuit is under very high
pressure.
All work on this circuit must be carried out
only by a PEUGEOT dealer or a qualified
workshop.
*
D
epending on engine.
Checking levels
Check all of these levels regularly, in line with
the manufacturer's service schedule. Top them
up if necessary, unless other wise indicated.
If a level drops significantly, have the
corresponding system checked by a PEUGEOT
dealer or a qualified workshop. The liquid must comply with the
manufacturer's recommendations and with
the vehicle's engine.
Take care when working under the bonnet,
as certain areas of the engine may be
extremely hot (risk of burns) and the
cooling fan could start at any time (even
with the ignition off).
Used products
Avoid prolonged contact of used oil or
fluids with the skin.
Most of these fluids are harmful to health
or indeed very corrosive.
Do not discard used oil or fluids into
sewers or onto the ground.
Take used oil to a PEUGEOT dealer or
a qualified workshop and dispose of it in
the containers reser ved for this purpose.
Engine oil level
The check is carried out either when
the ignition is switched on using the oil
level indicator in the instrument panel
for vehicles equipped with an electric
gauge, or using the dipstick.
To ensure that the reading is correct, your
vehicle must be parked on a level sur face
with the engine stopped for more than
30
minutes.
It is normal to top up the oil level between
two ser vices (or oil changes). PEUGEOT
recommends that you check the level, and top
up if necessary, every 3,000
miles (5,000 km).
Checking using the dipstick
The location of the dipstick is shown in the
corresponding underbonnet layout view.
F
T
ake the dipstick by its coloured grip and
pull it out completely.
F
W
ipe the end of the dipstick using a clean
non-fluffy cloth.
F
R
efit the dipstick and push fully down, then
pull it out again to make the visual check:
the correct level is between marks A and B .
Practical information
Page 187 of 324

185
A = MA X
B = MIN
If you find that the level is above the A mark or
below the B mark, do not star t the engine .
-
I
f the level is above the MAX mark (risk of
damage to the engine), contact a PEUGEOT
dealer or a qualified workshop.
-
I
f the level is below the MIN mark, you must
top up the engine oil.
Oil grade
Before topping up the oil or changing the oil,
check that the oil is the correct grade for your
engine and conforms to the manufacturer's
recommendations.
The location of the oil filler cap is shown in the
corresponding underbonnet layout view.
F
U
nscrew the oil filler cap to access the filler
opening.
Topping up the engine oil level
After topping up the oil, the check when
switching on the ignition with the oil level
indicator in the instrument panel is not
valid during the 30
minutes after topping
up.
Engine oil change
In order to maintain the reliability of the engine
and emissions control system, never use
additives in the engine oil.
Brake fluid level
The brake fluid level must be between
the marking " A" (MA X located on the
remote reservoir) and the marking " B"
(MIN located on the main reser voir). If
it is not, check the brake pad wear.
Changing the fluid
Refer to the personalised ser vice schedule for
your vehicle.
Fluid specification
This fluid must conform to the manufacturer's
recommendations.
Coolant level
Check the coolant level regularly.
It is normal to top up this fluid
between two services.
The check and top-up must only be done with
the engine cold.
A low coolant level presents a risk of serious
damage to your engine.
The coolant level should be close to the "MA X"
mark but should never exceed it.
If the level is close to or below the "MIN" mark,
it is essential to top up.
F
A
dd oil in small quantities, avoiding any
spills on engine components (risk of fire).
F
W
ait a few minutes before checking the
level again using the dipstick.
F
A
dd more oil if necessary.
F
A
fter checking the level, carefully refit the oil
filler cap and the dipstick in its tube.
7
Practical information
Page 192 of 324

190
In the event of contact with the skin, wash the
affected area with soap and water. In the event
of contact with the eyes, wash (irrigate) the
eyes with large amounts of water or with an eye
wash solution for at least 15 minutes. If you feel
a persistent burning sensation or irritation, get
medical attention.
If swallowed, immediately wash out the mouth
with clean water and then drink plenty of water.
In certain conditions (at high temperature,
for example), the risk of release of ammonia
cannot be excluded: do not inhale the vapour.
Ammonia has an irritant effect on mucous
membranes (eyes, nose and throat).
Keep AdBlue
® in its original container and
out of the reach of children.
Procedure
Before starting the top up procedure, ensure
that the vehicle is parked on a flat and level
sur face.
In winter, check that the temperature of the
vehicle is above -11°C. If not, due to freezing,
the AdBlue
® cannot be poured into the tank.
Park your vehicle somewhere warmer for a few
hours before topping up. In the event of an AdBlue
® breakdown,
confirmed by the message "Add AdBlue:
Starting impossible", you must top up with
at least 5
litres.
Never pour AdBlue
® into the Diesel fuel
tank.
For the specifics associated with the
access configuration for the AdBlue
® tank
(via the boot or via the fuel filler flap), refer
to the descriptions given in detail further
on.
If any AdBlue
® is splashed, or if there are
any spillages on the side of the body, rinse
immediately with cold water or wipe with a
damp cloth.
If the fluid has crystallised, clean it off
using a sponge and hot water.
Important: in the event of a top-up after a
breakdown because of a lack of AdBlue,
you must wait around 5
minutes before
switching on the ignition, without opening
the driver’s door, locking the vehicle,
introducing the key into the ignition
switch, or introducing the key of the
K
eyless Entr y and Star ting system into
the passenger compartment.
Switch on the ignition, then wait for
10
seconds before starting the engine.
Practical information
Page 193 of 324

191
Access to the AdBlue® tank
via the boot
Filling the AdBlue® tank is an operation
included in every routine ser vice on your
vehicle by a PEUGEOT dealer or a qualified
workshop.
Nevertheless, given the capacity of the tank, it
may be necessary to top up the fluid between
ser vices, as soon as an alert (warning lamps
and a message) indicates it.
You can go to a PEUGEOT dealer or a qualified
workshop.
If you intend to do the topping-up yourself,
read the following procedure carefully.
The supply in a non-drip bottle simplifies
topping up.
F
S
witch off the ignition and remove the key. F
W
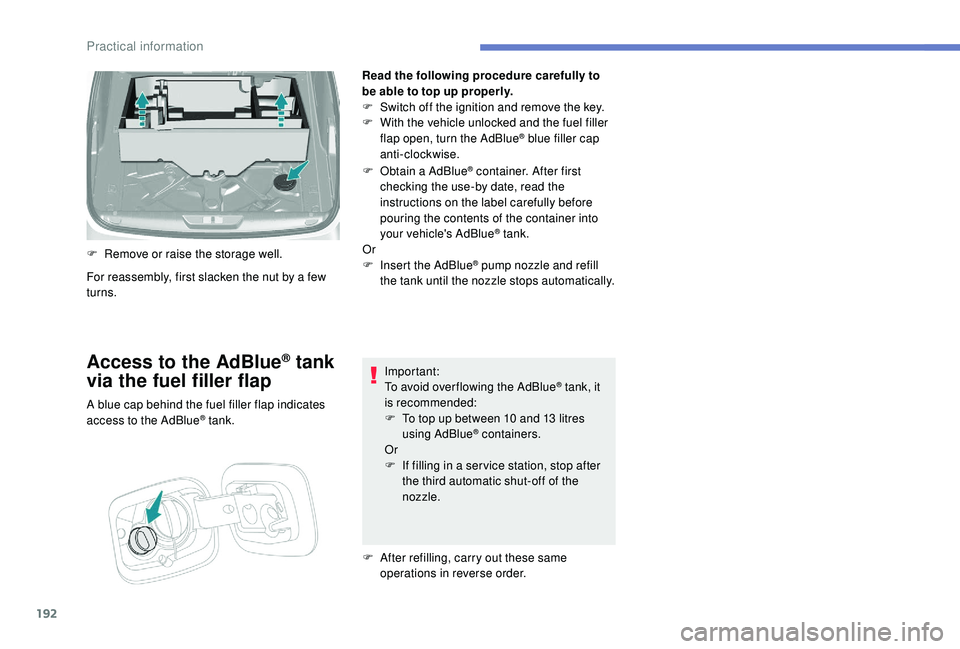
orking inside the boot, lift the carpet and
then, depending on the equipment, lift out
the spare wheel and/or the storage well.
F
W
ithout pressing, turn the black cap a
quarter turn anti-clockwise and lift it off.
F
T
urn the blue cap anti-clockwise.
F
O
btain non-drip bottles of AdBlue
®. After
first checking the use-by date, carefully
read the instructions for use on the label
before pouring the contents of the bottle into
your vehicle's AdBlue
® tank.
F
A
fter filling, per form the same operations in
reverse order.
With subwoofer
- Carefully disengage the wiring harness from its housing to give a little more free cable
length.
-
U
ndo the central nut and remove the
fastener (nut and bolt).
F
P
lace the subwoofer to the side of the boot.
7
Practical information
Page 194 of 324

192
Read the following procedure carefully to
be able to top up properly.
F
S
witch off the ignition and remove the key.
F
W
ith the vehicle unlocked and the fuel filler
flap open, turn the AdBlue
® blue filler cap
anti-clockwise.
F
O
btain a AdBlue
® container. After first
checking the use-by date, read the
instructions on the label carefully before
pouring the contents of the container into
your vehicle's AdBlue
® tank.
Or
F
I
nsert the AdBlue
® pump nozzle and refill
the tank until the nozzle stops automatically.
Important:
To avoid over flowing the AdBlue
® tank, it
i
s recommended:
F
T
o top up between 10 and 13
litres
using AdBlue
® containers.
Or
F
I
f filling in a ser vice station, stop after
the third automatic shut-off of the
nozzle.
F
A
fter refilling, carry out these same
operations in reverse order.
Access to the AdBlue® tank
via the fuel filler flap
A blue cap behind the fuel filler flap indicates
access to the AdBlue® tank.
For reassembly, first slacken the nut by a few
turns. F
R
emove or raise the storage well.
Practical information
Page 196 of 324

194
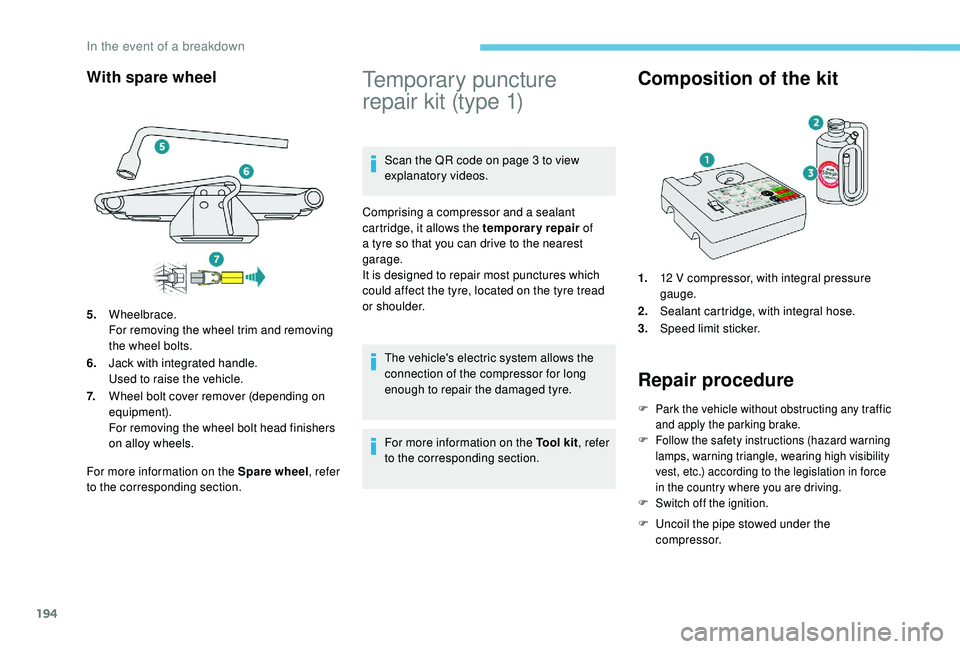
With spare wheel
For more information on the Spare wheel, refer
to the corresponding section.
Temporary puncture
repair kit (type 1)
Scan the QR code on page 3 to view
explanatory videos.
Comprising a compressor and a sealant
cartridge, it allows the temporary repair of
a tyre so that you can drive to the nearest
garage.
It is designed to repair most punctures which
could affect the tyre, located on the tyre tread
or shoulder.
The vehicle's electric system allows the
connection of the compressor for long
enough to repair the damaged tyre.
For more information on the Tool kit , refer
to the corresponding section.
Composition of the kit
1. 12 V compressor, with integral pressure
gauge.
2. Sealant cartridge, with integral hose.
3. Speed limit sticker.
Repair procedure
F Park the vehicle without obstructing any traffic
and apply the parking brake.
F
F
ollow the safety instructions (hazard warning
lamps, warning triangle, wearing high visibility
vest, etc.) according to the legislation in force
in the country where you are driving.
F
S
witch off the ignition.
F Uncoil the pipe stowed under the compressor.
5.
Wheelbrace.
For removing the wheel trim and removing
the wheel bolts.
6. Jack with integrated handle.
Used to raise the vehicle.
7. Wheel bolt cover remover (depending on
equipment).
For removing the wheel bolt head finishers
on alloy wheels.
In the event of a breakdown