2018 PEUGEOT 108 child lock
[x] Cancel search: child lockPage 4 of 180

2
.
.
Instrument panels 8
D isplays 9
Warning and indicator lamps
9
I
ndic ators
18
Trip computer
1
8
Adjusting the time
2
0Keys
22
"
K
eyless Entry and Starting" system
2
3
Doors 26
Boot
27
Front electric windows
2
8
Quarter windows
2
9
Electric fabric roof
2
9
Advice on care
3
1
Front seats
3
2
Rear seats
3
4
Mirrors
35
Steering wheel adjustment
3
6
Ventilation
3
6
Heating
3
7
Manual air conditioning
3
7
Automatic air conditioning
3
8
Front demist – defrost
4
0
Rear screen demist – defrost
4
1
Courtesy lamp
4
1
Boot lighting
4
1
Interior fittings
4
2
Rear shelf
4
4
Boot fittings
4
5Lighting control stalk
4
6
Automatic headlamp illumination
4
8
Direction indicators
4
8
Headlamp adjustment
4
9
Wiper control stalk
4
9
Changing a
wiper blade
5
0
General safety recommendations 5 1
H o r n 51
Hazard warning lamps
5
2
ESC system
5
2
Seat belts
5
4
Airbags
56
Child seats
5
9
Deactivating the front passenger airbag
6
0
ISOFIX mountings and child seats
6
6
i-Size child seats
7
0
Child lock
7
1
InstrumentsAccess
Over view
Ease of use and comfort Lighting and visibility
Safety
Eco-driving
Instruments and controls 4
E co-driving
6
Contents
Page 28 of 180

26
Check that the light on the electronic key
flashes 4 times.
While this function is activated, the "
K
eyless
Entry and Starting" system is inoperative.
To reactivate the electronic key, press one of
the buttons (open or closed padlock).
Changing the battery of the
electronic key
Battery type: CR2032/3 volts.
I f the battery of the electronic key is
defective, this warning lamp comes
on in the instrument panel. F
F
it the new battery into its compartment
observing the original fitting direction.
F
R
eplace the protective cover.
F
C
lip the cover onto the casing.
Advice
Remote control/electronic key
These high frequency remote controls are
sensitive systems; do not handle them
while in your pocket as there is a
risk that
the vehicle may unlock without you being
aware of it.
Do not repeatedly press the buttons of
your remote control or your electronic key
when out of range and out of sight of your
vehicle. You may stop it from working.
The remote control would then have to be
reinitialised.
Locking the vehicle
Driving with the doors locked could make
it difficult for the emergency ser vices to
enter the vehicle in an emergency.
As a
safety precaution (with children on
board), remove the key from the ignition or
take the electronic key when you leave the
vehicle, even for a
short time. Lost keys, remote control, electronic
key
Visit a
PEUGEOT dealer with the vehicle's
registration certificate, your personal
identification documents and if possible,
the label bearing the key code.
The PEUGEOT dealer will be able to look
up the key code and the transponder code
required to order a new key.
Purchasing a
second-hand vehicle
Have the pairing of all of the keys in your
possession checked by a
PEUGEOT
dealer, to ensure that only your keys can
be used to open and start the vehicle.
F
U
nclip the cover using a
small screwdriver
at the cut-out.
F
R
emove the casing.
F
R
emove the protective cover from the
battery by pulling it upwards.
F
R
emove the dead battery from its
compartment.
Doors
Locking/unlocking from
inside
Access
Page 30 of 180

28
With the " Keyless Entry and
Starting " system
If the vehicle had previously been unlocked
using the front doors, it is not necessary to
have the electronic key on your person to use
the button for opening the boot.
F
W
ith the electronic key on your person,
press the button on the boot sill to lock it.
or
Lock the vehicle using the front doors. When closing the boot, be careful not to
slam the boot lid: guide it as it closes and
release it towards the end of its travel.
Emergency control
Measures for mechanically unlocking the boot
in the event of a
battery or central locking fault.
Unlocking
F Fold the rear seat backrest to gain access to the lock from inside the boot.
F
U
sing a screwdriver protected by a cloth,
remove the 4
retaining clips then the boot
trim.
F
M
ove the catch to the right to unlock the
boot.
Front electric windows
(Depending on version).
1. Left-hand front.
2. Right-hand front.
After switching on the ignition, press one of the
controls to open or pull it to close. The window
stops as soon as the control is released.
The driver has access to the controls for
both front windows.
The window controls are inoperative with
the ignition switched off.
The operation of closing the windows
could cause serious injuries.
Make sure that nothing obstructs the
windows from being raised, and pay
special attention to children.
F
W
ith the electronic key on your person,
press the button for opening the boot, to
unlock and partially open it.
The vehicle is also unlocked.
F
L
ift the boot lid by the outside handle to
open it.
Access
Page 32 of 180
30
Position 0:Roof completely closed.
Position 1: Stop position during automatic
closure of the roof.
Position 2: Roof completely open.
Opening
F Press briefly on the control in the opening
direction to open the roof by stages.
or
F
P
ress the control in the opening direction
and keep it pressed until the beginning
of operation, to fully open the roof. A new
press stops the roof moving.
Closing
F Press briefly on the control in the closing direction to close the roof in stages.
or
F
P
ress the control in the closing direction
and keep it pressed until the beginning of
operation to close the roof to position 1 .
Pressing it again stops the roof moving.
F
T
o close the roof completely, keep the
control pressed (between positions 1
and 0)
until the roof is heard to lock. The operation of closing the roof could
cause serious injuries: pay particular
attention to children.
If the roof does not close correctly:
-
c
heck that nothing is hindering the closure
(ignition off),
-
r
epeat the command to close (engine
running).
If the problem persists, contact a PEUGEOT
dealer or a qualified workshop.
Protecting the electric control
motors for opening and closing
the roof
During repeated opening and closing
movements of the roof, it is possible that
heating up of the electric motors no longer
allows the roof to be opened or closed. Allow
the motors to cool by not trying to move the
roof for ten minutes.
Operating fault
If there is an electrical fault, contact
a
PEUGEOT dealer or a qualified workshop.
Acoustic air deflector
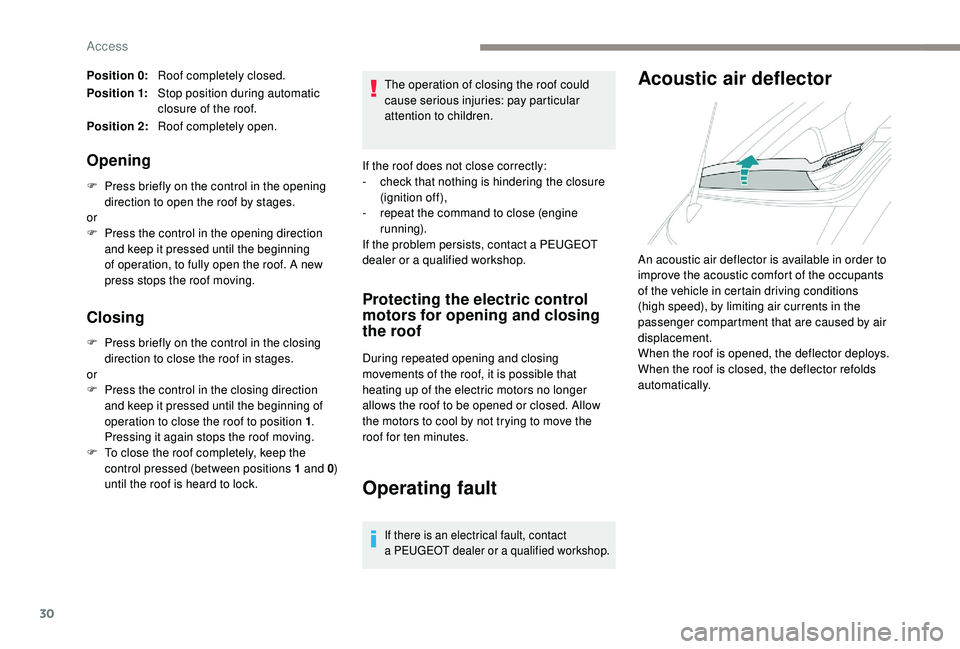
An acoustic air deflector is available in order to
improve the acoustic comfort of the occupants
of the vehicle in certain driving conditions
(high speed), by limiting air currents in the
passenger compartment that are caused by air
displacement.
When the roof is opened, the deflector deploys.
When the roof is closed, the deflector refolds
automatically.
Access
Page 35 of 180
33
With the engine running, the front seats can be
heated separately.
F
P
ress the switch. The indicator lamp comes
on.
F
P
ressing a
second time stops operation.
The temperature is controlled automatically.
The heated seat function is deactivated
approximately two minutes after the ignition is
switched off. To reactivate the function, switch
on the ignition and press the control again.
Switch off the heated seats as soon as
you consider it necessary, as reducing
the consumption of electrical current
reduces fuel consumption.
Do not use the function when the seat is
not occupied.
Reduce the intensity of the heating as
soon as possible.
When the seat and passenger
compartment have reached an
adequate temperature, you can stop
the function; reducing the consumption
of electrical current reduces fuel
consumption. Prolonged use at the highest setting is
not recommended for those with sensitive
skin.
There is a
risk of burns for people whose
perception of heat is impaired (illness,
taking medication, for example).
There is a
risk of overheating the system if
material with insulating properties is used,
such as cushions or seat covers.
Do not use the function:
-
i
f wearing damp clothing,
-
i
f child seats are fitted.
To avoid breaking the heating element in
the seat:
-
d
o not place heavy objects on the seat,
-
d
o not kneel or stand on the seat,
-
d
o not place sharp objects on the seat,
-
d
o not spill liquids onto the seat.
To avoid the risk of short-circuit:
-
d
o not use liquid products for cleaning
the seat,
-
n
ever use the heating function when
the seat is damp.Access to rear seats
(3-door)
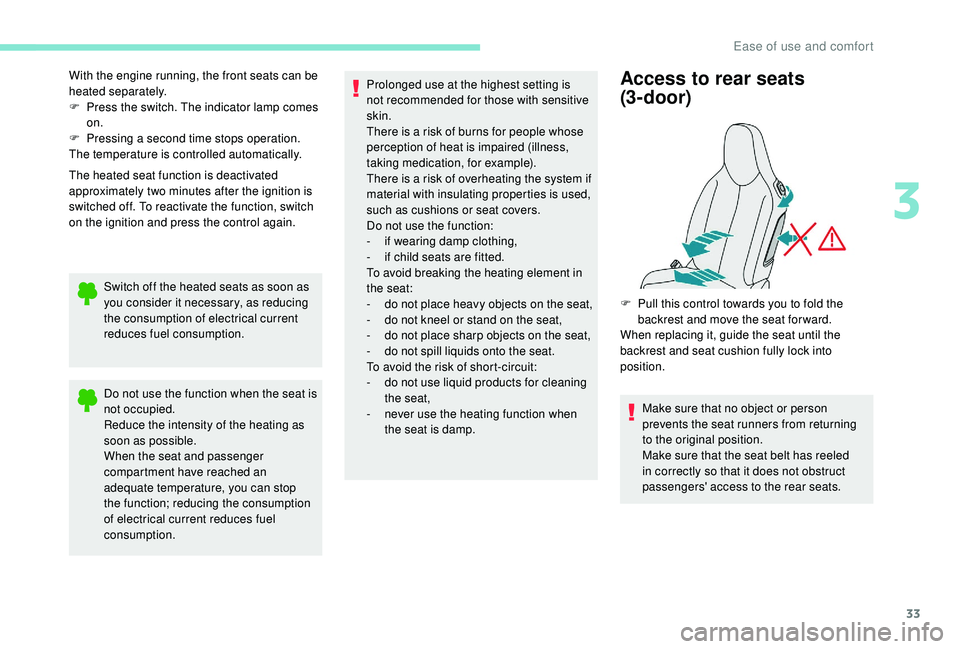
F Pull this control towards you to fold the backrest and move the seat for ward.
When replacing it, guide the seat until the
backrest and seat cushion fully lock into
position.
Make sure that no object or person
prevents the seat runners from returning
to the original position.
Make sure that the seat belt has reeled
in correctly so that it does not obstruct
passengers' access to the rear seats.
3
Ease of use and comfort
Page 68 of 180
66
U:Seat suitable for the installation of
a
child seat secured using a seat belt
and universally approved, rearward
and/or for ward facing, with the front
seat adjusted in the middle longitudinal
position.
U (R): same as U , with the vehicle seat which
must be adjusted in the rearmost
longitudinal position, backrest
straightened.
ISOFIX mountings
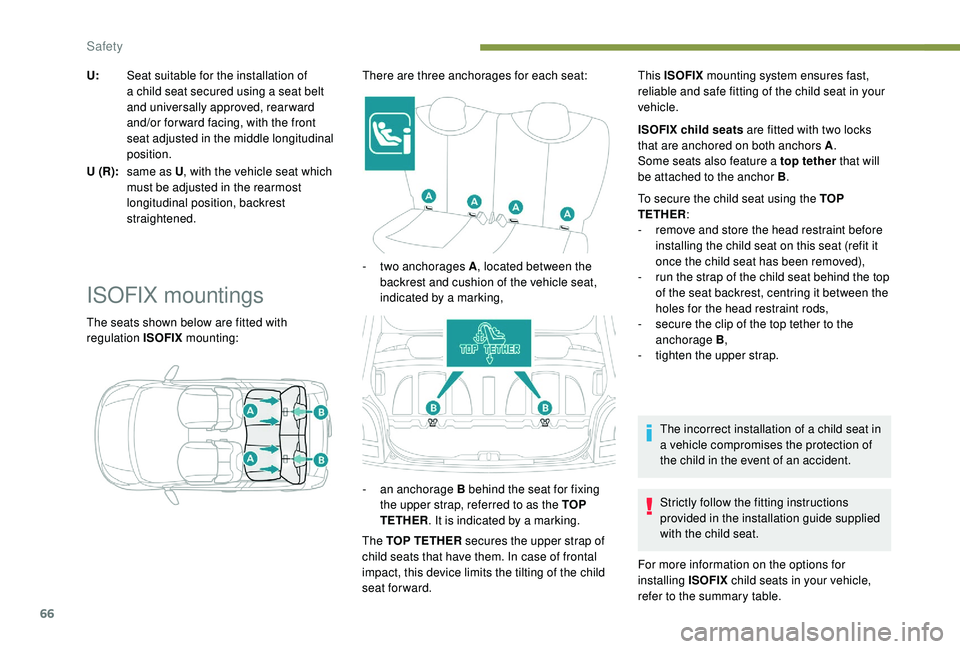
The seats shown below are fitted with
regulation ISOFIX mounting: There are three anchorages for each seat:
-
t
wo anchorages A
, located between the
backrest and cushion of the vehicle seat,
indicated by a marking,
-
an
anchorage B behind the seat for fixing
the upper strap, referred to as the TOP
TETHER . It is indicated by a
marking.
The TOP TETHER secures the upper strap of
child seats that have them. In case of frontal
impact, this device limits the tilting of the child
seat forward. This ISOFIX
mounting system ensures fast,
reliable and safe fitting of the child seat in your
vehicle.
ISOFIX child seats are fitted with two locks
that are anchored on both anchors A .
Some seats also feature a top tether
that will
be attached to the anchor B .
To secure the child seat using the TOP
TETHER :
-
r
emove and store the head restraint before
installing the child seat on this seat (refit it
once the child seat has been removed),
-
r
un the strap of the child seat behind the top
of the seat backrest, centring it between the
holes for the head restraint rods,
- s ecure the clip of the top tether to the
anchorage B ,
-
t
ighten the upper strap.
The incorrect installation of a
child seat in
a
vehicle compromises the protection of
the child in the event of an accident.
Strictly follow the fitting instructions
provided in the installation guide supplied
with the child seat.
For more information on the options for
installing ISOFIX child seats in your vehicle,
refer to the summary table.
Safety
Page 73 of 180
71
Children at the rear
At rear seating positions, always leave
sufficient space between the front seat
and:
-
a "
rear ward facing" child seat,
-
t
he child's feet for a child seat fitted
forward facing.
To do this, move the front seat for wards
and, if necessary, move its backrest into
the upright position.
For optimal installation of the forward
facing child seat, verify that its backrest is
as close as possible to the backrest of the
vehicle seat, if possible in contact with it.
Children at the front
The legislation on carrying children on the
front passenger seat is specific to each
country. Refer to the legislation in force in
the country in which you are driving.
Deactivate the front passenger airbag
when a "rear ward facing" child seat is
installed on the front passenger seats.
Other wise, there is a
risk of serious or
fatal injury to the child if the airbag is
deployed. Installing a
booster seat
The chest part of the seat belt must be
positioned on the child's shoulder without
touching the neck.
Ensure that the lap part of the seat belt
passes correctly over the child's thighs.
We recommend using a
booster seat with
a
backrest, equipped with a belt guide at
shoulder level.
Additional protections
To prevent accidental opening of the doors
and rear windows, use the child lock.
Take care not to open the rear windows by
more than one third.
To protect young children from the rays
of the sun, fit side blinds on the rear
windows.
As a
safety precaution, do not leave:
-
a c
hild or children alone and
unattended in a
vehicle,
-
a c
hild or an animal in a vehicle
which is exposed to the sun, with the
windows closed,
-
t
he keys within reach of children inside
the vehicle.Child lock
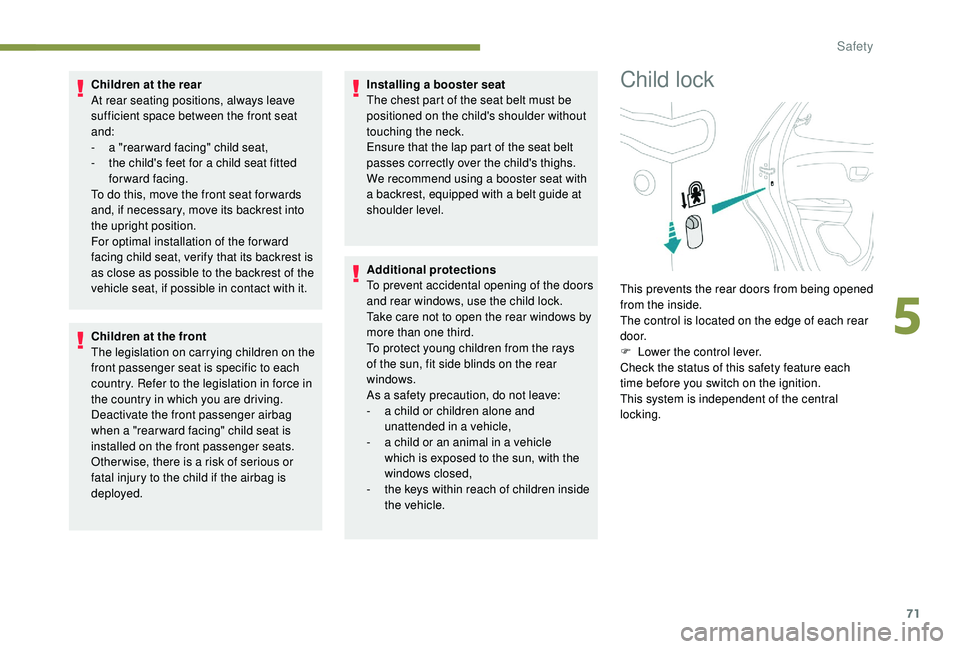
This prevents the rear doors from being opened
from the inside.
The control is located on the edge of each rear
d o o r.
F
L
ower the control lever.
Check the status of this safety feature each
time before you switch on the ignition.
This system is independent of the central
locking.
5
Safety
Page 172 of 180
170
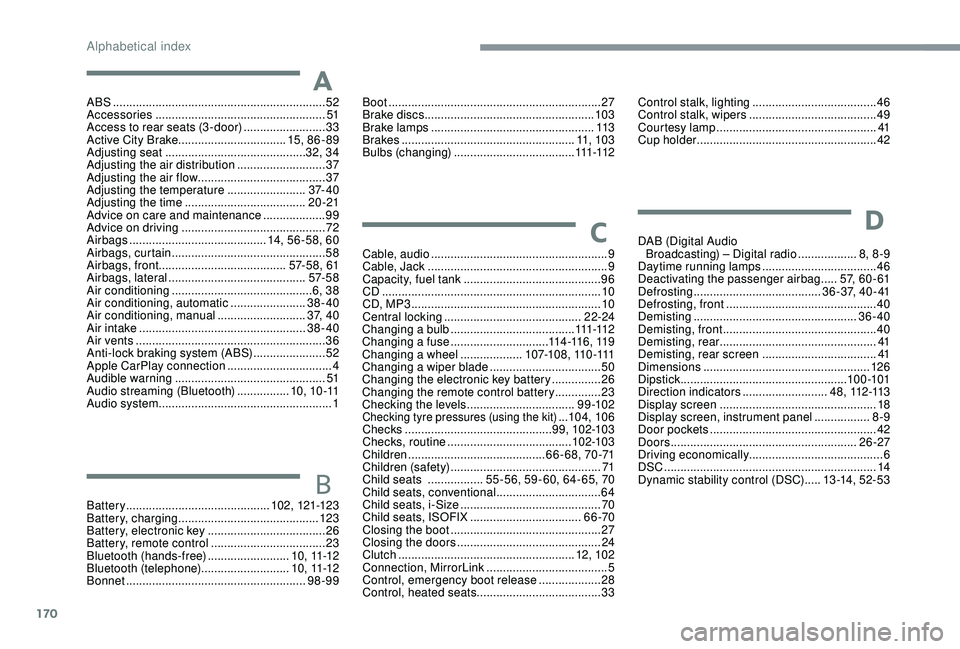
ABS .................................................................52
Accessories .................................................... 51
Access to rear seats (3 -door)
.........................33
Active City Brake
...............................
..15, 8 6 - 89
Adjusting seat
........................................... 32, 34
Adjusting the air distribution
...........................37
Adjusting the air flow
....................................... 37
A
djusting the temperature
........................37- 4 0
Adjusting the time
..................................... 20 -21
Advice on care and maintenance
...................99
Advice on driving
............................................ 72
Airbags
...............................
...........14, 56 -58, 60
Airbags, curtain
............................................... 58
Airbags, front ....................................... 57- 5 8 , 61
Airbags, lateral
.......................................... 57- 5 8
Air conditioning
........................................... 6, 38
Air conditioning, automatic
.......................38-40
Air conditioning, manual
........................... 3
7, 4 0
Air intake
................................................... 38-40
Air vents
.......................................................... 36
Anti-lock braking system (ABS)
......................52
Apple CarPlay connection
................................4
Audible warning
.............................................. 51
A
udio streaming (Bluetooth)
................10, 10 -11
Audio system
..................................................... 1Boot
.................................................................27
Brake discs
....................................................103
Brake lamps
...............................
...................113
Brakes
.....................................................11, 1 0 3
Bulbs (changing)
.....................................111 -112
Battery
............................................ 102, 121-123
Battery, charging
........................................... 123
Battery, electronic key
....................................26
Battery, remote control
...................................23
Bluetooth (hands-free)
......................... 1
0 , 11 -12
Bluetooth (telephone)
........................... 1
0 , 11 -12
Bonnet
....................................................... 98-99 Control stalk, lighting
......................................46
Control stalk, wipers
.......................................49
C
ourtesy lamp .................................................41
Cup holder
.......................................................42
DAB (Digital Audio Broadcasting) – Digital radio
..................8, 8 -9
Daytime running lamps
...................................46
Deactivating the passenger airbag
.....5 7, 6 0 - 6 1
Defrosting
.......................................36-37, 40-41
Defrosting, front
..............................................40
Demisting
..................................................36-40
Demisting, front
............................................... 40
D
emisting, rear
................................................41
Demisting, rear screen
...................................41
Dimensions
..............................
.....................126
Dipstick
................
...................................10 0 -101
Direction indicators
..........................4 8 , 112 -113
Display screen
................................................18
Display screen, instrument panel
.................8-9
Door pockets
...............................
....................42
Doors
.........................................................26-27
Driving economically ......................................... 6
DSC
.................................................................14
Dynamic stability control (DSC)
.....13 -14, 52- 5 3
Cable, audio
......................................................9
Cable, Jack
.......................................................9
Capacity, fuel tank
..........................................96
CD
...................................................................10
CD, MP3
..........................................................10
Central locking
.......................................... 2
2-24
Changing a
bulb
......................................111
-112
Changing a
fuse
..............................11
4 -11 6 , 11 9
Changing a
wheel
...................1
0 7-1 0 8 , 11 0 -111
Changing a
wiper blade
..................................50
C
hanging the electronic key battery
...............26
C
hanging the remote control battery
..............23
Checking the levels
.................................9 9 -10 2
Checking tyre pressures (using the kit) ...104, 10 6
Checks
............................................. 99, 102-103
Checks, routine
...................................... 102-103
Children
.......................................... 66-68, 70-71
Children (safety)
.............................................. 71
Child seats
................. 5
5 -56, 59 - 60, 64- 65, 70
Child seats, conventional
................................ 64
Child seats, i-Size
........................................... 70
Child seats, ISOFIX
.................................. 66 -70
Closing the boot
.............................................. 27
Closing the doors
............................................ 24
Clutch
...................................................... 12, 102
Connection, MirrorLink
..................................... 5
Control, emergency boot release
................... 28
Control, heated seats
...................................... 33
A
B
DC
Alphabetical index