2018 PEUGEOT 108 fuel consumption
[x] Cancel search: fuel consumptionPage 8 of 180

6
Eco- driving
Optimise the use of your
gearbox
With a manual gearbox, move off gently
an d change up without waiting. During
acceleration change up early.
With an ETG gearbox, give preference to
automatic mode (Easy) and avoid pressing the
accelerator pedal heavily or suddenly.
Drive smoothly
Maintain a safe distance between vehicles,
u se engine braking rather than the
brake pedal, and press the accelerator
progressively. These practices contribute
towards a
reduction in fuel consumption and
CO
2 emissions and also help reduce the
b
ackground traffic noise.
Control the use of your electrical
equipment
Before moving off, if the passenger
compartment is too warm, ventilate it by
opening the windows and air vents before
using the air conditioning.
Above 30
mph (50 km/h), close the windows
and leave the air vents open.
Consider using equipment that can help
keep the temperature in the passenger
compartment down (sunroof and window
b l i n d s …) .
Unless it has automatic regulation, switch off
the air conditioning as soon as the desired
temperature has been reached.
Switch off the demisting and defrosting
controls, if not automatic.
Switch off the heated seat as soon as
possible. Switch off the headlamps and front foglamps
when the ambient light level does not require
their use.
Avoid running the engine before moving off,
particularly in winter; your vehicle will warm up
much faster while driving.
As a
passenger, if you avoid connecting your
multimedia devices (film, music, video game,
etc.), you will contribute towards limiting the
consumption of electrical energy, and so of
fuel.
Disconnect your portable devices before
leaving the vehicle.
Eco-driving is a
range of everyday practices
that allow the motorist to optimise their fuel
consumption and CO
2 emissions.
T
he gear shift indicator invites you to engage
the most suitable gear: as soon as the
indication is displayed in the instrument panel,
follow it straight away.
For vehicles fitted with an ETG gearbox, this
indicator only appears in manual mode.
Eco-driving
Page 20 of 180

18
Indicators
Total/trip distance recorder
When the ignition is switched on, the distance
recorder that was selected when the engine
was last switched off is displayed.-
t
rip recorder with TRIP displayed.
To reset the trip recorder to zero, while it is
displayed, press one of the two buttons 1 .
Fuel level indicator
Low fuel level
When the fuel in the tank reaches
a
low level, this warning lamp
comes on in the instrument panel,
accompanied by an audible warning.
You must add at least 5
litres of fuel after
running out of fuel.
Trip computer
System that gives you information on the
current journey (range, fuel consumption…).
Data displays
* depending on version. F
P
ress the steering mounted control to
display the various trip computer tabs in
succession.
-
T
otal distance travelled.
- Trip
A.
- Trip
B.
-
T
he partial Stop & Start time counter*.
-
T
he total Stop & Start* time counter.
-
T
he outside temperature*.
-
C
urrent fuel consumption.
-
A
verage fuel consumption.
-
Range.
-
A
verage speed.
-
L
ighting dimmer.
Pressing button 1
allows you to alternate the
distance display:
-
t
otal with ODO (odometer) displayed, Shows the quantity of fuel available:
-
1/
1
and six bars, the tank is full.
-
R
and one bar, the fuel in the tank is at the
reser ve level.
You have about 5
litres of fuel left.
Instruments
Page 21 of 180
19
Outside temperature
In some situations, it may happen that the
outside temperature is displayed after a delay
or not at all, including:
-
w
hen stationary or moving at a slow speed
(less than about 16
mph (25 km/h),
-
i
n the case of a change that is too high
(entering or leaving a
garage, tunnel, etc.),
-
d
uring very short journeys (less than about
2
minutes).
Lighting dimmer control
When driving at night, this function allows
certain instrument panel displays to be
switched off so as to reduce visual fatigue for
the driver.
It operates only while the sidelamps are on.
F
A
s soon as the "Lighting dimmer" menu is
displayed, keep one of the DISP buttons
pressed to access the settings.
F
T
hen press one of the two DISP buttons
successively to increase or decrease the
brightness. The display flashes to show you
the brightness chosen.
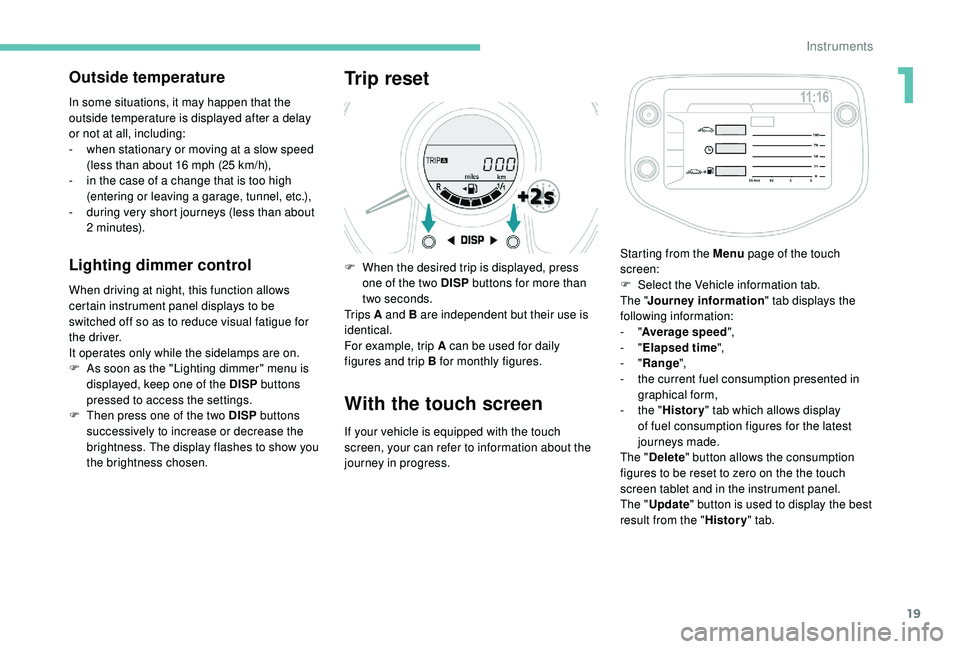
Trip reset
F When the desired trip is displayed, press one of the two DISP buttons for more than
two seconds.
Tr i p s A and B are independent but their use is
identical.
For example, trip A can be used for daily
figures and trip B for monthly figures.
With the touch screen
If your vehicle is equipped with the touch
screen, your can refer to information about the
journey in progress. Starting from the Menu
page of the touch
screen:
F
S
elect the Vehicle information tab.
The " Journey information " tab displays the
following information:
- "
Average speed ",
- "
Elapsed time ",
- "
Range ",
-
t
he current fuel consumption presented in
graphical form,
-
t
he "
History " tab which allows display
of fuel consumption figures for the latest
journeys made.
The " Delete " button allows the consumption
figures to be reset to zero on the the touch
screen tablet and in the instrument panel.
The " Update " button is used to display the best
result from the " History" tab.
1
Instruments
Page 22 of 180

20
Trip computer, some
definitions
Range
(miles or km)
The distance which can still be travelled with
the fuel remaining in the tank (at the average
fuel consumption seen over the last few miles
(kilometres) travelled).This value may fluctuate if a
change
of driving style or terrain results in
a
significant change in the current fuel
consumption.
When the level of fuel is low, the message "Lo
FUEL" is displayed.
While the level of the fuel is low, the range
cannot be recalculated.
Current fuel consumption
(mpg or l/100 km or km/l)
C alculated over the last few seconds.
Average fuel consumption
(mpg or l/100 km or km/l)
C alculated since the last time the trip recorder
was reset to zero.
Average speed
(mph or km/h)
Calculated since the last time the trip recorder
was reset to zero.
Stop & Start time counter
(minutes/seconds or hours/minutes)
If your vehicle is fitted with the Stop & Start, a
time counter adds up the time spent in STOP
mode during a
journey.
It resets to zero every time the ignition is
switched on.
Adjusting the time
Radio
The time is adjusted using the " MENU" dial:
- p ress the dial to access the menus and to
confirm a
selection,
-
t
urn the dial to select a function, an item in
a
list.
At any time you can return to the previous step
using the " Back" button.
F
P
ress the dial to access the menus.
F
T
urn the dial to select " CLOCK".
F
P
ress the dial to confirm. The hours digits
flash.
F
T
urn the dial to adjust the hours.
F
P
ress the dial to confirm. The minutes digits
flash.
F
T
urn the dial to adjust the minutes.
F
P
ress the dial to confirm and leave the
menu.
Instruments
Page 35 of 180
33
With the engine running, the front seats can be
heated separately.
F
P
ress the switch. The indicator lamp comes
on.
F
P
ressing a
second time stops operation.
The temperature is controlled automatically.
The heated seat function is deactivated
approximately two minutes after the ignition is
switched off. To reactivate the function, switch
on the ignition and press the control again.
Switch off the heated seats as soon as
you consider it necessary, as reducing
the consumption of electrical current
reduces fuel consumption.
Do not use the function when the seat is
not occupied.
Reduce the intensity of the heating as
soon as possible.
When the seat and passenger
compartment have reached an
adequate temperature, you can stop
the function; reducing the consumption
of electrical current reduces fuel
consumption. Prolonged use at the highest setting is
not recommended for those with sensitive
skin.
There is a
risk of burns for people whose
perception of heat is impaired (illness,
taking medication, for example).
There is a
risk of overheating the system if
material with insulating properties is used,
such as cushions or seat covers.
Do not use the function:
-
i
f wearing damp clothing,
-
i
f child seats are fitted.
To avoid breaking the heating element in
the seat:
-
d
o not place heavy objects on the seat,
-
d
o not kneel or stand on the seat,
-
d
o not place sharp objects on the seat,
-
d
o not spill liquids onto the seat.
To avoid the risk of short-circuit:
-
d
o not use liquid products for cleaning
the seat,
-
n
ever use the heating function when
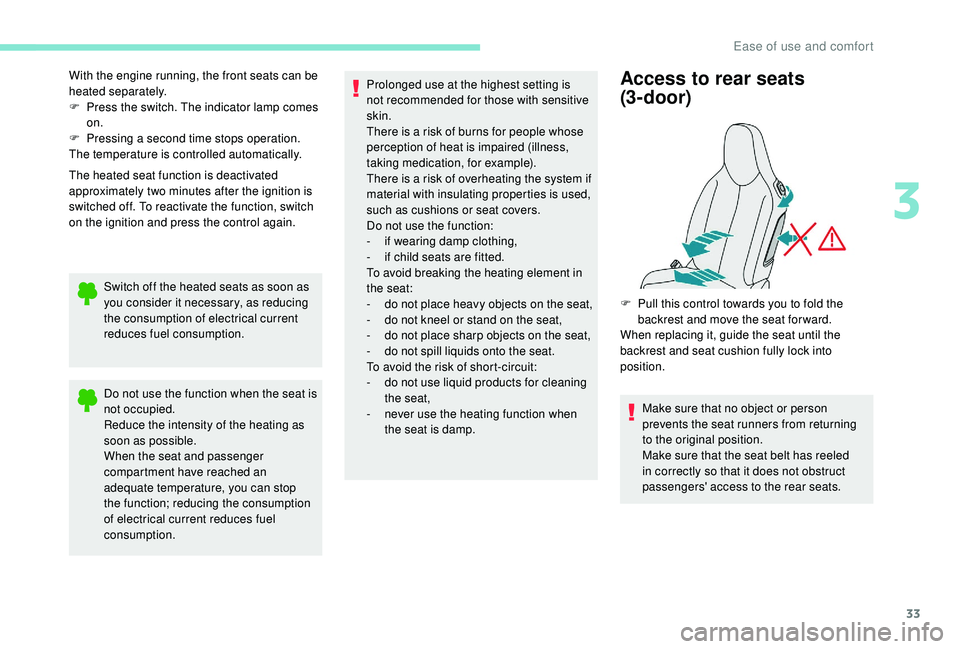
the seat is damp.Access to rear seats
(3-door)
F Pull this control towards you to fold the backrest and move the seat for ward.
When replacing it, guide the seat until the
backrest and seat cushion fully lock into
position.
Make sure that no object or person
prevents the seat runners from returning
to the original position.
Make sure that the seat belt has reeled
in correctly so that it does not obstruct
passengers' access to the rear seats.
3
Ease of use and comfort
Page 43 of 180
41
With the automatic air
conditioning system
F Press the dedicated button, its indicator lamp comes on.
F
T
o switch it off, press this button again; its
indicator lamp goes off.
The other settings (air flow, air distribution,
etc.) are controlled automatically.
Rear screen demist –
defrost
The control button is located
on the heating/ventilation or air
conditioning system control panel.
Switching on
The rear screen demist – defrost can only
operate when the engine is running.
F
P
ress this button to demist /defrost the rear
screen and, depending on version, the door
mirrors. The indicator lamp associated with
the button comes on.
Switching off
F Press this button again to switch off the demisting/defrosting. The indicator lamp
associated with the button goes off.
Switch off the demisting/defrosting of
the rear screen and door mirrors, if
fitted, as soon as appropriate, as lower
current consumption results in reduced
fuel consumption.
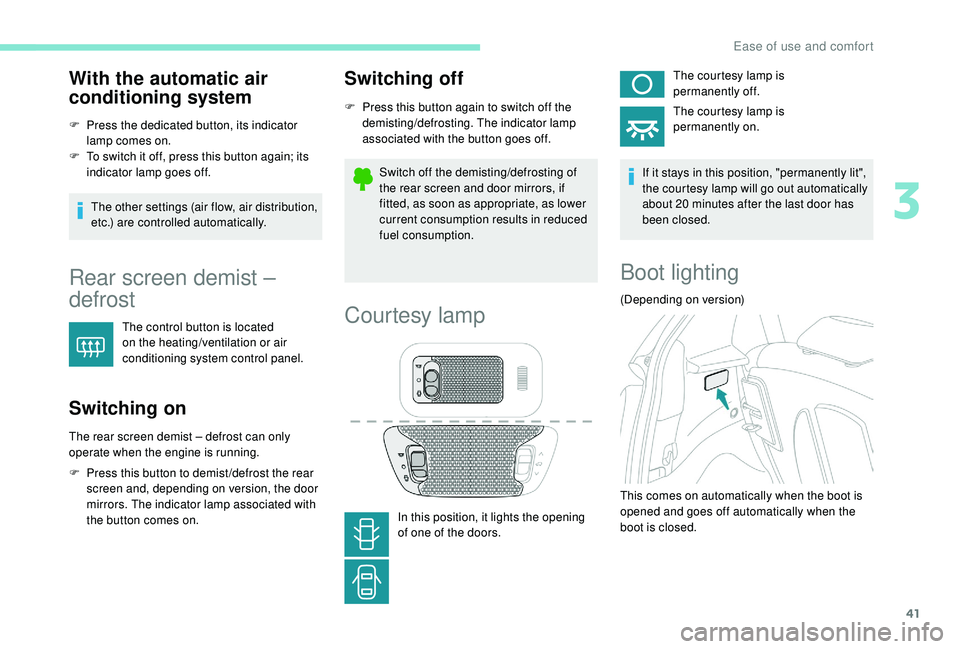
Courtesy lamp
In this position, it lights the opening
of one of the doors. The courtesy lamp is
permanently off.
The courtesy lamp is
permanently on.
If it stays in this position, "permanently lit",
the courtesy lamp will go out automatically
about 20 minutes after the last door has
been closed.
Boot lighting
(Depending on version)
This comes on automatically when the boot is
opened and goes off automatically when the
boot is closed.
3
Ease of use and comfort
Page 81 of 180
79
If you stop the vehicle but keep the engine
running, you must always move the gear
selector to the neutral position N.
A continuous audible signal sounds if you
turn the ignition switch to " OFF" while the
vehicle is in 2nd, 3rd, 4th or 5th gear.
If this happens, turn the ignition switch
to " ON ", move the gear selector to the
position N , return it to position E , M or R,
then turn the ignition switch to " OFF".
If the vehicle is on a
slope, use the brake
to stop the vehicle from moving and place
the gear selector to position N , E or R.
In all cases, you must apply the parking
brake to immobilise the vehicle.
Before doing anything in the engine
compartment, make sure that the gear
selector is in neutral N and the parking
brake is applied.Operating limits
When on a slope or when hill start assist is
a ctivated, never keep the vehicle stationary
using the accelerator: you could damage the
clutch.
In these situations, an audible signal sounds.
F
I
n that case, move the gear selector to
position N .
F
W
ait 15 minutes before moving off again, to
allow the clutch to cool down.
Operating faults
With the ignition on, lighting of this
warning lamp indicates a gearbox
fault.
Contact a
PEUGEOT dealer or
a
qualified workshop.
If N flashes in the instrument panel together
with an audible signal for a
long period of time:
-
m
ake sure that the ignition switch is
correctly set to the " ON" position,
-
m
ove the gear selector to N , then return it to
E , M or R .
If 1
flashes in the instrument panel:
-
m
ove the gear selector to E or M , then
return it to N .
If R flashes in the instrument panel:
-
m ove the gear selector to R , then return it to N.
Gear shift indicator
System which reduces fuel consumption by
recommending the most appropriate gear.
Operation
Depending on the driving situation and the
equipment of your vehicle, the system can
recommend you to change gear.
Gear shift recommendations are for information
only. In fact, the road layout, the traffic density
and safety remain the deciding factors when
choosing the best gear. The driver therefore
remains responsible for deciding whether or not
to follow the indications issued by the system.
This function cannot be deactivated.
Example:
-
Y
ou are in third gear.
-
Y
ou press the accelerator pedal.
-
T
he system may suggest that you engage
a
higher gear.
6
Driving
Page 83 of 180
81
Operation
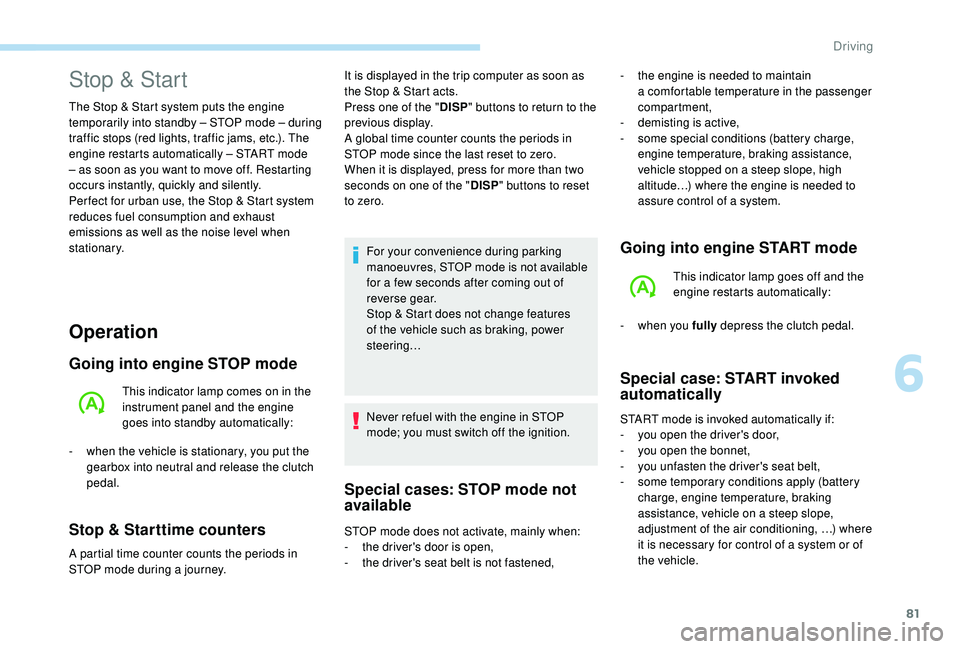
Going into engine STOP mode
This indicator lamp comes on in the
instrument panel and the engine
goes into standby automatically:
-
w
hen the vehicle is stationary, you put the
gearbox into neutral and release the clutch
pedal.
Stop & Starttime counters
A partial time counter counts the periods in
STOP mode during a journey. For your convenience during parking
manoeuvres, STOP mode is not available
for a
few seconds after coming out of
reverse gear.
Stop & Start does not change features
of the vehicle such as braking, power
steering…
Never refuel with the engine in STOP
mode; you must switch off the ignition.
Special cases: STOP mode not
available
Stop & Start
The Stop & Start system puts the engine
temporarily into standby – STOP mode – during
traffic stops (red lights, traffic jams, etc.). The
engine restarts automatically – START mode
– as soon as you want to move off. Restarting
occurs instantly, quickly and silently.
Per fect for urban use, the Stop & Start system
reduces fuel consumption and exhaust
emissions as well as the noise level when
stationary. -
t
he engine is needed to maintain
a comfortable temperature in the passenger
compartment,
-
d
emisting is active,
-
s
ome special conditions (battery charge,
engine temperature, braking assistance,
vehicle stopped on a
steep slope, high
altitude…) where the engine is needed to
assure control of a
system.
Going into engine START mode
This indicator lamp goes off and the
engine restarts automatically:
-
w
hen you fully depress the clutch pedal.
Special case: START invoked
automatically
START mode is invoked automatically if:
- y
ou open the driver's door,
-
y
ou open the bonnet,
-
y
ou unfasten the driver's seat belt,
-
s
ome temporary conditions apply (battery
charge, engine temperature, braking
assistance, vehicle on a
steep slope,
adjustment of the air conditioning, …) where
it is necessary for control of a
system or of
the vehicle.
It is displayed in the trip computer as soon as
the Stop & Start acts.
Press one of the "
DISP" buttons to return to the
previous display.
A global time counter counts the periods in
STOP mode since the last reset to zero.
When it is displayed, press for more than two
seconds on one of the " DISP" buttons to reset
to zero.
STOP mode does not activate, mainly when:
-
t
he driver's door is open,
-
t
he driver's seat belt is not fastened,
6
Driving