2018 PEUGEOT 108 ABS
[x] Cancel search: ABSPage 15 of 180

13
Warning/indicator lampStateCause Actions/Observations
Orange warning/indicator lamps
Anti-lock
braking system
(ABS)Fixed.
The anti-lock braking system has
a
fault.The vehicle retains conventional braking.
Drive carefully at moderate speed, then carry out (3).
Emission
control system Fixed.
The emission control system is
faulty. Quickly carry out (3).
Engine fault Fixed.
A major fault that does not have a specific
w arning lamp has been detected.Carry out (2) without fail.
Low fuel level Fixed, accompanied
by an audible signal. When it first comes on there remains
approximately 5
litres of fuel in the
tank (reserve). Refuel without delay to avoid running out of fuel.
Never drive until completely empty
, this could
damage the emissions and injection systems.
Under-inflation Fixed. The pressure in one or more tyres is
too low. Check the pressure of the tyres as soon as possible.
Reinitialise the detection system after adjusting the
pressure.
Dynamic
stability control
(DSC)/Traction
control (TRC) Flashing.
DSC/ TRC is activated if there is
a
loss of grip or trajectory.
Fixed. The DSC/ TRC systems are faulty. Carry out (3).
1
Instruments
Page 20 of 180

18
Indicators
Total/trip distance recorder
When the ignition is switched on, the distance
recorder that was selected when the engine
was last switched off is displayed.-
t
rip recorder with TRIP displayed.
To reset the trip recorder to zero, while it is
displayed, press one of the two buttons 1 .
Fuel level indicator
Low fuel level
When the fuel in the tank reaches
a
low level, this warning lamp
comes on in the instrument panel,
accompanied by an audible warning.
You must add at least 5
litres of fuel after
running out of fuel.
Trip computer
System that gives you information on the
current journey (range, fuel consumption…).
Data displays
* depending on version. F
P
ress the steering mounted control to
display the various trip computer tabs in
succession.
-
T
otal distance travelled.
- Trip
A.
- Trip
B.
-
T
he partial Stop & Start time counter*.
-
T
he total Stop & Start* time counter.
-
T
he outside temperature*.
-
C
urrent fuel consumption.
-
A
verage fuel consumption.
-
Range.
-
A
verage speed.
-
L
ighting dimmer.
Pressing button 1
allows you to alternate the
distance display:
-
t
otal with ODO (odometer) displayed, Shows the quantity of fuel available:
-
1/
1
and six bars, the tank is full.
-
R
and one bar, the fuel in the tank is at the
reser ve level.
You have about 5
litres of fuel left.
Instruments
Page 47 of 180

45
Do not place heavy objects on the shelf,
this may cause it to become unclipped.
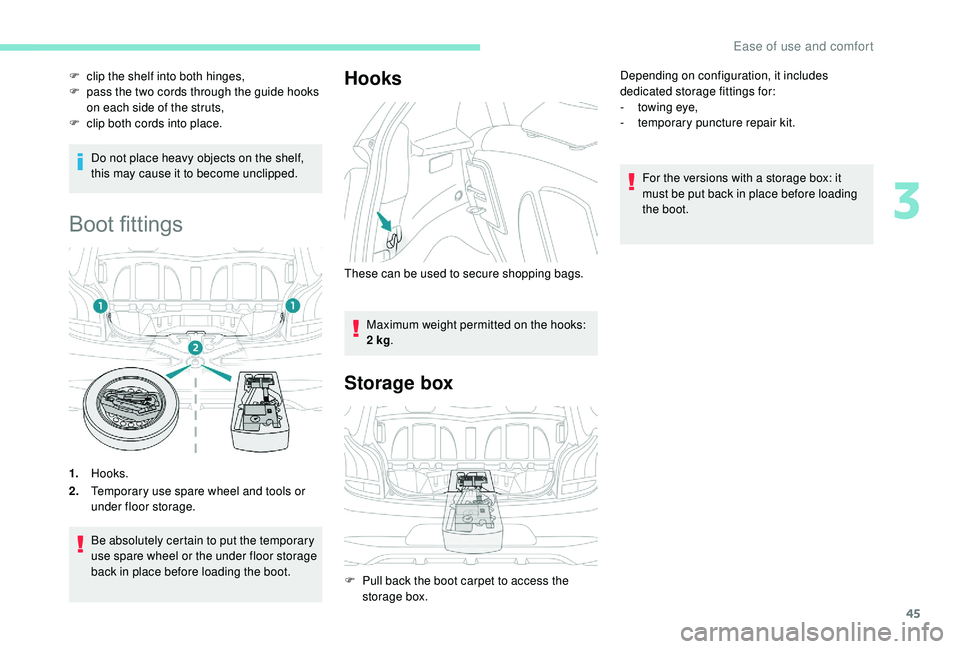
Boot fittings
1.Hooks.
2. Temporary use spare wheel and tools or
under floor storage.
Be absolutely certain to put the temporary
use spare wheel or the under floor storage
back in place before loading the boot.
Hooks
Maximum weight permitted on the hooks:
2
kg .
Storage box
Depending on configuration, it includes
dedicated storage fittings for:
-
t
owing eye,
-
t
emporary puncture repair kit.
For the versions with a
storage box: it
must be put back in place before loading
the boot.
F
c
lip the shelf into both hinges,
F
p
ass the two cords through the guide hooks
on each side of the struts,
F
c
lip both cords into place.
These can be used to secure shopping bags.
F
P
ull back the boot carpet to access the
storage box.
3
Ease of use and comfort
Page 54 of 180

52
Hazard warning lamps
F When you press this red button, all four direction indicators flash.
It can operate with the ignition off. F
P
ress the central part of the steering wheel.
Electronic stability control
(ESC)
The ESC programme incorporates the following
systems:
-
a
nti-lock braking system (ABS) and
electronic brake force distribution (EBFD),
Definitions
Anti-lock braking system (ABS)
and electronic brake force
distribution (EBFD)
These systems improve the stability and
manoeuvrability of your vehicle when braking
and contribute towards improved control on
corners, in particular on poor or slippery road
surfaces.
ABS prevents the wheels from locking during
emergency braking.
EBFD ensures total management of the braking
pressure, wheel by wheel.
Emergency braking assistance
(EBA)
In an emergency, this system permits the
optimum braking pressure to be reached
more quickly, therefore reducing the stopping
distance.
It triggers according to the speed at which
the brake pedal is pressed. This is felt by
a
reduction in the resistance of the pedal and
an increase in the effectiveness of the braking.
Traction control (TRC)
This system optimises traction in order to limit
wheel slip by acting on the brakes of the driving
wheels and on the engine. It also improves
the directional stability of the vehicle on
acceleration.
-
em
ergency braking assistance (EBA),
-
t
raction control (TRC),
- d
ynamic stability control (DSC).
Dynamic stability control (DSC)
If there is a difference between the path
f ollowed by the vehicle and that required by the
driver, this system monitors each wheel and
automatically acts on the brake of one or more
wheels and on the engine to return the vehicle
to the required path, within the limits of the laws
of physics.
Operation
Anti-lock braking system (ABS)
and electronic brake force
distribution (EBD)
If this warning lamp comes on,
accompanied by an audible
signal, it indicates an ABS system
malfunction that could cause control
of the vehicle to be lost during
braking.
Drive carefully at a
moderate speed and
contact a
PEUGEOT dealer or a qualified
workshop.
Safety
Page 55 of 180

53
If this warning lamp comes on,
accompanied by an audible signal,
it indicates an electronic brake
force distribution (EBFD) system
malfunction that could cause control
of the vehicle to be lost during
braking.
Yo u must stop as soon as it is safe to do so.
Contact a
PEUGEOT dealer or a qualified
workshop without delay.
When changing wheels (tyres and rims),
ensure that these are approved for your
vehicle.
When operating under normal conditions,
the ABS may cause the brake pedal to
vibrate slightly.
In emergency braking, press the brake
pedal hard and maintain this pressure.
Dynamic stability control (DSC)
and traction control (TRC)
Activation
These systems are activated automatically
every time the vehicle is started. Activation of these systems
is signalled by flashing of this
indicator in the instrument panel,
accompanied by an audible signal
for the DSC system.
Deactivation
In exceptional conditions (moving a vehicle that
i s bogged down in mud, stuck in snow, on loose
soil, …), it may prove useful to deactivate the
DSC and TRC systems, so that the wheels can
move freely and regain grip.
It is recommended that the systems are
reactivated as soon as possible however.
F
P
ress the button briefly.
Deactivating TRC alone
This warning lamp comes on: the
TRC system no longer acts on the
operation of the engine. Deactivation of the TRC and DSC systems
F
W
ith the vehicle stopped
, press the button
for more than 3 seconds.
These warning lamps come on: the
TRC and DSC systems no longer act
on the operation of the engine.
Reactivation
The TRC and DSC systems reactivate
automatically each time the engine is started.
F
P
ress the button again to
reactivate them manually.
When only the TRC system has been
deactivated, it reactivates as soon as the speed
of the vehicle increases.
If the TRC and DSC systems have both
been deactivated, they do not reactivate by
themselves, even if the speed of the vehicle
increases.
Operating fault
If this warning lamp comes on,
accompanied by an audible signal,
this indicates a fault with the system.
As soon as they detect a
problem of grip or
trajectory, these systems act on the operation
of the engine and brakes.
5
Safety
Page 89 of 180

87
Conditions of activation
Active City Brake functions if the following
conditions are met:
•
T
he engine is running.
•
T
he vehicle is moving for ward.
•
For triggering the pre-collision warning :
-
t
he speed is between 9 and 87 mph
(15
and 140 km/h),
-
t
he difference in speed between your
vehicle and the one in front is more than
about 9
mph (15 km/h).
•
For help in braking :
-
t
he speed is between about 19 and
50
mph (30 and 80 km/h),
-
t
he difference in speed between your
vehicle and the one in front is more than
about 19
mph (30 km/h).
•
For automatic pre-collision braking :
-
t
he speed is between about 6 and
50
mph (10 and 80 km/h),
-
t
he difference in speed between your
vehicle and the one in front is more than
about 6
mph (10 km/h)
•
t
he braking assistance systems (ABS,
EBFD, EBA) are not faulty.
•
T
he trajectory control systems (TRC, DSC)
hare not deactivated or faulty.
•
T
he vehicle is not making a sharp turn.
•
T
he system has not triggered in the last ten
seconds.
Operation
Three functional stages are possible:
• P re-collision warning : if risk of a
collision
with a
vehicle is detected, a warning lamp
comes on, accompanied by an audible
signal, to warn the driver to take avoiding
action. The triggering thresholds of the
warning can be set.
•
Br
aking assistance : increases the braking
started by the driver, but only if a
risk of
collision is detected.
•
A
utomatic pre-collision braking : if
your vehicle is approaching the vehicle
in front of you too quickly, the system
will automatically engage the brakes to
reduce the speed of impact. The collision
can be automatically avoided if the speed
difference between your vehicle and the
one in front of you is not more than 18
mph
(30
km/h).Then you are alerted by the display
of this warning indicator in the
instrument panel, accompanied by
an audible signal.
The brake lamps of your vehicle are lit to warn
other users.
The automatic braking can lead to the complete
stop of the vehicle if the situation requires. Unless the driver de-clutches quickly
enough during automatic braking,
triggering of the system may cause the
engine to stall.
6
Driving
Page 101 of 180

99
F Push the exterior safety catch to the left and raise the bonnet.
F
U
nclip the bonnet stay from its housing.
F
F
ix the stay in the notch to hold the bonnet
open.
Do not open the bonnet under very windy
conditions.
When the engine is hot, handle the
exterior safety catch and the stay with
care (risk of burns).
The cooling fan may star t after
switching off the engine: take care
with articles and clothing that might be
caught by the fan blades.
Because of the presence of electrical
equipment under the bonnet, it is
recommended that exposure to water
(rain, washing, etc.) be limited.
Closing
F Take the stay out of the support notch.
F C lip the stay in its housing.
F
L
ower the bonnet and release it near the
end of its travel.
F
P
ull on the bonnet to check that it is fully
latched.
To avoid damaging the electrical units,
never use a
high-pressure jet wash in the
engine compartment.
Engine compartment
1. Windscreen washing fluid reservoir.
2. Engine coolant reservoir.
3. A i r f i l t e r.
4. Brake fluid reser voir.
5. Battery.
6. Fusebox.
7. Engine oil dipstick.
8. Engine oil filler cap.
9. Remote earth point.
To access the brake fluid reser voir and/
or the fusebox, unclip the plastic cover,
located at the base of the windscreen, by
pressing the two tabs.
Checking levels
Check all of these levels regularly, in line with
the manufacturer's service schedule. Top them
up if necessary, unless other wise indicated.
If a
level drops significantly, have the
corresponding system checked by a
PEUGEOT
dealer or a
qualified workshop.
The liquid must comply with the
manufacturer's recommendations and with
the vehicle's engine.
7
Practical information
Page 103 of 180

101
Topping up the engine oil level
The location of the oil filler cap is shown in the
corresponding underbonnet layout view.
F
U
nscrew the oil filler cap to access the filler
opening.
F
A
dd oil in small quantities, avoiding any
spills on engine components (risk of fire).
F
W
ait a few minutes before checking the
level again using the dipstick.
F
A
dd more oil if necessary.
F
A
fter checking the level, carefully refit the oil
filler cap and the dipstick in its tube.
Engine oil change
In order to maintain the reliability of the engine
and emissions control system, never use
additives in the engine oil.
Brake fluid level
The fluid level should be close to the
"MA X" mark. If it is not, check the
brake pad wear.
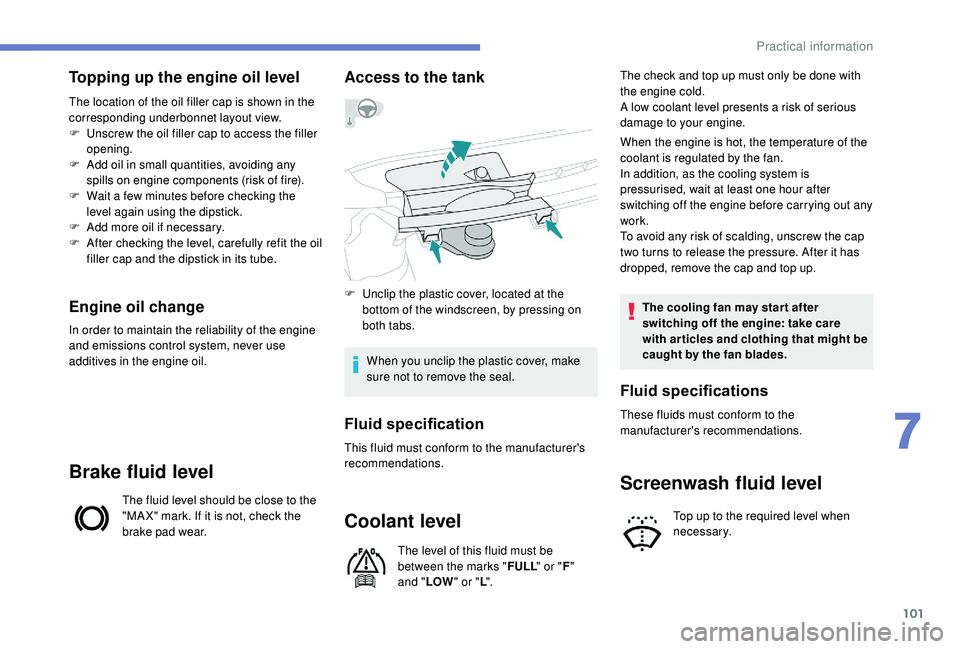
Access to the tank
F Unclip the plastic cover, located at the bottom of the windscreen, by pressing on
both tabs.
When you unclip the plastic cover, make
sure not to remove the seal.
Fluid specification
This fluid must conform to the manufacturer's
recommendations.
Coolant level
The level of this fluid must be
between the marks " FULL" or "F"
and " LOW " or "L". The check and top up must only be done with
the engine cold.
A low coolant level presents a
risk of serious
damage to your engine.
When the engine is hot, the temperature of the
coolant is regulated by the fan.
In addition, as the cooling system is
pressurised, wait at least one hour after
switching off the engine before carrying out any
work.
To avoid any risk of scalding, unscrew the cap
two turns to release the pressure. After it has
dropped, remove the cap and top up.
The cooling fan may star t after
switching off the engine: take care
with articles and clothing that might be
caught by the fan blades.
Screenwash fluid level
Top up to the required level when
necessary.
Fluid specifications
These fluids must conform to the
manufacturer's recommendations.
7
Practical information