2018 PEUGEOT 108 change wheel
[x] Cancel search: change wheelPage 9 of 180
7
Limit the causes of excess
consumption
Spread loads throughout the vehicle; place
the heaviest items in the bottom of the boot,
as close as possible to the rear seats.
Limit the loads carried in the vehicle and
reduce wind resistance (roof bars, roof rack,
…). Use a roof box in preference.
Remove roof bars and the roof rack after use.
At the end of winter, remove winter tyres and
refit your summer tyres.
Observe the recommendations
on maintenance
Check the tyre pressures regularly, when cold,
referring to the label in the door aperture,
driver's side.
Carry out this check in particular:
-
b
efore a long journey,
-
a
t each change of season,
-
a
fter a long period out of use. Have your vehicle ser viced regularly (engine
oil, oil filter, air filter, passenger compartment
filter…) and obser ve the schedule of
operations recommended in the warranty and
maintenance record. Do not forget the spare wheel and the tyres on
any trailer or caravan.
.
Eco-driving
Page 17 of 180

15
Warning/indicator lampStateCause Actions/Observations
Stop & Star t Fixed. The Stop & Start system has been
deactivated. Reactivate the system by pressing the button again.
Flashing. The Stop & Start system has a
fault. Carry out (3).
Speed limiter Fixed. The speed limiter is faulty. Carry out (3).
Active City
Brake Flashing.
The Active City Brake system has
a
fault.Carry out (3).
Active City
Brake Fixed.
The button has been pressed.
The configuration of the system has
been changed. The Active City Brake system is activated.
Flashing,
accompanied by an
audible signal. The Active City Brake system is in
action.
The system optimises the braking to avoid a
collision.
Active City
Brake Fixed.
The Active City Brake system has
been deactivated. Reactivate the system by pressing the button again.
Lane Depar ture
Warning System Fixed.
The lane departure warning system
is faulty. Carry out (3).
Lane Depar ture
Warning System Flashing (orange),
accompanied by an
audible signal. A line is being crossed, right side. Turn the steering wheel in the opposite direction to
return to the correct trajectory.
1
Instruments
Page 76 of 180

74
With the electronic key inside the vehicle: each
press of the "START/STOP " button, without
action on the pedals , allows the mode of the
vehicle to be changed:
F
F
irst press (" ACC" mode). The accessories
(audio system, 12
V socket, etc.) can be
used.
F
Sec
ond press (" ON" mode). Ignition on.
F
T
hird press (" OFF" m o d e).
If you use accessories for a
prolonged
period of time, the vehicle will
automatically transfer into " OFF" mode
after about 20
minutes.
Be careful , to avoid discharging the
battery.
Starting the engine
At the first press of the " S TA R T/
STOP " button, this indicator lamp
flashes slowly in the instrument panel.
Electronic key inside the vehicle.
F V ehicle with a manual gearbox: move the
gear lever to the neutral position and press
the clutch pedal fully down.
F
V
ehicle with an electronic gearbox: move
the gear selector to N and press the brake
pedal firmly.
This indicator lamp lights up on the
instrument panel.
Depending on the outside temperature,
each start attempt can last up to about
30
seconds. During this time, do not press
the " START/STOP " button again, and do
not release the clutch pedal nor the brake
pedal (depending on the gearbox type).
After this time, if the engine has not
started, press the " START/STOP" button
again to carry out a
new attempt.
F
P
ress the " START/STOP " button and
release it. If one of the starting conditions is not met,
the indicator for the "Keyless Entry and
Starting" system will flash rapidly on the
instrument panel. In some circumstances,
it may be necessary to turn the steering
wheel slightly while pressing the "
S TA R T/
STOP " button, to help unlock the steering
column.
The presence of the electronic key in the
vehicle is essential for ignition and starting
the engine. Once the engine has started,
make sure the electronic key is always
on board until the end of the journey:
other wise you will not be able to lock the
vehicle.
Switching off the engine
F Stop the vehicle.
F V ehicle with a manual gearbox: move the
gear lever to neutral.
F
V
ehicle with an ETG gearbox: move the
gear selector to N .
With the electronic key inside the vehicle, press
the " START/STOP " button.
The engine stops.
The steering column locks when a
door is
opened or the vehicle is locked.
Driving
Page 80 of 180
78
F Select position E with the gear selector.
The gearbox then operates in auto-adaptive
mode, without any action needed from the
driver.
It continuously selects the gear best adapted to
the following parameters:
-
f
uel consumption optimisation,
-
s
tyle of driving,
-
r
oad conditions,
-
v
ehicle load.
To obtain the best acceleration, for instance
when overtaking another vehicle, press hard on
the accelerator pedal and go through the point
of resistance.
At any time, you can change the mode by
moving the gear selector from position E to
position M and vice versa.
Never select neutral (position N ) when the
vehicle is moving.
Temporary control of gear
changing
You can temporarily take control of gear
changes using the steering mounted control
paddles + and -.
Manual mode
During braking or deceleration, the gearbox
changes down automatically to be in the
correct gear for the vehicle to accelerate again.
Under strong acceleration, the gearbox will not
change up without action by the driver at the
gear selector or the controls under the steering
wheel (unless the engine speed is close to its
maximum speed).Automatic mode (EASY)The gear change requests are acted upon only
if the engine speed allows. If they are rejected,
an audible signal sounds.
The gear engaged is displayed in the
instrument panel.
This function allows you to anticipate certain
situations, such as overtaking another vehicle
or approaching a
bend in the road.
After a
few moments with no action on the
control paddles, the gearbox returns to
automatic operation.
F
M
ove the gear selector to position M .
F
C
hange gears using:
-
t
he gear selector, by moving it:
-
b
ackwards, + to change up a gear,
-
f
or wards, - to change down a gear,
-
o
r the steering mounted control paddles +
or -.
The gear engaged is displayed.
The gear change requests are acted upon only
if the engine speed allows.
It is not necessary to release the accelerator
when changing gear. If a
change is rejected, an
audible signal sounds. You can change mode at any time by moving
the gear selector from position M to position E
and vice versa.
Never select neutral (position N ) when the
vehicle is moving.
Reverse gear
To engage reverse gear, the vehicle must be
stationary with your foot on the brake pedal.
F
Sel
ect position R .
An audible signal indicates that reverse gear
has been engaged.
Stopping the vehicle
The vehicle can be stopped regardless of the
position of the gear selector ( N, E or R ).
However, if the driver's door is opened when
the gear selector is not in position N , an audible
signal will sound.
Driving
Page 94 of 180

92
Under-inflation detection
The system monitors the pressure in all four
tyres, once the vehicle is moving.
It compares the information given by the
wheel speed sensors with reference values,
which must be reinitialised after ever y tyre
pressure adjustment or wheel change.
The system triggers an alert as soon as it
detects a
drop in the pressure of one or more
tyres. The tyre under-inflation detection system
does not replace the need for vigilance on
the part of the driver.
This system still requires you to check the
tyre inflation pressure (including the spare
wheel) every month as well as before
a
long journey.
Driving with under-inflated tyres impairs
handling, extends braking distances and
causes early tyre wear, particularly in
adverse conditions (heavy loads, high
speeds, long journeys).
Driving with under-inflated tyres
increases fuel consumption. The tyre pressure specifications for your
vehicle can be found on the tyre pressure
label.
For more information on the
Identification markings
, refer to the
corresponding section.
Tyre pressures should be checked when
the tyres are "cold" (vehicle stopped for
1 hour or after a journey of less than
6 miles (10 km) at moderate speeds).
Other wise (when hot), add 0.3 bar to the
pressures shown on the label.Under-inflation alert
This is shown by the warning lamp
coming on, fixed, accompanied by
an audible signal.
F
R
educe speed immediately, avoid excessive
steering movements and sudden braking.
F
S
top as soon as it is safe to do so.
This system automatically monitors the tyre
pressure while driving.
Detection of loss of pressure does not
always bring about a visible deformation
of the tyre. Do not make do with just
a
visual check.
Driving
Page 105 of 180
103
Brake pads
Brake wear depends on the style
of driving, particularly in the case
of vehicles used in town, over short
distances. It may be necessary to
have the condition of the brakes
checked, even between vehicle
services.
Unless there is a
leak in the circuit, a drop in
the brake fluid level indicates that the brake
pads are worn.
Brake disc/drum wear
For information on checking
brake disc/drum wear, contact
a
PEUGEOT dealer or a qualified
workshop.
Parking brake
If excessive travel or a loss of
e ffectiveness of this system is
noticed, the parking brake must
be checked, even between two
services.
This system must be checked by a
PEUGEOT
dealer or a
qualified workshop.
Wheels and tyres
The pressure must be checked on
all tyres, including the spare wheel,
when the tyres are "cold", at least
once a month and before a long
j o u r n ey. Driving with worn or damaged tyres reduces
braking efficiency and control of the vehicle's
steering. Regular inspections of the condition
of tyres (tread and sides) and rims are
recommended as well as making sure that
valves are fitted.
Using different size wheels and tyres from
those specified can affect the lifetime of tyres,
wheel rotation, ground clearance and the
speedometer reading and have an adverse
effect on road holding.
Fitting different tyres on the front and rear axles
can cause the ESC to mistime.
Only use products recommended by
PEUGEOT or products of equivalent
quality and specification.
In order to optimise the operation of
components as important as those in the
braking system, PEUGEOT selects and
offers very specific products.
After washing the vehicle, dampness, or
in wintry conditions, ice can form on the
brake discs and pads: braking efficiency
may be reduced. Make light brake
applications to dry and defrost the brakes.
ETG gearbox
The ETG gearbox does not require
any maintenance (no oil change).
The pressures given on the tyre pressure label
are valid for "cold" tyres. If you have driven for
more than 10
minutes or more than 6 miles
(10
kilometres) at more than 31 mph (50 km/h),
0.3
bar (30 kPa) should be added to the values
given on the label.
Under-inflation increases fuel consumption.
Non-compliant tyre pressure causes premature
wear on tyres and has an adverse effect on the
vehicle's road holding – Risk of an accident!
7
Practical information
Page 109 of 180
107
If a pressure of 2 bars is not reached after
7 minutes, this indicates that the tyre is not
repairable; contact a
PEUGEOT dealer or
a
qualified workshop for assistance.
F
O
nce the correct pressure is reached, put
the switch to the " O" position.
F
R
emove the kit then stow it. Do not drive more than 120
mph
(200 km/h) with the repaired tyre; see
a PEUGEOT dealer or a qualified
workshop to change the tyre.
Tyre under-inflation detection After a tyre repair, the warning
lamp will remain on until the
system is reset.
For more information on Tyre under-
inflation detection , refer to the
corresponding section.
Should the pressure of one or more tyres
be adjusted, it is necessary to reinitialise
the under-inflation detection system.
For more information on Tyre under-
inflation detection , refer to the
corresponding section.
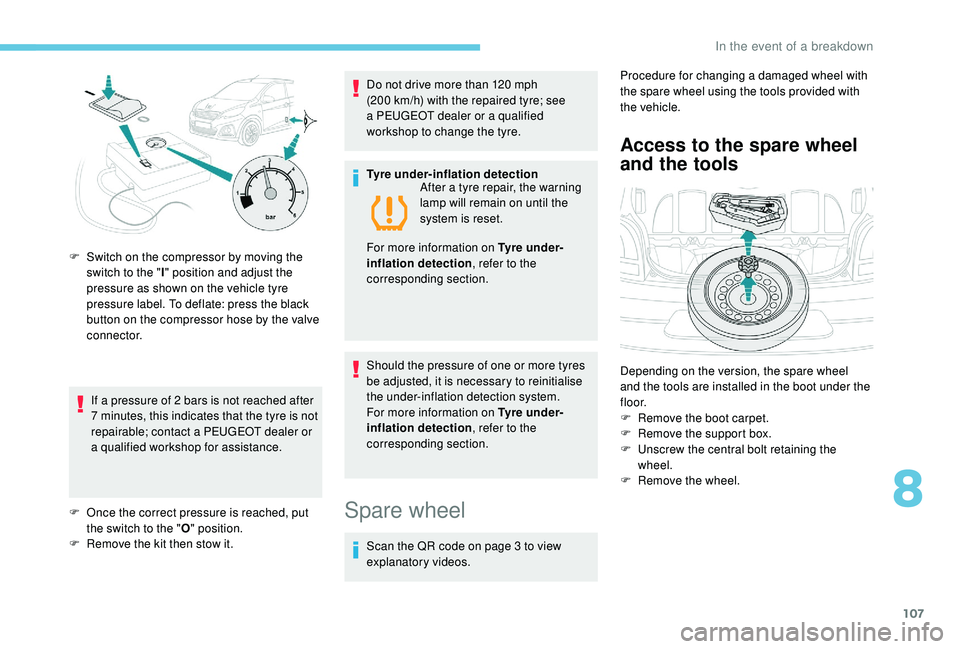
F
S
witch on the compressor by moving the
switch to the " I" position and adjust the
pressure as shown on the vehicle tyre
pressure label. To deflate: press the black
button on the compressor hose by the valve
connector.
Spare wheel
Scan the QR code on page 3 to view
e xplanatory videos. Procedure for changing a
damaged wheel with
the spare wheel using the tools provided with
the vehicle.
Access to the spare wheel
and the tools
Depending on the version, the spare wheel
and the tools are installed in the boot under the
f l o o r.
F
R
emove the boot carpet.
F
R
emove the support box.
F
U
nscrew the central bolt retaining the
wheel.
F
R
emove the wheel.
8
In the event of a breakdown
Page 110 of 180
108
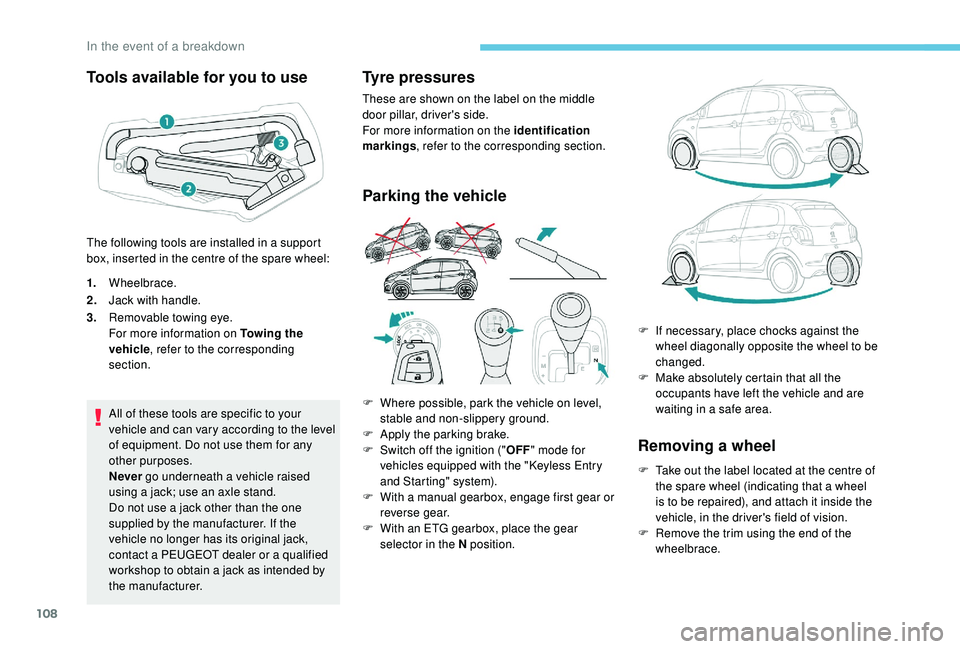
Tools available for you to use
1.Wheelbrace.
2. Jack with handle.
3. Removable towing eye.
For more information on Towing the
vehicle , refer to the corresponding
section.
All of these tools are specific to your
vehicle and can vary according to the level
of equipment. Do not use them for any
other purposes.
Never go underneath a
vehicle raised
using a
jack; use an axle stand.
Do not use a
jack other than the one
supplied by the manufacturer. If the
vehicle no longer has its original jack,
contact a
PEUGEOT dealer or a qualified
workshop to obtain a
jack as intended by
the manufacturer.
Tyre pressures
These are shown on the label on the middle
door pillar, driver's side.
For more information on the identification
markings , refer to the corresponding section.
Parking the vehicle
Removing a wheel
F Take out the label located at the centre of the spare wheel (indicating that a wheel
is to be repaired), and attach it inside the
vehicle, in the driver's field of vision.
F
R
emove the trim using the end of the
wheelbrace.
The following tools are installed in a
support
box, inserted in the centre of the spare wheel:
F
W
here possible, park the vehicle on level,
stable and non-slippery ground.
F
A
pply the parking brake.
F
S
witch off the ignition ("
OFF" mode for
vehicles equipped with the " K
eyless Entry
and Starting" system).
F
W
ith a
manual gearbox, engage first gear or
reverse gear.
F
W
ith an ETG gearbox, place the gear
selector in the N position. F
I
f necessary, place chocks against the
wheel diagonally opposite the wheel to be
changed.
F
M
ake absolutely certain that all the
occupants have left the vehicle and are
waiting in a safe area.
In the event of a breakdown