Page 33 of 180

31
Precautions in use
Never put objects on the open or closed
roof.
Do not sit or place anything on the
crossbar of the roof when it is open.
To avoid damaging the roof, do not open it
if there is snow or ice present.
Never use sharp tools to remove snow or
ice that has built up on the roof.
To prevent creases appearing in the
canvas, it is recommended not to leave
the roof open for long periods.
It is not recommended to operate the
vehicle's air conditioning system when the
roof is open.
If the vehicle is to be parked outside for
a long period, it is advisable to protect the
roof using a
tarpaulin.
It is advisable to close the roof when you
park the vehicle.
Even if the roof is closed, it is safer not to
leave any valuables inside the vehicle.
When you leave the vehicle, turn off
the ignition and remove the key (or take
the electronic key with you) to prevent
unintentional operation of the roof.
Advice on care
General recommendations on the care and
maintenance of your vehicle are given in the
warranty and maintenance record.
Fabric roof
Before washing the fabric, remove as
much dirt as possible using a soft brush or
a
vacuum cleaner.
To avoid damaging the roof:
-
n
ever use a high-pressure washer,
-
n
ever clean your vehicle in an
automatic roller-brush car wash.
Allow the vehicle to dry in the shade and
avoid exposing it to direct sunlight.
To remove stains, dab them (never rub
them) with a
sponge and some soapy
water, then immediately rinse the fabric
with clean water.
Immediately remove bird droppings or
plant resins, their caustic nature could
damage the fabric. For regular care of the fabric and to keep
its original appearance, we recommend
using the environmentally friendly product
"Insect removal" product" from the
"TECHNATURE" range. To obtain this
product, visit a
PEUGEOT dealer.
Never use chemical products, detergents,
stain removers, solvents, alcohol, petrol,…
to clean the fabric.
To waterproof the fabric, use only
waterproofing products specifically for
fabric hoods.
Acoustic air deflector
We recommend that you clean the
acoustic air deflector with care , using
a
soft brush.
2
Access
Page 34 of 180

32
Front seats
For safety reasons, only adjust seats
when the vehicle is stationary.
Before moving the seat backwards,
ensure that there is nothing that might
prevent the full travel of the seat.
There is a risk of trapping or pinching
passengers if present in the rear seats
or jamming the seat if large objects are
placed on the floor behind the seat.
Correct driving position
Before taking to the road and to make the most
of the ergonomic layout of the instruments and
controls, carry out these adjustments in the
following order:
-
t
he seat backrest angle,
-
t
he seat cushion height,
-
t
he longitudinal position of the seat,
-
t
he height of the steering wheel,
-
t
he rear view mirror and door mirrors. Once these adjustments have been made,
check the instrument panel can be viewed
correctly from your driving position.Forwards-backwards
F Raise the control and slide the seat
forwards or backwards.
Seat backrest angle
F Take your weight off the backrest.
F T urn the control knob to adjust the seat
backrest angle.
Height of driver's seat
(Depending on version).
F
P
ull the control upwards to raise or push
it downwards to lower, as many times as
necessary to obtain the position required.
Heated seat control
Ease of use and comfort
Page 35 of 180

33
With the engine running, the front seats can be
heated separately.
F
P
ress the switch. The indicator lamp comes
on.
F
P
ressing a
second time stops operation.
The temperature is controlled automatically.
The heated seat function is deactivated
approximately two minutes after the ignition is
switched off. To reactivate the function, switch
on the ignition and press the control again.
Switch off the heated seats as soon as
you consider it necessary, as reducing
the consumption of electrical current
reduces fuel consumption.
Do not use the function when the seat is
not occupied.
Reduce the intensity of the heating as
soon as possible.
When the seat and passenger
compartment have reached an
adequate temperature, you can stop
the function; reducing the consumption
of electrical current reduces fuel
consumption. Prolonged use at the highest setting is
not recommended for those with sensitive
skin.
There is a
risk of burns for people whose
perception of heat is impaired (illness,
taking medication, for example).
There is a
risk of overheating the system if
material with insulating properties is used,
such as cushions or seat covers.
Do not use the function:
-
i
f wearing damp clothing,
-
i
f child seats are fitted.
To avoid breaking the heating element in
the seat:
-
d
o not place heavy objects on the seat,
-
d
o not kneel or stand on the seat,
-
d
o not place sharp objects on the seat,
-
d
o not spill liquids onto the seat.
To avoid the risk of short-circuit:
-
d
o not use liquid products for cleaning
the seat,
-
n
ever use the heating function when
the seat is damp.Access to rear seats
(3-door)
F Pull this control towards you to fold the backrest and move the seat for ward.
When replacing it, guide the seat until the
backrest and seat cushion fully lock into
position.
Make sure that no object or person
prevents the seat runners from returning
to the original position.
Make sure that the seat belt has reeled
in correctly so that it does not obstruct
passengers' access to the rear seats.
3
Ease of use and comfort
Page 36 of 180
,
-
a f
olding one-pie")
34
Rear seats
Your vehicle is equipped with a rear bench
s eat that has a fixed one-piece cushion and,
depending on version:
-
a f
olding backrest in two halves (50/50),
-
a f
olding one-piece backrest.
Storage of belts
When they are not being used or before folding
down a backrest of the bench seat, be sure
to store the rear seat belts by inserting the
tongues in the dedicated housings located on
the side pillars.
Folding down the backrest
of the bench seat
Folding down is per formed at the rear of the
vehicle with the boot open.
F
P
lace the head restraints in the low position.
For more information on the Rear head
restraints , refer to the corresponding section.
F
P
ull the strap A located behind the backrest
to unlock it and fold it down on the cushion.
Folding up the backrest of
the bench seat
3-door 5-door F
F
old back the backrest and lock it on the
anchorage B .
F
C
heck that the backrest of the rear seat is
properly locked.
Rear head restraints
(Depending on version).
The rear head restraints are removable and
have two positions:
-
h
igh, the position for use.
-
l
ow, the position for storage.
Ease of use and comfort
Page 37 of 180

35
To raise the head restraint, pull it upwards.
To lower it, press the catch A then push down
the head restraint.
To remove it:
-
s
lightly tilt the backrest,
-
m
ove the head restraint to the high position,
-
p
ress the catch A while pulling the head
restraint upwards.
To reinstall it:
-
s
lightly tilt the backrest,
-
i
nsert the rods of the head restraint into the
holes.
To reach the low position, press the catch A .
Mirrors
Manual door mirrors
F Move the lever in any of the four directions
to adjust the mirror.
Electric door mirrors
Adjustment
F Move control A to the right or to the left to select the corresponding mirror.
F
M
ove control B in all four directions to
adjust.
F
R
eturn control A to its home position
(c e nt r e).
Objects seen in the mirror are in reality
closer than they appear.
Take this into account when assessing
the distance of vehicles approaching from
behind.
Demisting – Defrosting
Use the rear screen demist – defrost
control. For more information on Demisting and
defrosting the rear window
, refer to the
associated section.
Folding/unfolding
When parking the vehicle, the door mirrors can
be folded in manually.
The original settings are kept when they
are folded out again.
Rear view mirror (manual)
The rear view mirror has two positions:
- d ay (normal),
-
n
ight (anti-dazzle).
To change from one to the other, push or pull
the lever on the lower edge of the mirror.
3
Ease of use and comfort
Page 38 of 180

F While the vehicle is stationary, hold the
steering wheel then lower the control to unlock it.
F
A
djust the height as required and raise the")
36
Steering wheel adjustment
(with power steering)
F While the vehicle is stationary, hold the
steering wheel then lower the control to unlock it.
F
A
djust the height as required and raise the
control again to lock the steering wheel.
For safety reasons, these operations must
not be carried out while driving.
Ventilation5. Air outlets to the rear footwells (depends
on version).
1. Windscreen demisting/defrosting vents.
2. Central vent.
3. Side vents.
4. Air outlets to the front footwells.
Recommendations
for ventilation and air
conditioning
If the interior temperature is very high after
the vehicle has stood for a
long time in the
sunshine, please ventilate the passenger
compartment for a
few moments.
To obtain a
per fectly even distribution
of air, ensure that the external air intake
grille, the air vents, air passages and
the air outlets in the footwells are not
obstructed.
Ensure that the passenger compartment
filter, situated behind the glove box,
inside the air conditioning unit, is in good
condition. Replace the filter elements
periodically. If you drive in a
dusty
environment, have them replaced twice
as often.
Operate the air conditioning system for
5
to 10 minutes, once or twice a month, to
keep it in per fect working order.
To ensure correct operation of your air
conditioning system, we also advise you to
have it checked regularly.
If the system does not produce cold air, do
not use it and contact a
PEUGEOT dealer
or a
qualified workshop.
Ease of use and comfort
Page 39 of 180

37
The condensation created by the air
conditioning results in a discharge of water
under the vehicle which is per fectly normal.
The air conditioning system does not
contain chlorine and does not present
any danger to the ozone layer.
Heating
The heating system only operates with the
engine running.
1. Temperature adjustment.
2. Air flow adjustment.
3. Air distribution adjustment.
Temperature adjustment
F Turn control 1 from blue (cold) to red (hot) to
adjust the temperature to your liking.
Air flow adjustment
F Turn the dial 2 from position 1 to position
4 to obtain the desired flow of air.
If you put the air flow control in position 0
(system deactivation), the temperature is no
longer controlled. A slight flow of air can still be
felt, resulting from the for ward movement of the
vehicle.
Avoid driving for too long with the
ventilation off (risk of misting and
deterioration of air quality).
Air distribution adjustment
Turn dial 3 to vary the air distribution in the
p assenger compartment.
Central and side air vents. Central, side and footwell air vents.
Footwells.
Windscreen and footwells.
Windscreen.
Manual air conditioning
The system only operates when the engine is
running.
1.
Temperature adjustment.
2. Air flow adjustment.
3
Ease of use and comfort
Page 40 of 180
 to red (hot) to
adjust the temperature to yo")
38
3.Air distribution adjustment.
4. Recirculation of interior air.
5. Air conditioning On/Off.
Temperature adjustment
F Turn control 1 from blue (cold) to red (hot) to
adjust the temperature to your liking.
Air flow adjustment
F Turn the dial 2 from position 1 to position
4 to obtain the desired flow of air.
If you put the air flow control in position 0
(system deactivation), the temperature is no
longer controlled. A slight flow of air can still be
felt, resulting from the for ward movement of the
vehicle.
Avoid driving for too long with the
ventilation off (risk of misting and
deterioration of air quality).
Air distribution adjustment
Turn dial 3 to vary the air distribution in the
p assenger compartment.
Air conditioning
Central and side air vents.
Central, side and footwell air vents.
Footwells.
Windscreen and footwells.
Windscreen.
With the engine running, the air conditioning is
designed to operate effectively in all seasons,
with the windows closed.
It allows you:
-
i
n summer, to lower the temperature,
-
t
o increase the effectiveness of the
demisting in winter, above 3°C.
On/Off
F Press button 5 to activate/deactivate the air
conditioning system. The air conditioning does not operate
when the air flow is deactivated.
Automatic air conditioning
The air conditioning system operates when the
engine is running.
1.
Adjusting the temperature.
2. Air flow adjustment.
3. Air distribution adjustment.
4. Recirculation of interior air.
5. Air conditioning On/Off.
6. Automatic programme.
Automatic programme
It automatically adjusts all settings for the
following functions to provide optimum
operation for the comfort level chosen:
Ease of use and comfort
 1
1 2
2 3
3 4
4 5
5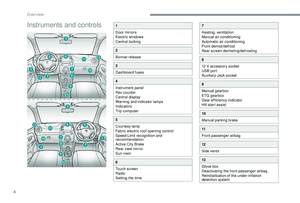 6
6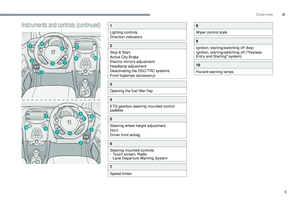 7
7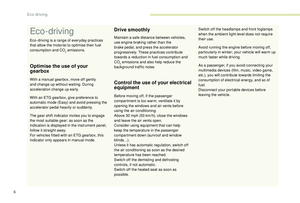 8
8 9
9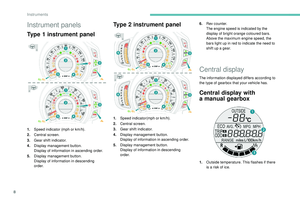 10
10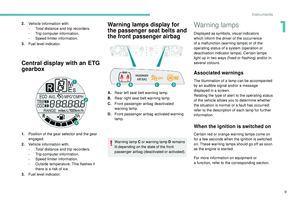 11
11 12
12 13
13 14
14 15
15 16
16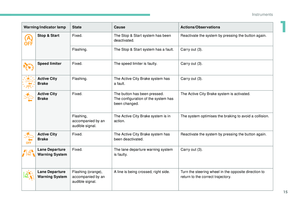 17
17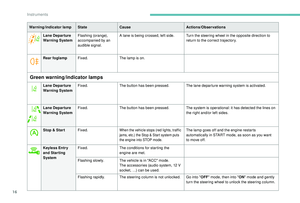 18
18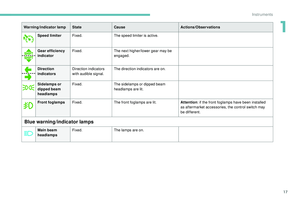 19
19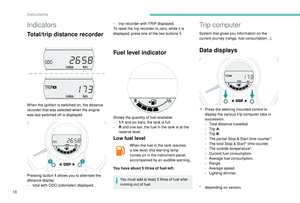 20
20 21
21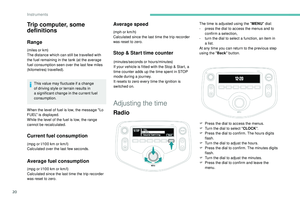 22
22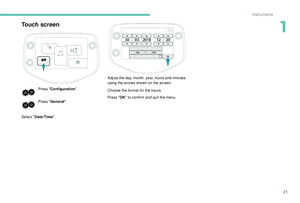 23
23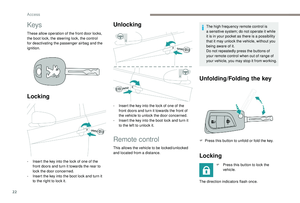 24
24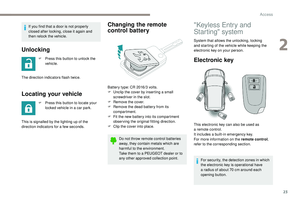 25
25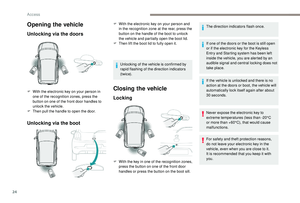 26
26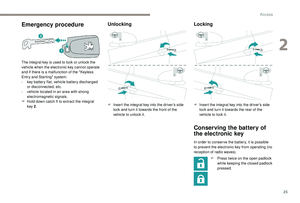 27
27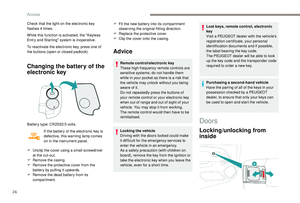 28
28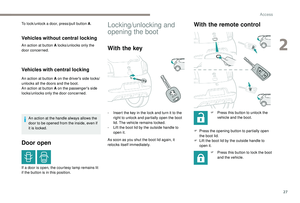 29
29 30
30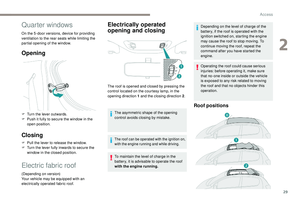 31
31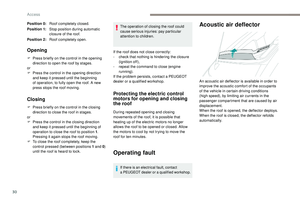 32
32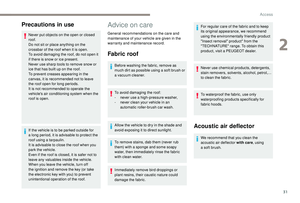 33
33 34
34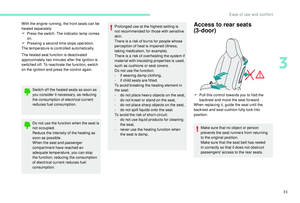 35
35 36
36 37
37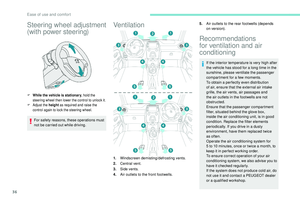 38
38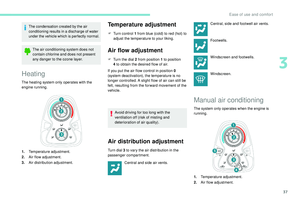 39
39 40
40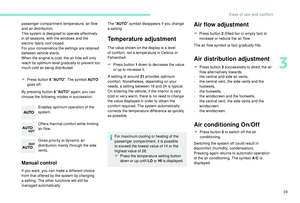 41
41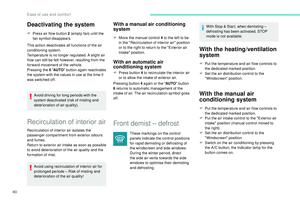 42
42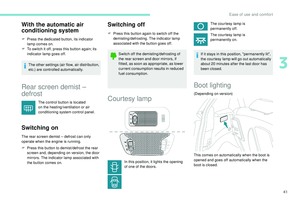 43
43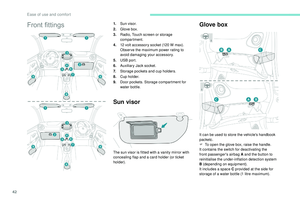 44
44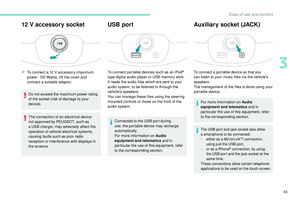 45
45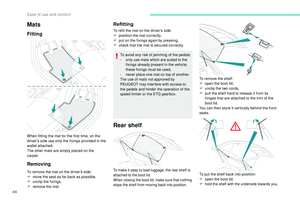 46
46 47
47 48
48 49
49 50
50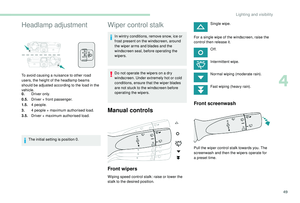 51
51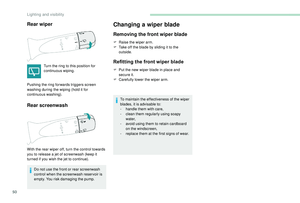 52
52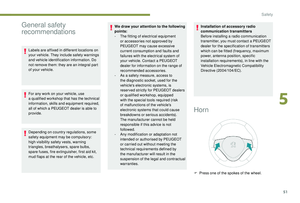 53
53 54
54 55
55 56
56 57
57 58
58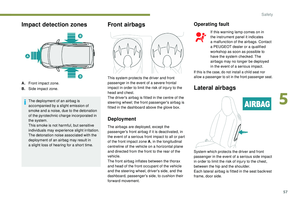 59
59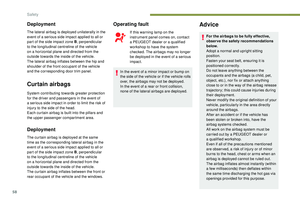 60
60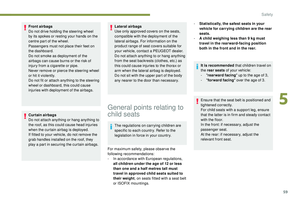 61
61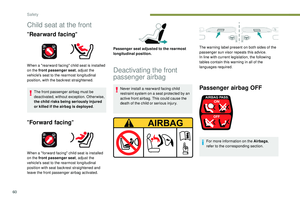 62
62 63
63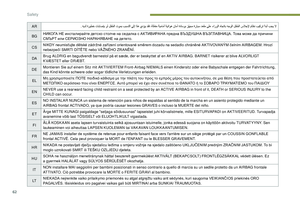 64
64 65
65 66
66 67
67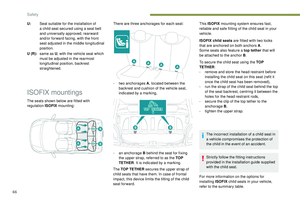 68
68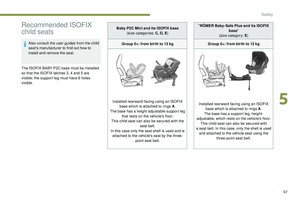 69
69 70
70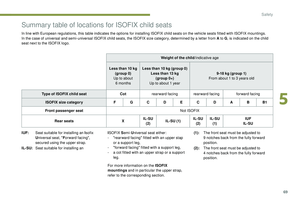 71
71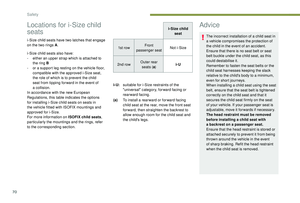 72
72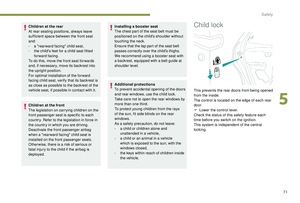 73
73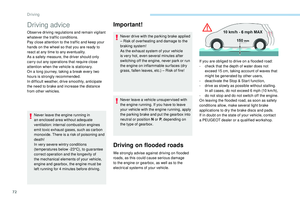 74
74 75
75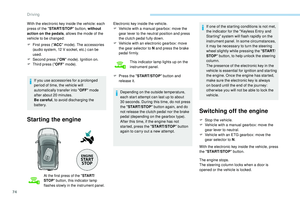 76
76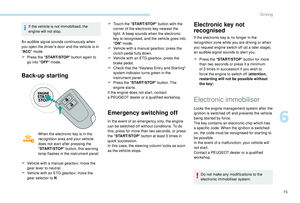 77
77 78
78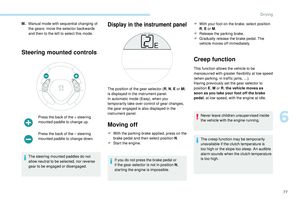 79
79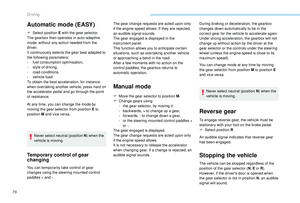 80
80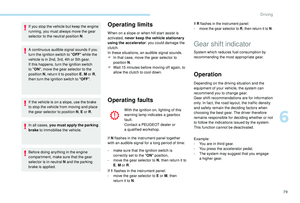 81
81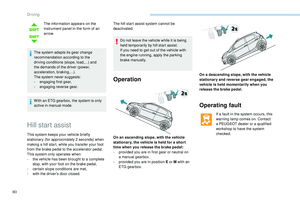 82
82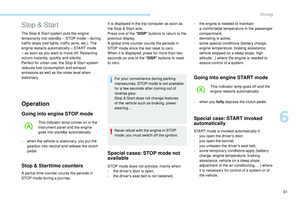 83
83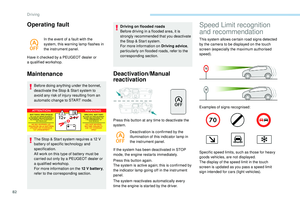 84
84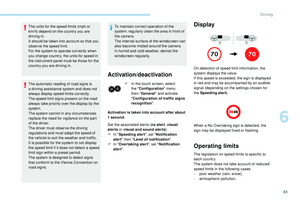 85
85 86
86 87
87 88
88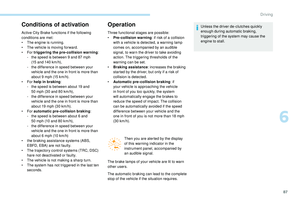 89
89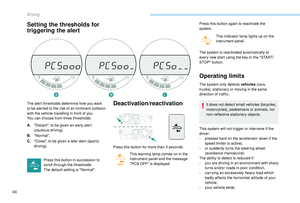 90
90 91
91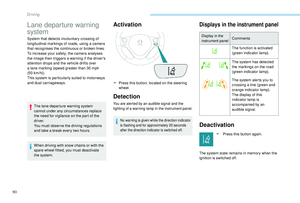 92
92 93
93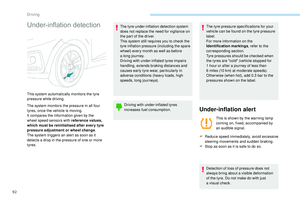 94
94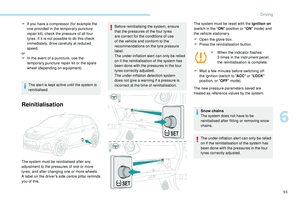 95
95 96
96 97
97 98
98 99
99 100
100 101
101 102
102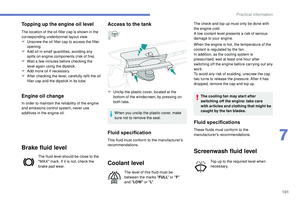 103
103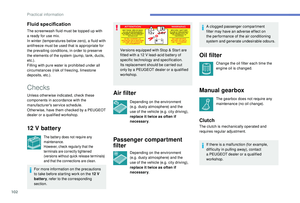 104
104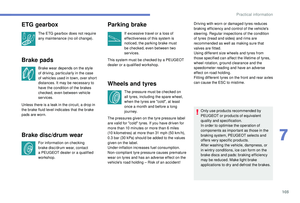 105
105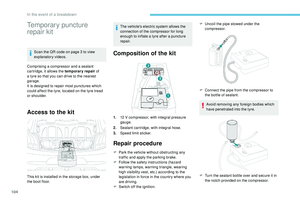 106
106 107
107 108
108 109
109 110
110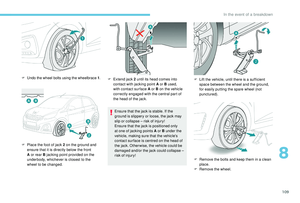 111
111 112
112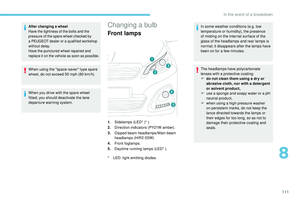 113
113 114
114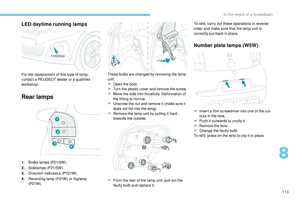 115
115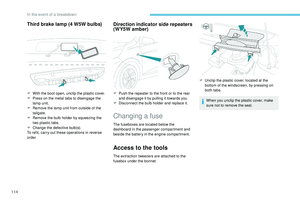 116
116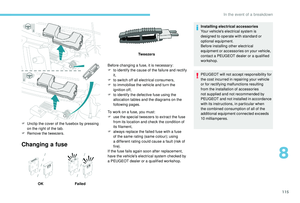 117
117 118
118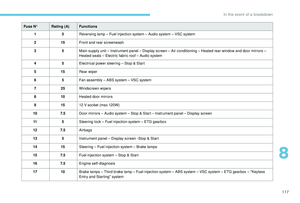 119
119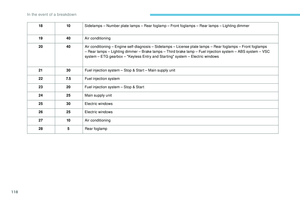 120
120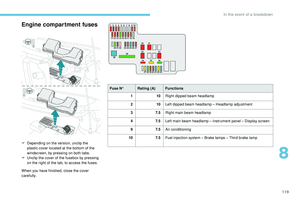 121
121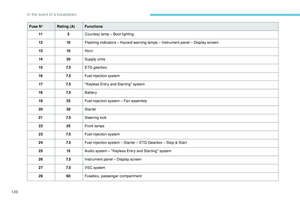 122
122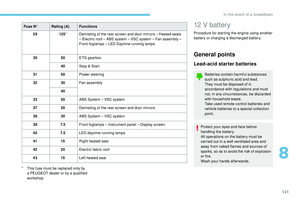 123
123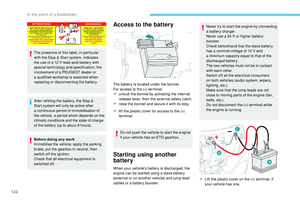 124
124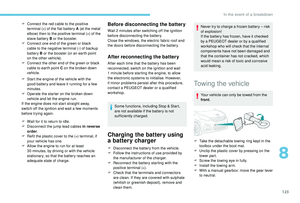 125
125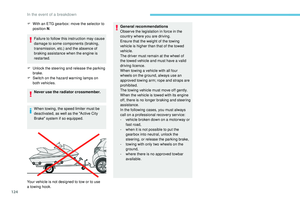 126
126 127
127 128
128 129
129 130
130 131
131 132
132 133
133 134
134 135
135 136
136 137
137 138
138 139
139 140
140 141
141 142
142 143
143 144
144 145
145 146
146 147
147 148
148 149
149 150
150 151
151 152
152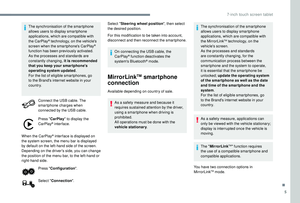 153
153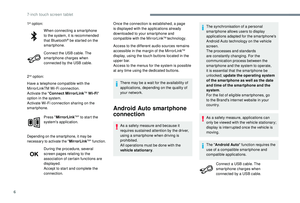 154
154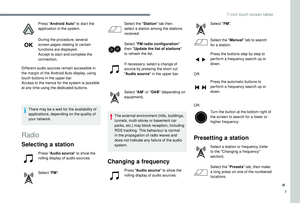 155
155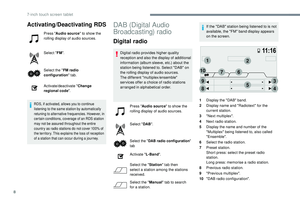 156
156 157
157 158
158 159
159 160
160 161
161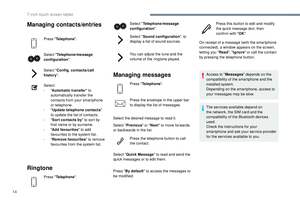 162
162 163
163 164
164 165
165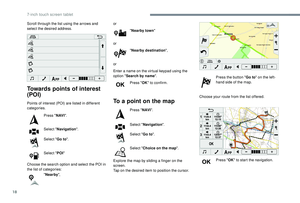 166
166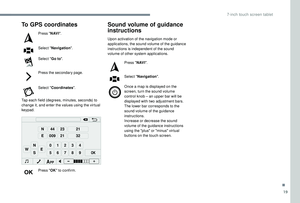 167
167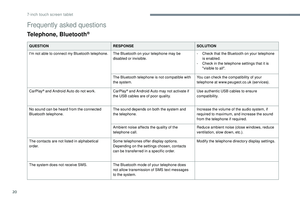 168
168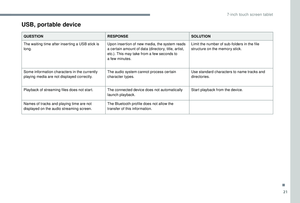 169
169 170
170 171
171 172
172 173
173 174
174 175
175 176
176 177
177 178
178 179
179