Page 49 of 180
, for as long as
the stalk is kept pulled.
Displays
Illumination o")
47
In the lighting off and sidelamps modes, the
driver can switch on the main beam headlamps
temporarily ("headlamp flash"), for as long as
the stalk is kept pulled.
Displays
Illumination of the corresponding indicator
lamp in the instrument panel confirms that the
lighting selected is switched on.
Selection ring for the
foglamps
Front foglamps and rear
foglamp
With the dipped beams on, push the control
for wards to switch on the main beams. Pull the
control towards you to return to dipped beams.
The foglamps operate when the dipped or main
beams are on. Turn and release the ring:
F
f
or wards once to switch on the rear
foglamp,
F
f
or wards a
second time to switch on the
front foglamps,
F
b
ackwards once to switch off the front
foglamps,
F
b
ackwards a
second time to switch off the
rear foglamp.
If the lighting is switched off automatically
(version with AUTO lighting) or the dipped
beams are switched off manually, the foglamps
and sidelamps remain on.
F
T
urn the ring backwards and release it to
turn off all the lamps. In good or rainy weather, both day and
night, using the front foglamps and the
rear foglamp is prohibited. In these
situations, the power of their beams may
dazzle other drivers. They should only be
used in fog or falling snow.
In these weather conditions, it is your
responsibility to switch on the foglamps
and dipped headlamps manually as the
sunshine sensor may detect sufficient
light.
Do not forget to turn off the front foglamps
and the rear foglamp as soon as they are
no longer necessary.
Switching off the lamps when the
ignition is switched off
When switching off the ignition, all of the
lamps turn off immediately, except for
dipped beam if guide-me-home lighting is
activated.
Switching on the lighting after the
ignition is switched off
To reactivate the lighting control, rotate
the ring to the 0
position – lamps off, then
to the desired position.
On opening the driver's door a
temporary
audible signal warns the driver that the
lighting is on.
4
Lighting and visibility
Page 50 of 180

48
Automatic headlamp
illumination
Switching on
F Turn the ring to the "AUTO" position.
Switching off
F Turn the ring to another position.
In fog or snow, the sunshine sensor may
detect sufficient light. The lamps will not
come on automatically.
Do not cover the light sensor, the
associated functions would no longer be
controlled.
Manual guide-me-home
lighting
Switching on
F Set the lighting control stalk to the "Lights off " or "Auto" position.
F
W
ith the ignition off, flash the headlamps
using the lighting stalk.
The headlamps come on for a
duration of about
30
seconds.
Switching off
The manual guide-me-home lighting stops
immediately if:
-
y
ou "flash the headlamps" again,
When a
low level of ambient light is detected by
a
light sensor, the sidelamps and dipped beam
headlamps are switched on automatically,
without any action on the part of the driver.
As soon as the level of light becomes sufficient
again, the lamps are switched off automatically.
The sensor is located at the bottom of the
windscreen. (Depending on version)
Temporarily keeps the dipped beam
headlamps on after the vehicle's ignition has
been switched off, making exit easier for the
occupants when the light is poor.
Direction indicators
Three flashes
F Press briefly upwards or downwards,
without going beyond the point of
resistance; the direction indicators will flash
3
times.
-
y
ou put the lighting control in another
position,
-
y
ou switch on the ignition.
F
L
eft: lower the lighting stalk passing the
point of resistance.
F
R
ight: raise the lighting stalk passing the
point of resistance.
Lighting and visibility
Page 51 of 180

49
Headlamp adjustment
To avoid causing a nuisance to other road
u sers, the height of the headlamp beams
should be adjusted according to the load in the
vehicle.
0. Driver only.
0.5. Driver + front passenger.
1.5. 4
people.
3. 4
people + maximum authorised load.
3.5. Driver + maximum authorised load.
The initial setting is position 0.
Wiper control stalk
In wintry conditions, remove snow, ice or
frost present on the windscreen, around
the wiper arms and blades and the
windscreen seal, before operating the
wipers.
Do not operate the wipers on a
dry
windscreen. Under extremely hot or cold
conditions, ensure that the wiper blades
are not stuck to the windscreen before
operating the wipers.
Manual controls
Front wipers
Wiping speed control stalk: raise or lower the
stalk to the desired position. Single wipe.
For a single wipe of the windscreen, raise the
control then release it.
Of f.
Intermittent wipe.
Normal wiping (moderate rain).
Fast wiping (heavy rain).
Front screenwash
Pull the wiper control stalk towards you. The
screenwash and then the wipers operate for
a
preset time.
4
Lighting and visibility
Page 52 of 180
50
Rear wiper
Turn the ring to this position for
continuous wiping.
Rear screenwash
Do not use the front or rear screenwash
control when the screenwash reser voir is
empty. You risk damaging the pump.
Changing a wiper blade
Removing the front wiper blade
F Raise the wiper arm.
F T ake off the blade by sliding it to the
outside.
Refitting the front wiper blade
F Put the new wiper blade in place and secure it.
F
C
arefully lower the wiper arm.
To maintain the effectiveness of the wiper
blades, it is advisable to:
-
h
andle them with care,
-
c
lean them regularly using soapy
water,
-
a
void using them to retain cardboard
on the windscreen,
-
r
eplace them at the first signs of wear.
Pushing the ring for wards triggers screen
washing during the wiping (hold it for
continuous washing).
With the rear wiper off, turn the control towards
you to release a
jet of screenwash (keep it
turned if you wish the jet to continue).
Lighting and visibility
Page 53 of 180

51
General safety
recommendations
Labels are affixed in different locations on
your vehicle. They include safety warnings
and vehicle identification information. Do
not remove them: they are an integral part
of your vehicle.
For any work on your vehicle, use
a qualified workshop that has the technical
information, skills and equipment required,
all of which a
PEUGEOT dealer is able to
provide.
Depending on country regulations, some
safety equipment may be compulsory:
high visibility safety vests, warning
triangles, breathalysers, spare bulbs,
spare fuses, fire extinguisher, first aid kit,
mud flaps at the rear of the vehicle, etc. We draw your attention to the following
points:
-
T
he fitting of electrical equipment
or accessories not approved by
PEUGEOT may cause excessive
current consumption and faults and
failures with the electrical system of
your vehicle. Contact a
PEUGEOT
dealer for information on the range of
recommended accessories.
-
A
s a safety measure, access to
the diagnostic socket, used for the
vehicle's electronic systems, is
reser ved strictly for PEUGEOT dealers
or qualified workshop, equipped
with the special tools required (risk
of malfunctions of the vehicle's
electronic systems that could cause
breakdowns or serious accidents).
The manufacturer cannot be held
responsible if this advice is not
followed.
-
A
ny modification or adaptation not
intended or authorised by PEUGEOT
or carried out without meeting the
technical requirements defined by
the manufacturer will result in the
suspension of the legal and contractual
warranties. Installation of accessory radio
communication transmitters
Before installing a
radio communication
transmitter, you must contact a PEUGEOT
dealer for the specification of transmitters
which can be fitted (frequency, maximum
power, antenna position, specific
installation requirements), in line with the
Vehicle Electromagnetic Compatibility
Directive (2004/104/EC).
Horn
F Press one of the spokes of the wheel.
5
Safety
Page 54 of 180

52
Hazard warning lamps
F When you press this red button, all four direction indicators flash.
It can operate with the ignition off. F
P
ress the central part of the steering wheel.
Electronic stability control
(ESC)
The ESC programme incorporates the following
systems:
-
a
nti-lock braking system (ABS) and
electronic brake force distribution (EBFD),
Definitions
Anti-lock braking system (ABS)
and electronic brake force
distribution (EBFD)
These systems improve the stability and
manoeuvrability of your vehicle when braking
and contribute towards improved control on
corners, in particular on poor or slippery road
surfaces.
ABS prevents the wheels from locking during
emergency braking.
EBFD ensures total management of the braking
pressure, wheel by wheel.
Emergency braking assistance
(EBA)
In an emergency, this system permits the
optimum braking pressure to be reached
more quickly, therefore reducing the stopping
distance.
It triggers according to the speed at which
the brake pedal is pressed. This is felt by
a
reduction in the resistance of the pedal and
an increase in the effectiveness of the braking.
Traction control (TRC)
This system optimises traction in order to limit
wheel slip by acting on the brakes of the driving
wheels and on the engine. It also improves
the directional stability of the vehicle on
acceleration.
-
em
ergency braking assistance (EBA),
-
t
raction control (TRC),
- d
ynamic stability control (DSC).
Dynamic stability control (DSC)
If there is a difference between the path
f ollowed by the vehicle and that required by the
driver, this system monitors each wheel and
automatically acts on the brake of one or more
wheels and on the engine to return the vehicle
to the required path, within the limits of the laws
of physics.
Operation
Anti-lock braking system (ABS)
and electronic brake force
distribution (EBD)
If this warning lamp comes on,
accompanied by an audible
signal, it indicates an ABS system
malfunction that could cause control
of the vehicle to be lost during
braking.
Drive carefully at a
moderate speed and
contact a
PEUGEOT dealer or a qualified
workshop.
Safety
Page 55 of 180
 system
malfunction that could cause control
of the vehicle to be los")
53
If this warning lamp comes on,
accompanied by an audible signal,
it indicates an electronic brake
force distribution (EBFD) system
malfunction that could cause control
of the vehicle to be lost during
braking.
Yo u must stop as soon as it is safe to do so.
Contact a
PEUGEOT dealer or a qualified
workshop without delay.
When changing wheels (tyres and rims),
ensure that these are approved for your
vehicle.
When operating under normal conditions,
the ABS may cause the brake pedal to
vibrate slightly.
In emergency braking, press the brake
pedal hard and maintain this pressure.
Dynamic stability control (DSC)
and traction control (TRC)
Activation
These systems are activated automatically
every time the vehicle is started. Activation of these systems
is signalled by flashing of this
indicator in the instrument panel,
accompanied by an audible signal
for the DSC system.
Deactivation
In exceptional conditions (moving a vehicle that
i s bogged down in mud, stuck in snow, on loose
soil, …), it may prove useful to deactivate the
DSC and TRC systems, so that the wheels can
move freely and regain grip.
It is recommended that the systems are
reactivated as soon as possible however.
F
P
ress the button briefly.
Deactivating TRC alone
This warning lamp comes on: the
TRC system no longer acts on the
operation of the engine. Deactivation of the TRC and DSC systems
F
W
ith the vehicle stopped
, press the button
for more than 3 seconds.
These warning lamps come on: the
TRC and DSC systems no longer act
on the operation of the engine.
Reactivation
The TRC and DSC systems reactivate
automatically each time the engine is started.
F
P
ress the button again to
reactivate them manually.
When only the TRC system has been
deactivated, it reactivates as soon as the speed
of the vehicle increases.
If the TRC and DSC systems have both
been deactivated, they do not reactivate by
themselves, even if the speed of the vehicle
increases.
Operating fault
If this warning lamp comes on,
accompanied by an audible signal,
this indicates a fault with the system.
As soon as they detect a
problem of grip or
trajectory, these systems act on the operation
of the engine and brakes.
5
Safety
Page 56 of 180

54
Drive carefully at a moderate speed and
c ontact a PEUGEOT dealer or a qualified
workshop for verification of the system.
The TRC and DSC systems offer
exceptional safety in normal driving, but
this should not encourage the driver to
take extra risks or drive at high speed.
The correct operation of the systems
depends on observing the manufacturer's
recommendations regarding wheels (tyres
and rims), braking system components,
electronic components as well as
assembly and repair procedures used by
the PEUGEOT dealer network.
After an impact, have the systems
checked by a
PEUGEOT dealer or
a
qualified workshop.Seat belts
Front seat belts
The front seat belts are fitted with
a pretensioning and force limiting system.
This system improves safety in the front
seats in the event of a
front or side impact.
Depending on the severity of the impact, the
pretensioning system instantly tightens the seat
belts against the body of the occupants.
The pretensioning seat belts are active when
the ignition is on.
The force limiter reduces the pressure of
the seat belt on the passenger's chest, thus
improving their protection.
Rear seat belts
The rear seats are each fitted with a three-point
sea t belt.
Locking
F Pull the strap then insert the tongue in the buckle.
F
C
heck that the seat belt is fastened
correctly by pulling the strap.
Safety
 1
1 2
2 3
3 4
4 5
5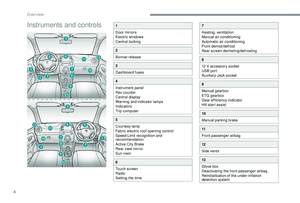 6
6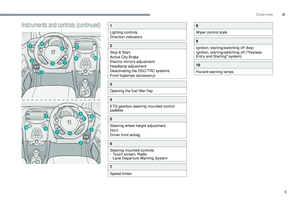 7
7 8
8 9
9 10
10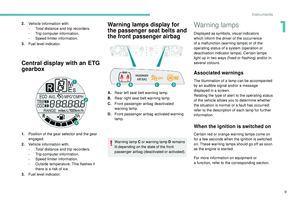 11
11 12
12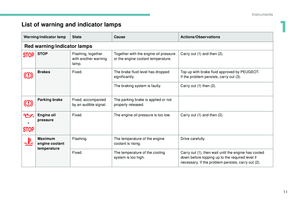 13
13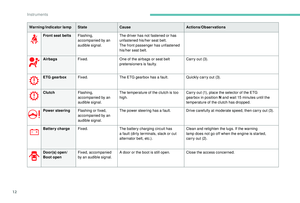 14
14 15
15 16
16 17
17 18
18 19
19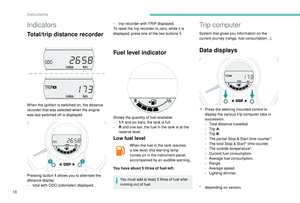 20
20 21
21 22
22 23
23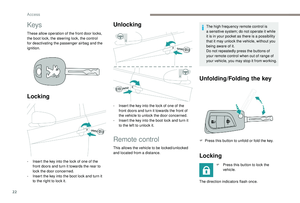 24
24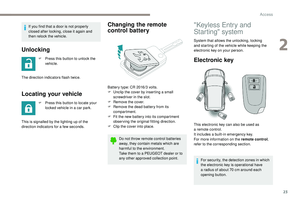 25
25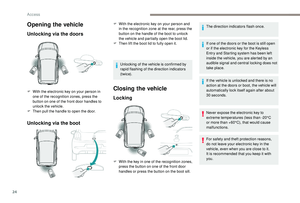 26
26 27
27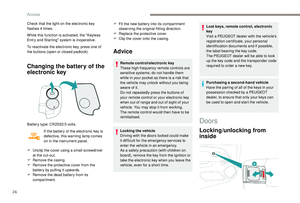 28
28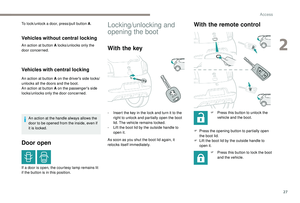 29
29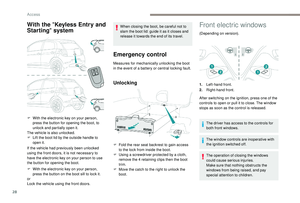 30
30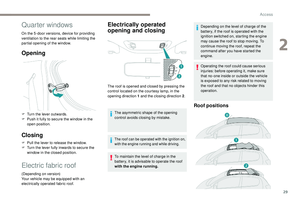 31
31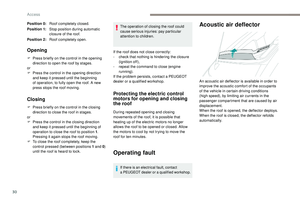 32
32 33
33 34
34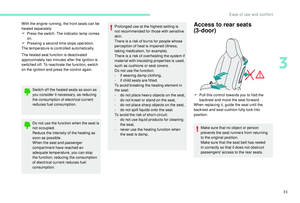 35
35 36
36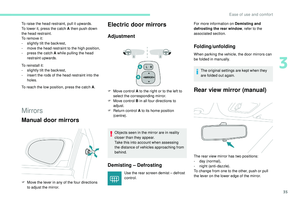 37
37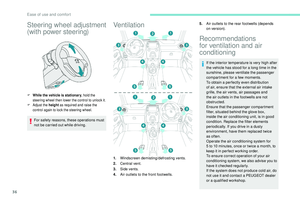 38
38 39
39 40
40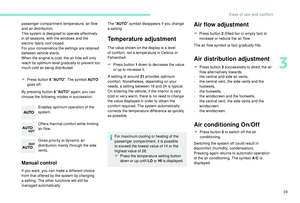 41
41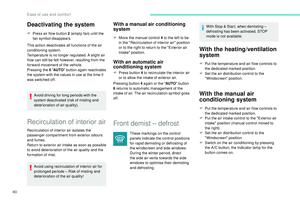 42
42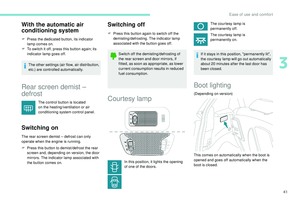 43
43 44
44 45
45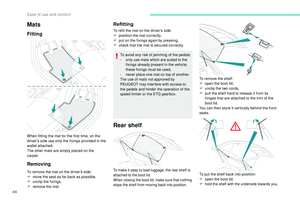 46
46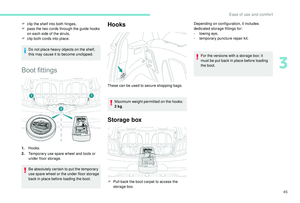 47
47 48
48 49
49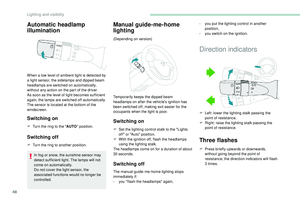 50
50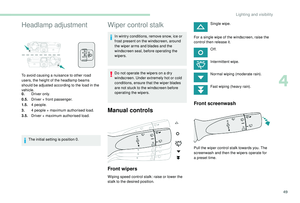 51
51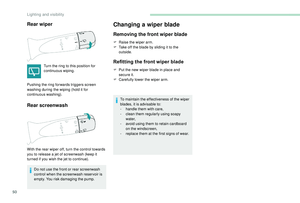 52
52 53
53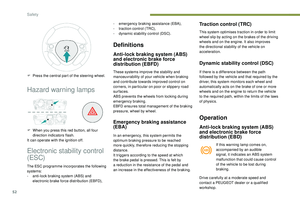 54
54 55
55 56
56 57
57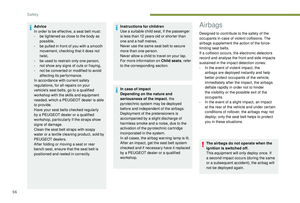 58
58 59
59 60
60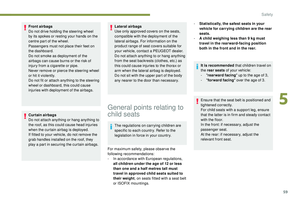 61
61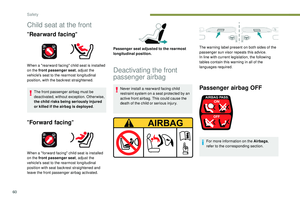 62
62 63
63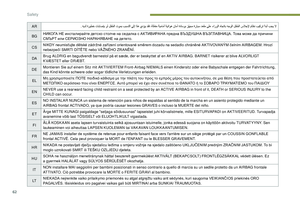 64
64 65
65 66
66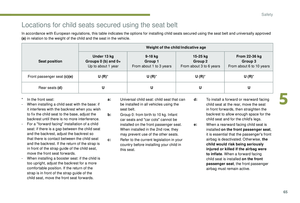 67
67 68
68 69
69 70
70 71
71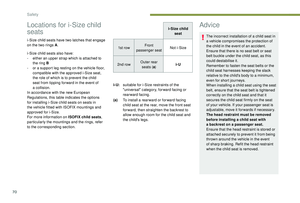 72
72 73
73 74
74 75
75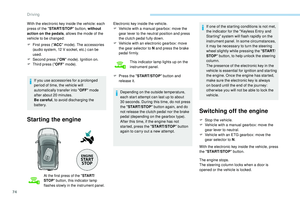 76
76 77
77 78
78 79
79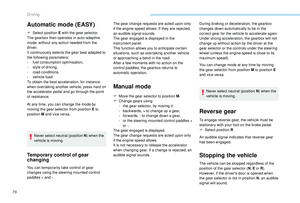 80
80 81
81 82
82 83
83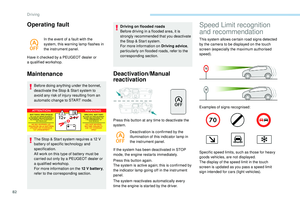 84
84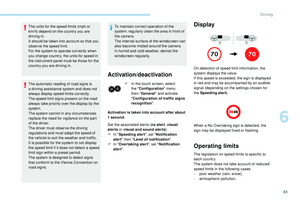 85
85 86
86 87
87 88
88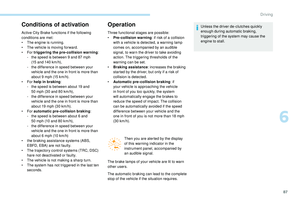 89
89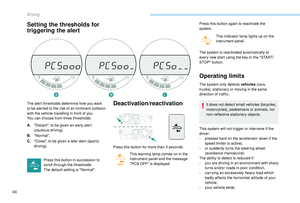 90
90 91
91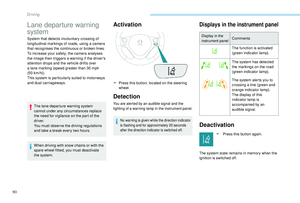 92
92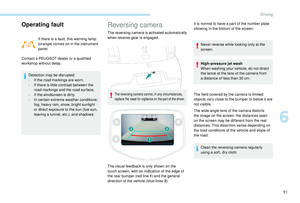 93
93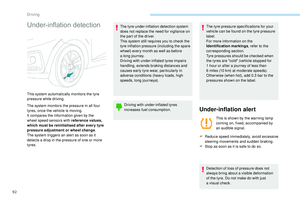 94
94 95
95 96
96 97
97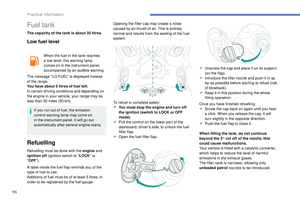 98
98 99
99 100
100 101
101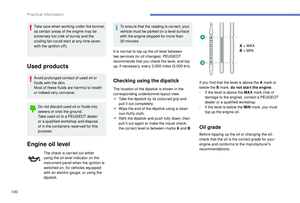 102
102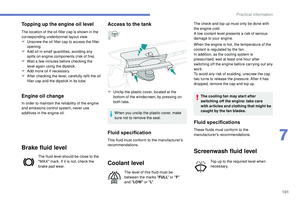 103
103 104
104 105
105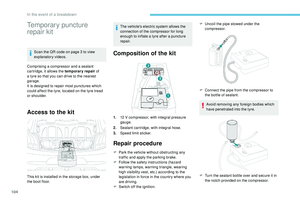 106
106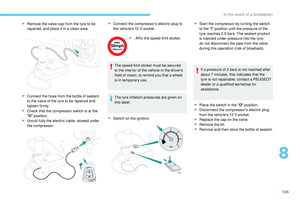 107
107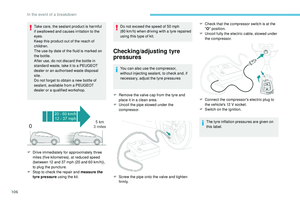 108
108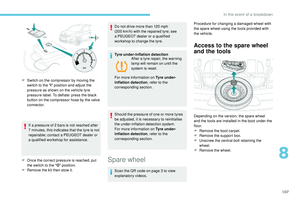 109
109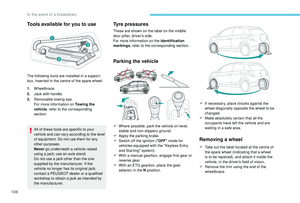 110
110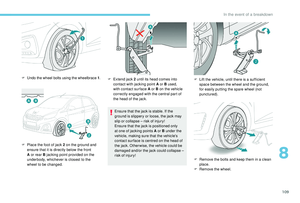 111
111 112
112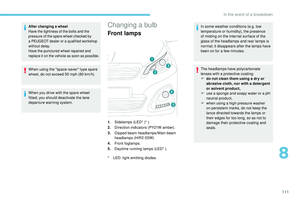 113
113 114
114 115
115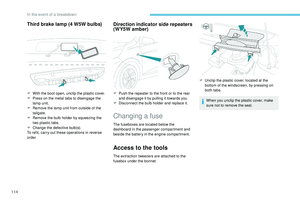 116
116 117
117 118
118 119
119 120
120 121
121 122
122 123
123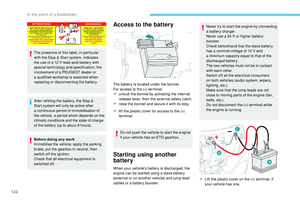 124
124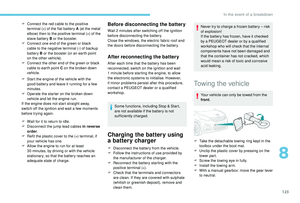 125
125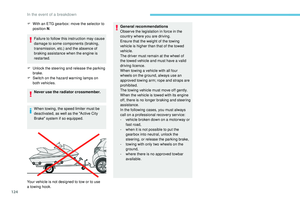 126
126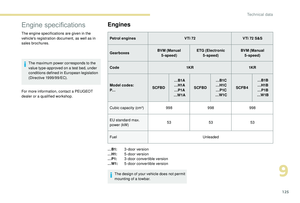 127
127 128
128 129
129 130
130 131
131 132
132 133
133 134
134 135
135 136
136 137
137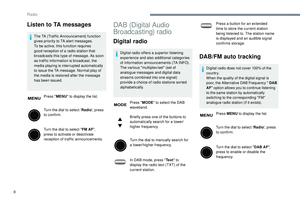 138
138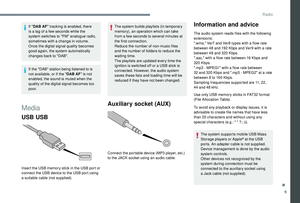 139
139 140
140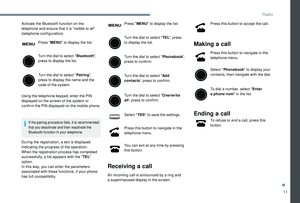 141
141 142
142 143
143 144
144 145
145 146
146 147
147 148
148 149
149 150
150 151
151 152
152 153
153 154
154 155
155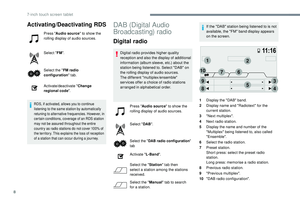 156
156 157
157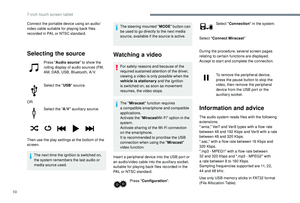 158
158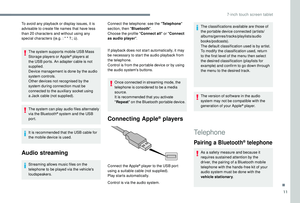 159
159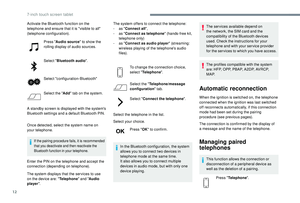 160
160 161
161 162
162 163
163 164
164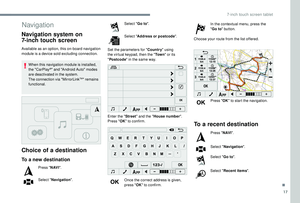 165
165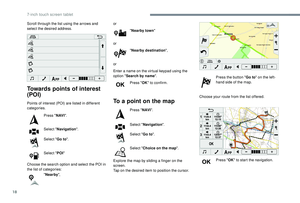 166
166 167
167 168
168 169
169 170
170 171
171 172
172 173
173 174
174 175
175 176
176 177
177 178
178 179
179