Page 37 of 460
∙ Do not allow children to play with theseat belts. Most seating positions are
equipped with Automatic Locking Re-
tractor (ALR) mode seat belts. If the
seat belt becomes wrapped around a
child’s neck with the ALR mode acti-
vated, the child can be seriously in-
jured or killed if the seat belt retracts
and becomes tight. This can occur
even if the vehicle is parked. Unbuckle
the seat belt to release the child. If the
seat belt cannot be unbuckled or is
already unbuckled, release the child
by cutting the seat belt with a suitable
tool (such as a knife or scissors) to
release the seat belt.
Fastening the seat belts
1. Adjust the seat. For additional informa- tion, refer to “Seats” in this section.
Page 45 of 460
WARNING
Do not allow children to play with the
seat belts. Most seating positions are
equipped with Automatic Locking Re-
tractor (ALR) mode seat belts. If the seat
belt becomes wrapped around a child’s
neck with the ALR mode activated, the
child can be seriously injured or killed if
the seat belt retracts and becomes
tight. This can occur even if the vehicle
is parked. Unbuckle the seat belt to re-
lease the child. If the seat belt cannot be
unbuckled or is already unbuckled, re-
lease the child by cutting the seat belt
with a suitable tool (such as a knife or
scissors) to release the seat belt.
Children need adults to help protect
them. They need to be properly re-
strained.
In addition to the general information in
this manual, child safety information is
available from many other sources, includ-
ing doctors, teachers, government traffic
safety offices, and community organiza-
tions. Every child is different, so be sure to
learn the best way to transport your child. There are three basic types of child re-
straint systems:
∙ Rear-facing child restraints
∙ Forward-facing child restraints
∙ Booster seats
The proper restraint depends on the child’s
size. Generally, infants up to about 1 year
and less than 20 lbs. (9 kg) should be placed
in rear-facing child restraints. Forward-
facing child restraints are available for chil-
dren who outgrow rear-facing child re-
straints and are at least 1 year old. Booster
seats are used to help position a vehicle
lap/shoulder belt on a child who can no
longer use a forward-facing child restraint.
Page 156 of 460
WARNING
∙ Do not use the HomeLink® UniversalTransceiver with any garage door
opener that lacks safety stop and re-
verse features as required by federal
safety standards. (These standards
became effective for opener models
manufactured af ter April 1, 1982). A
garage door opener which cannot de-
tect an object in the path of a closing
garage door and then automatically
stop and reverse, does not meet cur-
rent federal safety standards. Using a
garage door opener without these
features increases the risk of serious
injury or death.
∙ During the programming procedure your garage door or security gate will
open and close (if the transmitter is
within range). Make sure that people
or objects are clear of the garage door,
gate, etc. that you are programming.
∙ Your vehicle’s engine should be turned off while programming the
HomeLink® Universal Transceiver.
PROGRAMMING HOMELINK®
If you have any questions or are having
difficulty programming your HomeLink®
buttons, refer to the HomeLink® web site at:
www.homelink.com or call 1-800-355-3515.
NOTE:
Place the ignition switch in the ACC posi-
tion (if so equipped) when programming
HomeLink®. It is also recommended that
a new battery be placed in the hand-held
transmitter of the device being pro-
grammed to HomeLink® for quicker pro-
gramming and accurate transmission of
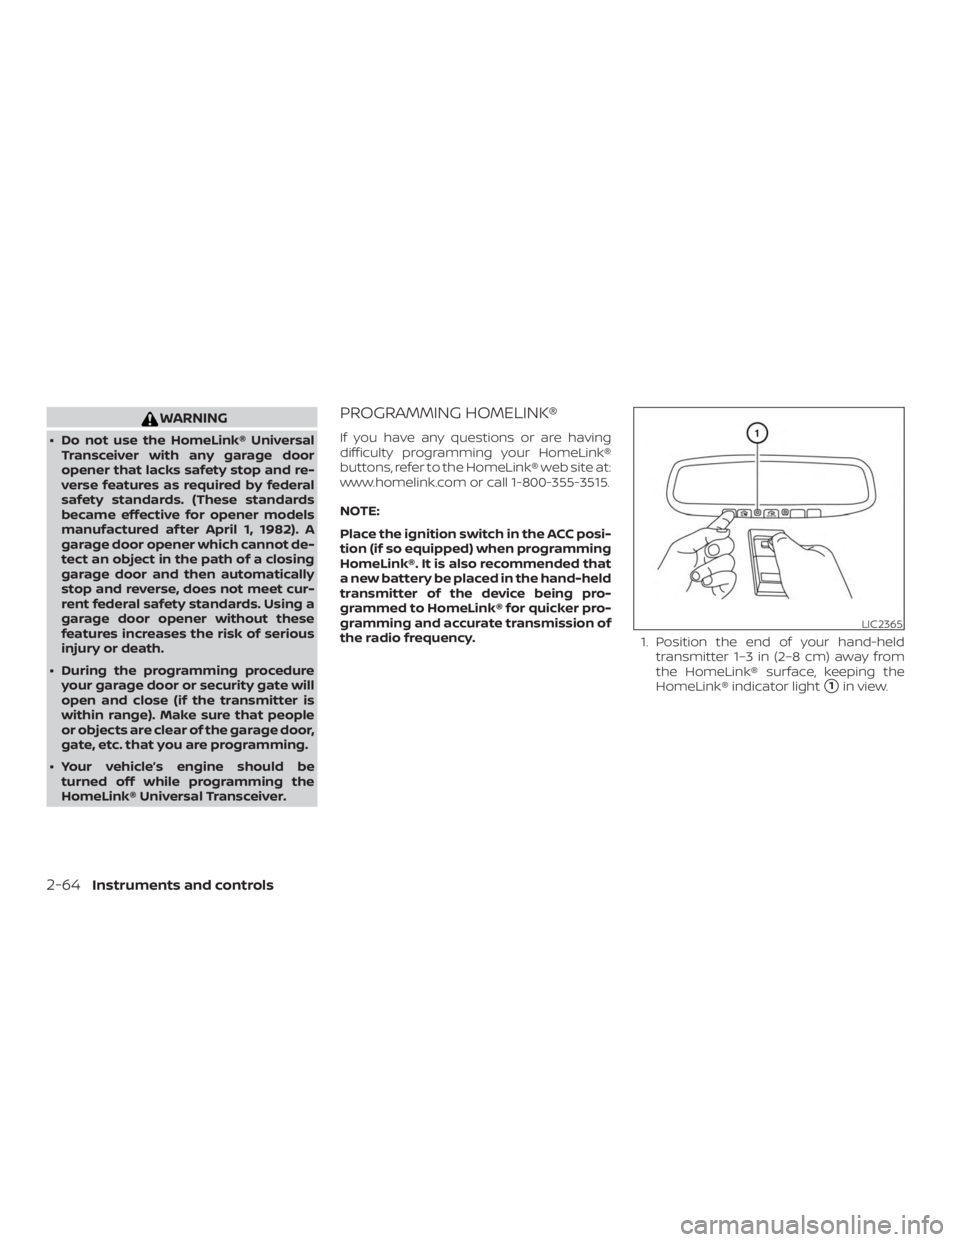
the radio frequency. 1. Position the end of your hand-held
transmitter 1–3 in (2–8 cm) away from
the HomeLink® surface, keeping the
HomeLink® indicator light
�1in view.
Page 187 of 460
sounds to indicate the power close se-
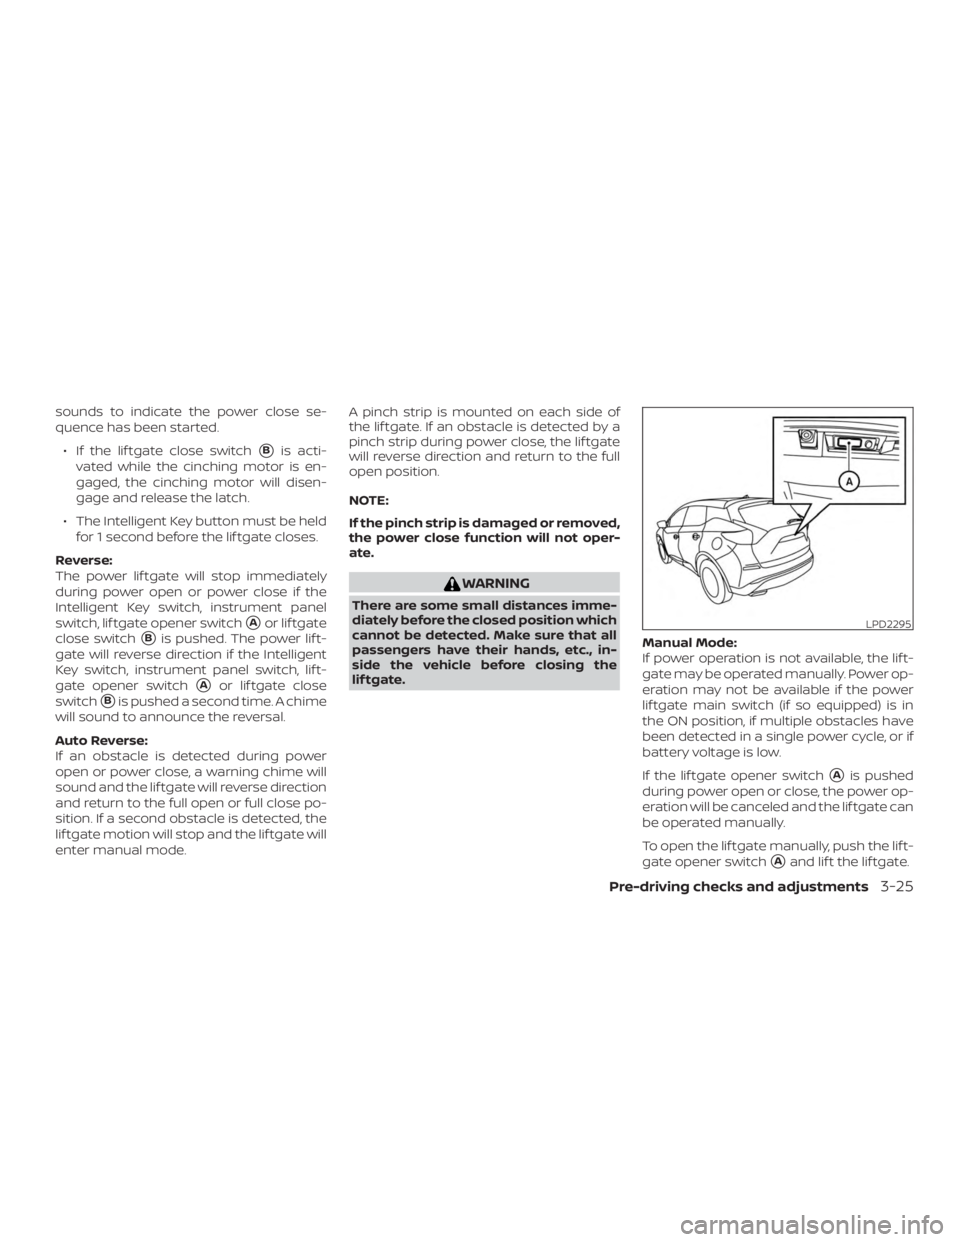
quence has been started.∙ If the lif tgate close switch
�Bis acti-
vated while the cinching motor is en-
gaged, the cinching motor will disen-
gage and release the latch.
∙ The Intelligent Key button must be held for 1 second before the lif tgate closes.
Reverse:
The power lif tgate will stop immediately
during power open or power close if the
Intelligent Key switch, instrument panel
switch, lif tgate opener switch
�Aor lif tgate
close switch
�Bis pushed. The power lif t-
gate will reverse direction if the Intelligent
Key switch, instrument panel switch, lif t-
gate opener switch
�Aor lif tgate close
switch
�Bis pushed a second time. A chime
will sound to announce the reversal.
Auto Reverse:
If an obstacle is detected during power
open or power close, a warning chime will
sound and the lif tgate will reverse direction
and return to the full open or full close po-
sition. If a second obstacle is detected, the
lif tgate motion will stop and the lif tgate will
enter manual mode. A pinch strip is mounted on each side of
the lif tgate. If an obstacle is detected by a
pinch strip during power close, the lif tgate
will reverse direction and return to the full
open position.
NOTE:
If the pinch strip is damaged or removed,
the power close function will not oper-
ate.
Page 228 of 460
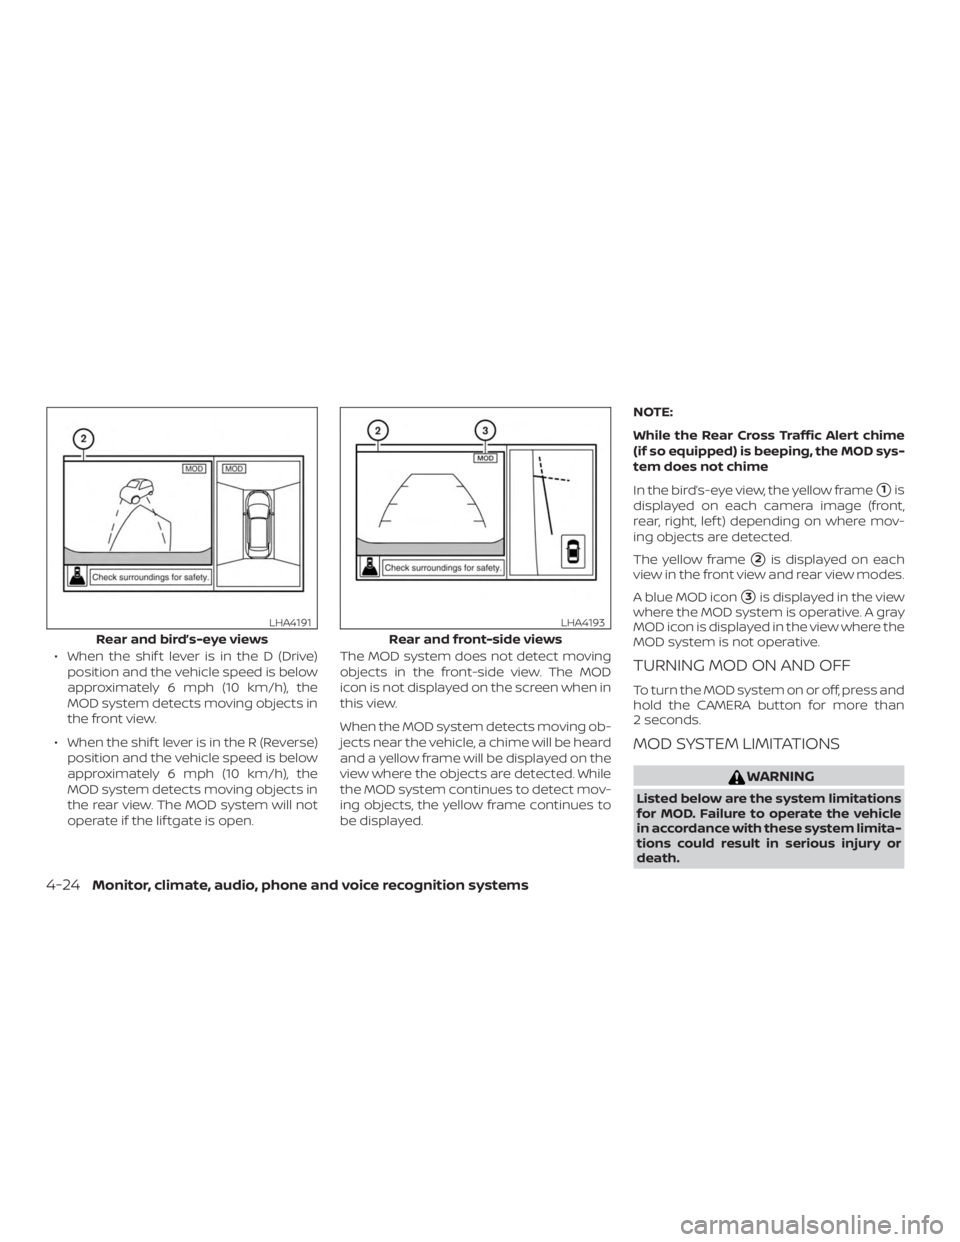
∙ When the shif t lever is in the D (Drive)position and the vehicle speed is below
approximately 6 mph (10 km/h), the
MOD system detects moving objects in
the front view.
∙ When the shif t lever is in the R (Reverse) position and the vehicle speed is below
approximately 6 mph (10 km/h), the
MOD system detects moving objects in
the rear view. The MOD system will not
operate if the lif tgate is open. The MOD system does not detect moving
objects in the front-side view. The MOD
icon is not displayed on the screen when in
this view.
When the MOD system detects moving ob-
jects near the vehicle, a chime will be heard
and a yellow frame will be displayed on the
view where the objects are detected. While
the MOD system continues to detect mov-
ing objects, the yellow frame continues to
be displayed. NOTE:
While the Rear Cross Traffic Alert chime
(if so equipped) is beeping, the MOD sys-
tem does not chime
In the bird’s-eye view, the yellow frame
�1is
displayed on each camera image (front,
rear, right, lef t) depending on where mov-
ing objects are detected.
The yellow frame
�2is displayed on each
view in the front view and rear view modes.
A blue MOD icon
�3is displayed in the view
where the MOD system is operative. A gray
MOD icon is displayed in the view where the
MOD system is not operative.
TURNING MOD ON AND OFF
To turn the MOD system on or off, press and
hold the CAMERA button for more than
2 seconds.
MOD SYSTEM LIMITATIONS
Page 346 of 460
All-Wheel Drive (AWD) models with
Continuously Variable
Transmission (CVT)
NISSAN recommends that towing dollies
be used when towing your vehicle or place
the vehicle on a flatbed truck as illustrated.
Page 347 of 460
Front-Wheel Drive (FWD) models
with Continuously Variable
Transmission (CVT)
NISSAN recommends that your vehicle be
towed with the driving (front) wheels off the
ground or place the vehicle on a flatbed
truck as illustrated.
Page 392 of 460
If excessive tire wear is found, it is recom-
mended that all four tires be replaced with
tires of the same size, brand, construction
and tread pattern. The tire pressure and
wheel alignment should also be checked
and corrected as necessary. It is recom-
mended that you visit a NISSAN dealer for
this service.
All season tires
NISSAN specifies All Season tires on some
models to provide good performance all
year, including snowy and icy road condi-
tions. All Season tires are identified by ALL
SEASON and/or M&S on the tire sidewall.
Snow tires have better snow traction than
All Season tires and may be more appropri-
ate in some areas.
Summer tires
NISSAN specifies summer tires on some
models to provide superior performance
on dry roads. Summer tire performance is
substantially reduced in snow and ice.
Summer tires do not have the tire traction
rating “M&S” on the tire sidewall.
If you plan to operate your vehicle in snowy
or icy conditions, NISSAN recommends the
use of SNOW tires or ALL SEASON tires on all
four wheels.
Snow tires
If snow tires are needed, it is necessary to
select tires equivalent in size and load rat-
ing to the original equipment tires. If you do
not, it can adversely affect the safety and
handling of your vehicle.
Generally, snow tires have lower speed rat-
ings than factory equipped tires and may
not match the potential maximum vehicle
speed. Never exceed the maximum speed
rating of the tire.
If you install snow tires, they must be the
same size, brand, construction and tread
pattern on all four wheels.
For additional traction on icy roads, stud-
ded tires may be used. However, some U.S.
states and Canadian provinces prohibit
their use. Check local, state and provincial
laws before installing studded tires. Skid
and traction capabilities of studded snow
tires on wet or dry surfaces may be poorer
than that of non-studded snow tires.
TIRE CHAINS