2018 MERCEDES-BENZ G-CLASS belt
[x] Cancel search: beltPage 145 of 294
Activationconditions
You can activat eth eHOLD function if:
Rth evehicl eis stationary
Rth eengin eis runnin gor if it has been auto -
matically switched off by th eECO start/sto p
function
Rth edriver's door is closed or your seat belt is
fastene d
Rtheparking brak eis release d
Rthetransmission is in position h,kori
RDISTRONI CPLU Sis deactivated
Activating the HOLD function
XMak esur ethat th eactivation condition sare
met .
XDepress th ebrak epedal .
XQuickl ydepress th ebrak epedal further until
ë appear sin th emultifunction display.
The HOLD function is activated. You can
release th ebrak epedal .
If depressing th ebrak epedal th efirst time does
no tactivat eth eHOLD function ,wait briefl yand
then tr yagain .
Deactivating the HOLD function
The HOLD function is deactivated automatically
if:
Ryou depress th eaccelerato rand th etrans -
mission is in position hork
Rthetransmission is in position j
Ryou depress thebrak epedal again wit h acer-
tai namount of pressur euntil ë disap-
pear sfrom th emultifunction display
Ryou activat eDISTRONI CPLU S
On steep uphil lor downhill inclines or if there is
a malfunction ,th etransmission may also be
automatically shifte dint oposition j.
Permanent all-wheel drive
!
Never to wthevehicl ewit hon eaxl eraised.
This may damag eth etransfer case. Damage
of this sor tis no tcovered by th eMercedes-
Benz Limited Warranty. All wheels mus t
remain either on th eground or be fully raised.
Observ eth einstruction sfor towin gth evehi-
cle wit hall wheels in full contact wit hth e
ground .
!When testing th eparking brake, only oper -
ate th evehicl ebriefl y(fo r a maximum of te n
seconds) on abrak edynamometer. Turn th e
SmartKey to position gor1 in th eignition
lock. You could otherwise damag eth edrive
train or th ebrak esystem.
!A function or performance test should only
be carrie dout on atwo-axle dynamometer.
Befor eyou operate th evehicl eon suc h a
dynamometer, pleas econsult aqualified
workshop .You could otherwise damag eth e
drive train or th ebrak esystem.
The all-whee ldrive system ensures that all four
wheels are permanentl ydriven .The all-whee l
drive system improve svehicl etraction together
wit hES P
®and 4ETS if adrive whee lspin sdue to
insufficien tgrip.
If adrive whee lspin sdue to insufficien tgrip:
ROnly depress th eaccelerato rpedal as far as
necessar ywhen pullin gaway.
RTak eyour foo toff th eaccelerator, slowly,
while th evehicl eis in motion .
In wintr ydrivin gconditions, always use winte r
tires (M+ Stires )and if necessary, snow chain s
(
Ypage 259). Only in this way can th emaximum
effec tof all-whee ldrive be achieved.
Fo rinformation on drivin goff-road, see
(
Ypage 129).
PARKTRONIC
Import ant safety notes
PARKTRONI Cis an electronic parking aid wit h
ultrasonic sensors. It monitors th earea around
your vehicl eusin gsix sensor sin th efron t
bumper and four sensor sin th erear bumper.
PARKTRONI Cindicates visually and audibly th e
distanc ebetween your vehicl eand an object.
PARKTRONI Cis only an aid. It is no t areplace -
men tfor your attention to your immediat esur -
roundings. You are always responsibl efor saf e
maneuvering, parking and exiting aparking
space. Mak esur ethat there are no persons,
animals or objects in th emaneuverin garea
while maneuverin gand parking in/leaving park -
ing spaces.
!When parking ,pay particular attention to
objects abov eor belo wthesensors, suc has
flower pot sor trailer drawbars .PARKTRONI C
does no tdetec tsuc hobjects when they are in
Driving systems143
Driving and parking
Z
Page 183 of 294

Display messagesPossible causes/consequences andMSolutions
?
CoolantToo HotSto pVehicl eTur nEngine Off
The coolan tis to ohot .
A warning tone also sounds.
GWARNIN G
Do no tdrive when your engin eis overheated. This can caus esom e
fluids whic hmay hav eleaked int oth eengin ecompartmen tto catch
fire.
Steam from th eoverheate dengin ecan also caus eserious burn swhic h
can occur jus tby opening th ehood.
There is aris kof injury.
XPull ove rand stop th evehicl esafely and switch off th eengine, pay-
ing attention to roa dand traffic conditions.
XSecur eth evehicl eagainst rollin gaway (Ypage 122).
XLeaveth evehicl eand keep asaf edistanc efrom th evehicl euntil th e
engin ehas cooled down .
XMakesur ethat th eair supply to th eengin eradiato ris no tblocked,
e.g. by snow, slus hor ice .
XDo no tstart th eengin eagain until th edisplay message goe sout and
th ecoolan ttemperature is belo wtheH marking .Otherwise ,th e
engin ecould be damaged.
XPay attention to th ecoolan ttemperature gauge .
XIf thetemperature increases again ,visit aqualified specialist work-
sho pimmediately.
Under normal operating condition sand at th ecorrec tcoolan tlevel,
th egauge may ris eto th eH marking .
The poly-V-belt may hav etorn .
XPull ove rand stop th evehicl esafely and switch off th eengine, pay-
ing attention to roa dand traffic conditions.
XChec kth epoly-V-belt .
If th epoly-V-belt is torn:
!Do no tcontinu edriving. The engin ecould otherwise overheat.
XConsult aqualified specialist workshop .
If th epoly-V-belt is not damaged :
XWait until thedisplay message disappear sbefore restarting th e
engine. Otherwise ,th eengin ecould be damaged.
XPay attention to th ecoolan ttemperature gauge .
XVisitaqualified specialist workshop .
Display messages181
On-board computer and displays
Z
Page 184 of 294
Display messagesPossible causes/consequences andMSolutions
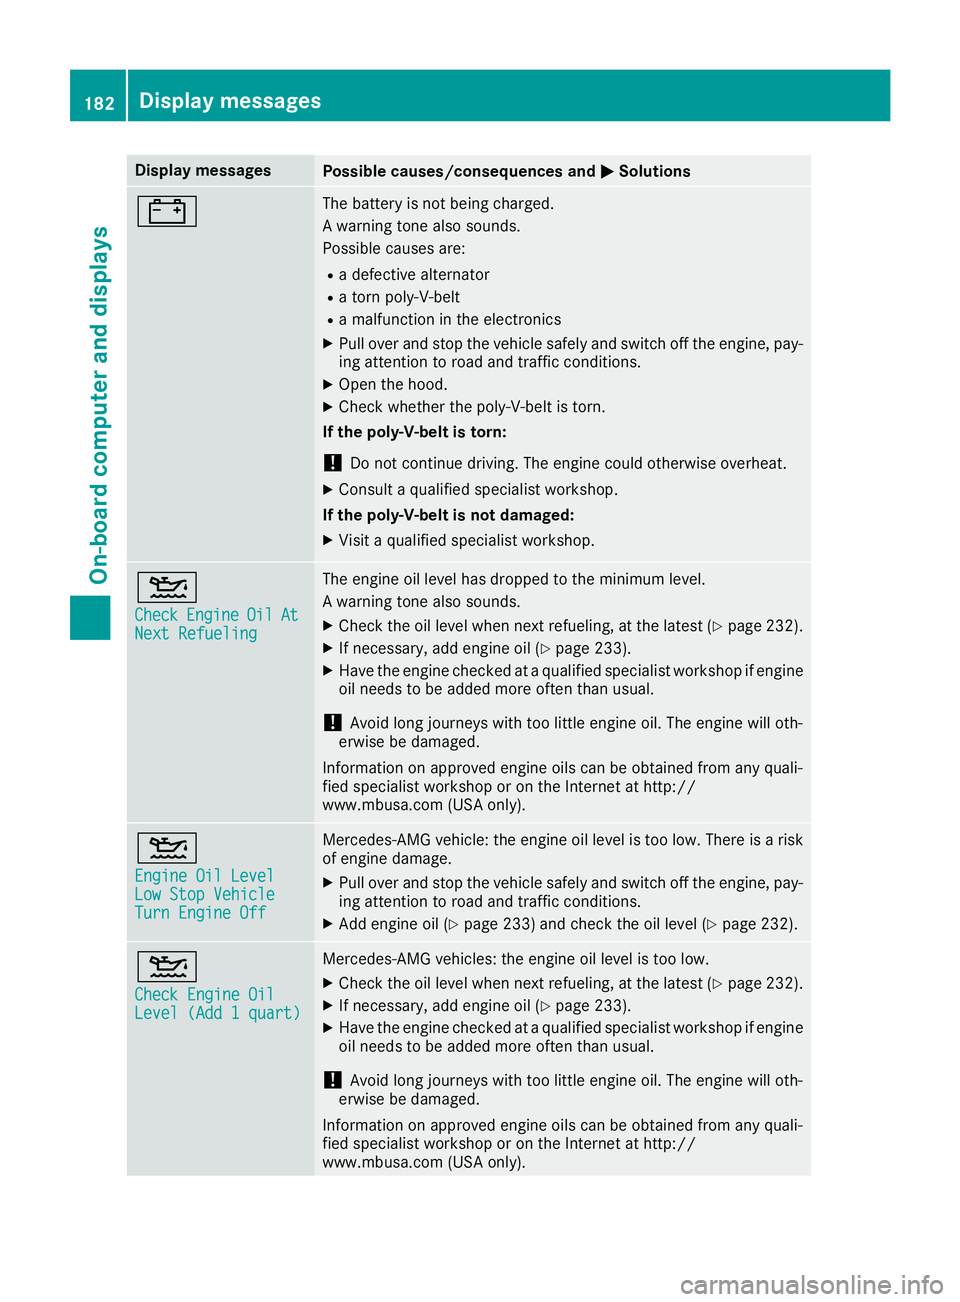
#The battery is notbein gcharged.
A warning tone also sounds.
Possibl ecauses are:
Radefective alternato r
Ratorn poly-V-belt
Ramalfunction in th eelectronics
XPull ove rand stop th evehicl esafely and switch off th eengine, pay-
ing attention to roa dand traffic conditions.
XOpe nth ehood.
XChec kwhether th epoly-V-belt is torn .
If th epoly-V-belt is torn:
!Do no tcontinu edriving. The engin ecould otherwise overheat.
XConsult aqualified specialist workshop .
If th epoly-V-belt is not damaged :
XVisitaqualified specialist workshop .
4
CheckEngineOilAtNextRefueling
The engin eoil level has dropped to th eminimum level.
A warning tone also sounds.
XChec kth eoil level when next refueling, at th elatest (Ypage 232).
XIf necessary, add engin eoil (Ypage 233).
XHav eth eengin echecke dat aqualified specialist workshop if engin e
oil needs to be added mor eoften than usual.
!Avoid lon gjourneys wit hto olittl eengin eoil. The engin ewill oth-
erwise be damaged.
Information on approve dengin eoils can be obtained from any quali-
fie dspecialist workshop or on th eInternet at http:/ /
www.mbusa.com (US Aonly).
4
Engine Oil LevelLow Sto pVehicl eTurnEngine Off
Mercedes-AMG vehicle: th eengin eoil level is to olow. There is aris k
of engin edamage.
XPull ove rand stop th evehicl esafely and switch off th eengine, pay-
ing attention to roa dand traffic conditions.
XAd dengin eoil (Ypage 233) and chec kth eoil level (Ypage 232).
4
Check Engine OilLevel (Ad d 1quart)
Mercedes-AMG vehicles: th eengin eoil level is to olow.
XChec kth eoil level when next refueling, at th elatest (Ypage 232).
XIf necessary, add engin eoil (Ypage 233).
XHav eth eengin echecke dat aqualified specialist workshop if engin e
oil needs to be added mor eoften than usual.
!Avoid lon gjourneys wit hto olittl eengin eoil. The engin ewill oth-
erwise be damaged.
Information on approve dengin eoils can be obtained from any quali-
fie dspecialist workshop or on th eInternet at http:/ /
www.mbusa.com (US Aonly).
182Display messages
On-board computer and displays
Page 194 of 294
Safety
Seat belts
Warning/
indicator
lampNSignal type
Possible causes/consequences and M
Solutions
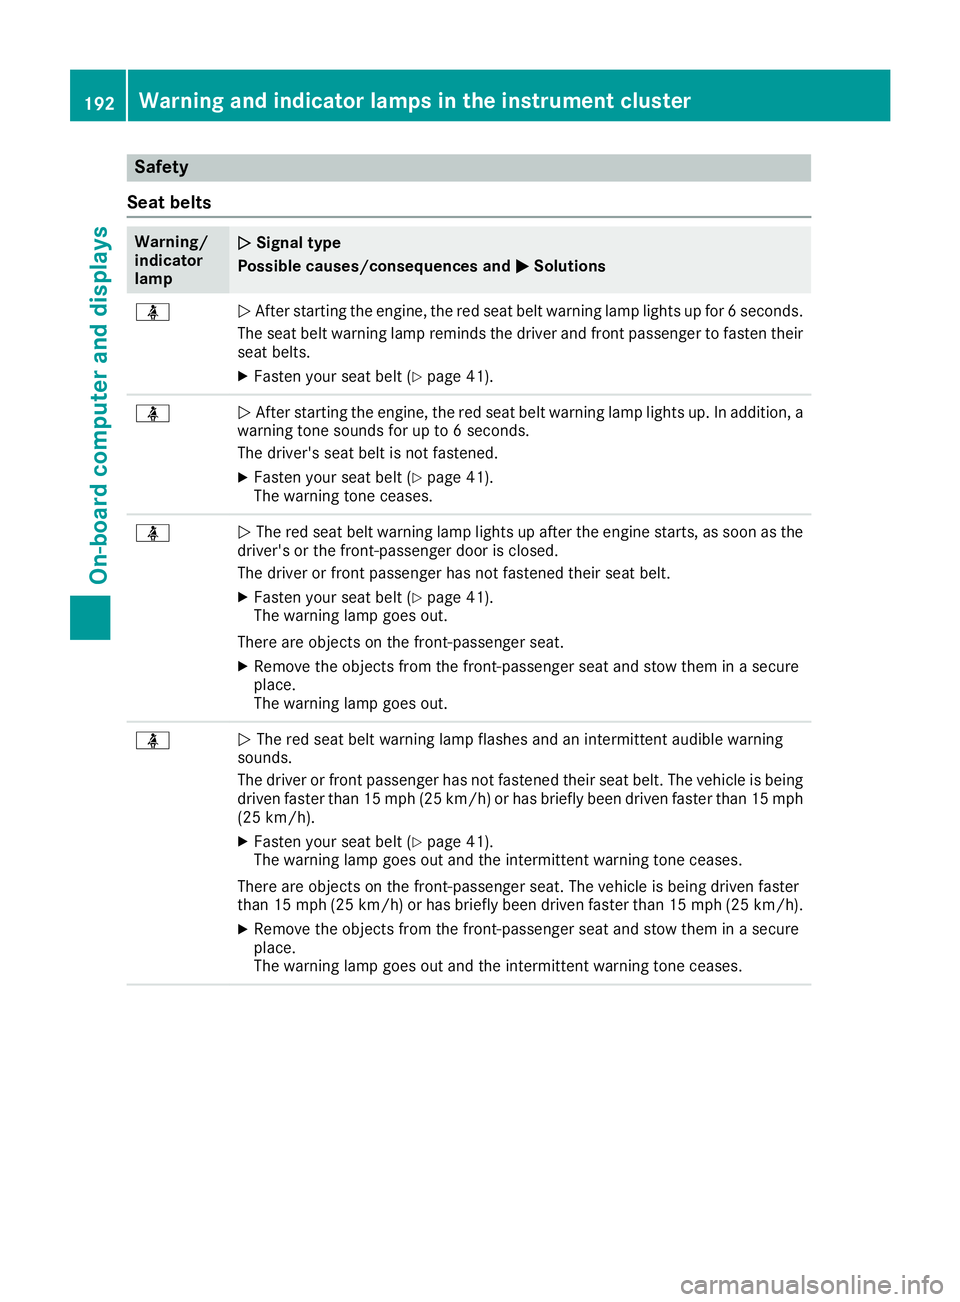
üNAfter starting the engine, the red seat belt warning lamp lights up for 6 seconds.
The seat belt warning lamp reminds the driver and front passenger to fasten their
seat belts.
XFasten your seat belt (Ypage 41).
üN After starting the engine, the red seat belt warning lamp lights up. In addition, a
warning tone sounds for up to 6 seconds.
The driver's seat belt is not fastened.
XFasten your seat belt (Ypage 41).
The warning tone ceases.
üN The red seat belt warning lamp lights up after the engine starts, as soon as the
driver's or the front-passenger door is closed.
The driver or front passenger has not fastened their seat belt.
XFasten your seat belt (Ypage 41).
The warning lamp goes out.
There are objects on the front-passenger seat.
XRemove the objects from the front-passenger seat and stow them in a secure
place.
The warning lamp goes out.
üN The red seat belt warning lamp flashes and an intermittent audible warning
sounds.
The driver or front passenger has not fastened their seat belt. The vehicle is being driven faster than 15 mph (25 km/h) or has briefly been driven faster than 15 mph
(25 km/h).
XFasten your seat belt (Ypage 41).
The warning lamp goes out and the intermittent warning tone ceases.
There are objects on the front-passenger seat. The vehicle is being driven faster
than 15 mph (25 km/h) or has briefly been driven faster than 15 mph (25 km/h).
XRemove the objects from the front-passenger seat and stow them in a secure
place.
The warning lamp goes out and the intermittent warning tone ceases.
192Warning and indicator lamps in the instrument cluster
On-board computer and displays
Page 212 of 294
RAlways place the load against the backrests ofthe front seats or rear seats.
RUse the cargo tie-down rings and the parcel
nets to transport loads and luggage.
RUse cargo tie-down rings and fastening mate-
rials appropriate for the weight and size of theload.
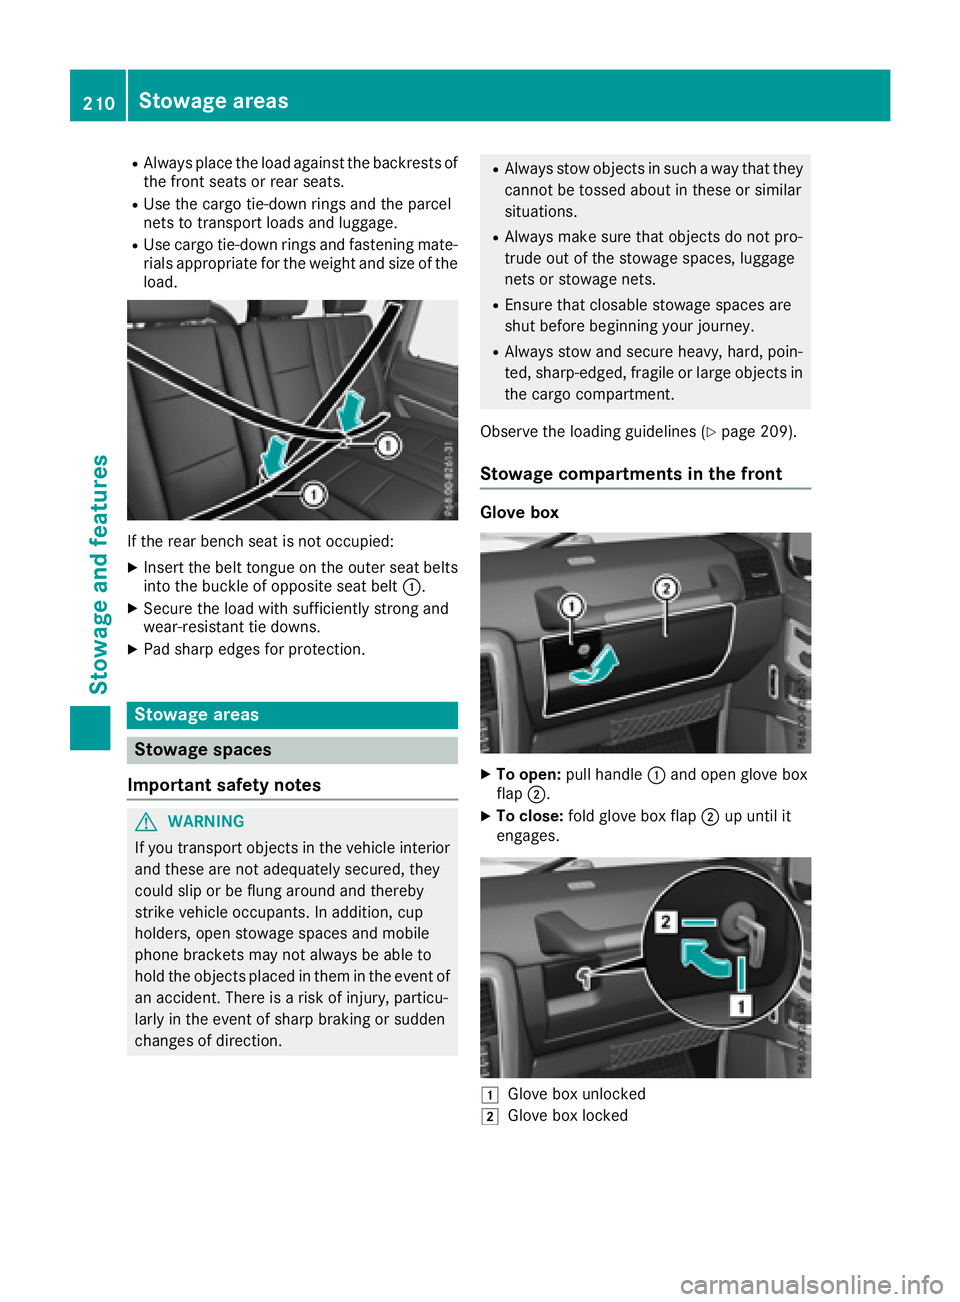
If the rear bench seat is not occupied:
XInsert the belt tongue on the outer seat belts
into the buckle of opposite seat belt :.
XSecure the load with sufficiently strong and
wear-resistant tie downs.
XPad sharp edges for protection.
Stowage areas
Stowage spaces
Important safety notes
GWARNING
If you transport objects in the vehicle interior
and these are not adequately secured, they
could slip or be flung around and thereby
strike vehicle occupants. In addition, cup
holders, open stowage spaces and mobile
phone brackets may not always be able to
hold the objects placed in them in the event of
an accident. There is a risk of injury, particu-
larly in the event of sharp braking or sudden
changes of direction.
RAlways stow objects in such a way that they
cannot be tossed about in these or similar
situations.
RAlways make sure that objects do not pro-
trude out of the stowage spaces, luggage
nets or stowage nets.
REnsure that closable stowage spaces are
shut before beginning your journey.
RAlways stow and secure heavy, hard, poin-
ted, sharp-edged, fragile or large objects in
the cargo compartment.
Observe the loading guidelines (
Ypage 209).
Stowage compartments in the front
Glove box
XTo open: pull handle :and open glove box
flap ;.
XTo close: fold glove box flap ;up until it
engages.
1Glove box unlocked
2Glove box locked
210Stowage areas
Stowag ean d features
Page 213 of 294
XTo lock:insert the mechanical key into the
lock (Ypage 64) and turn it 90° clockwise to
position 2.
XTo unlock: insert the mechanical key into the
lock (Ypage 64) and turn it 90° counter-
clockwise to position 1.
The glove box can only be locked and unlocked
using the mechanical key.
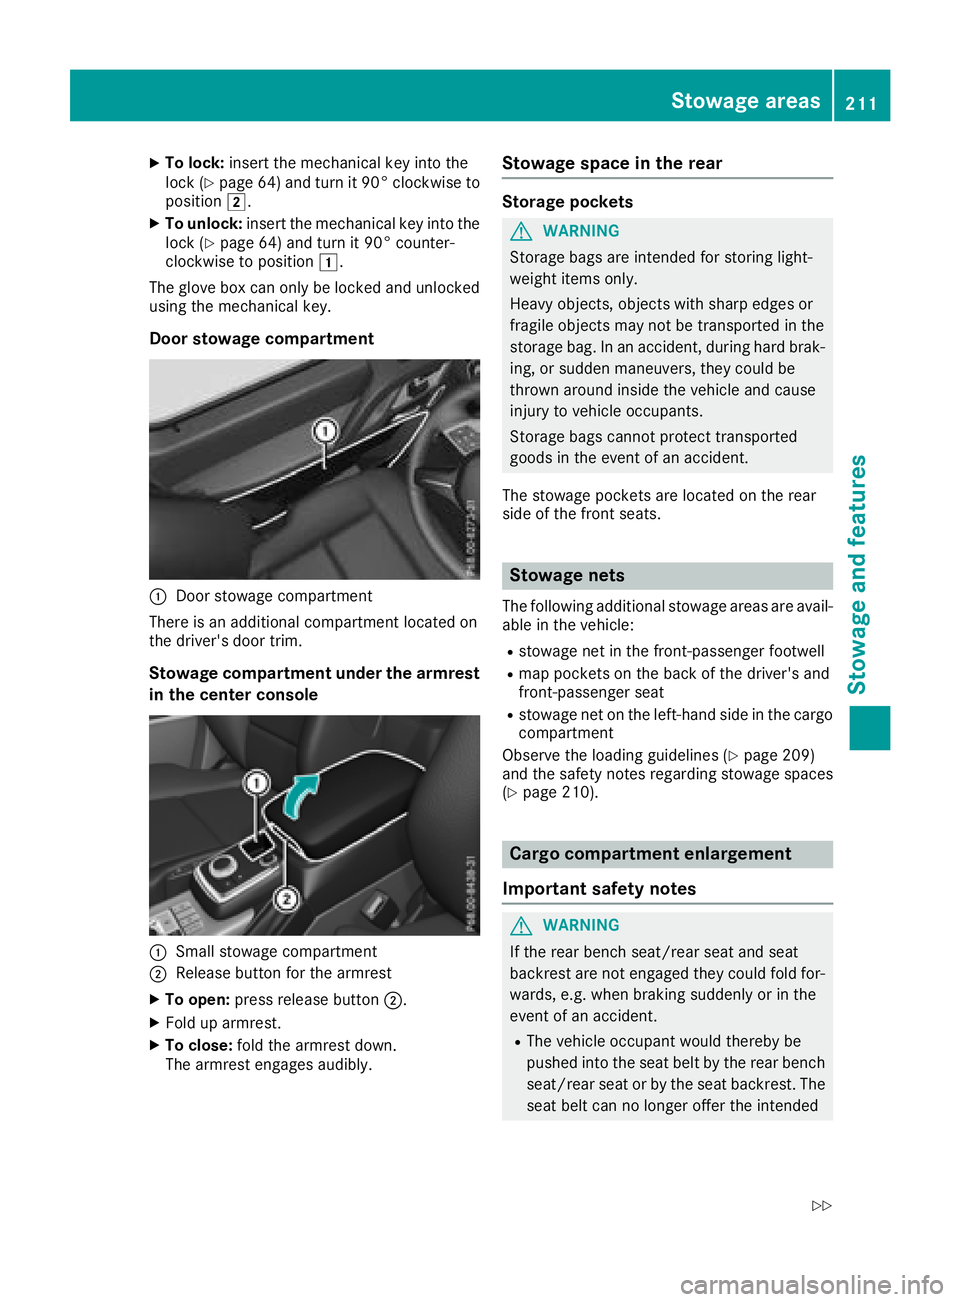
Door stowage compartment
:Door stowage compartment
There is an additional compartment located on
the driver's door trim.
Stowage compartment under the armrest
in the center console
:Small stowage compartment
;Release button for the armrest
XTo open: press release button ;.
XFold up armrest.
XTo close:fold the armrest down.
The armrest engages audibly.
Stowage space in the rear
Storage pockets
GWARNING
Storage bags are intended for storing light-
weight items only.
Heavy objects, objects with sharp edges or
fragile objects may not be transported in the
storage bag. In an accident, during hard brak-
ing, or sudden maneuvers, they could be
thrown around inside the vehicle and cause
injury to vehicle occupants.
Storage bags cannot protect transported
goods in the event of an accident.
The stowage pockets are located on the rear
side of the front seats.
Stowage nets
The following additional stowage areas are avail-
able in the vehicle:
Rstowage net in the front-passenger footwell
Rmap pockets on the back of the driver's and
front-passenger seat
Rstowage net on the left-hand side in the cargo
compartment
Observe the loading guidelines (
Ypage 209)
and the safety notes regarding stowage spaces
(
Ypage 210).
Cargo compartment enlargement
Important safety notes
GWARNING
If the rear bench seat/rear seat and seat
backrest are not engaged they could fold for-
wards, e.g. when braking suddenly or in the
event of an accident.
RThe vehicle occupant would thereby be
pushed into the seat belt by the rear bench
seat/rear seat or by the seat backrest. The
seat belt can no longer offer the intended
Stowage areas211
Stowag ean d features
Z
Page 214 of 294
level of protection and could even cause
injuries.
RObjects or loads in the trunk/cargo com-
partment cannot be restrained by the seat
backrest.
There is an increased risk of injury.
Before every trip, make sure that the seat
backrests and the rear bench seat/rear seat
are engaged.
GWARNING
Combustion engines emit poisonous exhaust
gases such as carbon monoxide. If the rear
door is open when the engine is running, par-
ticularly if the vehicle is moving, exhaust
fumes could enter the passenger compart-
ment. There is a risk of poisoning.
Turn off the engine before opening the rear
door. Never drive with the rear door open.
!Ensure that you remove all containers from
the cup holder in the rear before folding the
seat backrest and the seat cushion of the rear
bench seat forwards.
Observe the loading guidelines (
Ypage 209).
The rear bench seat is split symmetrically.
The left-hand and right-hand rear bench seats
can be folded forward to increase the capacity
of the rear compartment. You can:
Rfold the seat backrests forward
Rfold the rear bench seat back fully
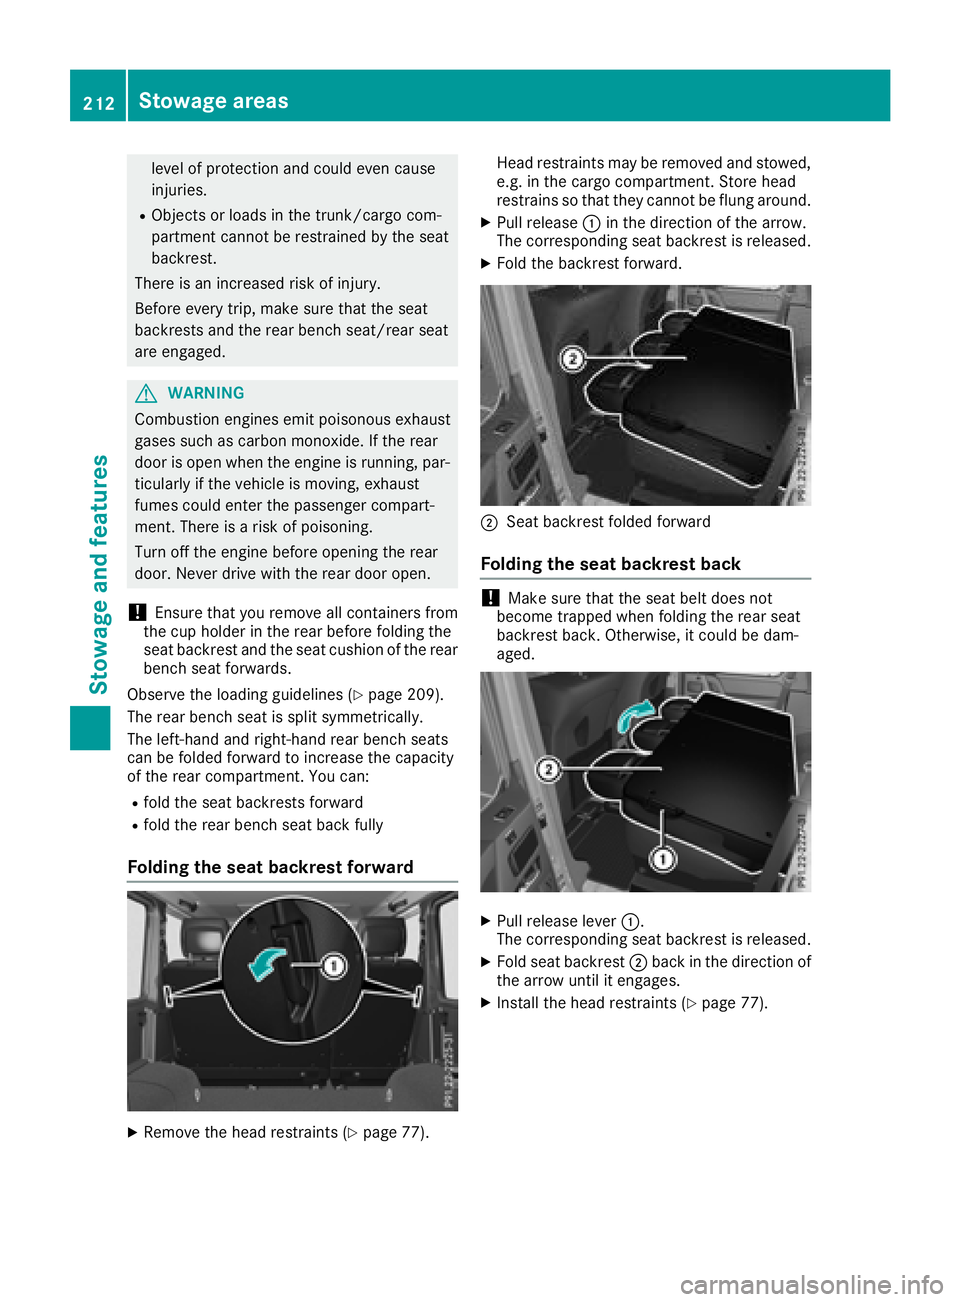
Folding the seat backrest forward
XRemove the head restraints (Ypage 77). Head restraints may be removed and stowed,
e.g. in the cargo compartment. Store head
restrains so that they cannot be flung around.
XPull release
:in the direction of the arrow.
The corresponding seat backrest is released.
XFold the backrest forward.
;Seat backrest folded forward
Folding the seat backrest back
!Make sure that the seat belt does not
become trapped when folding the rear seat
backrest back. Otherwise, it could be dam-
aged.
XPull release lever :.
The corresponding seat backrest is released.
XFold seat backrest ;back in the direction of
the arrow until it engages.
XInstall the head restraints (Ypage 77).
212Stowage areas
Stowage and features
Page 215 of 294
Rear bench seat
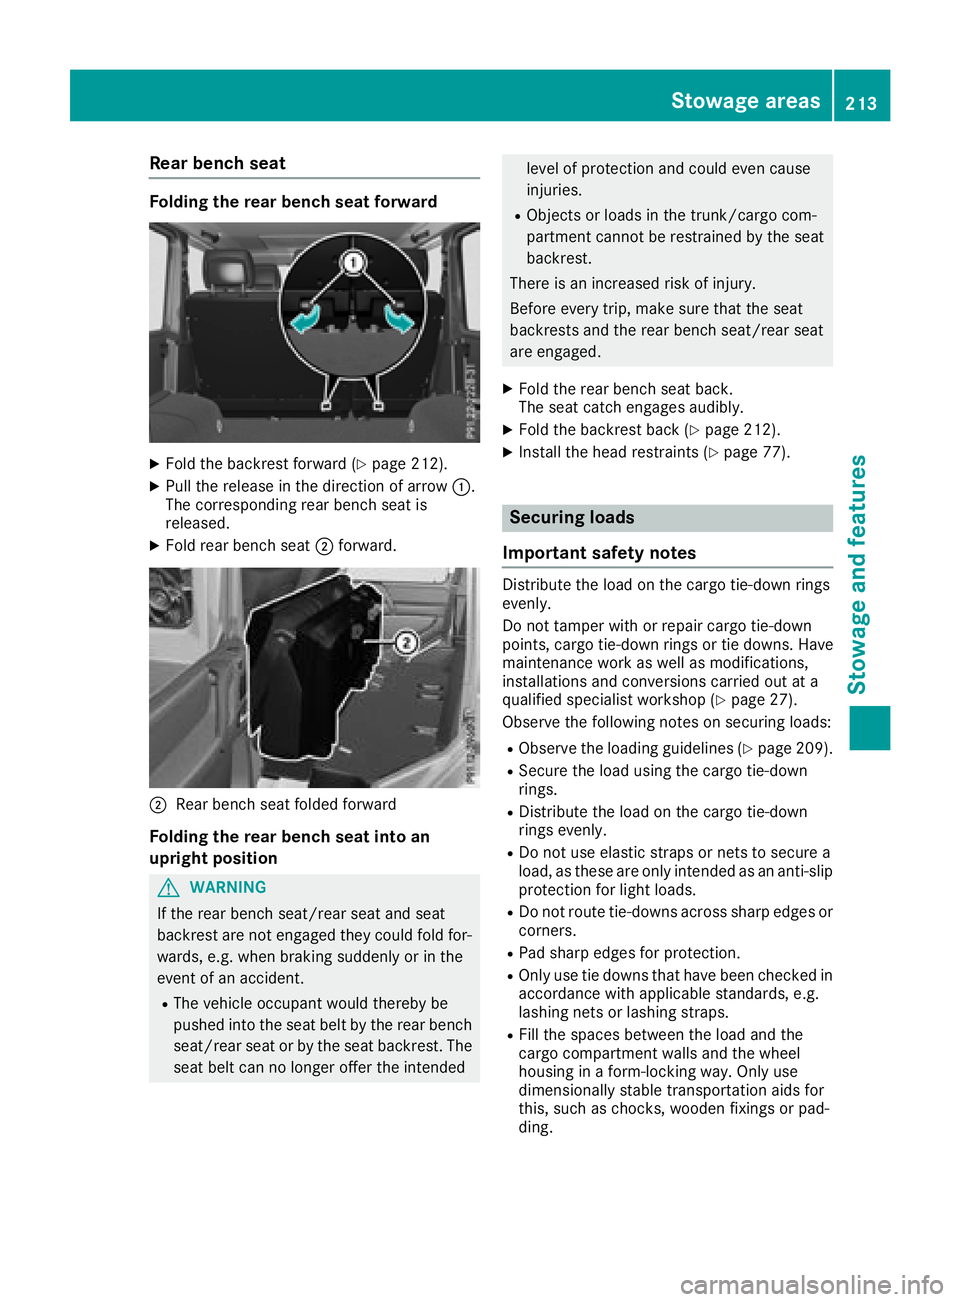
Folding the rear bench seat forward
XFold the backrest forward (Ypage 212).
XPull the release in the direction of arrow:.
The corresponding rear bench seat is
released.
XFold rear bench seat ;forward.
;Rear bench seat folded forward
Folding the rear bench seat into an
upright position
GWARNING
If the rear bench seat/rear seat and seat
backrest are not engaged they could fold for-
wards, e.g. when braking suddenly or in the
event of an accident.
RThe vehicle occupant would thereby be
pushed into the seat belt by the rear bench
seat/rear seat or by the seat backrest. The
seat belt can no longer offer the intended
level of protection and could even cause
injuries.
RObjects or loads in the trunk/cargo com-
partment cannot be restrained by the seat
backrest.
There is an increased risk of injury.
Before every trip, make sure that the seat
backrests and the rear bench seat/rear seat
are engaged.
XFold the rear bench seat back.
The seat catch engages audibly.
XFold the backrest back (Ypage 212).
XInstall the head restraints (Ypage 77).
Securing loads
Important safety notes
Distribute the load on the cargo tie-down rings
evenly.
Do not tamper with or repair cargo tie-down
points, cargo tie-down rings or tie downs. Have
maintenance work as well as modifications,
installations and conversions carried out at a
qualified specialist workshop (
Ypage 27).
Observe the following notes on securing loads:
RObserve the loading guidelines (Ypage 209).
RSecure the load using the cargo tie-down
rings.
RDistribute the load on the cargo tie-down
rings evenly.
RDo not use elastic straps or nets to secure a
load, as these are only intended as an anti-slip
protection for light loads.
RDo not route tie-downs across sharp edges or corners.
RPad sharp edges for protection.
ROnly use tie downs that have been checked in
accordance with applicable standards, e.g.
lashing nets or lashing straps.
RFill the spaces between the load and the
cargo compartment walls and the wheel
housing in a form-locking way. Only use
dimensionally stable transportation aids for
this, such as chocks, wooden fixings or pad-
ding.
Stowage areas213
Stowage and features
Z