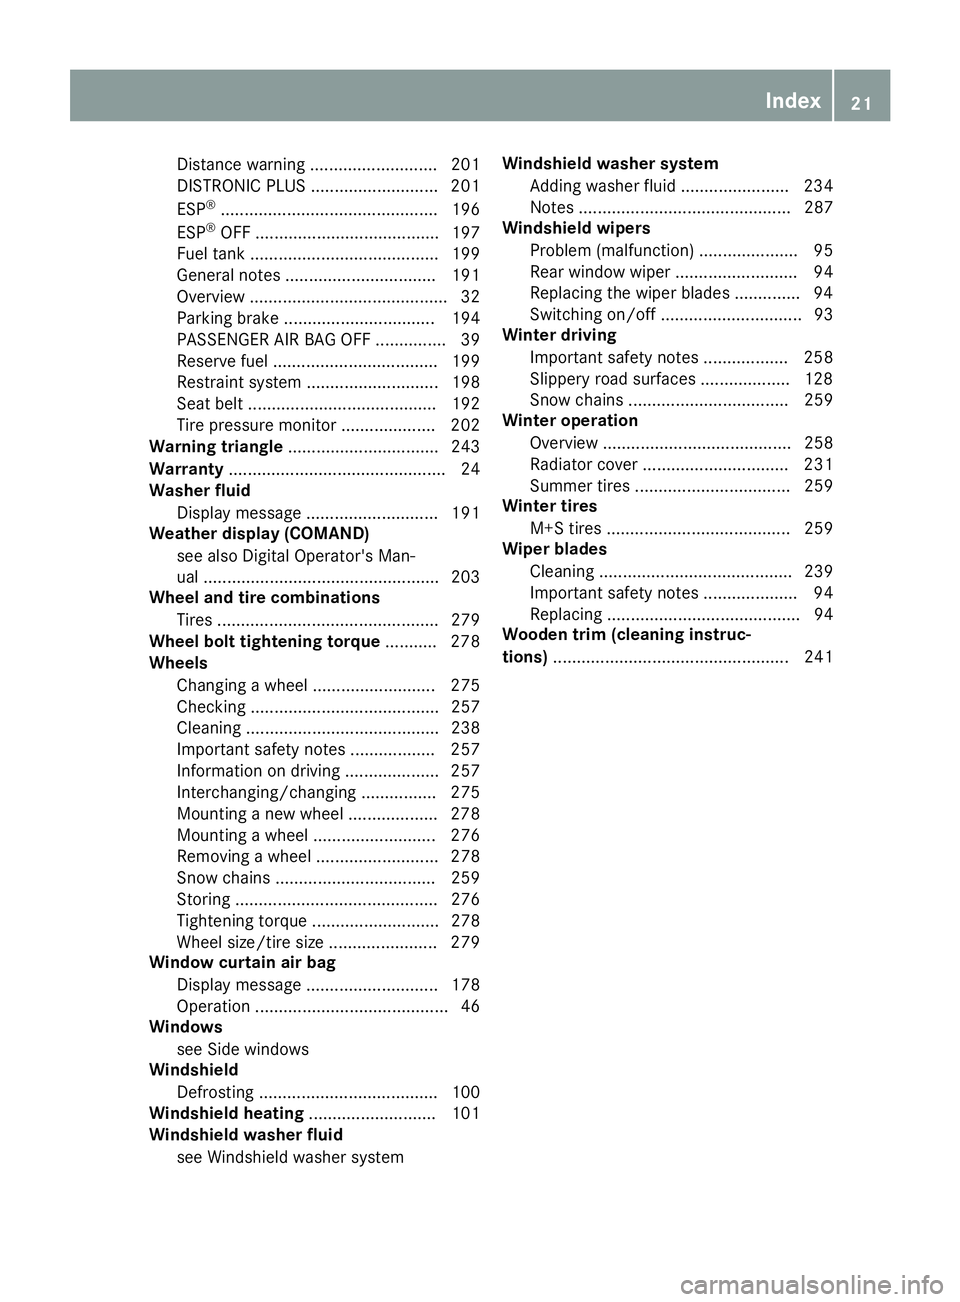
2018 MERCEDES-BENZ G-CLASS fuel reserve
[x] Cancel search: fuel reservePage 12 of 294

General notes .................................. 59
Important safety information ...........59
Trailer stabilization ........................... 61
Warning lamp ................................. 196
Exhaust
see Exhaust pipe
Exhaust check ................................... 125
Exhaust pipe
Cleaning ......................................... 240
Exterior lighting
Cleaning ......................................... 239
see Lights
Exterior mirrors
Adjusting ......................................... 82
Dipping (automatic) .........................8 3
Folding in when locking (on-board
computer) ...................................... 170
Folding in/out (automatically) ......... 83
Folding in/out (electrically) ............. 82
Out of position (troubleshooting) ..... 83
Setting ............................................. 82
Storing settings (memory func-
tion) ................................................. 84
Storing the parking position ............. 83
F
Favorites
Overview ........................................ 205
Filler cap
see Refueling
First-aid kit ......................................... 244
Flat tire
Changing a wheel/mounting the
spare wheel ................................... 275
Preparing the vehicle ..................... 246
Folding the seat backrest (rear)
forwards/back .................................. 212
Frequencies
Mobile phone ................................. 281
Two-way radio ................................ 281
Fuel
Additives ........................................ 285
Consumption statistics .................. 163
Displaying the range ...................... 163
Driving tips .................................... 124
Fuel gauge ....................................... 32
Grade (gasoline) ............................ 284 Important safety notes .................. 284
Premium-grade unleaded gaso-
line ................................................. 284
Problem (malfunction) ................... 122
Refueling ........................................ 120
Tank content/reserve fuel ............. 284
Fuel filler flap
Closing ........................................... 121
Emergency release ........................ 121
Opening ......................................... 120
Fuel level
Calling up the range (on-board
computer) ...................................... 163
Fuel tank
Capacity ........................................ 284
Problem (malfunction) ................... 122
Fuse allocation chart ........................ 255
Fuse box
cargo compartment ....................... 256
Dashboard ..................................... 255
Front-passenger footwell ............... 255
Transmission tunnel ....................... 255
Fuses
Allocation chart ............................. 255
Before changing ............................. 254
Dashboard fuse box ....................... 255
Fuse allocation chart ..................... 255
Fuse box in the cargo compart-
ment .............................................. 256
Fuse box in the front-passenger
footwell .......................................... 255
Fuse box in the transmission tun-
nel ................................................. 255
Important safety notes .................. 254
G
Garage door openerClearing the memory ..................... 229
General notes ................................ 226
Important safety notes .................. 227
Opening/closing the garage doo r..2 29
Problems when programming ........2 29
Programming the remote control ... 227
Synchronizing the rolling code ....... 228
Gasoline ............................................. 284
Gear indicator (on-board com-
puter) ..................................................1 71
10Index
Page 17 of 294

R
RACE TIMER (on-board computer,
Mercedes-AMG vehicles).................. 172
RACETIMER
Deleting all laps .............................1 72
Displaying and starting .................. 172
Displaying the intermediate time ... 172
Resetting the current lap ...............1 72
Starting a new lap .......................... 172
Stopping ........................................ 172
Radiator cover ................................... 231
Radio
Selecting a station ......................... 165
Radio mode
see also Digital Operator's Man-
ual ..................................................2 03
Radio-wave reception/transmis-
sion in the vehicle
Declaration of conformity ................ 26
Rear bench seat
Folding forward .............................. 213
Rear compartment
Setting the air vents ......................1 03
Rear door
Display message ............................ 190
Important safety notes .................... 68
Rear fog lamp
Display message ............................ 180
Replacing bulbs ............................... 92
Switching on/off .............................. 87
Rear seat bench
Folding into an upright position ..... 213
Rear view camera
Cleaning instructions ..................... 240
Coupling up a trailer function ........1 48
Display in the multimedia system .. 147
Function/notes .............................1 46
General notes ................................ 146
Switching on/off ........................... 147
Rear window defroster
Problem (malfunction) ................... 101
Switching on/off ........................... 101
Rear window wiper
Replacing the wiper blade ................ 94
Switching on/off .............................. 94
Rear-view mirror
Dipping (automatic) ......................... 83 Reflective safety jacket
.................... 243
Refrigerant (air-conditioning sys-
tem)
Important safety notes .................. 287
Refueling
Fuel gauge ....................................... 32
Important safety notes .................. 120
R
efueling process .......................... 120
see Fuel
Remote control
Programming (garage door
opener) .......................................... 227
Replacing bulbs
Backup lamp .................................... 92
Brake lamp ...................................... 92
Important safety notes .................... 89
Overview of bulb types .................... 90
Rear fog lamp .................................. 92
Tail lamp .......................................... 92
Turn signal (rear) .............................. 92
Turn signals (front) ........................... 91
Reporting safety defects .................... 27
Rescue card ......................................... 28
Reserve (fuel tank)
see Fuel
Reserve fuel
Display message ............................ 183
Warning lamp ................................. 199
Residual heat
Switching on/off ........................... 102
Restraint system
Display message ............................ 177
Introduction ..................................... 38
Warning lamp ................................. 198
Warning lamp (function) ................... 38
Reversing lamps (display mes-
sage) ................................................... 180
Roadside Assistance (breakdown) .... 25
Roof lining and carpets (cleaning
guidelines) ......................................... 242
Route (navigation)
see Route guidance (navigation)
Route guidance
see also Digital Operator's Man-
ual .................................................. 203
Route guidance (navigation) ............ 164
Route guidance active ...................... 164
Index15
Page 23 of 294

Distance warning ........................... 201
DISTRONIC PLUS ........................... 201
ESP
®.............................................. 196
ESP®OFF ....................................... 197
Fuel tank ........................................ 199
General notes ................................ 191
Overview .......................................... 32
Parking brake ................................ 194
PASSENGER AIR BAG OFF ............... 39
Reserve fuel ................................... 199
Restraint system ............................ 198
Seat belt ........................................ 192
Tire pressure monitor .................... 202
Warning triangle ................................ 243
Warranty .............................................. 24
Washer fluid
Display message ............................ 191
Weather display (COMAND)
see also Digital Operator's Man-
ual .................................................. 203
Wheel and tire combinations
Tires ............................................... 279
Wheel bolt tightening torque ........... 278
Wheels
Changing a wheel .......................... 275
Checking ........................................ 257
Cleaning ......................................... 238
Important safety notes .................. 257
Information on driving .................... 257
Interchanging/changing ................ 275
Mounting a new wheel ................... 278
Mounting a wheel .......................... 276
Removing a wheel .......................... 278
Snow chains .................................. 259
Storing ........................................... 276
Tightening torque ........................... 278
Wheel size/tire size ....................... 279
Window curtain air bag
Display message ............................ 178
Operation ......................................... 46
Windows
see Side windows
Windshield
Defrosting ...................................... 100
Windshield heating ........................... 101
Windshield washer fluid
see Windshield washer system Windshield washer system
Adding washer fluid ....................... 234
Notes ............................................. 287
Windshield wipers
Problem (malfunction) ..................... 95
Rear window wiper .......................... 94
Replaci ng the w
iper blades .............. 94
Switching on/off .............................. 93
Winter driving
Important safety notes .................. 258
Slippery road surfaces ................... 128
Snow chains .................................. 259
Winter operation
Overview ........................................ 258
Radiator cover ............................... 231
Summer tires ................................. 259
Winter tires
M+S tires ....................................... 259
Wiper blades
Cleaning ......................................... 239
Important safety notes .................... 94
Replacing ......................................... 94
Wooden trim (cleaning instruc-
tions) .................................................. 241
Index21
Page 34 of 294

Instrument cluster
FunctionPage
:Speedometer wit hsegments16 0
Warning and indicator lamps:
÷ ESP®19 6
å ESP®OF F196
! ABS194
J Brakes(yellow)19 3
L Low-beam headlamps86
TParking lamp s87
KHigh-beam headlamps88
Brakes(red)19 3
$ (USAonly)
J Canad aonly
Parking brak e
F(USAonly)
· Distanc ewarning20 1
;#! Turn signals88
=Multifunction display162
FunctionPag e
?Tachometer160
Warning and indicator lamps:
R Rear fog lamp87
;CheckEngin e199
h Tirepressur emonitor20 2
6 Restrain tsystem38
ü Seat belt s192
ACoolan ttemperature gauge16 1
Warning and indicator lamps:
? Coolan t199
BFue llevel indicator
Warning and indicator lamps:
8 Reserve fuel wit hfuel
filler flap location indicator
(right-hand side )
199
CInstrumen tcluste rlighting16 0
32Instrument cluster
At a glance
Page 112 of 294

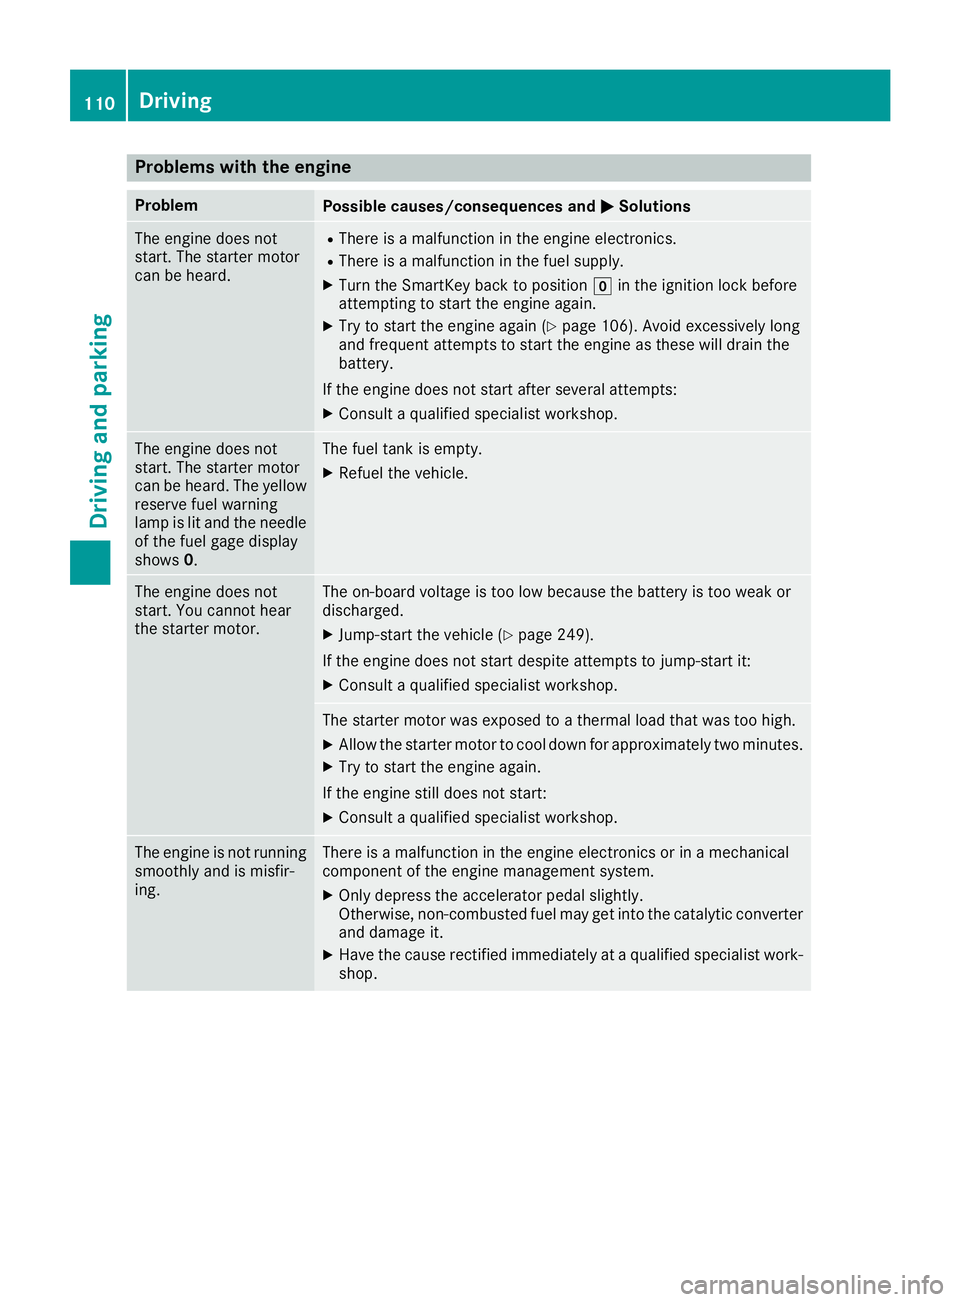
Problems with the engine
ProblemPossible causes/consequences andMSolutions
The engine does not
start. The starter motor
can be heard.RThere is a malfunction in the engine electronics.
RThere is a malfunction in the fuel supply.
XTurn the SmartKey back to positiongin the ignition lock before
attempting to start the engine again.
XTry to start the engine again (Ypage 106). Avoid excessively long
and frequent attempts to start the engine as these will drain the
battery.
If the engine does not start after several attempts:
XConsult a qualified specialist workshop.
The engine does not
start. The starter motor
can be heard. The yellow
reserve fuel warning
lamp is lit and the needle
of the fuel gage display
shows 0.The fuel tank is empty.
XRefuel the vehicle.
The engine does not
start. You cannot hear
the starter motor.The on-board voltage is too low because the battery is too weak or
discharged.
XJump-start the vehicle (Ypage 249).
If the engine does not start despite attempts to jump-start it:
XConsult a qualified specialist workshop.
The starter motor was exposed to a thermal load that was too high.
XAllow the starter motor to cool down for approximately two minutes.
XTry to start the engine again.
If the engine still does not start:
XConsult a qualified specialist workshop.
The engine is not running
smoothly and is misfir-
ing.There is a malfunction in the engine electronics or in a mechanical
component of the engine management system.
XOnly depress the accelerator pedal slightly.
Otherwise, non-combusted fuel may get into the catalytic converter
and damage it.
XHave the cause rectified immediately at a qualified specialist work-
shop.
110Driving
Driving and parking
Page 123 of 294

=Instruction label for fuel type to be refueled
?To insert the fuel filler cap
XSwitch off the engine.
XRemove the SmartKey from the ignition lock.
XPress the fuel filler flap in the direction of
arrow:.
The fuel filler flap swings up.
XTurn the fuel filler cap counterclockwise and
remove it.
XInsert the fuel filler cap into the holder
bracket on the inside of filler flap ?.
XCompletely insert the filler neck of the fuel
pump nozzle into the tank and refuel.
XOnly fill the tank until the pump nozzle
switches off.
Do not add any more fuel after the pump stops
filling for the first time. Otherwise, fuel may leak
out.
Closing the fuel filler flap
XReplace the cap on the filler neck and turn
clockwise until it engages audibly.
XClose the fuel filler flap.
Close the fuel filler flap before locking the vehi-
cle.
If you are driving with the fuel filler cap open, the
8 reserve fuel warning lamp flashes. A mes-
sage appears in the multifunction display
(
Ypage 183).
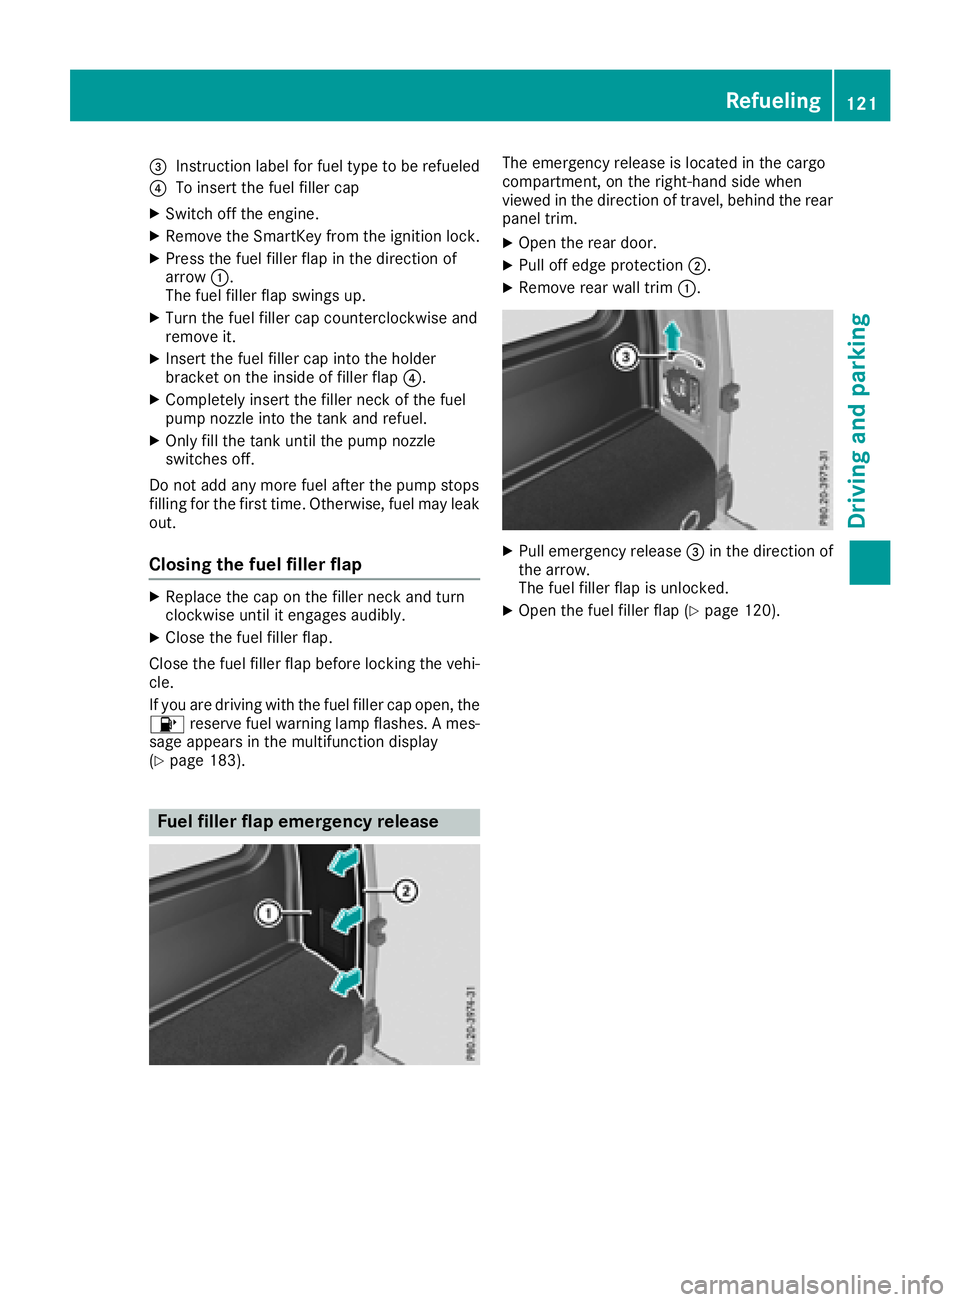
Fuel filler flap emergency release
The emergency release is located in the cargo
compartment, on the right-hand side when
viewed in the direction of travel, behind the rear
panel trim.
XOpen the rear door.
XPull off edge protection ;.
XRemove rear wall trim:.
XPull emergency release =in the direction of
the arrow.
The fuel filler flap is unlocked.
XOpen the fuel filler flap (Ypage 120).
Refueling121
Driving and parking
Z
Page 201 of 294

Engine
Warning/
indicator
lampNSignal type
Possible causes/consequences and M
Solutions
;NThe yellow Check Engine warning lamp lights up while the engine is running.
There may be a malfunction, for example:
Rin the engine management
Rin the fuel injection system
Rin the exhaust system
Rin the ignition system
Rin the fuel system
The emission limit values may be exceeded and the engine may be in emergency
mode.
XVisit a qualified specialist workshop immediately.
In some states, you must immediately visit a qualified specialist workshop as soon as the yellow Check Engine warning lamp lights up. This is due to the legal require-
ments in effect in these states. If in doubt, check whether such legal regulations
apply in the state in which you are currently driving.
8N The yellow reserve fuel warning lamp lights up while the engine is running.
The fuel level has dropped into the reserve range.
XRefuel at the nearest gas station.
8N The yellow reserve fuel warning lamp flashes while the vehicle is in motion.
In addition, the ;Check Engine warning lamp may light up.
The fuel filler cap is not closed correctly or the fuel system is leaking.
XCheck that the fuel filler cap is correctly closed.
XIf the fuel filler cap is not correctly closed: close the fuel filler cap.
XIf the fuel filler cap is closed:visit a qualified specialist workshop.
?NThe red coolant warning lamp lights up while the engine is running and the
coolant temperature gauge is at the start of the scale.
The temperature sensor for the coolant temperature gauge is malfunctioning.
The coolant temperature is no longer being monitored. There is a risk of engine
damage if the coolant temperature is too high.
XPull over and stop the vehicle safely and switch off the engine, paying attention
to road and traffic conditions. Do not continue driving under any circumstances.
XSecure the vehicle against rolling away (Ypage 122).
XConsult a qualified specialist workshop.
Warning and indicator lamps in the instrument cluster199
On-board computer and displays
Z
Page 240 of 294

Cleaning the paintwork
!Do not affix:
Rstickers
Rfilms
Rmagnetic plates or similar items
to painted surfaces. You could otherwise
damage the paintwork.
Scratches, corrosive deposits, areas affected by
corrosion and damage caused by inadequate
care cannot always be completely repaired. In
such cases, visit a qualified specialist workshop.
XRemove dirt immediately, where possible,
while avoiding rubbing too hard.
XSoak insect remains with insect remover and
rinse off the treated areas afterwards.
XSoak bird droppings with water and rinse off
the treated areas afterwards.
XRemove coolant, brake fluid, tree resin, oils,
fuels and greases by rubbing gently with a
cloth soaked in petroleum ether or lighter
fluid.
XUse tar remover to remove tar stains.
XUse silicone remover to remove wax.
If water no longer forms "beads" on the paint
surface, use the paint care products recommen-
ded and approved by Mercedes-Benz. This is the
case approximately every three to five months,
depending on the climate conditions and the
care product used.
The cleaning product Paint Cleaner, which has
been recommended and approved by
Mercedes-Benz, should be used when dirt has
penetrated the paint surface.
Also use Paint Cleaner on paint that has become
dull.
Do not use these care products in the sun or on
the hood while the hood is hot.
XUse a suitable touch-up stick, e.g. MB Touch-
Up Stick, to repair slight damage to the paint-
work quickly and provisionally.
Matte finish care
!Never polish the vehicle or the light alloy
wheels. Polishing causes the finish to shine.
!The following may cause the paint to
become shiny and thus reduce the matte
effect:
Rstrong rubbing of the paintwork with
unsuitable materials
Rfrequent use of automatic car washes
Rwashing the vehicle in direct sunlight
!Never use paint cleaner, buffing or polishing
products, or gloss preserver, e.g. wax. These
products are only suitable for high-gloss sur-
faces. Their use on vehicles with matte finish
leads to considerable surface damage (shiny,
spotted areas).
Always have paintwork repairs carried out at a
qualified specialist workshop.
!Do not use wash programs with a hot wax
treatment under any circumstances.
Observe these notes if your vehicle has a clear
matte finish. This will help you to avoid damage
to the paintwork due to incorrect treatment.
These notes also apply to light alloy wheels with a clear matte finish.
The vehicle should ideally be washed by hand
using a soft sponge, car shampoo and plenty of
water.
Use only insect remover and car shampoo from
the range of approved Mercedes-Benz care
products.
Cleaning the vehicle parts
Cleaning the wheels
GWARNING
The water jet from a circular jet nozzle (dirt
blasters) can cause invisible exterior damage
to the tires or chassis components. Compo-
nents damaged in this way may fail unexpect-
edly. There is a risk of an accident.
Do not use power washers with circular jet
nozzles to clean the vehicle. Have damaged
tires or chassis components replaced imme-
diately.
!Do not use acidic wheel cleaning products
to remove brake dust. This could damage
wheel bolts and brake components.
238Care
Maintenance and care