2018 Hyundai Kona ignition
[x] Cancel search: ignitionPage 399 of 523
6-32
What to do in an emergency
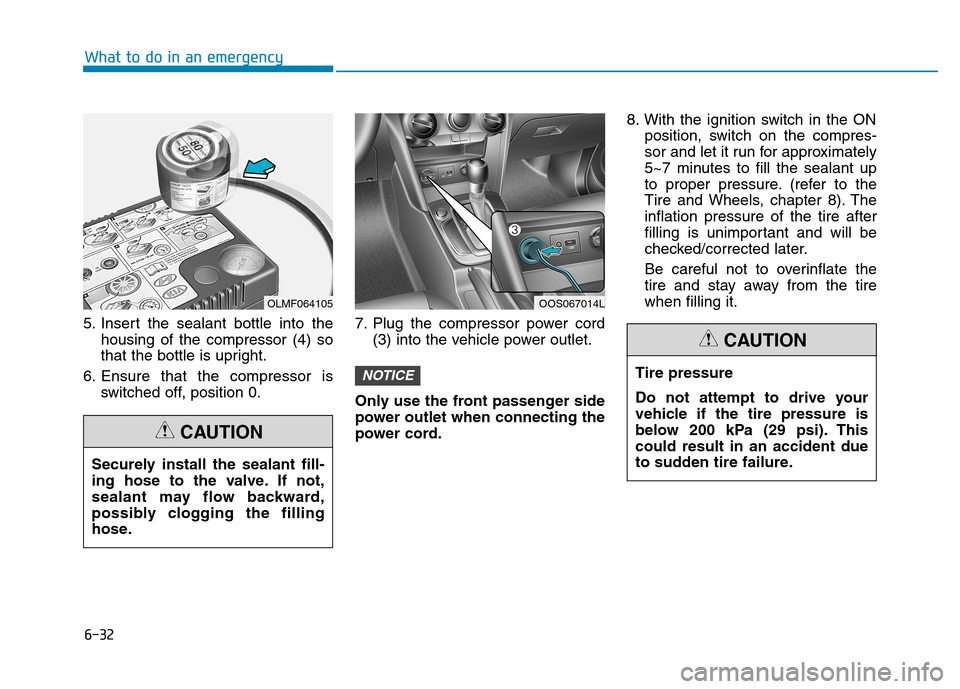
5. Insert the sealant bottle into thehousing of the compressor (4) so
that the bottle is upright.
6. Ensure that the compressor is switched off, position 0. 7. Plug the compressor power cord
(3) into the vehicle power outlet.
Only use the front passenger side
power outlet when connecting the
power cord. 8. With the ignition switch in the ON
position, switch on the compres-
sor and let it run for approximately
5~7 minutes to fill the sealant up
to proper pressure. (refer to the
Tire and Wheels, chapter 8). Theinflation pressure of the tire after
filling is unimportant and will be
checked/corrected later.
Be careful not to overinflate the
tire and stay away from the tirewhen filling it.
NOTICE
OLMF064105
Securely install the sealant fill-
ing hose to the valve. If not,
sealant may flow backward,
possibly clogging the filling
hose.
CAUTION
OOS067014L Tire pressure
Do not attempt to drive your
vehicle if the tire pressure is
below 200 kPa (29 psi). Thiscould result in an accident due
to sudden tire failure.
CAUTION
Page 400 of 523
6-33
What to do in an emergency
6
9. Switch off the compressor.
10. Detach the hoses from thesealant bottle connector and
from the tire valve.
Return the Tire Mobility Kit to its stor-
age location in the vehicle.
Distributing the sealant
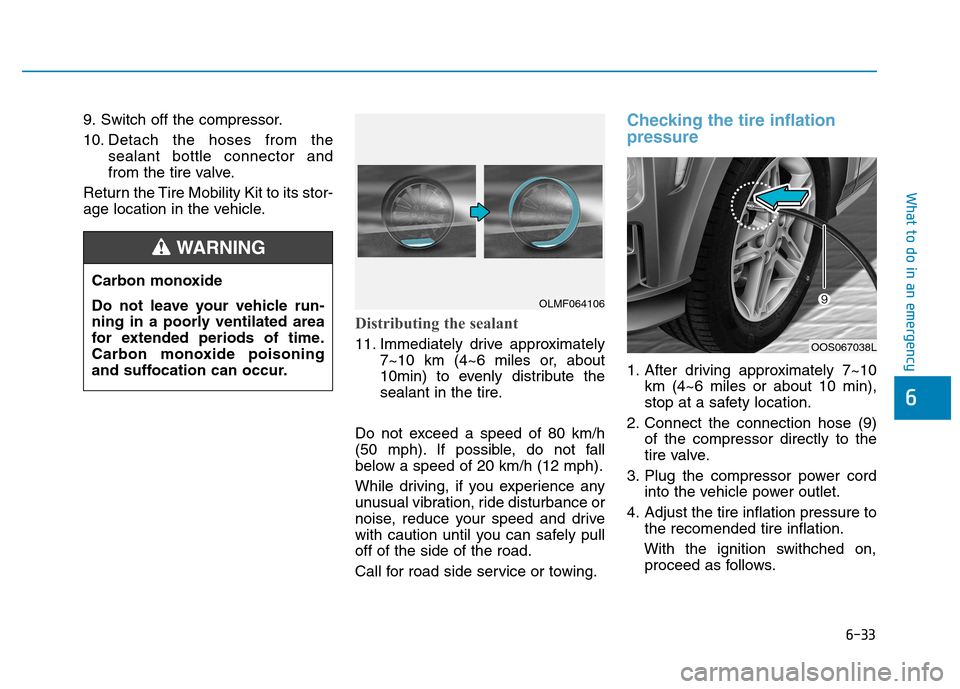
11. Immediately drive approximately 7~10 km (4~6 miles or, about
10min) to evenly distribute the
sealant in the tire.
Do not exceed a speed of 80 km/h
(50 mph). If possible, do not fall
below a speed of 20 km/h (12 mph).
While driving, if you experience any
unusual vibration, ride disturbance or
noise, reduce your speed and drive
with caution until you can safely pulloff of the side of the road.
Call for road side service or towing.
Checking the tire inflation pressure
1. After driving approximately 7~10 km (4~6 miles or about 10 min),
stop at a safety location.
2. Connect the connection hose (9) of the compressor directly to the
tire valve.
3. Plug the compressor power cord into the vehicle power outlet.
4. Adjust the tire inflation pressure to the recomended tire inflation.
With the ignition swithched on, proceed as follows.
Carbon monoxide
Do not leave your vehicle run-
ning in a poorly ventilated area
for extended periods of time.
Carbon monoxide poisoning
and suffocation can occur.
WARNING
OLMF064106
OOS067038L
Page 406 of 523
6-39
What to do in an emergency
6
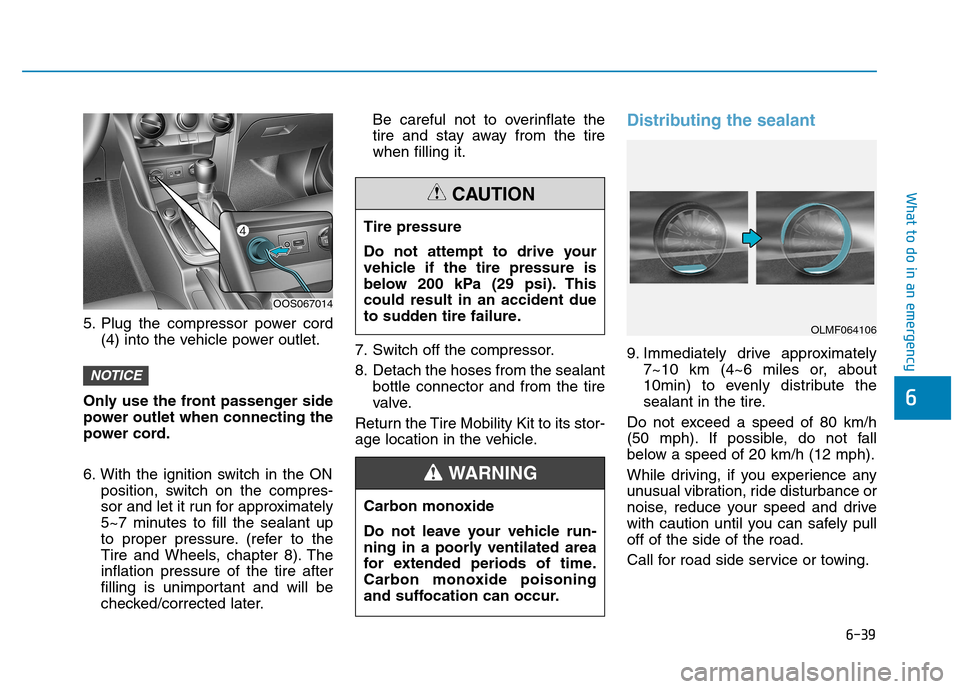
5. Plug the compressor power cord(4) into the vehicle power outlet.
Only use the front passenger side
power outlet when connecting the
power cord.
6. With the ignition switch in the ON position, switch on the compres-
sor and let it run for approximately
5~7 minutes to fill the sealant up
to proper pressure. (refer to the
Tire and Wheels, chapter 8). Theinflation pressure of the tire after
filling is unimportant and will be
checked/corrected later. Be careful not to overinflate the
tire and stay away from the tirewhen filling it.
7. Switch off the compressor.
8. Detach the hoses from the sealant bottle connector and from the tire
valve.
Return the Tire Mobility Kit to its stor-
age location in the vehicle.
Distributing the sealant
9. Immediately drive approximately 7~10 km (4~6 miles or, about
10min) to evenly distribute the
sealant in the tire.
Do not exceed a speed of 80 km/h
(50 mph). If possible, do not fall
below a speed of 20 km/h (12 mph).
While driving, if you experience any
unusual vibration, ride disturbance or
noise, reduce your speed and drive
with caution until you can safely pulloff of the side of the road.
Call for road side service or towing.
NOTICE
OOS067014 Tire pressure
Do not attempt to drive your
vehicle if the tire pressure is
below 200 kPa (29 psi). Thiscould result in an accident due
to sudden tire failure.
CAUTION
Carbon monoxide
Do not leave your vehicle run-
ning in a poorly ventilated area
for extended periods of time.
Carbon monoxide poisoning
and suffocation can occur.
WARNING
OLMF064106
Page 407 of 523
6-40
What to do in an emergency
Checking the tire inflation pressure
1. After driving approximately 7~10km (4~6 miles or about 10 min),
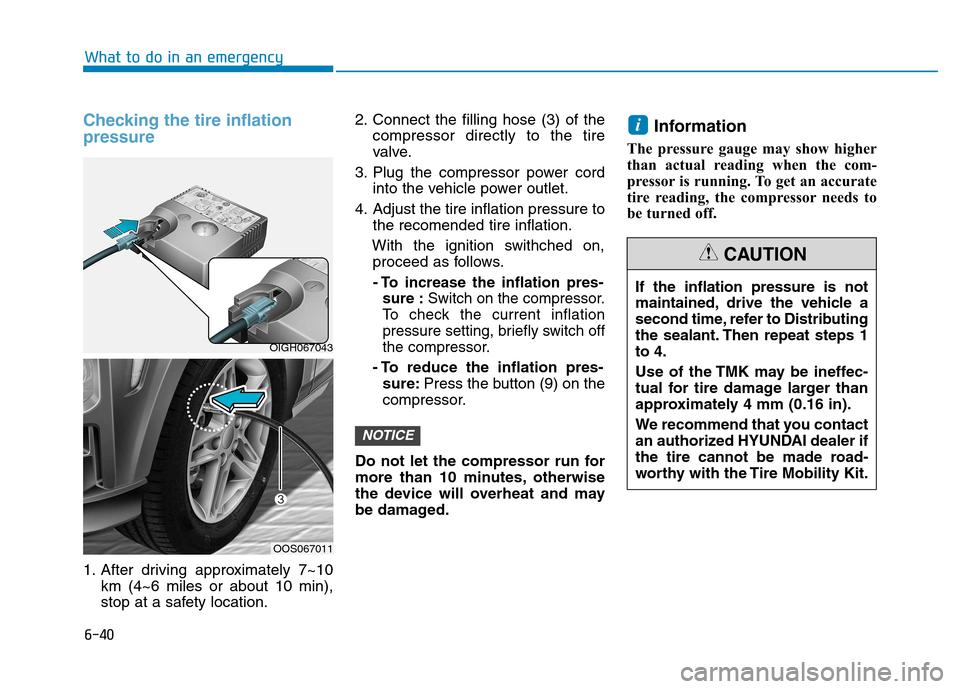
stop at a safety location. 2. Connect the filling hose (3) of the
compressor directly to the tire
valve.
3. Plug the compressor power cord into the vehicle power outlet.
4. Adjust the tire inflation pressure to the recomended tire inflation.
With the ignition swithched on, proceed as follows.
- To increase the inflation pres- sure : Switch on the compressor.
To check the current inflation
pressure setting, briefly switch off
the compressor.
- To reduce the inflation pres- sure: Press the button (9) on the
compressor.
Do not let the compressor run for
more than 10 minutes, otherwise
the device will overheat and may
be damaged. Information
The pressure gauge may show higher
than actual reading when the com-
pressor is running. To get an accurate
tire reading, the compressor needs to
be turned off.
i
NOTICE
OIGH067043
OOS067011 If the inflation pressure is not
maintained, drive the vehicle a
second time, refer to Distributing
the sealant. Then repeat steps 1to 4.
Use of the TMK may be ineffec-
tual for tire damage larger than
approximately 4 mm (0.16 in).
We recommend that you contact
an authorized HYUNDAI dealer if
the tire cannot be made road-
worthy with the Tire Mobility Kit.
CAUTION
Page 409 of 523
6-42
What to do in an emergency
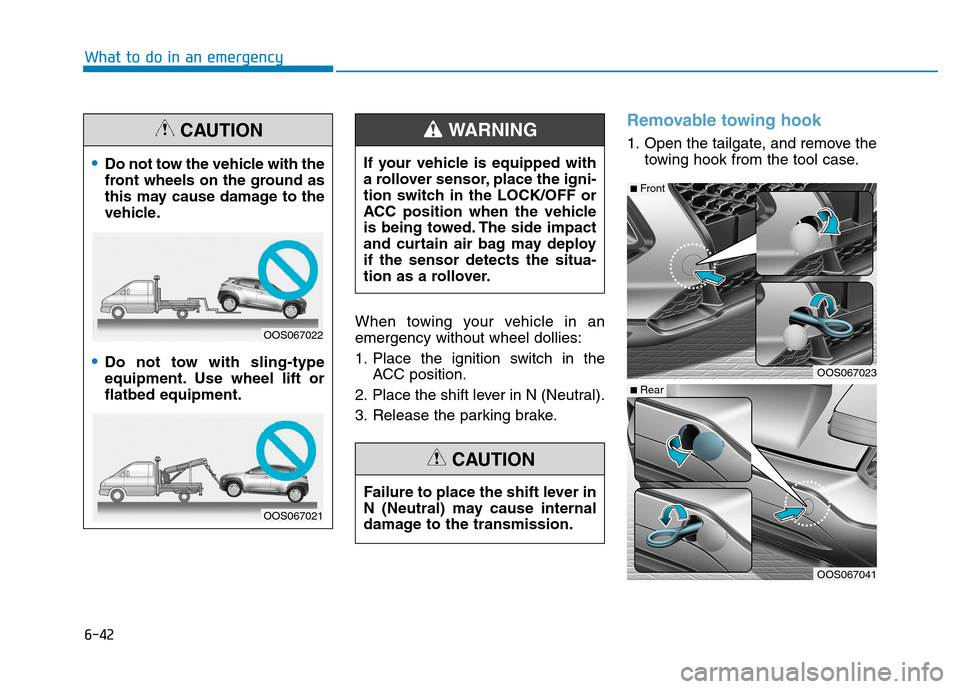
When towing your vehicle in an emergency without wheel dollies:
1. Place the ignition switch in theACC position.
2. Place the shift lever in N (Neutral).
3. Release the parking brake.
Removable towing hook
1. Open the tailgate, and remove the towing hook from the tool case.
Do not tow the vehicle with the
front wheels on the ground as
this may cause damage to the
vehicle.
Do not tow with sling-type
equipment. Use wheel lift orflatbed equipment.
CAUTION
OOS067022
OOS067021 Failure to place the shift lever in
N (Neutral) may cause internal
damage to the transmission.
CAUTION
If your vehicle is equipped with
a rollover sensor, place the igni-
tion switch in the LOCK/OFF or
ACC position when the vehicle
is being towed. The side impact
and curtain air bag may deployif the sensor detects the situa-
tion as a rollover.
WARNING
OOS067023
OOS067041
■
Front
■Rear
Page 411 of 523
6-44
What to do in an emergency
Always follow these emergency tow- ing precautions:
Place the ignition switch in theACC position so the steering wheel
is not locked.
Place the shift lever in N (Neutral).
Release the parking brake.
Depress the brake pedal with more force than normal as you will have
reduced braking performance.
More steering effort will be required because the power steer-
ing system will be disabled.
Use a vehicle heavier than your own to tow your vehicle.
The drivers of both vehicles should communicate with each other fre-
quently.
Before emergency towing, check that the hook is not broken or dam-aged.
Fasten the towing cable or chain securely to the hook.
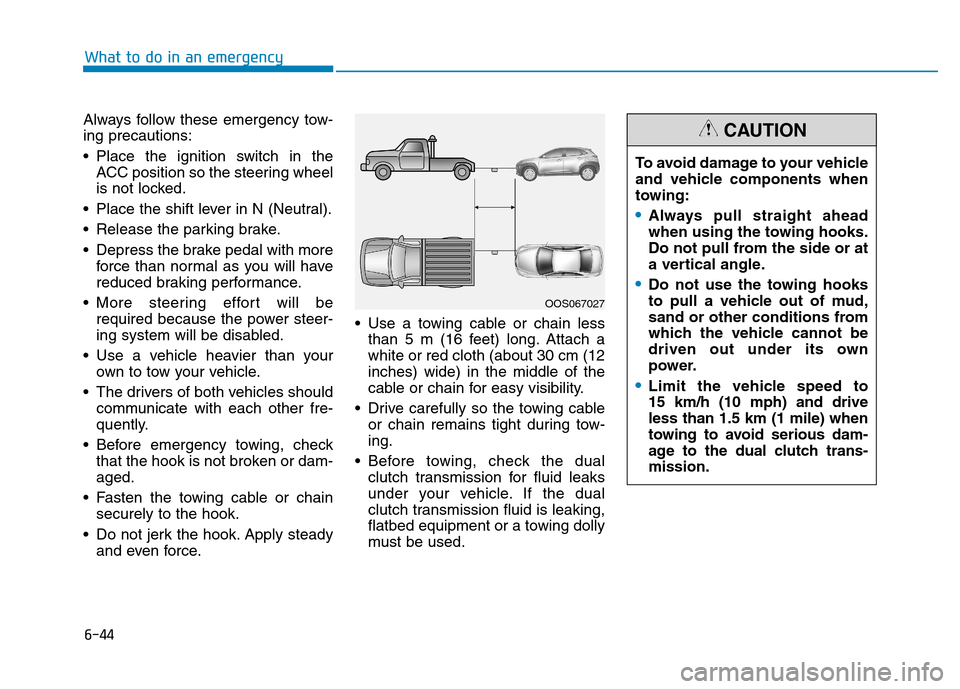
Do not jerk the hook. Apply steady and even force. Use a towing cable or chain less
than 5 m (16 feet) long. Attach awhite or red cloth (about 30 cm (12inches) wide) in the middle of the
cable or chain for easy visibility.
Drive carefully so the towing cable or chain remains tight during tow-ing.
Before towing, check the dual clutch transmission for fluid leaks
under your vehicle. If the dual
clutch transmission fluid is leaking,
flatbed equipment or a towing dolly
must be used.
OOS067027 To avoid damage to your vehicle
and vehicle components when
towing:
Always pull straight ahead
when using the towing hooks.
Do not pull from the side or at
a vertical angle.
Do not use the towing hooks
to pull a vehicle out of mud,
sand or other conditions from
which the vehicle cannot be
driven out under its own
power.
Limit the vehicle speed to 15 km/h (10 mph) and driveless than 1.5 km (1 mile) when
towing to avoid serious dam-
age to the dual clutch trans-mission.
CAUTION
Page 417 of 523
7-5
7
Maintenance
OOWW NNEERR MM AAIINN TTEENN AANN CCEE
The following lists are vehicle checks and inspections that should be per-
formed by the owner or an authorized
HYUNDAI dealer at the frequencies
indicated to help ensure safe, depend-
able operation of your vehicle.
Any adverse conditions should be
brought to the attention of your dealer
as soon as possible.
These Owner Maintenance vehicle
checks are generally not covered by
warranties and you may be charged
for labor, parts and lubricants used.
Owner maintenance schedule
When you stop for fuel:
Check the engine oil level.
Check the coolant level in the
engine coolant reservoir.
Check the windshield washer fluid level.
Check for low or under-inflated tires.
Performing maintenance work
on a vehicle can be dangerous.
If you lack sufficient knowledge
and experience or the propertools and equipment to do the
work, we
recommend that the
system be serviced by an author-
ized HYUNDAI dealer. ALWAYS
follow these precautions for
performing maintenance work:
Park your vehicle on level
ground, move the shift lever
into the P (Park, for dual
clutch transmission vehicle)
position or neutral (for manu-
al transmission vehicle) posi-
tion, apply the parking brake,
and place the ignition switchin the LOCK/ OFF position.
Block the tires (front and back)
to prevent the vehicle from
moving.
Remove loose clothing or jew-
elry that can become entan-
gled in moving parts.
WARNING If you must run the engine
during maintenance, do so
out doors or in an area withplenty of ventilation.
Keep flames, sparks, or smok-
ing materials away from the
battery and fuel-related parts.
Be careful when checking your
engine coolant level when the
engine is hot. This may result in
coolant being blown out of theopening and cause serious
burns and other injuries.
WARNING
Page 431 of 523
7-19
7
Maintenance
EEXX PPLLAA NN AATTIIOO NN OO FF SS CC HH EEDD UU LLEE DD MM AAIINN TTEENN AANN CCEE IITT EEMM SS
Engine oil and filter
The engine oil and filter should be
changed at the intervals specified in
the maintenance schedule. If the
vehicle is being driven in severe con-
ditions, more frequent oil and filterchanges are required.
Drive belts
Inspect all drive belts for evidence of
cuts, cracks, excessive wear or oil
saturation and replace if necessary.
Drive belts should be checked peri-
odically for proper tension and
adjusted as necessary.
Fuel lines, fuel hoses and con- nections
Check the fuel lines, fuel hoses and
connections for leakage and dam-
age. We recommend that the fuel
lines, fuel hoses and connections be
replaced by an authorized HYUNDAI
dealer.
Fuel filter (for gasoline)
HYUNDAI gasoline vehicle is
equipped a lifetime fuel filter that
integrated with the fuel tank. Regularmaintenance or replacement is not
needed but depends on fuel quality. If
there are some important safety mat-
ters like fuel flow restriction, surging,
loss of power, hard starting problem
etc, fuel filter inspection or replace is
needed. We recommend that the fuel
filter be Inspected or replaced by an
authorized HYUNDAI dealer.
Vapor hose and fuel filler cap
The vapor hose and fuel filler cap should be inspected at those inter-
vals specified in the maintenance
schedule. Make sure that a new
vapor hose or fuel filler cap is cor-rectly replaced.
Vacuum crankcase ventilation hoses (if equipped)
Inspect the surface of hoses for evi- dence of heat and/or mechanical
damage. Hard and brittle rubber,
cracking, tears, cuts, abrasions, and
excessive swelling indicate deterio-
ration. Particular attention should be
paid to examine those hose surfaces
nearest to high heat sources, such
as the exhaust manifold.Inspect the hose routing to ensurethat the hoses do not come in con-
tact with any heat source, sharp
edges or moving component whichmight cause heat damage or
mechanical wear. Inspect all hose
connections, such as clamps and
couplings, to make sure they are
secure, and that no leaks are pres-
ent. Hoses should be replaced
immediately if there is any evidence
of deterioration or damage.
When you are inspecting the belt,
place the ignition switch to the
LOCK/OFF or ACC position.
CAUTION