2018 Hyundai Kona ignition
[x] Cancel search: ignitionPage 345 of 523

5-91
Driving your vehicle
5
Information
During normal cruise control opera- tion, when the SET switch is activat-
ed or reactivated after applying the
brakes, the cruise control will acti-
vate after approximately 3 seconds.
This delay is normal.
Before activating the cruise control function, the system will check to
verify that the brake switch is oper-
ating normally. Depress the brake
pedal at least once after turning ON
the ignition or starting the vehicle.
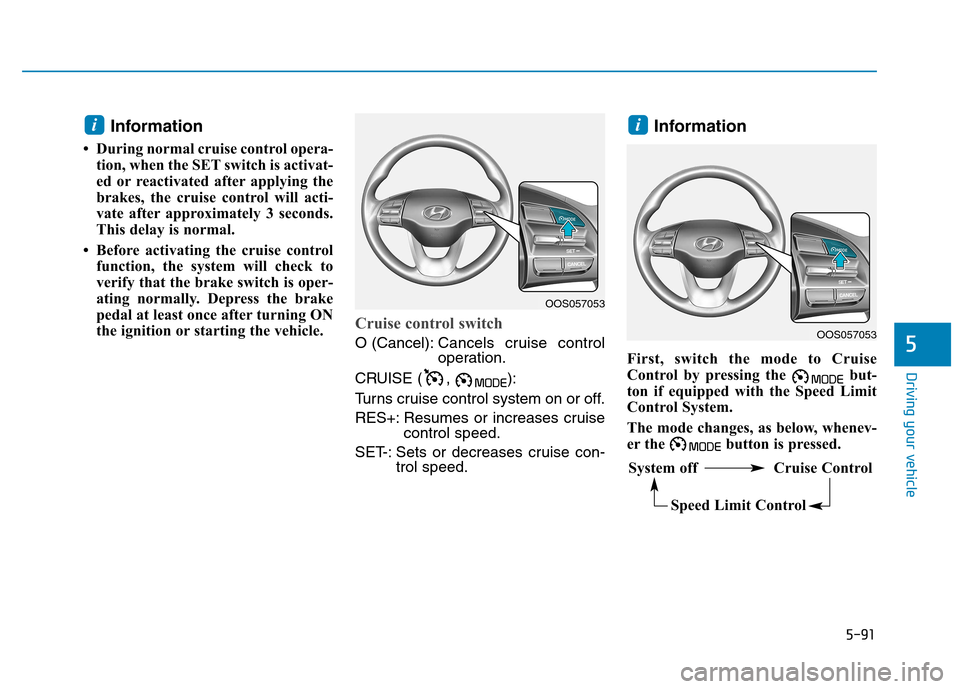
Cruise control switch
O (Cancel): Cancels cruise control
operation.
CRUISE ( , ):
Turns cruise control system on or off.
RES+: Resumes or increases cruise control speed.
SET-: Sets or decreases cruise con- trol speed. Information
First, switch the mode to Cruise
Control by pressing the but-
ton if equipped with the Speed Limit
Control System.
The mode changes, as below, whenev-
er the button is pressed.
ii
OOS057053
System off Cruise Control Speed Limit Control
OOS057053
Page 356 of 523

5-102
Driving your vehicle
When using tire chains:
Wrong size chains or improperlyinstalled chains can damage
your vehicle's brake lines, sus-
pension, body and wheels.
Use SAE “S” class or wire chains.
If you hear noise caused by chains contacting the body,
retighten the chain to prevent
contact with the vehicle body.
To prevent body damage, retight- en the chains after driving 0.5~1.0km (0.3~0.6 miles).
Do not use tire chains on vehi- cles equipped with aluminum
wheels. If unavoidable, use a
wire type chain.
Use wire chains less than 12 mm (0.47 in) wide to prevent damage
to the chain’s connection.
Winter Precautions
Use high quality ethylene glycol coolant
Your vehicle is delivered with high
quality ethylene glycol coolant in the
cooling system. It is the only type ofcoolant that should be used because
it helps prevent corrosion in the cool-
ing system, lubricates the water
pump and prevents freezing. Be sure
to replace or replenish your coolantin accordance with the maintenance
schedule in chapter 7. Before winter,
have your coolant tested to assure
that its freezing point is sufficient for
the temperatures anticipated during
the winter.
Check battery and cables
Winter temperatures affect battery
performance. Inspect the battery
and cables, as specified in the
chapter 7. The battery charging level
can be checked by an authorized
HYUNDAI dealer or in a service sta-tion. Change to "winter weight" oil if
necessary
In some regions during winter, it is recommended to use the "winter
weight" oil with lower viscosity. For
further information, refer to the chap-
ter 8. When you are not sure about a
type of winter weight oil, consult an
authorized HYUNDAI dealer.
Check spark plugs and ignition system
Inspect the spark plugs, as speci-
fied in the chapter 7.
If necessary,
replace them. Also check all ignition
wirings and components for any
cracks, wear-out, and damage.
To prevent locks from freezing
To prevent the locks from being
frozen, spray approved de-icing fluid
or glycerin into key holes. When a
lock opening is already covered with
ice, spray approved de-icing fluid
over the ice to remove it. When an
internal part of a lock freezes, try to
thaw it with a heated key. Carefully
use the heated key to avoid an injury.
NOTICE
Page 370 of 523

6-3
What to do in an emergency
6
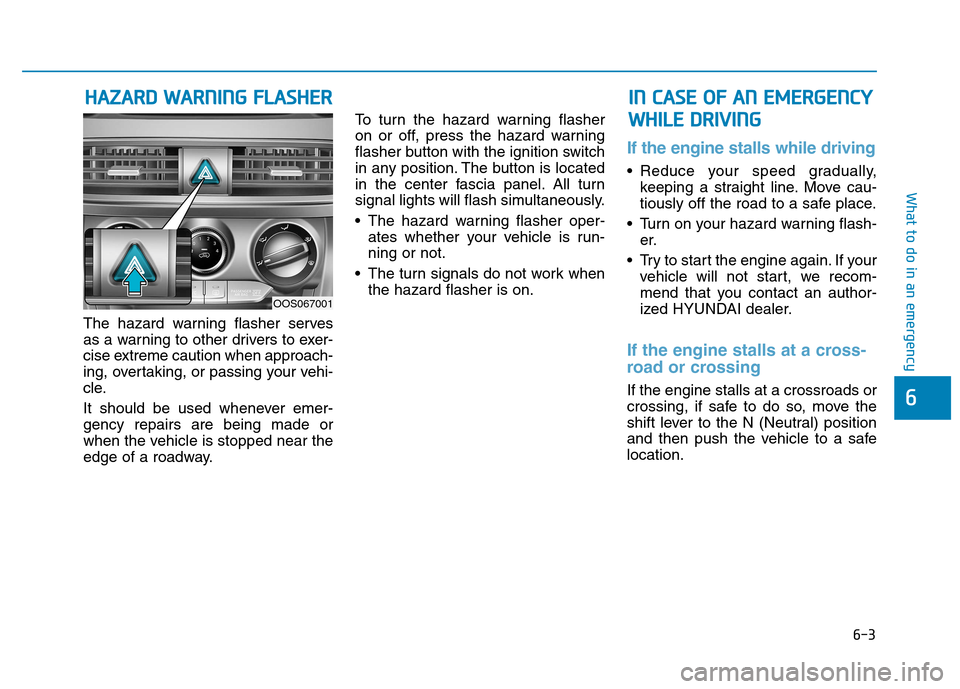
The hazard warning flasher serves
as a warning to other drivers to exer-
cise extreme caution when approach-
ing, overtaking, or passing your vehi-
cle.
It should be used whenever emer- gency repairs are being made or
when the vehicle is stopped near the
edge of a roadway.To turn the hazard warning flasher
on or off, press the hazard warning
flasher button with the ignition switch
in any position. The button is located
in the center fascia panel. All turn
signal lights will flash simultaneously.
• The hazard warning flasher oper-
ates whether your vehicle is run- ning or not.
The turn signals do not work when the hazard flasher is on.
If the engine stalls while driving
Reduce your speed gradually,keeping a straight line. Move cau-
tiously off the road to a safe place.
Turn on your hazard warning flash- er.
Try to start the engine again. If your vehicle will not start, we recom-
mend that you contact an author-
ized HYUNDAI dealer.
If the engine stalls at a cross-
road or crossing
If the engine stalls at a crossroads or
crossing, if safe to do so, move the
shift lever to the N (Neutral) position
and then push the vehicle to a safelocation.
HHAAZZAA RRDD WW AARRNN IINN GG FF LLAA SSHH EERR IINN CC AA SSEE OO FF AA NN EE MM EERR GG EENN CCYY
W
W HHIILL EE DD RRIIVV IINN GG
OOS067001
Page 371 of 523

6-4
What to do in an emergency
If you have a flat tire while driving
If a tire goes flat while you are driving:
Take your foot off the acceleratorpedal and let the vehicle slow
down while driving straight ahead.
Do not apply the brakes immedi-ately or attempt to pull off the road
as this may cause loss of vehiclecontrol resulting in an accident.
When the vehicle has slowed to
such a speed that it is safe to do
so, brake carefully and pull off the
road. Drive off the road as far as
possible and park on firm, level
ground. If you are on a divided
highway, do not park in the median
area between the two traffic lanes. When the vehicle is stopped, press
the hazard warning flasher button,
move the shift lever into P (Park,
for dual clutch transmission vehicle)
or neutral (for manual transmission
vehicle), apply the parking brake,
and place the ignition switch in theLOCK/OFF position.
Have all passengers get out of the vehicle. Be sure they all get out on
the side of the vehicle that is away
from traffic.
When changing a flat tire, follow the instructions provided later in
this chapter.If the engine doesn't turn over
or turns over slowly
Be sure the shift lever is in N(Neutral) or P (Park) if it is dual
clutch transmission vehicle. The
engine starts only when the shift
lever is in N (Neutral) or P (Park).
Check the battery connections to be sure they are clean and tight.
Turn on the interior light. If the light dims or goes out when you operate
the starter, the battery is drained.
Do not push or pull the vehicle to start
it. This could cause damage to your
vehicle. See instructions for "Jump
Starting" provided in this chapter.
II FF TT HH EE EE NN GGIINN EE WW IILL LL NN OO TT
S
S TT AA RRTT
Push or pull starting the vehicle
may cause the catalytic con-
verter to overload which can
lead to damage to the emission
control system.
CAUTION
Page 373 of 523

6-6
What to do in an emergency
To prevent damage to your vehi-
cle:
Only use a 12-volt power supply(battery or jumper system) to
jump start your vehicle.
Do not attempt to jump start your vehicle by push-starting.
Information An inappropriately disposedbattery can be harmful to the
environment and human
health. Dispose the battery
according to your local law(s)
or regulations.
Jump starting procedure
1. Position the vehicles close enough that the jumper cables will reach,
but do not allow the vehicles totouch.
2. Avoid fans or any moving parts in the engine compartment at all
times, even when the vehicles are
turned off.
3. Turn off all electrical devices such as radios, lights, air conditioning,
etc. Put the vehicles in P (Park, for
dual clutch transmission vehicle)
or neutral (for manual transmis-
sion vehicle), and set the parking
brakes. Turn both vehicles OFF.
i
NOTICEDo not attempt to jump start
your vehicle if your battery is
frozen.
NEVER attempt to recharge
the battery when the vehicle’s
battery cables are connected
to the battery.
The electrical ignition system
works with high voltage.
NEVER touch these compo-nents with the engine running
or when the ignition switch isin the ON position.
Do not allow the (+) and (-)
jumper cables to touch. It maycause sparks.
The battery may rupture or
explode when you jump start
with a low or frozen battery.
Pb
Page 377 of 523

6-10
What to do in an emergency
Your vehicle has also been equipped
with a TPMS malfunction indicator toindicate when the system is not
operating properly. The TPMS mal-function indicator is combined with
the low tire pressure telltale. Whenthe system detects a malfunction,
the telltale will flash for approximate-
ly one minute and then remain con-
tinuously illuminated.
This sequence will continue upon
subsequent vehicle start-ups as long
as the malfunction exists. When themalfunction indicator is illuminated,
the system may not be able to detect
or signal low tire pressure as intend-
ed. TPMS malfunctions may occur
for a variety of reasons, including theinstallation of replacement or alter-
nate tires or wheels on the vehicle
that prevent the TPMS from function-
ing properly. Always check theTPMS malfunction telltale afterreplacing one or more tires or wheels
on your vehicle to ensure that the
replacement or alternate tires and
wheels allow the TPMS to continue
to function properly.If the TPMS indicator does not illu-
minate for 3 seconds when the
ignition switch is turned to the ON
position or engine is running, or if
it comes on after blinking for
approximately one minute, we rec-
ommend that you contact an
authorized HYUNDAI dealer.Low tire pressure telltale
When the tire pressure
monitoring system warn-ing indicator is illuminated
and warning message
displayed on the cluster LCD display,
one or more of your tires is signifi-cantly under-inflated.
If the telltale illuminates, immediately
reduce your speed, avoid hard cor-
nering and anticipate increased stop-
ping distances. You should stop and
check your tires as soon as possible.Inflate the tires to the proper pres-
sure as indicated on the vehicle'splacard or tire inflation pressure label
located on the driver's side center
pillar outer panel. If you cannot reach
a service station or if the tire cannot
hold the newly added air, replace the
low pressure tire with the spare tire.
Then the Low Tire Pressure telltale
may flash for approximately one
minute and then remain continuously
illuminated after restarting and about
10 minutes of continuous driving
before you have the low pressure tire
repaired and replaced on the vehicle.
NOTICE
Page 383 of 523

6-16
What to do in an emergency
If any of the below happens, we rec- ommend that the system be
checked by an authorized HYUNDAI
dealer.
1. The low tire pressure telltale/TPMS malfunction indicator
does not illuminate for 3 sec-
onds when the ignition switchis turned to the ON position orthe engine is running.
2. The TPMS malfunction indicator remains illuminated after blink-
ing for approximately 1 minute.
3. The Low tire pressure position telltale remains illuminated.
Low tire pressure telltale
Low tire pressure position telltaleand tire pressuretelltale
When the tire pressure monitoring
system warning indicators are illumi-
nated and a warning message dis-
played on the cluster LCD display,
one or more of your tires is signifi-
cantly under-inflated. The low tirepressure position telltale light willindicate which tire is significantly
under-inflated by illuminating the cor-responding position light. If either telltale illuminates, immedi-
ately reduce your speed, avoid hard
cornering and anticipate increased
stopping distances. You should stop
and check your tires as soon as pos-
sible. Inflate the tires to the proper
pressure as indicated on the vehi-
cle’s placard or tire inflation pressure
label located on the driver's side cen-
ter pillar outer panel. If you cannot
reach a service station or if the tire
cannot hold the newly added air,
replace the low pressure tire with a
spare tire.
If you drive the vehicle for about 10
minutes at speeds above 25 km/h
after replacing the low pressure tire
with the spare tire, the below willhappen:
The TPMS malfunction indicator
may blink for approximately 1 minute
and then remain continuously illumi-
nated because the TPMS sensor isnot mounted on the spare wheel.
NOTICE
OOS047115L
Page 388 of 523

6-21
What to do in an emergency
6
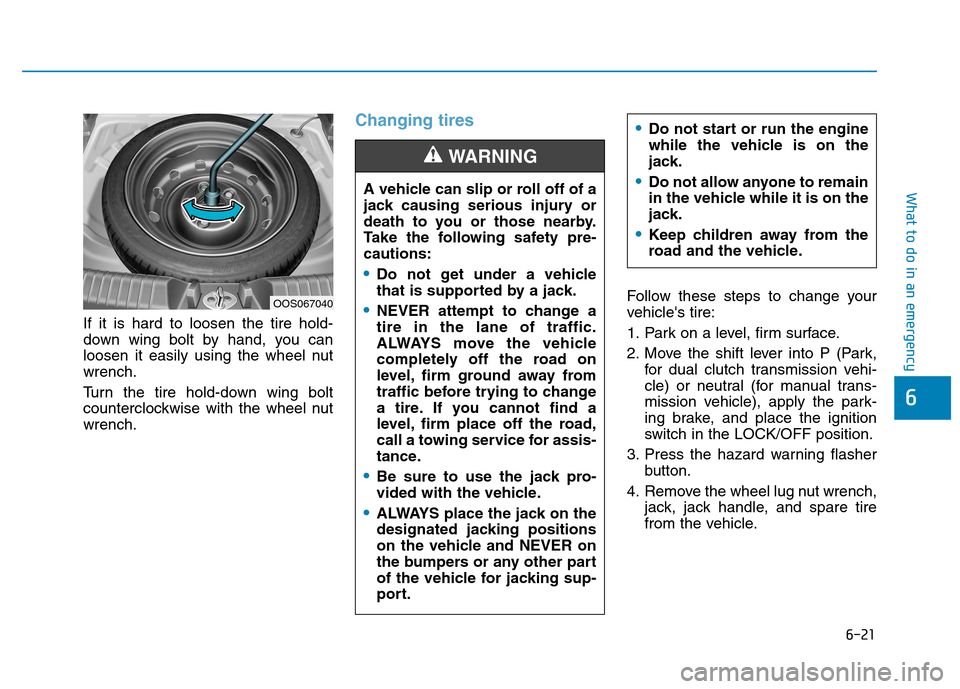
If it is hard to loosen the tire hold-
down wing bolt by hand, you can
loosen it easily using the wheel nutwrench.
Turn the tire hold-down wing bolt
counterclockwise with the wheel nutwrench.
Changing tires
Follow these steps to change your
vehicle's tire:
1. Park on a level, firm surface.
2. Move the shift lever into P (Park,for dual clutch transmission vehi-
cle) or neutral (for manual trans-
mission vehicle), apply the park-
ing brake, and place the ignition
switch in the LOCK/OFF position.
3. Press the hazard warning flasher button.
4. Remove the wheel lug nut wrench, jack, jack handle, and spare tire
from the vehicle.
A vehicle can slip or roll off of a
jack causing serious injury or
death to you or those nearby.
Take the following safety pre-cautions:
Do not get under a vehicle
that is supported by a jack.
NEVER attempt to change a tire in the lane of traffic.
ALWAYS move the vehicle
completely off the road on
level, firm ground away from
traffic before trying to change
a tire. If you cannot find a
level, firm place off the road,
call a towing service for assis-
tance.
Be sure to use the jack pro-
vided with the vehicle.
ALWAYS place the jack on the
designated jacking positions
on the vehicle and NEVER on
the bumpers or any other part
of the vehicle for jacking sup-
port.
WARNING
Do not start or run the engine
while the vehicle is on the
jack.
Do not allow anyone to remain
in the vehicle while it is on the
jack.
Keep children away from the
road and the vehicle.
OOS067040