Page 19 of 696
▫Sun Screens — If Equipped ................168
▫ Power Outlets ........................ .168
▫ Power Inverter — If Equipped .............171
▫ Cigar Lighter — If Equipped ..............172
▫ Smoker’s Package Kit — If Equipped ........172▫
Overhead Sunglass Storage ...............173
� ROOF LUGGAGE RACK — IF EQUIPPED ......173
▫ Deploying The Crossbars .................174
▫ Stowing The Crossbars ...................177
3
GETTING TO KNOW YOUR VEHICLE 17
Page 170 of 696

Sun Screens — If Equipped
Sun screens are available for second and third row seating
windows. The screens store in the sill trim panels, and the
tops of the windows are equipped with hooks that the sun
screens attach to when pulled out.
Gently pull up on the tab to raise the sun screen. Continue
pulling the sun screen until the tab is near the top of the
window.
Once the screen is completely to the top of the window,
extend the top bar of the sun screen over the two hooks
attached to the top of the window.To lower the sun screen, gently lift the tab upward to
disengage the hooks, and feed the screen back into the base
sill.
Power Outlets
Your vehicle is equipped with 12 Volt (15 Amp) power
outlets, and 5 Volt (2.5 Amp) USB power outlets, that can
be used to power cellular phones, small electronics and
other low powered electrical accessories. The power outlets
can be labeled with either a “key” or a “battery” symbol to
indicate how the outlet is powered. Power outlets labeled
with a “key” are powered when the ignition is in the ON orSun Screen Retracted
Sun Screen Extended
168 GETTING TO KNOW YOUR VEHICLE
Page 171 of 696
ACC position, while the outlets labeled with a “battery”
are connected directly to the battery and powered at all
times.
NOTE:
•All accessories connected to the “battery” powered
outlets should be removed or turned off when the
vehicle is not in use to protect the battery against
discharge.
CAUTION!
Power outlets are designed for accessory plugs only.
Do not insert any other object in the power outlets as
this will damage the outlet and blow the fuse. Im-
proper use of the power outlet can cause damage not
covered by your New Vehicle Limited Warranty.
The front power outlet is located at the bottom of the
instrument panel. In addition to the front power outlets, there is also a power
outlet located in the rear cargo area.
The rear power outlet is located in the right rear cargo area.12 Volt Front Power Outlet
3
GETTING TO KNOW YOUR VEHICLE 169
Page 172 of 696
NOTE:The USB outlet in the bottom of the instrument
panel can be switched from “ignition” only to constant
“battery” powered all the time. See an authorized dealer
for details.
WARNING!
To avoid serious injury or death:
• Only devices designed for use in this type of outlet
should be inserted into any 12 Volt outlet.
• Do not touch with wet hands.
(Continued)
Rear Power OutletPower Outlet Fuse Locations
1 — F95A-F95B USB IP 10A
2 — F85 Cigar Lighter 20A
3 — F60 RR Cargo Power Outlet 20A
170 GETTING TO KNOW YOUR VEHICLE
Page 173 of 696

WARNING!(Continued)
•Close the lid when not in use and while driving the
vehicle.
• If this outlet is mishandled, it may cause an electric
shock and failure.
CAUTION!
•Many accessories that can be plugged in draw power
from the vehicle’s battery, even when not in use (i.e.,
cellular phones, etc.). Eventually, if plugged in long
enough, the vehicle’s battery will discharge suffi-
ciently to degrade battery life and/or prevent the
engine from starting.
• Accessories that draw higher power (i.e., coolers,
vacuum cleaners, lights, etc.) will degrade the battery
even more quickly. Only use these intermittently and
with greater caution.
• After the use of high power draw accessories, or long
periods of the vehicle not being started (with acces-
sories still plugged in), the vehicle must be driven a
sufficient length of time to allow the generator to
recharge the vehicle’s battery.
Power Inverter — If Equipped
There is a 115 Volt, 150 Watt Power Inverter outlet located
on the right side of the vehicle, before the third row of seats
to convert DC current to AC current. The Power Inverter
can power cellular phones, electronics and other low
power devices requiring up to 150 Watts. Certain high-end
video game consoles will exceed this power limit, as will
most power tools.
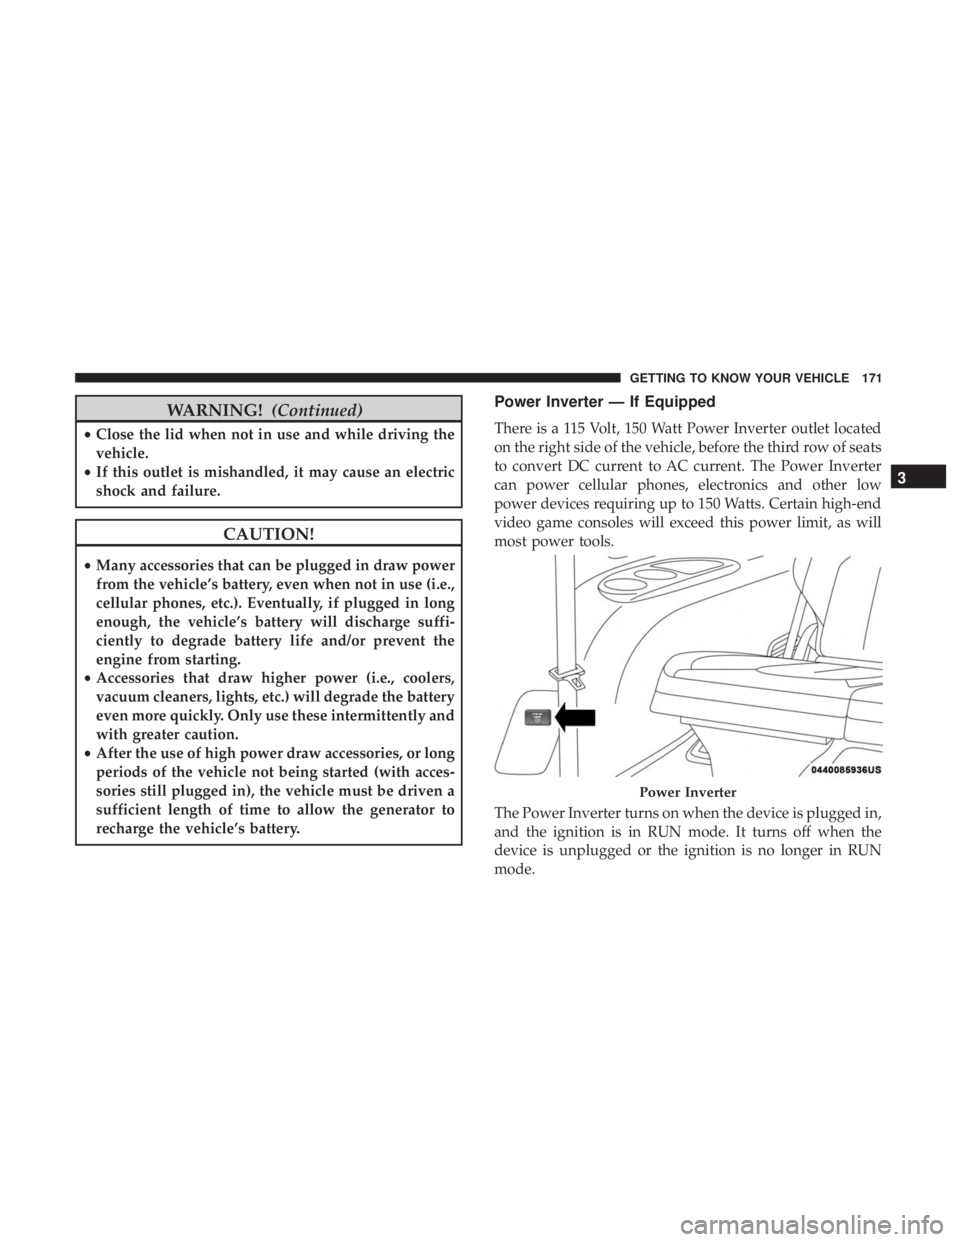
The Power Inverter turns on when the device is plugged in,
and the ignition is in RUN mode. It turns off when the
device is unplugged or the ignition is no longer in RUN
mode.
Power Inverter
3
GETTING TO KNOW YOUR VEHICLE 171
Page 174 of 696

The Power Inverter is designed with built-in overload
protection. If the power rating of 150 Watts is exceeded, the
Power Inverter shuts down. Once the electrical device has
been removed from the Power Inverter, it resets. To avoid
overloading the circuit, check the power ratings on electri-
cal devices prior to using the Power Inverter.
WARNING!
To avoid serious injury or death:
•Do not insert any objects into the receptacles.
• Do not touch with wet hands.
• Close the lid when not in use.
• If this outlet is mishandled, it may cause an electric
shock and failure.
Cigar Lighter — If Equipped
NOTE: Cigar lighters can be purchased at an authorized
dealer through Mopar parts.
The cigar lighter is located at the bottom of the instrument
panel. Push lighter inward to heat.
After a few seconds, the lighter automatically returns to its
initial position and is ready to be used.
WARNING!
When the cigar lighter is in use it becomes very hot. To
avoid serious injury, handle the cigar lighter with care.
Always check that the cigar lighter has turned off.
CAUTION!
Do not connect devices with power higher than 180
Watts (15 Amps) to the socket. Do not damage the
socket by using unsuitable adaptors. If the 180 Watt
(15 Amp) power rating is exceeded the fuse protecting
the system will need to be replaced.
Smoker’s Package Kit — If Equipped
With the optional authorized dealer-installed Smoker’s
Package Kit, a removable ash receiver is inserted into one
of the two cupholders in the center floor console. To install
the ash receiver, align the receiver so the thumb grip on the
lid is facing rearward. Push the ash receiver into either of
the cup wells to secure. Pull upward on the ash receiver to
remove for cleaning and/or storage.
The left rear trim panel cupholder is designed to accom-
modate a second ash receiver, if desired.
172 GETTING TO KNOW YOUR VEHICLE
Page 198 of 696

Loss of the battery charge may indicate one or more of the
following conditions:
•The charging system cannot deliver enough electrical
power to the vehicle system because the electrical loads
are larger than the capability of charging system. The
charging system is still functioning properly.
• Turning on all possible vehicle electrical loads (e.g.
HVAC to max settings, exterior and interior lights,
overloaded power outlets +12V, 150W, USB ports) dur-
ing certain driving conditions (city driving, towing,
frequent stopping).
• Installing options like additional lights, upfitter electri-
cal accessories, audio systems, alarms and similar de-
vices.
• Unusual driving cycles (short trips separated by long
parking periods).
• The vehicle was parked for an extended period of time
(weeks, months).
• The battery was recently replaced and was not charged
completely.
• The battery was discharged by an electrical load left on
when the vehicle was parked. •
The battery was used for an extended period with the
engine not running to supply radio, lights, chargers,
+12V portable appliances like vacuum cleaner ’s, game
consoles and similar devices.
What to do when an electrical load reduction action
message is present (“Battery Saver On” or “Battery Saver
Mode”)
During a trip:
• Reduce power to unnecessary loads if possible:
– Turn off redundant lights (interior or exterior)
– Check what may be plugged in to power outlets +12V, 150W, USB ports
– Check HVAC settings (blower, temperature)
– Check the audio settings (volume)
After a trip:
• Check if any aftermarket equipment was installed (ad-
ditional lights, upfitter electrical accessories, audio sys-
tems, alarms) and review specifications if any (load and
Ignition Off Draw currents).
• Evaluate the latest driving cycles (distance, driving time
and parking time).
196 GETTING TO KNOW YOUR INSTRUMENT PANEL
Page 440 of 696

FUSES
WARNING!
•When replacing a blown fuse, always use an appro-
priate replacement fuse with the same amp rating as
the original fuse. Never replace a fuse with another
fuse of higher amp rating. Never replace a blown
fuse with metal wires or any other material. Do not
place a fuse inside a circuit breaker cavity or vice
versa. Failure to use proper fuses may result in
serious personal injury, fire and/or property damage.
• Before replacing a fuse, make sure that the ignition is
off and that all the other services are switched off
and/or disengaged.
• If the replaced fuse blows again, contact an autho-
rized dealer.
• If a general protection fuse for safety systems (air
bag system, braking system), power unit systems
(engine system, transmission system) or steering
system blows, contact an authorized dealer.
General Information
The fuses protect electrical systems against excessive current.
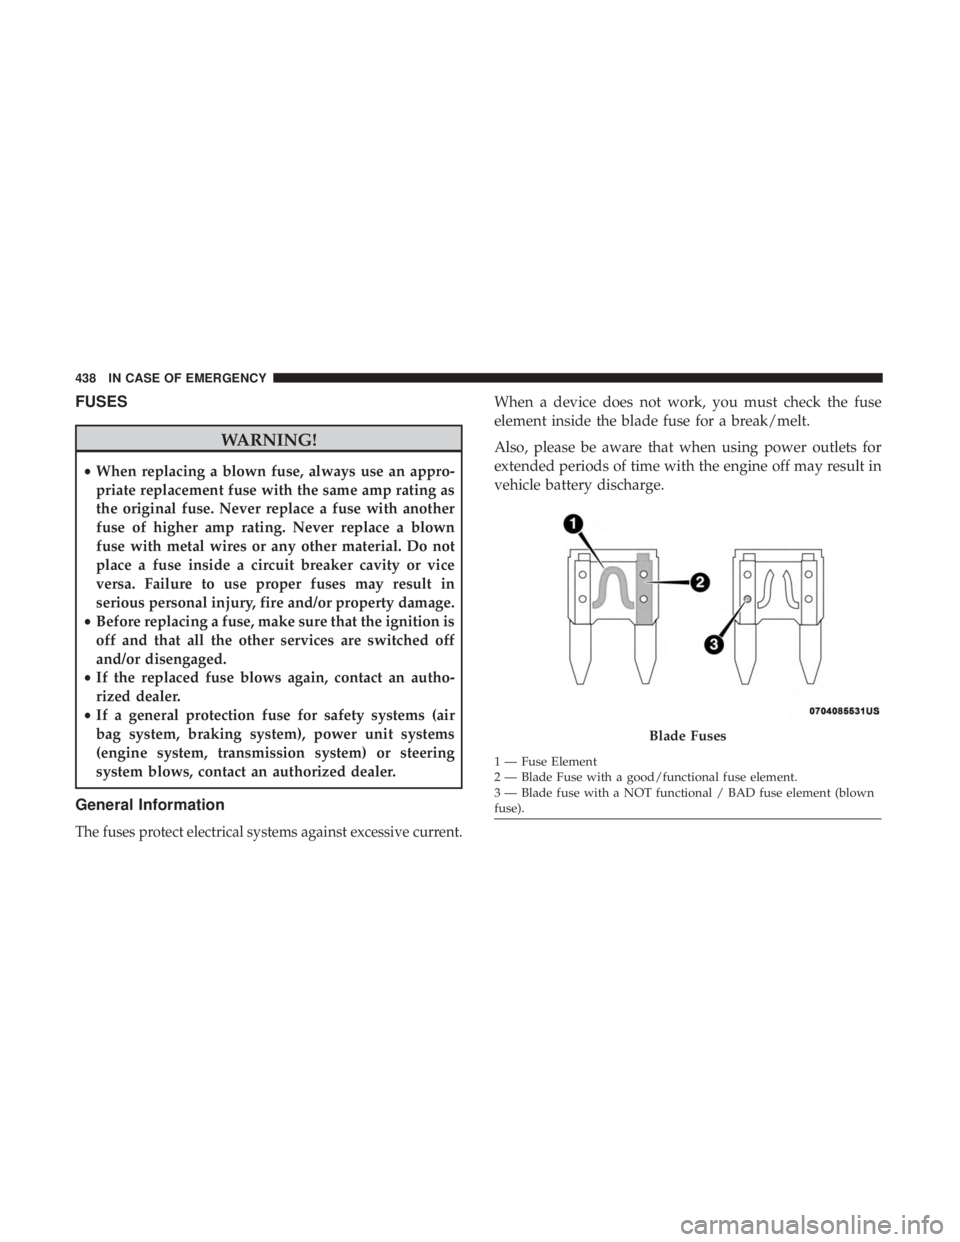
When a device does not work, you must check the fuse
element inside the blade fuse for a break/melt.
Also, please be aware that when using power outlets for
extended periods of time with the engine off may result in
vehicle battery discharge.
Blade Fuses
1 — Fuse Element
2 — Blade Fuse with a good/functional fuse element.
3 — Blade fuse with a NOT functional / BAD fuse element (blown
fuse).
438 IN CASE OF EMERGENCY