2018 CHRYSLER PACIFICA HYBRID service
[x] Cancel search: servicePage 6 of 614

INTRODUCTION
Dear Customer,
Congratulations on selecting your new vehicle. Be assured
that it represents precision workmanship, distinctive styl-
ing, and high quality. This Owner ’s Manual has been
prepared with the assistance of service and engineering
specialists to acquaint you with the operation and mainte-
nance of your vehicle. It is supplemented by Warranty
Information, and customer oriented documents. In the
attached Warranty Booklet, you will find a description of
the services that FCA offers to its customers, the Warranty
Certificate and the details of the terms and conditions for
maintaining its validity. Please take the time to read all of
these publications carefully before driving your vehicle for
the first time. Following the instructions, recommenda-
tions, tips, and important warnings in this manual will
help assure safe and enjoyable operation of your vehicle.
Be sure you are familiar with all vehicle controls, particu-
larly those used for braking, steering, transmission, and
transfer case shifting (if equipped). Learn how your vehicle
handles on different road surfaces. Your driving skills will
improve with experience.
This Owner ’s Manual describes all versions of this vehicle.
Options and equipment dedicated to specific markets orversions are not expressly indicated in the text. Therefore,
you should only consider the information which is related
to the trim level, engine, and version that you have
purchased. Any content introduced throughout the Own-
er ’s Information, that may or may not be applicable to your
vehicle, will be identified with the wording “If Equipped”.
All data contained in this publication are intended to help
you use your vehicle in the best possible way. FCA aims at
a constant improvement of the vehicles produced. For this
reason, it reserves the right to make changes to the model
described for technical and/or commercial reasons. For
further information, contact an authorized dealer.
NOTE:
After reviewing the Owner ’s Information, it should
be stored in the vehicle for convenient referencing, and
remain with the vehicle when sold.
When it comes to service, remember that an authorized
dealer knows your vehicle best, has factory-trained techni-
cians and genuine MOPAR® parts, and cares about your
satisfaction.
HOW TO USE THIS MANUAL
Essential Information
Consult the Table of Contents to determine which section
contains the information you desire.
4 INTRODUCTION
Page 20 of 614
HIGH VOLTAGE BATTERY
Your vehicle is equipped with a Lithium-ion high voltage
battery that is used to power the electric powertrain
systems and the 12 volt vehicle electrical system.
The high voltage battery is located under the middle
section of the vehicle, below and in front of the second row
seating. The high voltage battery is maintenance free and
designed to last for the life of the vehicle.
Lithium-ion batteries provide the following benefits:
•Lithium-ion batteries are much lighter than other types
of rechargeable batteries of the same size.
• Lithium-ion batteries hold their charge; they only lose
approximately 3 percent of their charge per month.
• Lithium-ion batteries have no memory, which means
that you do not have to completely discharge them
before recharging, as with some other batteries.
• Lithium-ion batteries can be recharged and discharged
thousands of times. High Voltage Battery Service Disconnect
The High Voltage Battery Service Disconnect is located
under the access panel, in front of the second row passen-
ger seating.
If your vehicle requires high voltage battery service, see
your authorized dealer.
WARNING!
Never try to remove the high voltage service discon-
nect. The high voltage service disconnect is used when
your vehicle requires service by a trained technician at
an authorized dealer. Failure to follow this warning
can cause severe burns or electrical shock that may
result in serious injury or death.
Disposal of the High Voltage Battery
Your vehicle’s high voltage battery is designed to last the
life of your vehicle. See your authorized dealer for infor-
mation on the disposal of the battery if it should require
replacement.
18 GETTING TO KNOW YOUR VEHICLE
Page 23 of 614
AC Level 1 Charging (120V, 15 Amp)
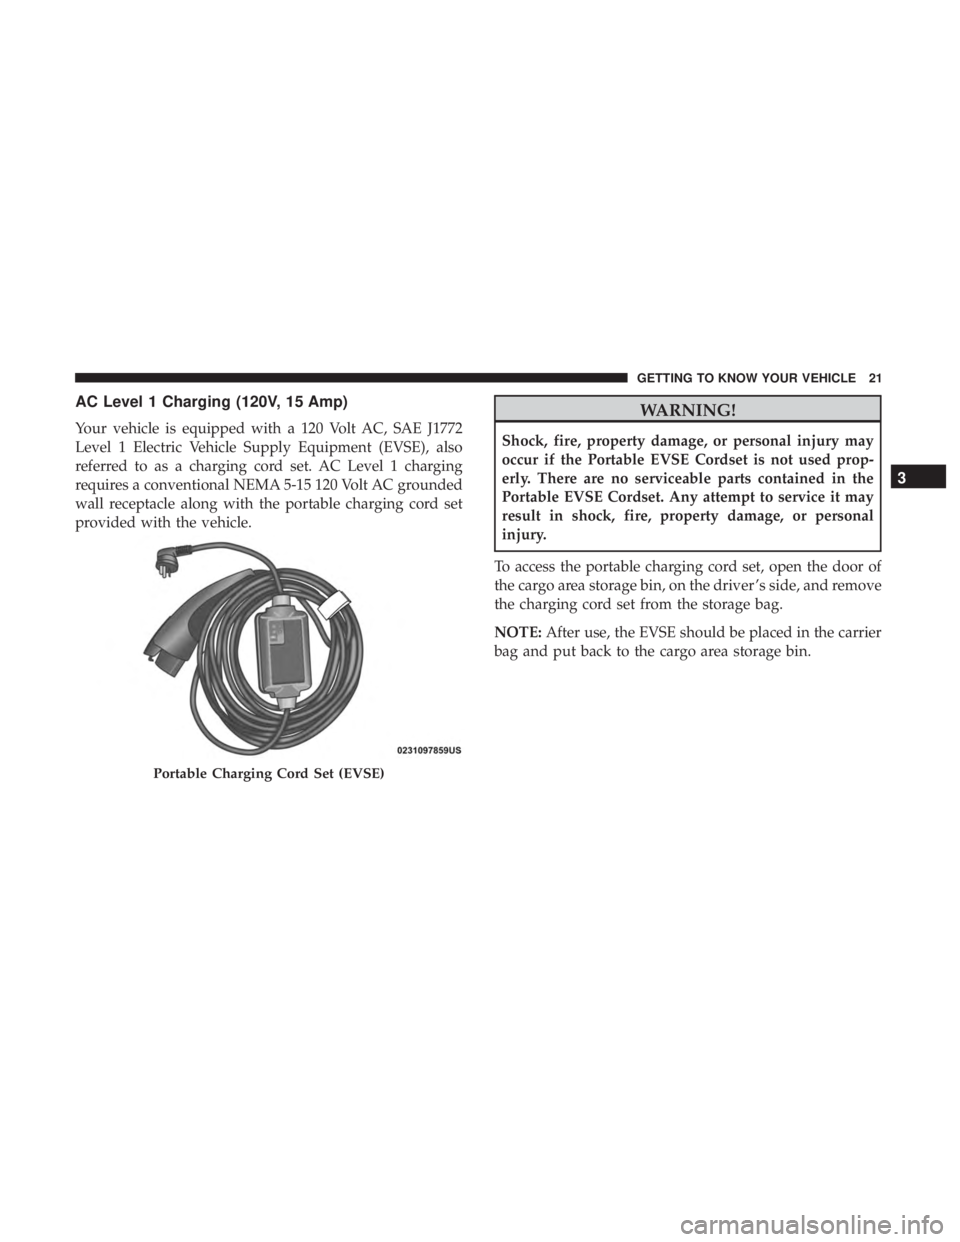
Your vehicle is equipped with a 120 Volt AC, SAE J1772
Level 1 Electric Vehicle Supply Equipment (EVSE), also
referred to as a charging cord set. AC Level 1 charging
requires a conventional NEMA 5-15 120 Volt AC grounded
wall receptacle along with the portable charging cord set
provided with the vehicle.
WARNING!
Shock, fire, property damage, or personal injury may
occur if the Portable EVSE Cordset is not used prop-
erly. There are no serviceable parts contained in the
Portable EVSE Cordset. Any attempt to service it may
result in shock, fire, property damage, or personal
injury.
To access the portable charging cord set, open the door of
the cargo area storage bin, on the driver ’s side, and remove
the charging cord set from the storage bag.
NOTE: After use, the EVSE should be placed in the carrier
bag and put back to the cargo area storage bin.
Portable Charging Cord Set (EVSE)
3
GETTING TO KNOW YOUR VEHICLE 21
Page 24 of 614

NOTE:The portable charging cord set is used for AC
Level 1 charging only.
WARNING!
• Read all the instructions before using this product.
• Do not put fingers or objects into the Charge Con-
nector.
• Do not use this product if the flexible power cord or
Electric Vehicle (EV) Cable is frayed, broken, has
cracked insulation or any other signs of damage.
(Continued)
WARNING! (Continued)
•Do not use this product if the enclosure or the
Charge Connector is broken, cracked, open, or shows
any other indication of damage.
• Do not use Portable EVSE Cordset with an extension
cord. Use of an extension cord may cause burns, fire,
or other damage or injury.
• This device may attempt to reset and run after an
interruption.
• There are no user serviceable parts inside the AC
Mode 2 Charging cord set. Do not attempt to repair or
service the charging cord set yourself – personal
injury may result.
• When using a charging station with the charging
cable attached, ensure the cable is not visibly dam-
aged before plugging into the vehicle.
• Do not allow children to operate this device. Adult
supervision is mandatory when children are in prox-
imity to a charge station that is in use.
• Do not use a charge station or vehicle receptacle that
is work or damaged with the AC Mode 3 charging
cable. Plugging into worn or damaged receptacles
may cause damage to the EVSE and vehicle.
(Continued)
Cargo Area Storage Bin
22 GETTING TO KNOW YOUR VEHICLE
Page 26 of 614
Charging Cordset Operation
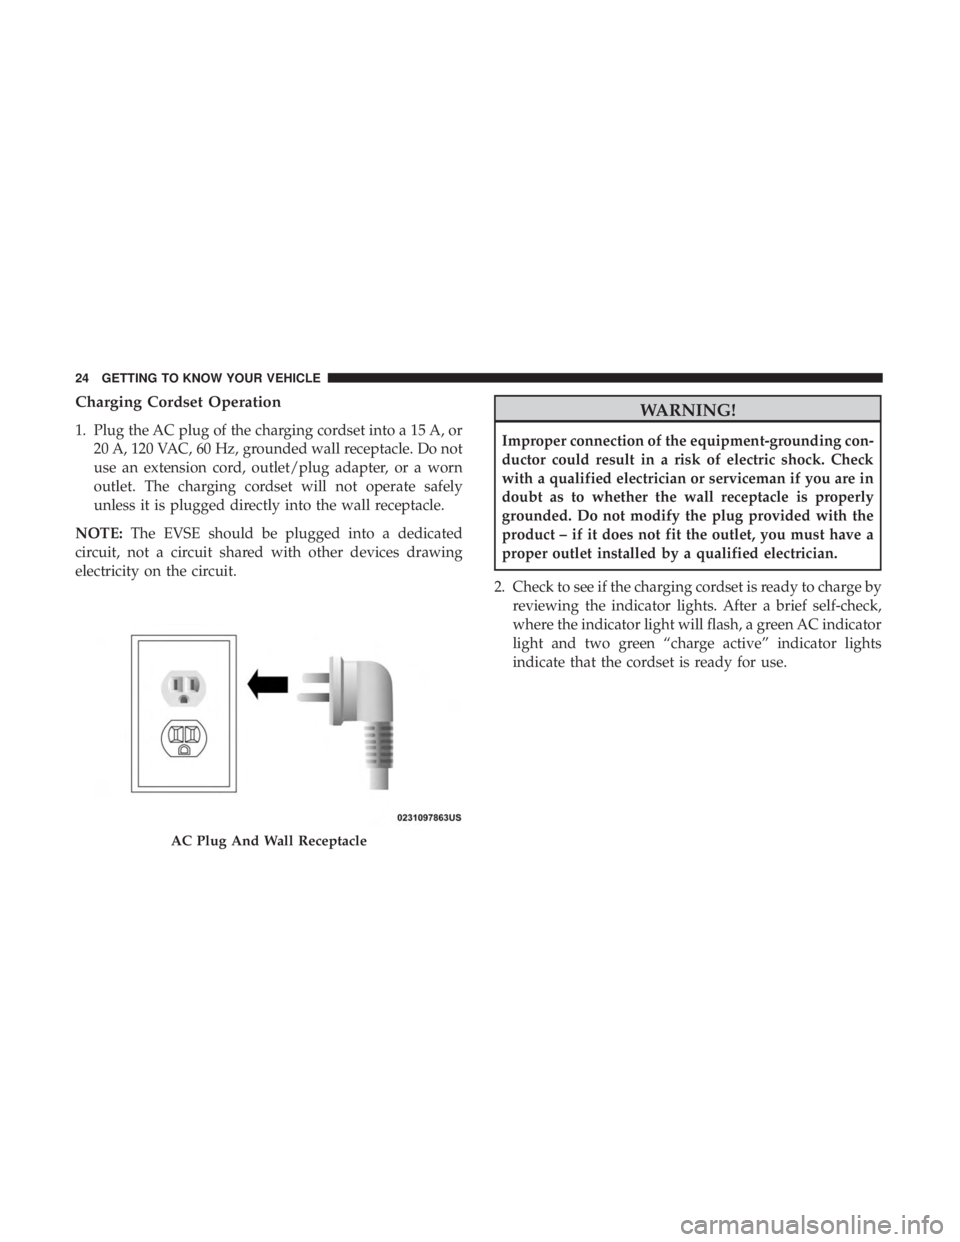
1. Plug the AC plug of the charging cordset into a 15 A, or20 A, 120 VAC, 60 Hz, grounded wall receptacle. Do not
use an extension cord, outlet/plug adapter, or a worn
outlet. The charging cordset will not operate safely
unless it is plugged directly into the wall receptacle.
NOTE: The EVSE should be plugged into a dedicated
circuit, not a circuit shared with other devices drawing
electricity on the circuit.
WARNING!
Improper connection of the equipment-grounding con-
ductor could result in a risk of electric shock. Check
with a qualified electrician or serviceman if you are in
doubt as to whether the wall receptacle is properly
grounded. Do not modify the plug provided with the
product – if it does not fit the outlet, you must have a
proper outlet installed by a qualified electrician.
2. Check to see if the charging cordset is ready to charge by reviewing the indicator lights. After a brief self-check,
where the indicator light will flash, a green AC indicator
light and two green “charge active” indicator lights
indicate that the cordset is ready for use.
AC Plug And Wall Receptacle
24 GETTING TO KNOW YOUR VEHICLE
Page 30 of 614
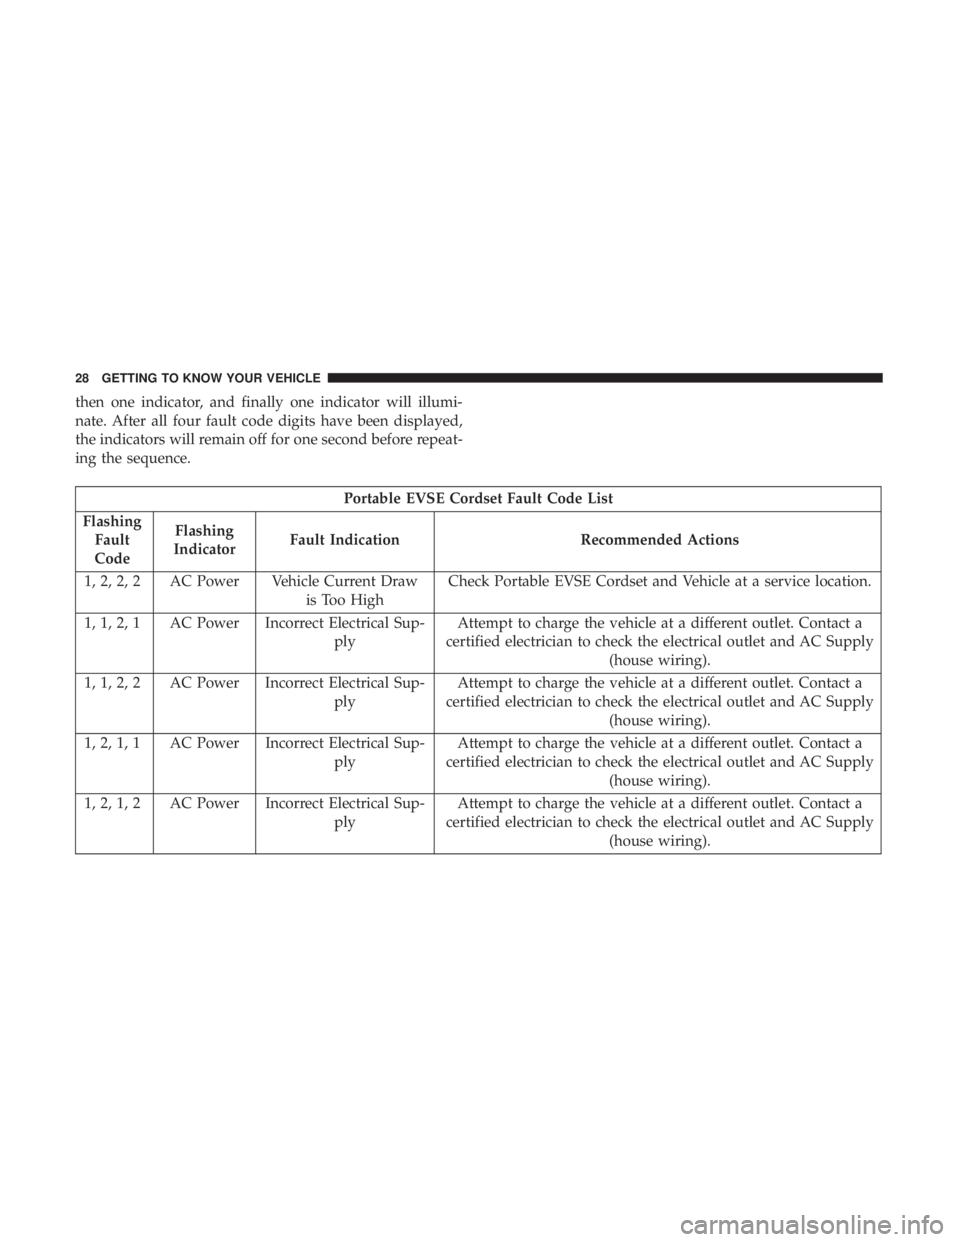
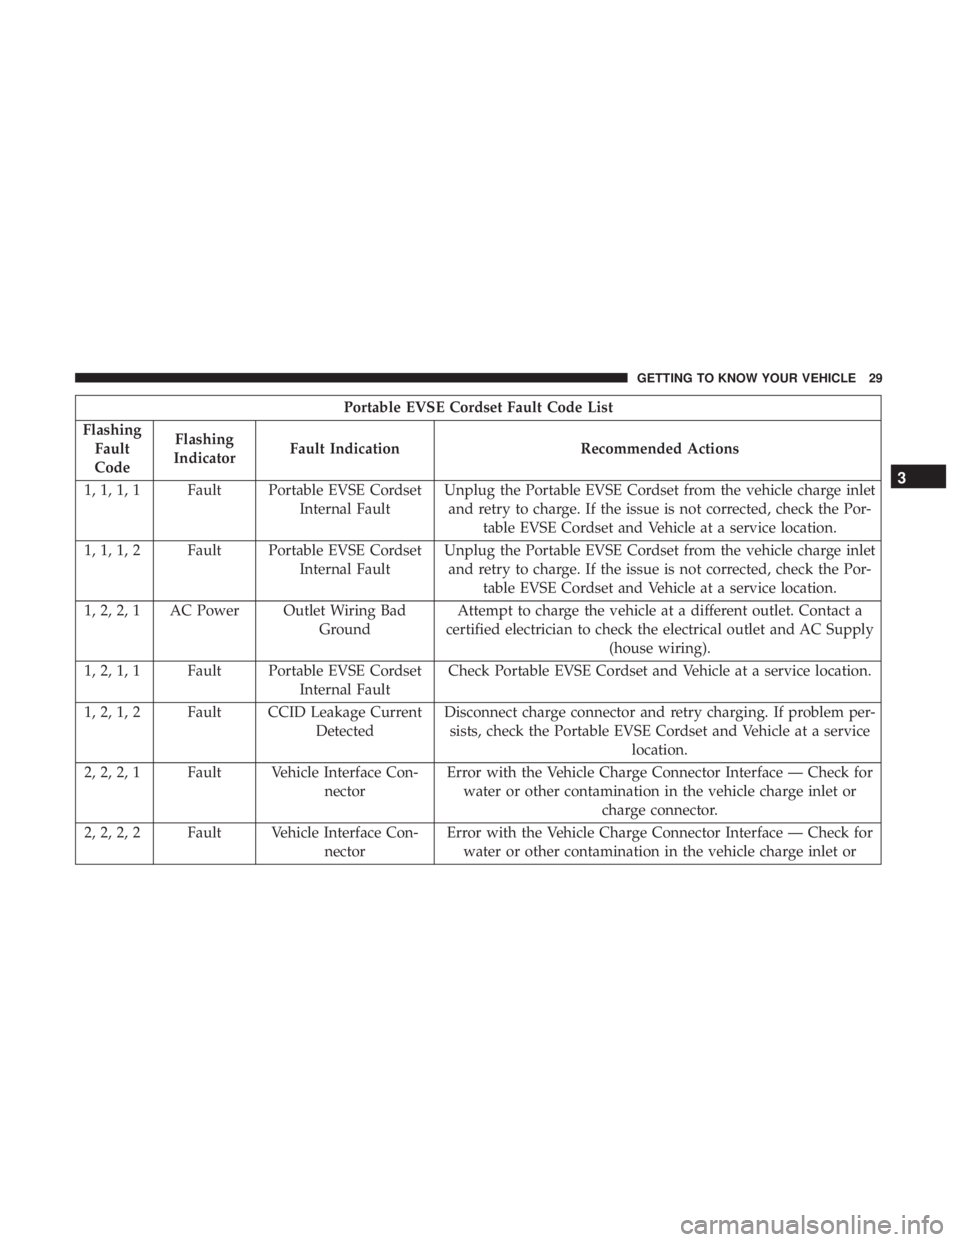
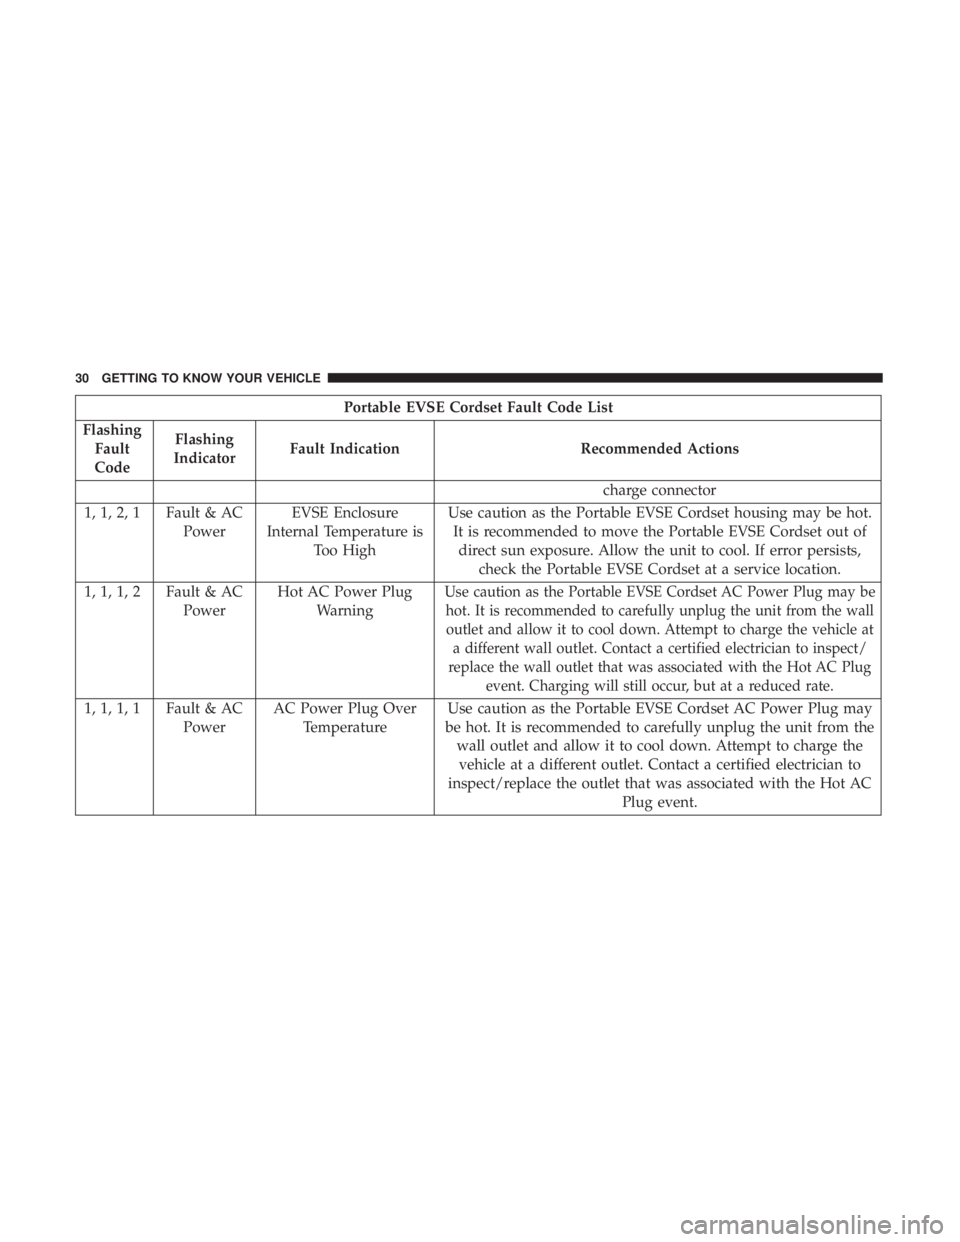
then one indicator, and finally one indicator will illumi-
nate. After all four fault code digits have been displayed,
the indicators will remain off for one second before repeat-
ing the sequence.
Portable EVSE Cordset Fault Code List
Flashing Fault
Code Flashing
Indicator Fault Indication Recommended Actions
1, 2, 2, 2 AC Power Vehicle Current Draw is Too HighCheck Portable EVSE Cordset and Vehicle at a service location.
1, 1, 2, 1 AC Power Incorrect Electrical Sup- plyAttempt to charge the vehicle at a different outlet. Contact a
certified electrician to check the electrical outlet and AC Supply (house wiring).
1, 1, 2, 2 AC Power Incorrect Electrical Sup- plyAttempt to charge the vehicle at a different outlet. Contact a
certified electrician to check the electrical outlet and AC Supply (house wiring).
1, 2, 1, 1 AC Power Incorrect Electrical Sup- plyAttempt to charge the vehicle at a different outlet. Contact a
certified electrician to check the electrical outlet and AC Supply (house wiring).
1, 2, 1, 2 AC Power Incorrect Electrical Sup- plyAttempt to charge the vehicle at a different outlet. Contact a
certified electrician to check the electrical outlet and AC Supply (house wiring).
28 GETTING TO KNOW YOUR VEHICLE
Page 31 of 614
Portable EVSE Cordset Fault Code List
Flashing Fault
Code Flashing
Indicator Fault Indication Recommended Actions
1, 1, 1, 1 Fault Portable EVSE Cordset Internal FaultUnplug the Portable EVSE Cordset from the vehicle charge inlet
and retry to charge. If the issue is not corrected, check the Por- table EVSE Cordset and Vehicle at a service location.
1, 1, 1, 2 Fault Portable EVSE Cordset Internal FaultUnplug the Portable EVSE Cordset from the vehicle charge inlet
and retry to charge. If the issue is not corrected, check the Por- table EVSE Cordset and Vehicle at a service location.
1, 2, 2, 1 AC Power Outlet Wiring Bad GroundAttempt to charge the vehicle at a different outlet. Contact a
certified electrician to check the electrical outlet and AC Supply (house wiring).
1, 2, 1, 1 Fault Portable EVSE Cordset Internal FaultCheck Portable EVSE Cordset and Vehicle at a service location.
1, 2, 1, 2 Fault CCID Leakage Current DetectedDisconnect charge connector and retry charging. If problem per-
sists, check the Portable EVSE Cordset and Vehicle at a service location.
2, 2, 2, 1 Fault Vehicle Interface Con- nectorError with the Vehicle Charge Connector Interface — Check for
water or other contamination in the vehicle charge inlet or charge connector.
2, 2, 2, 2 Fault Vehicle Interface Con- nectorError with the Vehicle Charge Connector Interface — Check for
water or other contamination in the vehicle charge inlet or
3
GETTING TO KNOW YOUR VEHICLE 29
Page 32 of 614
Portable EVSE Cordset Fault Code List
Flashing Fault
Code Flashing
Indicator Fault Indication Recommended Actions
charge connector
1, 1, 2, 1 Fault & AC Power EVSE Enclosure
Internal Temperature is Too High Use caution as the Portable EVSE Cordset housing may be hot.
It is recommended to move the Portable EVSE Cordset out of direct sun exposure. Allow the unit to cool. If error persists, check the Portable EVSE Cordset at a service location.
1, 1, 1, 2 Fault & AC PowerHot AC Power Plug
Warning
Use caution as the Portable EVSE Cordset AC Power Plug may behot. It is recommended to carefully unplug the unit from the walloutlet and allow it to cool down. Attempt to charge the vehicle at a different wall outlet. Contact a certified electrician to inspect/
replace the wall outlet that was associated with the Hot AC Plug event. Charging will still occur, but at a reduced rate.
1, 1, 1, 1 Fault & AC PowerAC Power Plug Over
Temperature Use caution as the Portable EVSE Cordset AC Power Plug may
be hot. It is recommended to carefully unplug the unit from the wall outlet and allow it to cool down. Attempt to charge thevehicle at a different outlet. Contact a certified electrician to
inspect/replace the outlet that was associated with the Hot AC Plug event.
30 GETTING TO KNOW YOUR VEHICLE