Page 16 of 614
▫To Arm The System .....................54
▫ To Disarm The System ...................54
� DOORS ...............................55
▫ Manual Lock ...........................55
▫ Central Lock/Unlock — If Equipped ..........57
▫ Unlock Doors Automatically On Exit —
If Equipped ...........................58
▫ Keyless Enter-N-Go — Passive Entry .........58
▫ Manual Sliding Side Door ..................62
▫ Power Sliding Side Door — If Equipped .......63
▫ Hands-Free Sliding Doors — If Equipped .......65
▫ Child Locks ............................66
� SEATS ................................68
▫
Manual Adjustment (Front Seats) — If Equipped . .68
▫ Manual Adjustment (Rear Seats) ............70
▫ Power Adjustment (Front Seats) — If Equipped . .72
▫ Heated Seats ...........................74 ▫
Ventilated Seats — If Equipped ..............75
▫ Easy Entry Slide Second Row Seating .........76
▫ Fold-Flat ..............................78
▫ Second Row Removable Seat ...............78
▫ Manually Folding Third Row Seats —
If Equipped ............................81
� HEAD RESTRAINTS ......................83
▫ Head Restraints — Front Seats ..............83
▫ Head Restraints — Second Row .............85
▫ Head Restraints — Third Row ..............86
� STEERING WHEEL .......................87
▫ Tilt/Telescoping Steering Column ............87
▫ Heated Steering Wheel — If Equipped ........88
� MIRRORS ..............................89
▫ Inside Day/Night Mirror — If Equipped ......89
▫ Automatic Dimming Mirror — If Equipped .....89
▫ Outside Mirrors ........................90
14 GETTING TO KNOW YOUR VEHICLE
Page 83 of 614
Manually Folding Third Row Seats — If Equipped
1. Lower the center head restraint down to the seatback bypushing the button on the guide and pushing the head
restraint down.
2. Pull release strap marked “1” to release the anchors.
3. Pull release strap marked “2” and tumble the seat rearward into the storage bin.
Release Strap “1”
Strap “2”
Stowed Third Row Seat
3
GETTING TO KNOW YOUR VEHICLE 81
Page 84 of 614
To Unfold Third Row Seats
1. Pull up on the assist strap to lift the seat out of thestorage bin and push the seat forward until the anchors
latch.
2. Pulling strap “2” releases the seatback to return to its full upright position. 3. Raise the head restraint to its upright position.
WARNING!
•
In a collision, you or others in your vehicle could be
injured if seats are not properly latched to their floor
attachments. Always be sure the seats are fully
latched.
• Sitting in a seat with the head restraint in its lowered
position could result in serious injury or death in a
(Continued)
Assist Straps
Strap “2”
82 GETTING TO KNOW YOUR VEHICLE
Page 88 of 614
NOTE:To remove the head restraint, raise it as far as it can
go then push the release button and the adjustment button
at the base of each post while pulling the head restraint up.
Seatback angle may need to be adjusted to fully remove the
head restraint. To reinstall the head restraint, put the head
restraint posts into the holes and push downward. Then,
adjust the head restraint to the appropriate height.
WARNING!
• A loose head restraint thrown forward in a collision
or hard stop could cause serious injury or death to
occupants of the vehicle. Always securely stow re-
moved head restraints in a location outside the
occupant compartment.
• ALL the head restraints MUST be reinstalled in the
vehicle to properly protect the occupants. Follow the
re-installation instructions above prior to operating
the vehicle or occupying a seat.
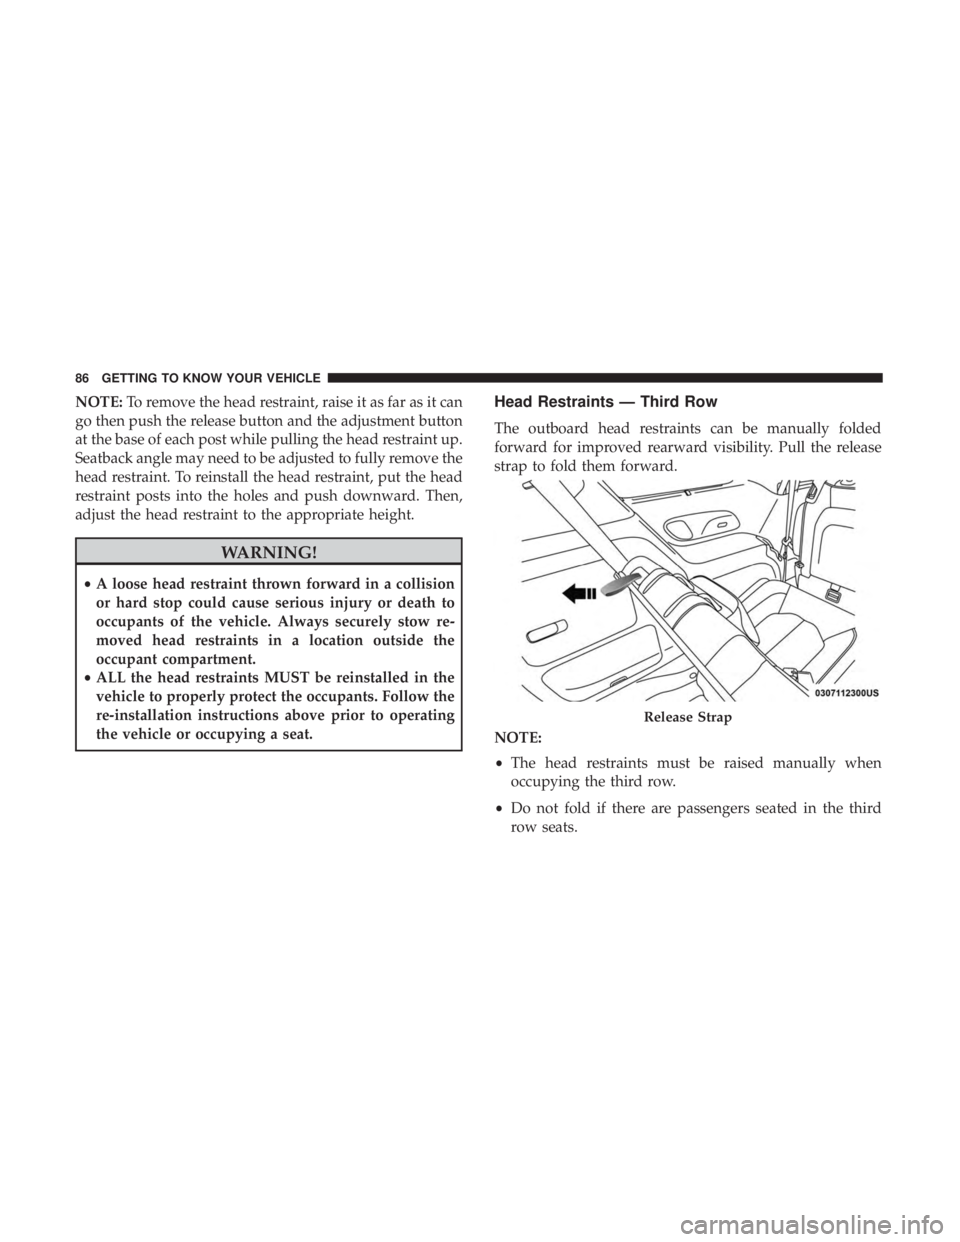
Head Restraints — Third Row
The outboard head restraints can be manually folded
forward for improved rearward visibility. Pull the release
strap to fold them forward.
NOTE:
• The head restraints must be raised manually when
occupying the third row.
• Do not fold if there are passengers seated in the third
row seats.
Release Strap
86 GETTING TO KNOW YOUR VEHICLE
Page 221 of 614
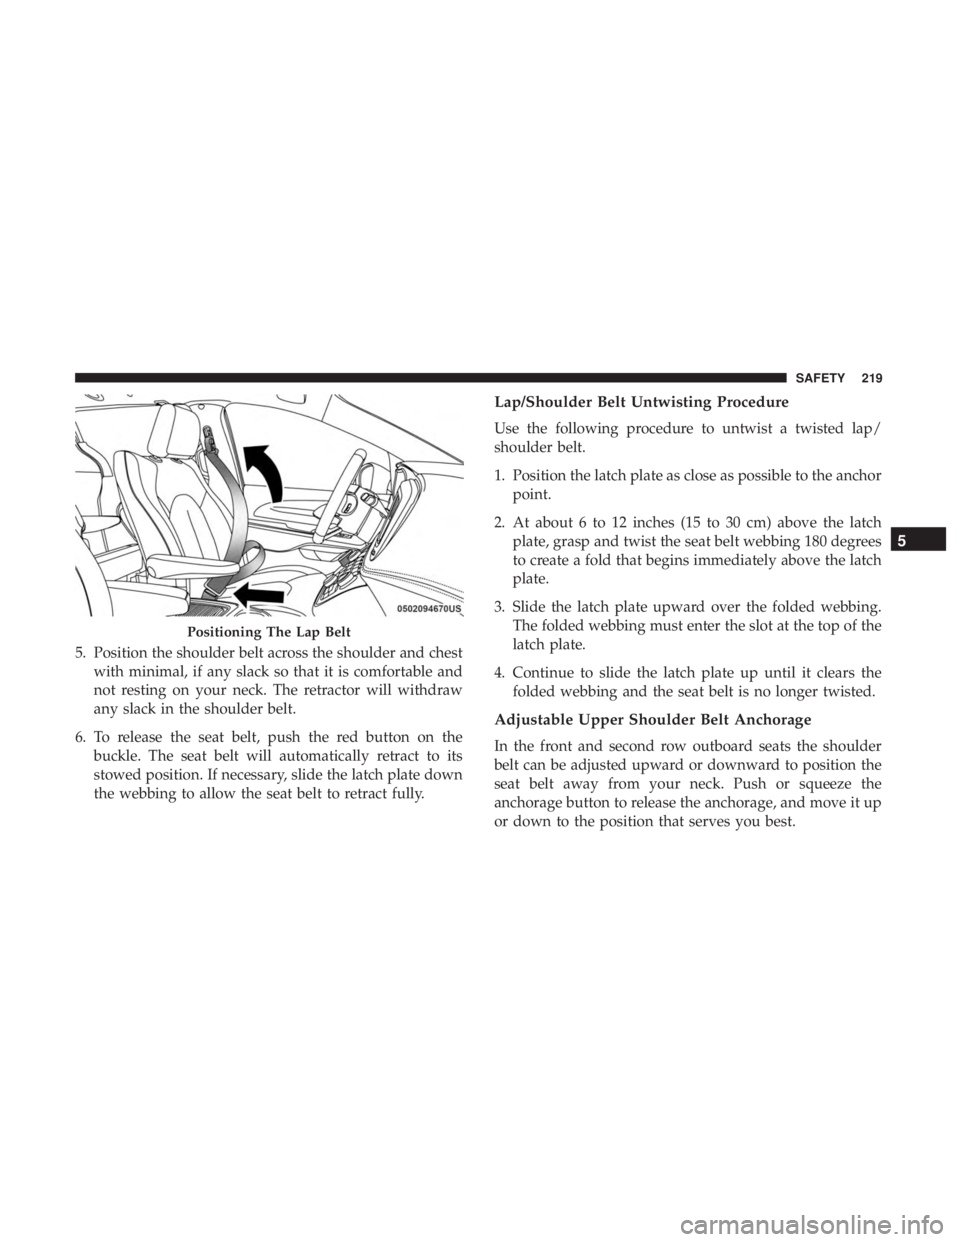
5. Position the shoulder belt across the shoulder and chestwith minimal, if any slack so that it is comfortable and
not resting on your neck. The retractor will withdraw
any slack in the shoulder belt.
6. To release the seat belt, push the red button on the buckle. The seat belt will automatically retract to its
stowed position. If necessary, slide the latch plate down
the webbing to allow the seat belt to retract fully.
Lap/Shoulder Belt Untwisting Procedure
Use the following procedure to untwist a twisted lap/
shoulder belt.
1. Position the latch plate as close as possible to the anchorpoint.
2. At about 6 to 12 inches (15 to 30 cm) above the latch plate, grasp and twist the seat belt webbing 180 degrees
to create a fold that begins immediately above the latch
plate.
3. Slide the latch plate upward over the folded webbing. The folded webbing must enter the slot at the top of the
latch plate.
4. Continue to slide the latch plate up until it clears the folded webbing and the seat belt is no longer twisted.
Adjustable Upper Shoulder Belt Anchorage
In the front and second row outboard seats the shoulder
belt can be adjusted upward or downward to position the
seat belt away from your neck. Push or squeeze the
anchorage button to release the anchorage, and move it up
or down to the position that serves you best.
Positioning The Lap Belt
5
SAFETY 219
Page 223 of 614
Second Row Center (If Equipped) And Third Row
Center Seat Belt Operating Instructions
The second row center (if equipped) and third row center
seat belts feature a seat belt with a mini-latch plate and
buckle, which allows the seat belt to detach from the lower
anchor when the seat is folded. The mini-latch plate and
regular latch plate can then be stored out of the way in the
headliner for added convenience to open up utilization of
the storage areas behind the front seats when the seat is not
occupied.
1. Remove the mini-latch plate and regular latch platefrom its stowed position in the headliner slightly behind
the second or third row seat. 2. Grasp the mini-latch plate and pull the seat belt over the
seat.
Mini-Latch Stowage
5
SAFETY 221
Page 230 of 614
WARNING!
•The seat belt assembly must be replaced if the
switchable Automatic Locking Retractor (ALR) fea-
ture or any other seat belt function is not working
properly when checked according to the procedures
in the Service Manual.
• Failure to replace the seat belt assembly could in-
crease the risk of injury in collisions.
• Do not use the Automatic Locking Mode to restrain
occupants who are wearing the seat belt or children
who are using booster seats. The locked mode is only
used to install rear-facing or forward-facing child
restraints that have a harness for restraining the
child.
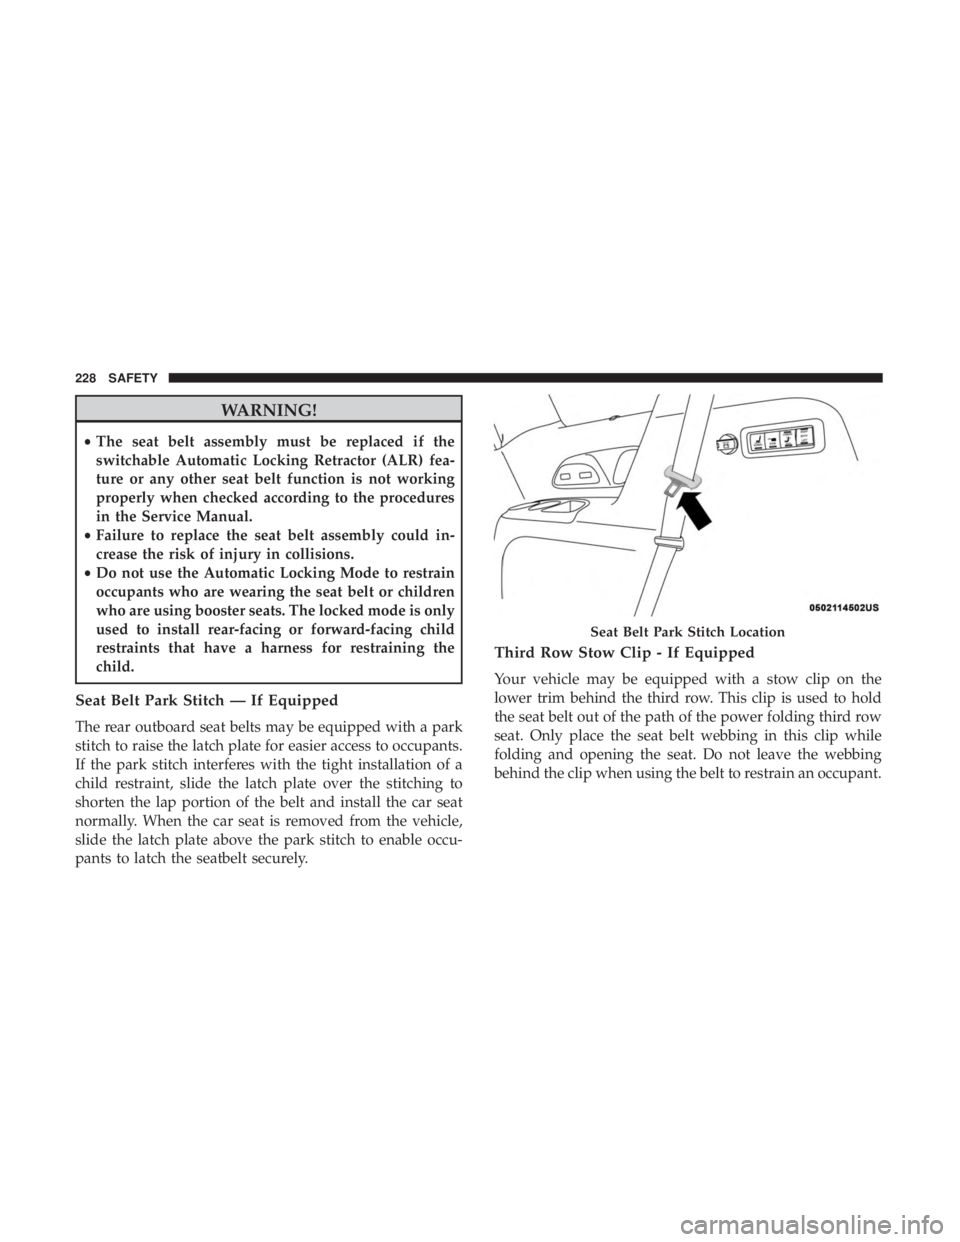
Seat Belt Park Stitch — If Equipped
The rear outboard seat belts may be equipped with a park
stitch to raise the latch plate for easier access to occupants.
If the park stitch interferes with the tight installation of a
child restraint, slide the latch plate over the stitching to
shorten the lap portion of the belt and install the car seat
normally. When the car seat is removed from the vehicle,
slide the latch plate above the park stitch to enable occu-
pants to latch the seatbelt securely.
Third Row Stow Clip - If Equipped
Your vehicle may be equipped with a stow clip on the
lower trim behind the third row. This clip is used to hold
the seat belt out of the path of the power folding third row
seat. Only place the seat belt webbing in this clip while
folding and opening the seat. Do not leave the webbing
behind the clip when using the belt to restrain an occupant.
Seat Belt Park Stitch Location
228 SAFETY
Page 267 of 614
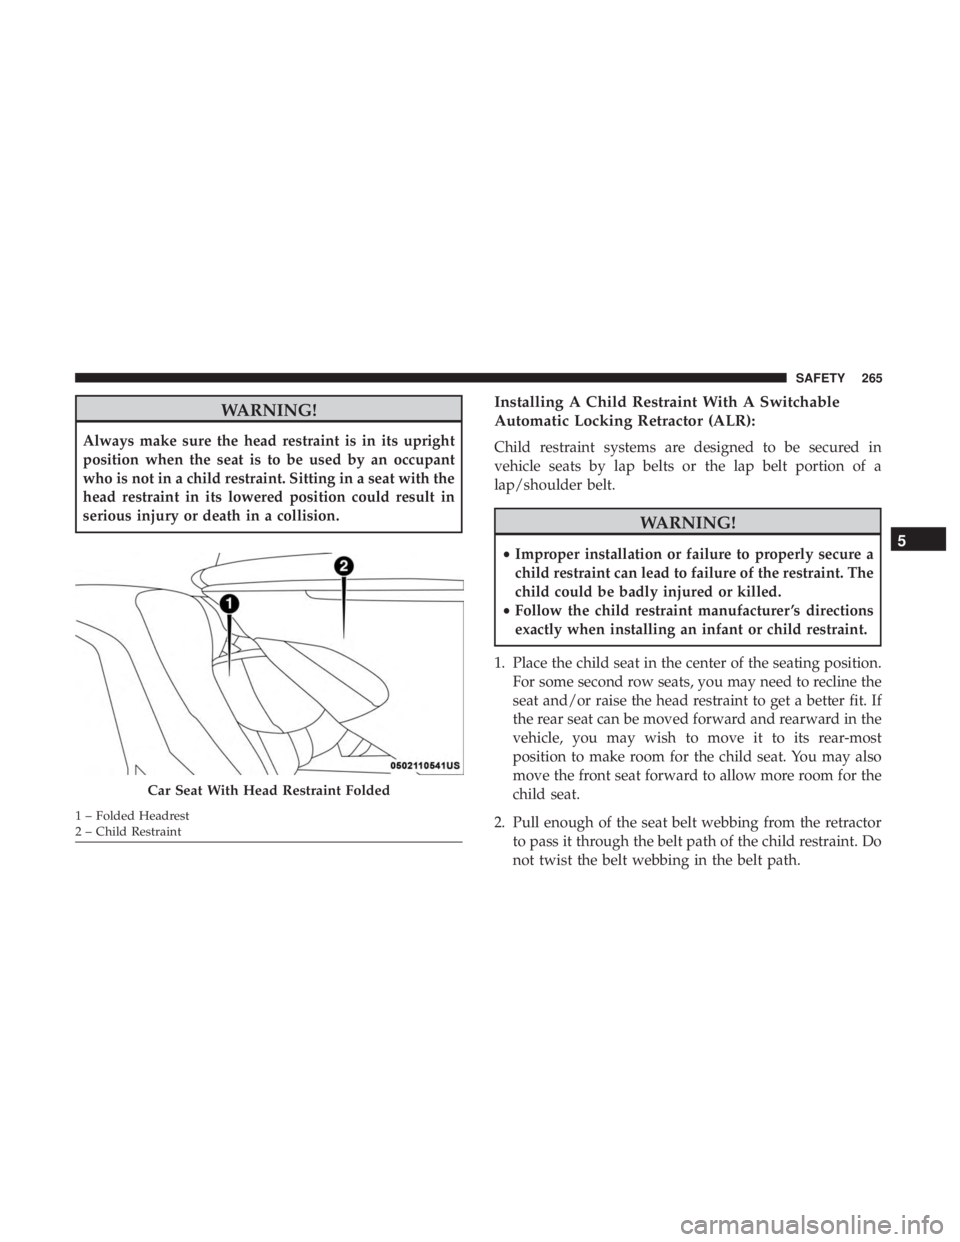
WARNING!
Always make sure the head restraint is in its upright
position when the seat is to be used by an occupant
who is not in a child restraint. Sitting in a seat with the
head restraint in its lowered position could result in
serious injury or death in a collision.
Installing A Child Restraint With A Switchable
Automatic Locking Retractor (ALR):
Child restraint systems are designed to be secured in
vehicle seats by lap belts or the lap belt portion of a
lap/shoulder belt.
WARNING!
•Improper installation or failure to properly secure a
child restraint can lead to failure of the restraint. The
child could be badly injured or killed.
• Follow the child restraint manufacturer ’s directions
exactly when installing an infant or child restraint.
1. Place the child seat in the center of the seating position. For some second row seats, you may need to recline the
seat and/or raise the head restraint to get a better fit. If
the rear seat can be moved forward and rearward in the
vehicle, you may wish to move it to its rear-most
position to make room for the child seat. You may also
move the front seat forward to allow more room for the
child seat.
2. Pull enough of the seat belt webbing from the retractor to pass it through the belt path of the child restraint. Do
not twist the belt webbing in the belt path.
Car Seat With Head Restraint Folded
1 – Folded Headrest
2 – Child Restraint
5
SAFETY 265