Page 366 of 614
The following table shows the approximate distances for
each zone:
ZoneDistance To The Rear Of The Vehicle
Red 0 - 1 ft (0 - 30 cm)
Yellow 1 ft - 6.5 ft (30 cm - 2 m)
Green 6.5 ft or greater (2 m or greater)
Modes Of Operation
“Manual” activation of the Rear View display is selected by
pressing the Back Up Camera soft key located in the
“Controls” screen within the Uconnect system.
Top View
The Top view will show in the Uconnect System with Rear
View and Front View in a split view display. There is
integrated ParkSense arcs in the image at the front and rear
of the vehicle. The arcs will change color from yellow to red
corresponding the distance zones to the oncoming object.
ParkSense Arcs
364 STARTING AND OPERATING
Page 367 of 614
NOTE:
•Front tires will be in image when the tires are turned.
• Due to wide angle cameras in mirror, the image will
appear distorted.
• Top view will show which sliding doors are open.
• Open front doors will remove outside image.
Rear View
This is the Default view of the system in
REVERSE and is always paired with the
Top view of the vehicle with optional
active guide lines for the projected path
when enabled.
Rear Cross Path View Pressing the Rear Cross Path soft key
will give the driver a wider angle view
of the rear camera system. The Top view
will be disabled when this is selected. Front View
The Front view will show you what is
immediately in front of the vehicle and
is always paired with the Top view of
the vehicle.
Front Cross Path View Pressing the Front Cross Path soft key
will give the driver a wider angle view
of the front camera system. The Top
view will be disabled when this is se-
lected.
6
STARTING AND OPERATING 365
Page 511 of 614

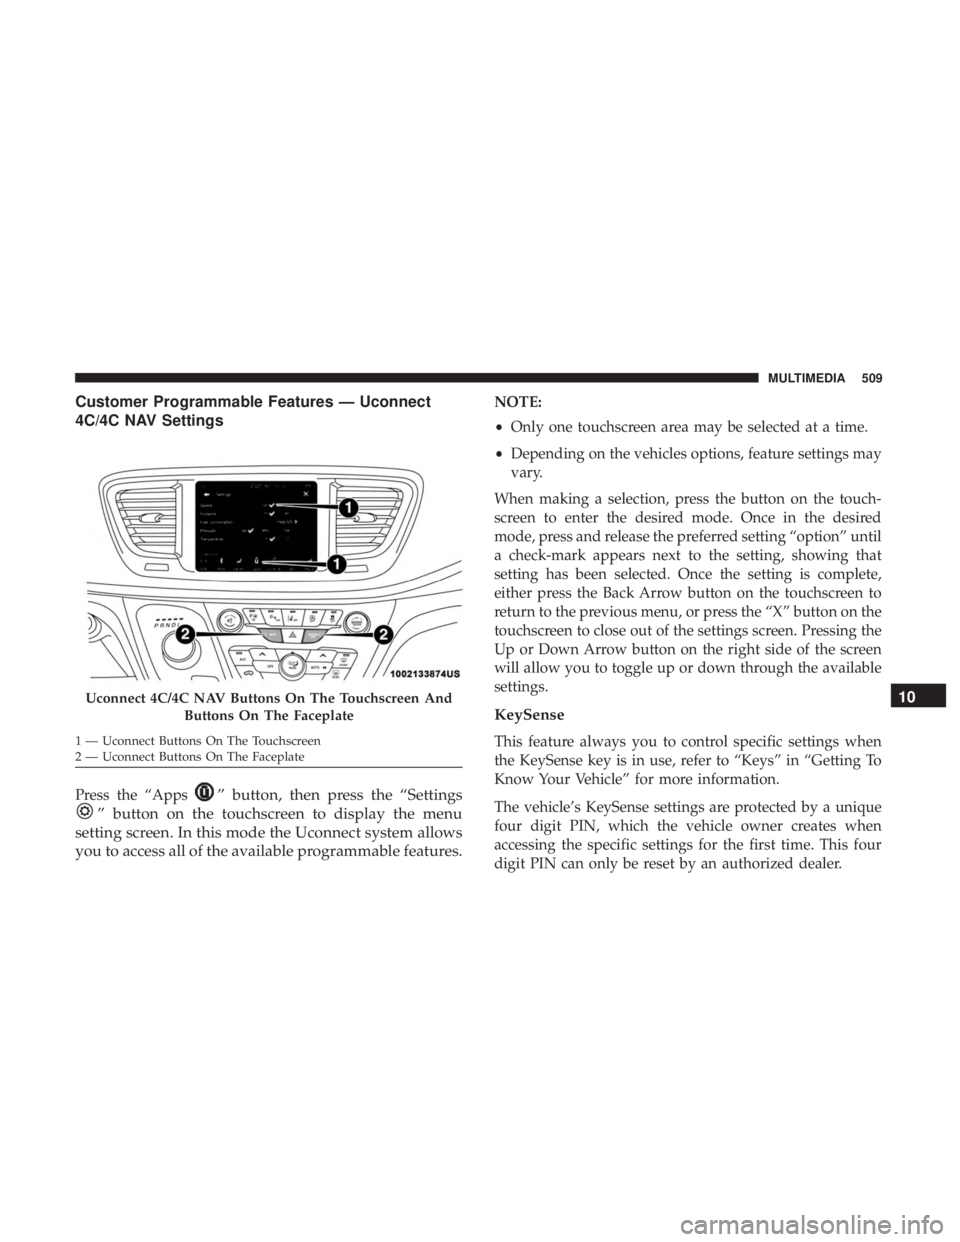
Customer Programmable Features — Uconnect
4C/4C NAV Settings
Press the “Apps” button, then press the “Settings
” button on the touchscreen to display the menu
setting screen. In this mode the Uconnect system allows
you to access all of the available programmable features.
NOTE:
• Only one touchscreen area may be selected at a time.
• Depending on the vehicles options, feature settings may
vary.
When making a selection, press the button on the touch-
screen to enter the desired mode. Once in the desired
mode, press and release the preferred setting “option” until
a check-mark appears next to the setting, showing that
setting has been selected. Once the setting is complete,
either press the Back Arrow button on the touchscreen to
return to the previous menu, or press the “X” button on the
touchscreen to close out of the settings screen. Pressing the
Up or Down Arrow button on the right side of the screen
will allow you to toggle up or down through the available
settings.
KeySense
This feature always you to control specific settings when
the KeySense key is in use, refer to “Keys” in “Getting To
Know Your Vehicle” for more information.
The vehicle’s KeySense settings are protected by a unique
four digit PIN, which the vehicle owner creates when
accessing the specific settings for the first time. This four
digit PIN can only be reset by an authorized dealer.
Uconnect 4C/4C NAV Buttons On The Touchscreen And Buttons On The Faceplate
1 — Uconnect Buttons On The Touchscreen
2 — Uconnect Buttons On The Faceplate
10
MULTIMEDIA 509
Page 512 of 614

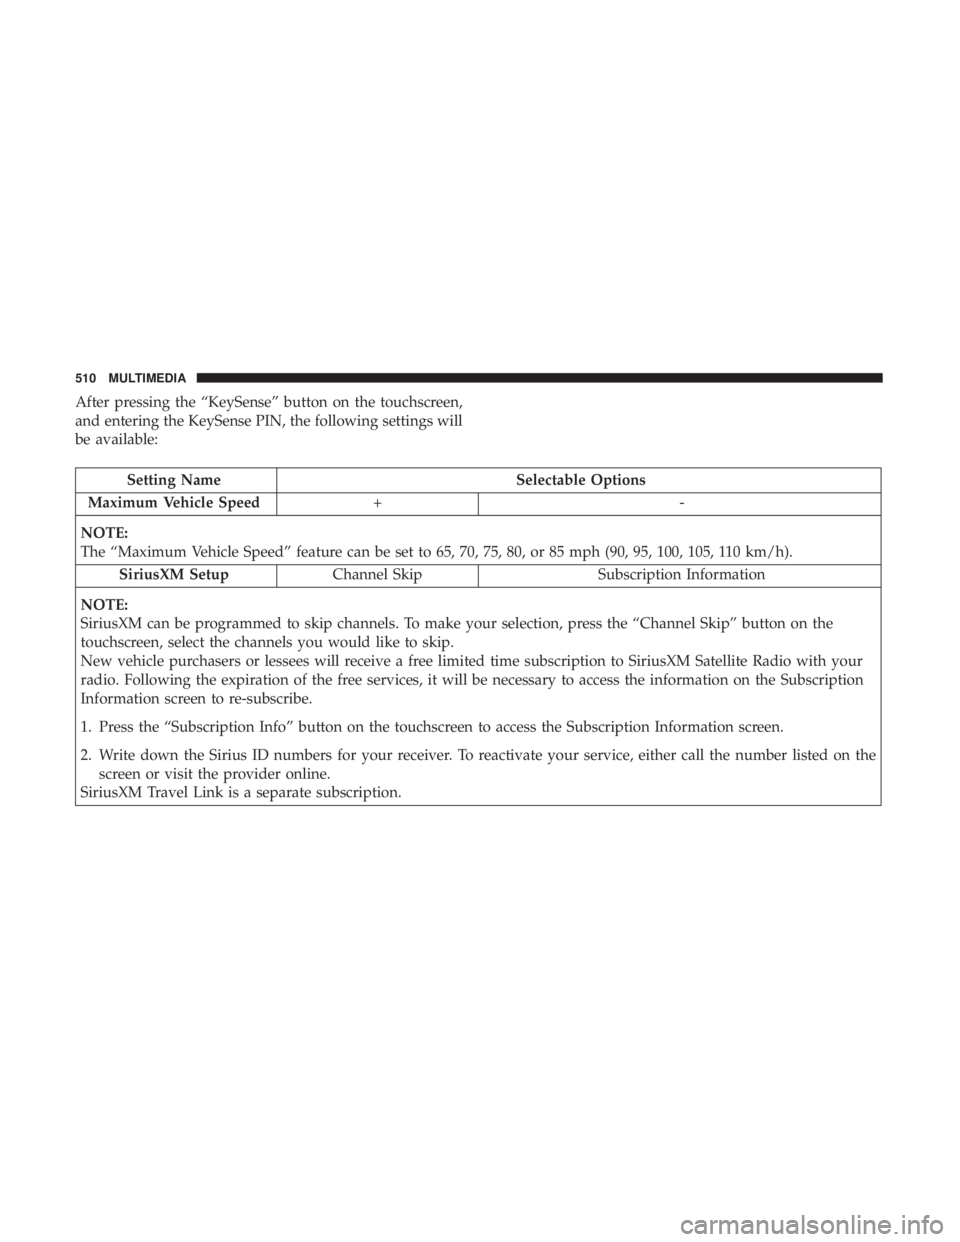
After pressing the “KeySense” button on the touchscreen,
and entering the KeySense PIN, the following settings will
be available:
Setting NameSelectable Options
Maximum Vehicle Speed +-
NOTE:
The “Maximum Vehicle Speed” feature can be set to 65, 70, 75, 80, or 85 mph (90, 95, 100, 105, 110 km/h). SiriusXM Setup Channel Skip Subscription Information
NOTE:
SiriusXM can be programmed to skip channels. To make your selection, press the “Channel Skip” button on the
touchscreen, select the channels you would like to skip.
New vehicle purchasers or lessees will receive a free limited time subscription to SiriusXM Satellite Radio with your
radio. Following the expiration of the free services, it will be necessary to access the information on the Subscription
Information screen to re-subscribe.
1. Press the “Subscription Info” button on the touchscreen to access the Subscription Information screen.
2. Write down the Sirius ID numbers for your receiver. To reactivate your service, either call the number listed on the screen or visit the provider online.
SiriusXM Travel Link is a separate subscription.
510 MULTIMEDIA
Page 523 of 614
Setting NameSelectable Options
Hill Start Assist — If Equipped On
Off
Key Sense:
Sliding Door Alert On Off
NOTE:
When the “Sliding Door Alert” feature is selected, a chime plays when the sliding door reverses or an obstacle is
sensed.
Mirrors & Wipers
After pressing the “Mirror and Wipers” button on the
touchscreen, the following settings will be available:
Setting Name Selectable Options
Rain Sensing Auto Wipers On Off
Headlights with Wipers On Off
10
MULTIMEDIA 521
Page 525 of 614
Setting NameSelectable Options
Headlight Illumi-
nated On Approach 0 sec
30 sec 60 sec 90 sec
NOTE:
When the “Headlight Illumination On Approach” feature is selected, it allows the adjustment of the amount of time
the headlights remain on after the doors are unlocked with the key fob. Headlights WithWipers — IfEquipped On
Off
Auto Dim High Beams — IfEquipped On
Off
NOTE:
When the “Auto Dim High Beams” feature is selected, the high beam headlights will activate/deactivate automati-
cally under certain conditions. Daytime Running Lights On
Off
Flash Lights With Lock On
Off
Flash Lights With Sliding Door On
Off
10
MULTIMEDIA 523
Page 527 of 614

Setting NameSelectable Options
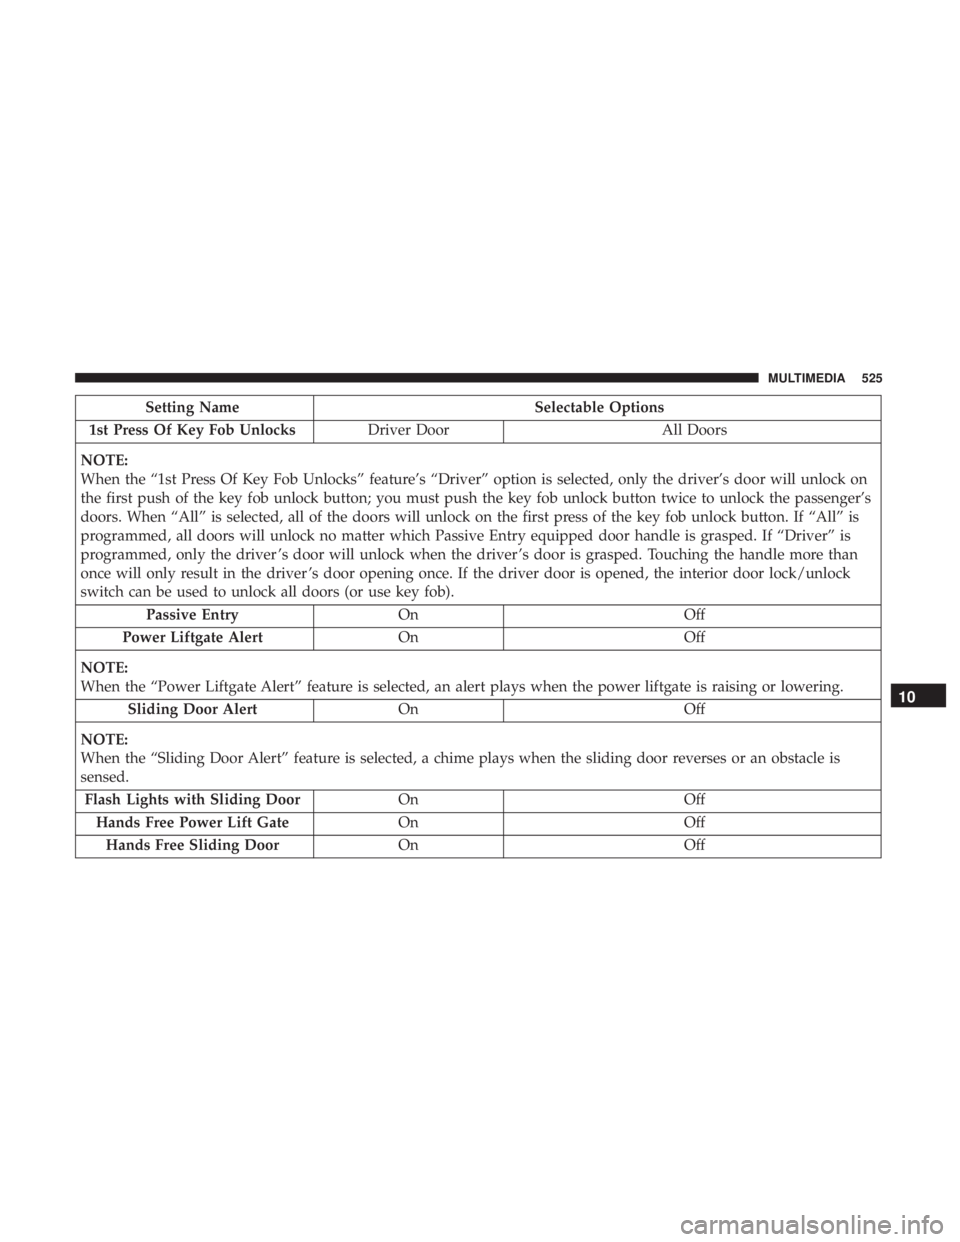
1st Press Of Key Fob Unlocks Driver Door All Doors
NOTE:
When the “1st Press Of Key Fob Unlocks” feature’s “Driver” option is selected, only the driver’s door will unlock on
the first push of the key fob unlock button; you must push the key fob unlock button twice to unlock the passenger’s
doors. When “All” is selected, all of the doors will unlock on the first press of the key fob unlock button. If “All” is
programmed, all doors will unlock no matter which Passive Entry equipped door handle is grasped. If “Driver” is
programmed, only the driver ’s door will unlock when the driver ’s door is grasped. Touching the handle more than
once will only result in the driver ’s door opening once. If the driver door is opened, the interior door lock/unlock
switch can be used to unlock all doors (or use key fob). Passive Entry On Off
Power Liftgate Alert On Off
NOTE:
When the “Power Liftgate Alert” feature is selected, an alert plays when the power liftgate is raising or lowering. Sliding Door Alert On Off
NOTE:
When the “Sliding Door Alert” feature is selected, a chime plays when the sliding door reverses or an obstacle is
sensed. Flash Lights with Sliding Door OnOff
Hands Free Power Lift Gate OnOff
Hands Free Sliding Door OnOff
10
MULTIMEDIA 525
Page 528 of 614

Setting NameSelectable Options
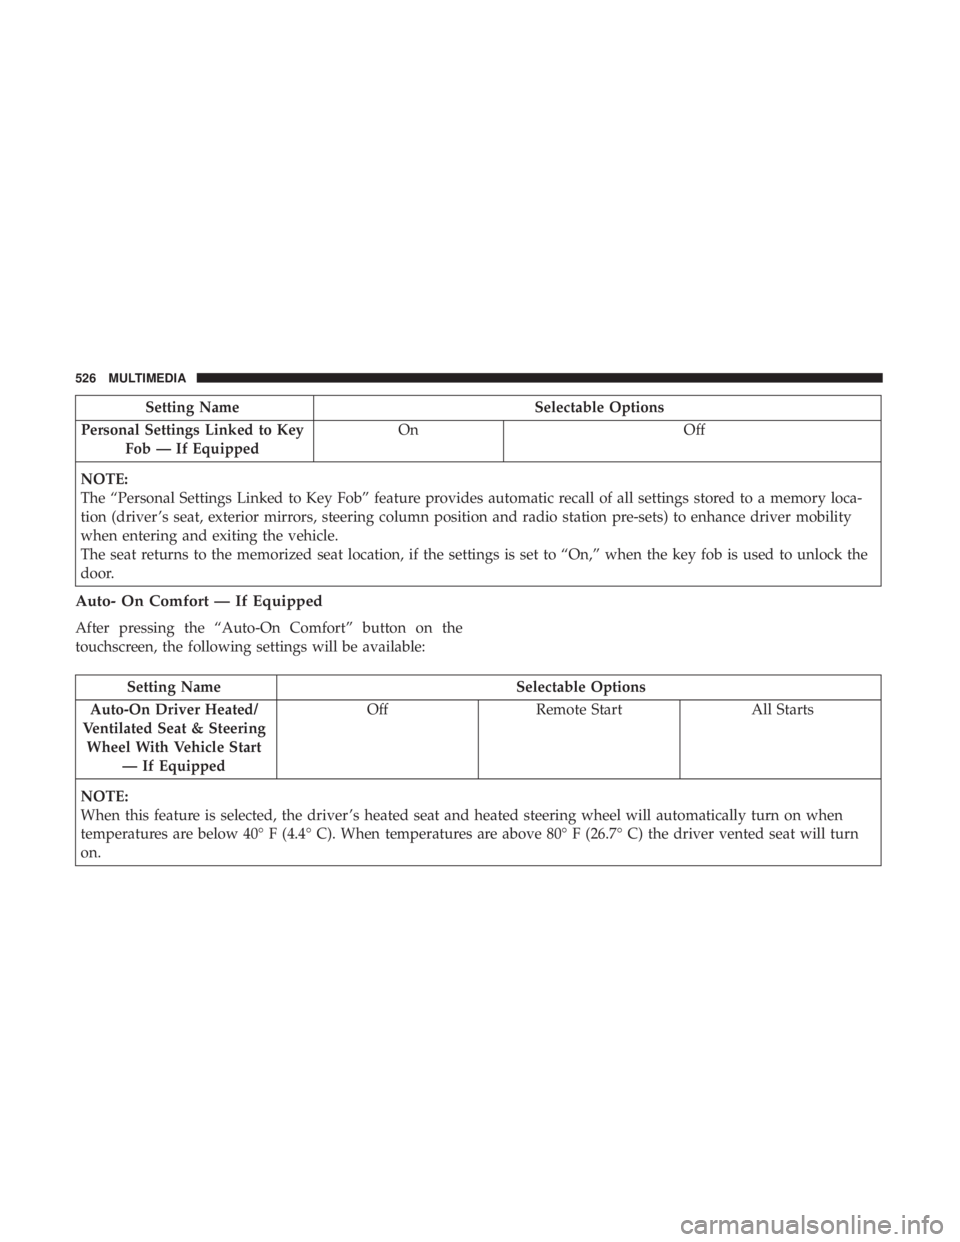
Personal Settings Linked to Key Fob — If Equipped On
Off
NOTE:
The “Personal Settings Linked to Key Fob” feature provides automatic recall of all settings stored to a memory loca-
tion (driver ’s seat, exterior mirrors, steering column position and radio station pre-sets) to enhance driver mobility
when entering and exiting the vehicle.
The seat returns to the memorized seat location, if the settings is set to “On,” when the key fob is used to unlock the
door.
Auto- On Comfort — If Equipped
After pressing the “Auto-On Comfort” button on the
touchscreen, the following settings will be available:
Setting Name Selectable Options
Auto-On Driver Heated/
Ventilated Seat & Steering Wheel With Vehicle Start — If Equipped Off
Remote Start All Starts
NOTE:
When this feature is selected, the driver ’s heated seat and heated steering wheel will automatically turn on when
temperatures are below 40° F (4.4° C). When temperatures are above 80° F (26.7° C) the driver vented seat will turn
on.
526 MULTIMEDIA