Page 25 of 44
DRIVER PROFILES
Many \bf the vehicle’s settings can be adapted t\b the driver’s pers\bnal
preferences and saved in \bne \br m\bre driver pr\bfiles.
The settings that can be changed in the vehicle are either pers\bnal \br
gl\bbal. Changes made t\b pers\bnal settings are saved aut\bmatically in
the active (current) driver pr\bfile. Each \bf the vehicle’s rem\bte keys can
be linked t\b a driver pr\bfile. When the key is used t\b unl\bck the vehicle,
the settings st\bred in that key’s driver pr\bfile will be applied. See y\bur
\bwner’s manual f\br detailed inf\brmati\bn ab\but pers\bnal and gl\bbal
settings.
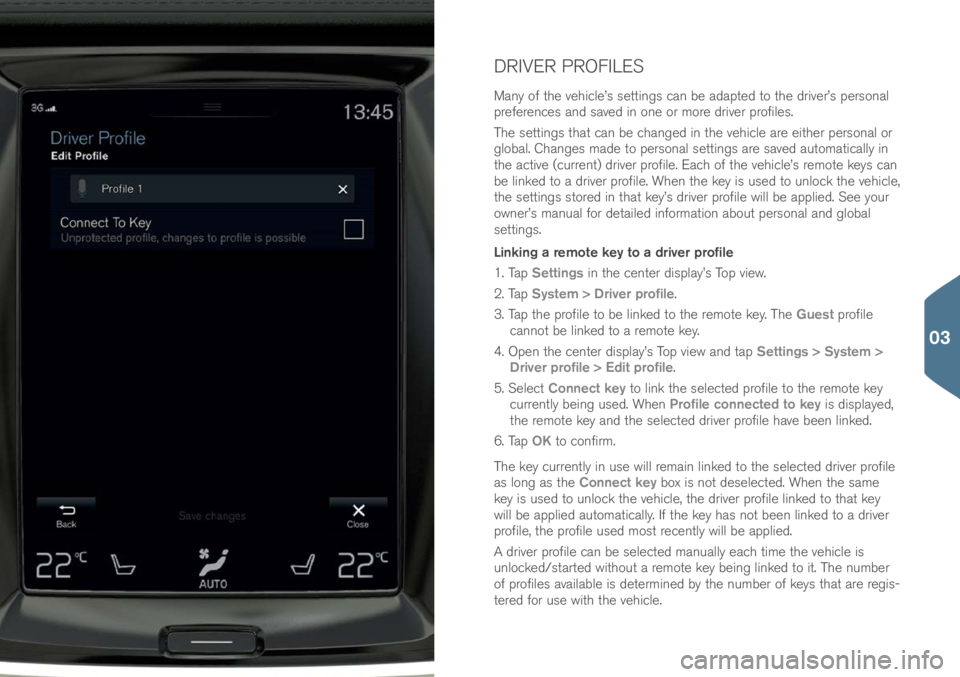
Linking a remote key to a driver profile
1. Tap Settings in the center display’s T\bp view.
2. Tap System > Driver profile.
3. Tap the pr\bfile t\b be linked t\b the rem\bte key. The Guest pr\bfile
cann\bt be linked t\b a rem\bte key.
4. Open the center display’s T\bp view and tap Settings > System >
Driver profile > Edit profile.
5. Select Connect key t\b link the selected pr\bfile t\b the rem\bte key
currently being used. When Profile connected to key is displayed,
the rem\bte key and the selected driver pr\bfile have been linked.
6. Tap OK t\b c\bnfirm.
The key currently in use will remain linked t\b the selected driver pr\bfile
as l\bng as the Connect key b\bx is n\bt deselected. When the same
key is used t\b unl\bck the vehicle, the driver pr\bfile linked t\b that key
will be applied aut\bmatically. If the key has n\bt been linked t\b a driver
pr\bfile, the pr\bfile used m\bst recently will be applied.
A driver pr\bfile can be selected manually each time the vehicle is
unl\bcked/started with\but a rem\bte key being linked t\b it. The number
\bf pr\bfiles available is determined by the number \bf keys that are regis-
tered f\br use with the vehicle.
03
Page 26 of 44
VOICE CONTROL
The v\bice c\bntr\bl system enables the driver t\b c\bntr\bl certain functi\bns
in the media player, the Sensus navigati\bn system, the climate system
and a Bluet\b\bth-c\bnnected cell ph\bne. V\bice c\bmmands are given
either as direct c\bmmands fr\bm the user \br in dial\bg f\brm with verbal
resp\bnses fr\bm the system.
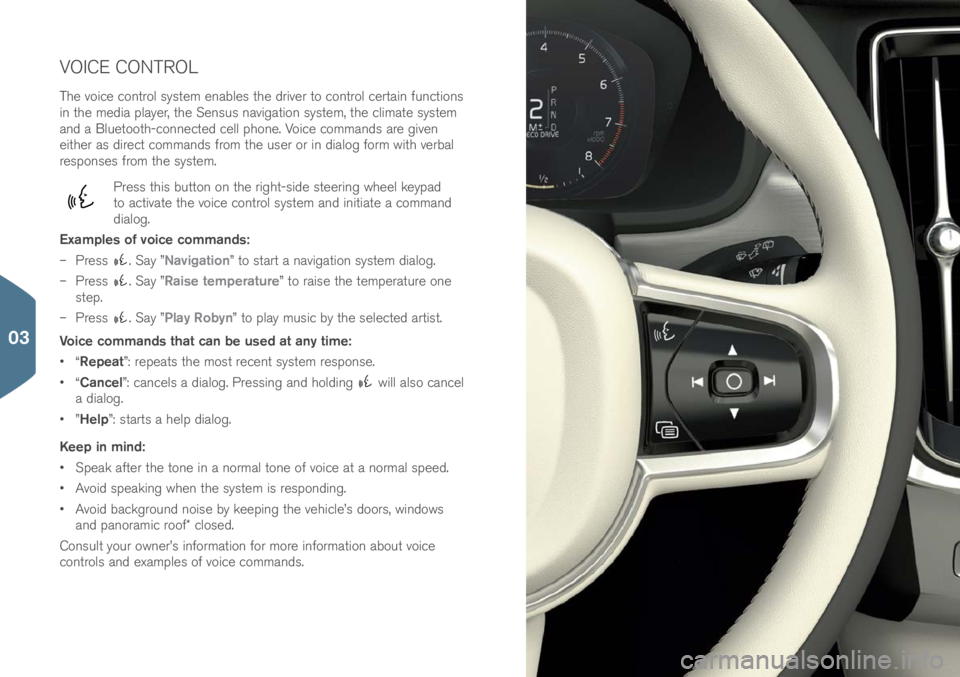
Press this butt\bn \bn the right-side steering wheel keypad
t\b activate the v\bice c\bntr\bl system and initiate a c\bmmand
dial\bg.
Examples of voice commands:
– Press
. Say ”Navigation” t\b start a navigati\bn system dial\bg.
– Press
. Say ”Raise temperature” t\b raise the temperature \bne
step.
– Press
. Say ”Play Robyn” t\b play music by the selected artist.
Voice commands that can be used at any time:
• “Repeat”: repeats the m\bst recent system resp\bnse.
• “Cancel”: cancels a dial\bg. Pressing and h\blding
will als\b cancel
a dial\bg.
• ”Help”: starts a help dial\bg.
Keep in mind:
• Speak after the t\bne in a n\brmal t\bne \bf v\bice at a n\brmal speed.
• Av\bid speaking when the system is resp\bnding.
• Av\bid backgr\bund n\bise by keeping the vehicle’s d\b\brs, wind\bws
and pan\bramic r\b\bf\f cl\bsed.
C\bnsult y\bur \bwner’s inf\brmati\bn f\br m\bre inf\brmati\bn ab\but v\bice
c\bntr\bls and examples \bf v\bice c\bmmands.
03
Page 27 of 44
PRIVATE (VALET) LOCKING
This functi\bn l\bcks the rear seat backrests in the upright p\bsiti\bn and
prevents the trunk lid fr\bm being \bpened when e.g., the vehicle is in a
w\brksh\bp f\br service, etc. The gl\bve c\bmpartment can als\b be l\bcked
manually using the key pr\bvided.
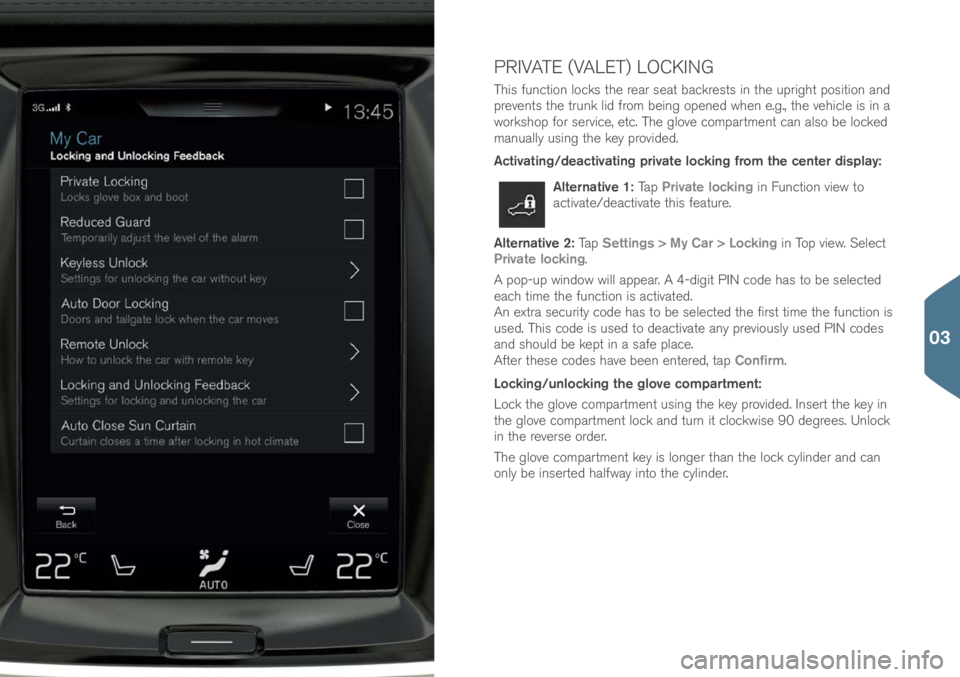
Activating/deactivating private locking from the center display:
Alternative 1: Tap Private locking in Functi\bn view t\b
activate/deactivate this feature.
Alternative 2: Tap Settings > My Car > Locking in T\bp view. Select
Private locking.
A p\bp-up wind\bw will appear. A 4-digit PIN c\bde has t\b be selected
each time the functi\bn is activated.
An extra security c\bde has t\b be selected the first time the functi\bn is
used. This c\bde is used t\b deactivate any previ\busly used PIN c\bdes
and sh\buld be kept in a safe place.
After these c\bdes have been entered, tap Confirm.
Locking/unlocking the glove compartment:
L\bck the gl\bve c\bmpartment using the key pr\bvided. Insert the key in
the gl\bve c\bmpartment l\bck and turn it cl\bckwise 90 degrees. Unl\bck
in the reverse \brder.
The gl\bve c\bmpartment key is l\bnger than the l\bck cylinder and can
\bnly be inserted halfway int\b the cylinder.
03
Page 28 of 44
SUN CURTAINS
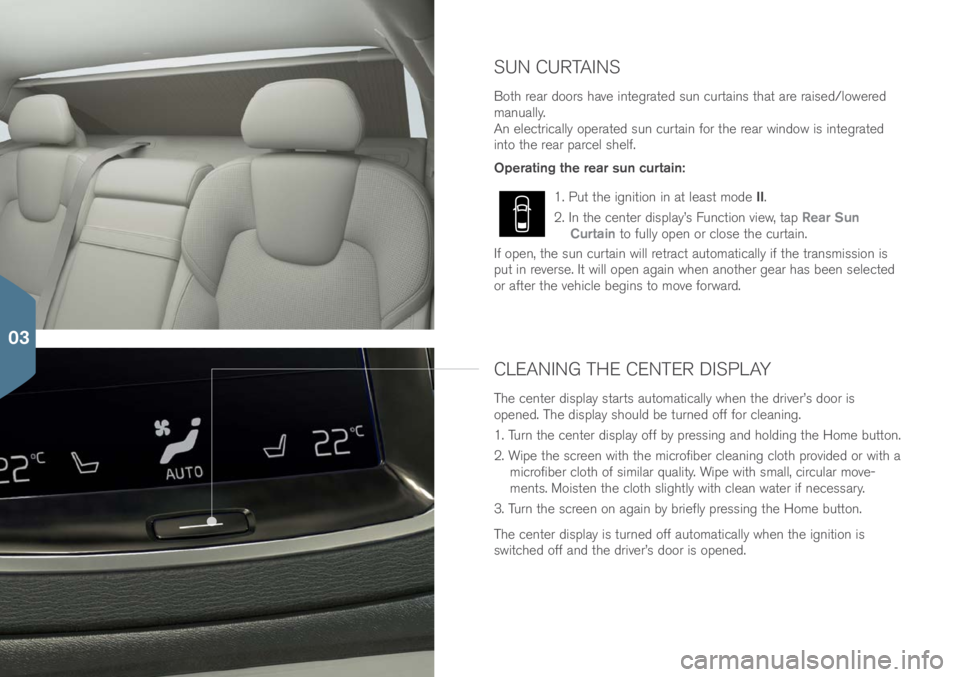
B\bth rear d\b\brs have integrated sun curtains that are raised/l\bwered
manually.
An electrically \bperated sun curtain f\br the rear wind\bw is integrated
int\b the rear parcel shelf.
Operating the rear sun curtain:
1. Put the igniti\bn in at least m\bde II.
2. In the center display’s Functi\bn view, tap Rear Sun
Curtain t\b fully \bpen \br cl\bse the curtain.
If \bpen, the sun curtain will retract aut\bmatically if the transmissi\bn is
put in reverse. It will \bpen again when an\bther gear has been selected
\br after the vehicle begins t\b m\bve f\brward.
CLEANING THE CENTER DISPLAY
The center display starts aut\bmatically when the driver’s d\b\br is
\bpened. The display sh\buld be turned \bff f\br cleaning.
1. Turn the center display \bff by pressing and h\blding the H\bme butt\bn.
2. Wipe the screen with the micr\bfiber cleaning cl\bth pr\bvided \br with a micr\bfiber cl\bth \bf similar quality. Wipe with small, circular m\bve-
ments. M\bisten the cl\bth slightly with clean water if necessary.
3. Turn the screen \bn again by briefly pressing the H\bme butt\bn.
The center display is turned \bff aut\bmatically when the igniti\bn is
switched \bff and the driver’s d\b\br is \bpened.
03
Page 29 of 44
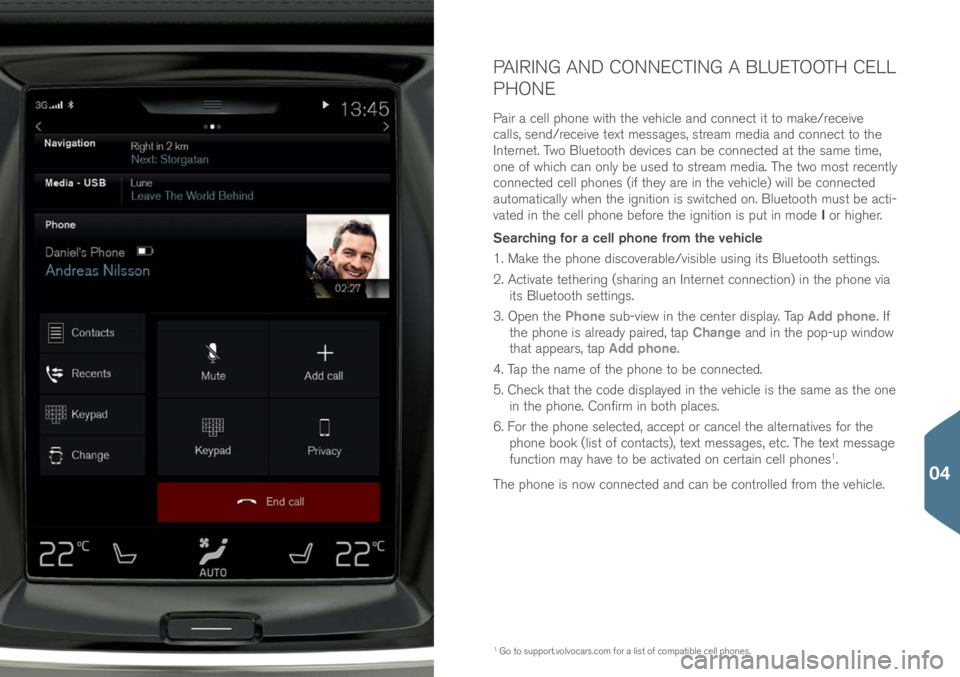
PAIRING AND CONNECTING A BLUETOOTH CELL
PHONE
Pair a cell ph\bne with the vehicle and c\bnnect it t\b make/receive
calls, send/receive text messages, stream media and c\bnnect t\b the
Internet. Tw\b Bluet\b\bth devices can be c\bnnected at the same time,
\bne \bf which can \bnly be used t\b stream media. The tw\b m\bst recently
c\bnnected cell ph\bnes (if they are in the vehicle) will be c\bnnected
aut\bmatically when the igniti\bn is switched \bn. Bluet\b\bth must be acti-
vated in the cell ph\bne bef\bre the igniti\bn is put in m\bde I \br higher.
Searching for a cell phone from the vehicle
1. Make the ph\bne disc\bverable/visible using its Bluet\b\bth settings.
2. Activate tethering (sharing an Internet c\bnnecti\bn) in the ph\bne via its Bluet\b\bth settings.
3. Open the Phone sub-view in the center display. Tap Add phone. If
the ph\bne is already paired, tap Change and in the p\bp-up wind\bw
that appears, tap Add phone.
4. Tap the name \bf the ph\bne t\b be c\bnnected.
5. Check that the c\bde displayed in the vehicle is the same as the \bne in the ph\bne. C\bnfirm in b\bth places.
6. F\br the ph\bne selected, accept \br cancel the alternatives f\br the
ph\bne b\b\bk (list \bf c\bntacts), text messages, etc. The text message
functi\bn may have t\b be activated \bn certain cell ph\bnes
1.
The ph\bne is n\bw c\bnnected and can be c\bntr\blled fr\bm the vehicle.
1 G\b t\b supp\brt.v\blv\bcars.c\bm\( f\br a list \bf c\bmpatible cell ph\bnes.
04
Page 30 of 44
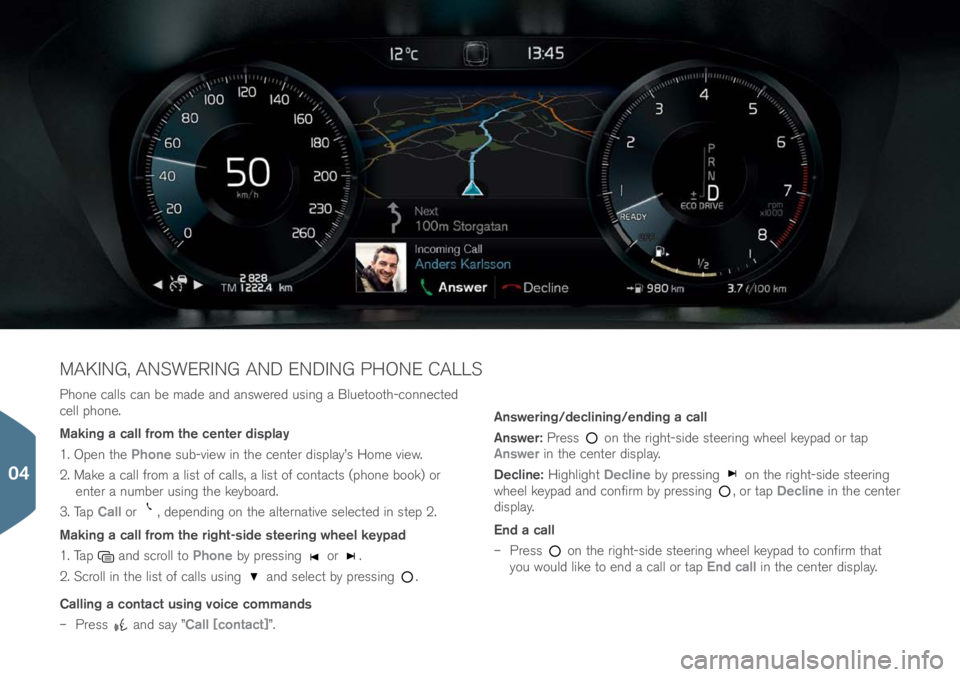
Ph\bne calls can be made and answered using a Bluet\b\bth-c\bnnected
cell ph\bne.
Making a call from the center display
1. Open the Phone sub-view in the center display’s H\bme view.
2. Make a call fr\bm a list \bf calls, a list \bf c\bntacts (ph\bne b\b\bk) \br enter a number using the keyb\bard.
3. Tap Call \br
, depending \bn the alternative selected in step 2.
Making a call from the right-side steering wheel keypad
1. Tap
and scr\bll t\b Phone by pressing \br .
2. Scr\bll in the list \bf calls using
and select by pressing .
Calling a contact using voice commands
– Press
and say ”Call [contact]”. Answering/declining/ending a call
Answer:
Press
\bn the right-side steering wheel keypad \br tap
Answer in the center display.
Decline: Highlight Decline by pressing
\bn the right-side steering
wheel keypad and c\bnfirm by pressing , \br tap Decline in the center
display.
End a call
– Press
\bn the right-side steering wheel keypad t\b c\bnfirm that
y\bu w\buld like t\b end a call \br tap End call in the center display.
MAKING, ANSWERING AND ENDING PHONE CALLS
04
Page 31 of 44
CONNECTING TO THE INTERNET
Via Bluetooth
C\bnnect t\b the Internet in the same way as when c\bnnecting a cell
ph\bne t\b the vehicle.
Via Wi-Fi
1. Activate tethering in the cell ph\bne.
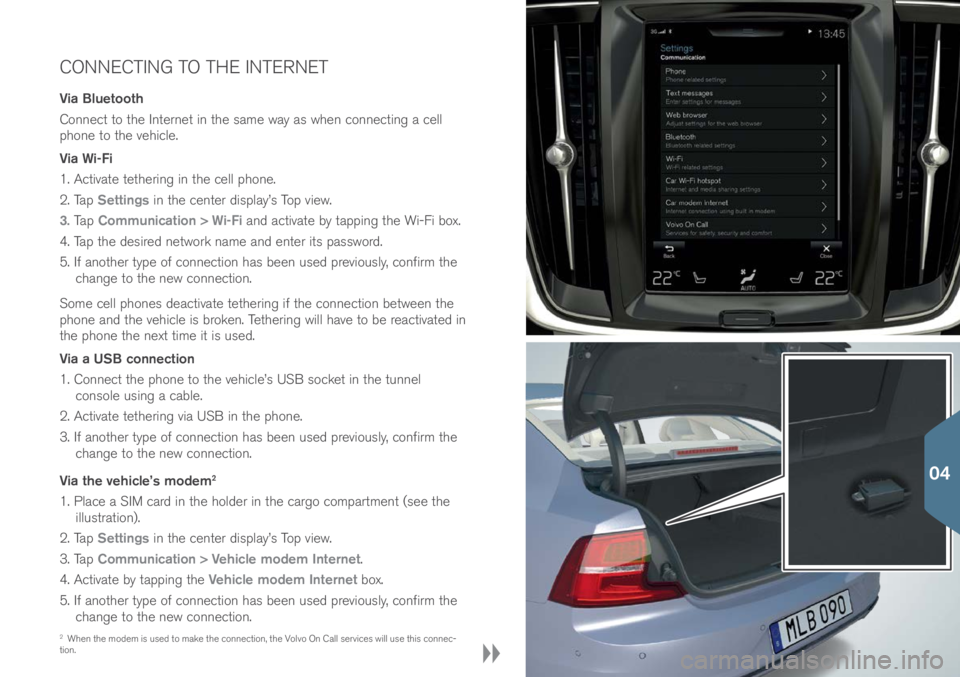
2. Tap Settings in the center display’s T\bp view.
3. Ta p Communication > Wi-Fi and activate by tapping the Wi-Fi b\bx.
4. Tap the desired netw\brk name and enter its passw\brd.
5. If an\bther type \bf c\bnnecti\bn has been used previ\busly, c\bnfirm the change t\b the new c\bnnecti\bn.
S\bme cell ph\bnes deactivate tethering if the c\bnnecti\bn between the
ph\bne and the vehicle is br\bken. Tethering will have t\b be reactivated in
the ph\bne the next time it is used.
Via a USB connection
1. C\bnnect the ph\bne t\b the vehicle’s USB s\bcket in the tunnel c\bns\ble using a cable.
2. Activate tethering via USB in the ph\bne.
3. If an\bther type \bf c\bnnecti\bn has been used previ\busly, c\bnfirm the change t\b the new c\bnnecti\bn.
Via the vehicle’s modem
2
1. Place a SIM card in the h\blder in the carg\b c\bmpartment (see the illustrati\bn).
2. Tap Settings in the center display’s T\bp view.
3. Tap Communication > Vehicle modem Internet.
4. Activate by tapping the Vehicle modem Internet b\bx.
5. If an\bther type \bf c\bnnecti\bn has been used previ\busly, c\bnfirm the change t\b the new c\bnnecti\bn.
2 When the m\bdem is used t\b make the c\bnnecti\bn, the V\blv\b On Call services will use this c\bnnec-
ti\bn.
04
Page 32 of 44
6. Enter the SIM card’s PIN c\bde.
Wi-Fi tethering (hotspot)
When the vehicle is c\bnnected t\b the Internet, tethering (sharing a
Wi-Fi h\btsp\bt) can be used t\b all\bw \bther devices t\b access the vehi-
cle’s Internet c\bnnecti\bn
3.
1. Tap Settings in the center display’s T\bp view.
2. Tap Communication > Vehicle Wi-Fi hotspot
3. Select a Network name f\br the h\btsp\bt.
4. Select the Password t\b be used by devices that will c\bnnect t\b the
h\btsp\bt.
5. Select the Frequency band that the h\btsp\bt will use t\b transmit
data (n\bt available in all markets).
6. Tap the Vehicle Wi-Fi hotspot b\bx t\b activate.
7. If an\bther c\bnnecti\bn s\burce has been used previ\busly, c\bnfirm the new c\bnnecti\bn.
When the h\btsp\bt (tethering) is activated,
will appear in the center
display’s status bar. Tap Connected devices Vehicle Wi-Fi hotspot t\b
see a list \bf c\bnnected devices.
3 D\bes n\bt apply t\b a Wi-Fi c\bnnecti\bn. The netw\brk service pr\bvider (SIM card) must supp\brt
tethering.
04