Page 120 of 588
1203-3. Adjusting the seats
Head restraints
Up
Pull the head restraints up.
Down
Push the head restraint down while
pressing the lock release button.
■
Center seat
Up
Pull the head restraints up.
Down
Push the head restraint down while pressing the lock release button.
Head restraints are provided for all seats.
Front seats
Lock release button
1
2
Rear seats
1
2
Double Cab modelsCrewMax models
Lock release buttonLock release button
Page 121 of 588
1213-3. Adjusting the seats
3
Operation of each component
■Outer seat
To u s e
Lift up the head restraint back to
the neutral position and then push
the head restraint down.
To f o l d
Lift up the head restraint while
pressing the right lock release but-
ton, and fold it forward.
■Removing the head restraints
Front seats and center rear seat (CrewMax models)
Center rear seat (Double Cab models)
Outer rear seat (Double Cab and CrewMax models)
Lock release button
1
2
Pull the head restraint up while pressing
the lock release button.
Pull the head restraint up while pressing
the lock release button.
Pull the head restraint up while pressing
both lock release buttons.
Lock release button
Lock release button
Lock release button
Page 122 of 588

1223-3. Adjusting the seats
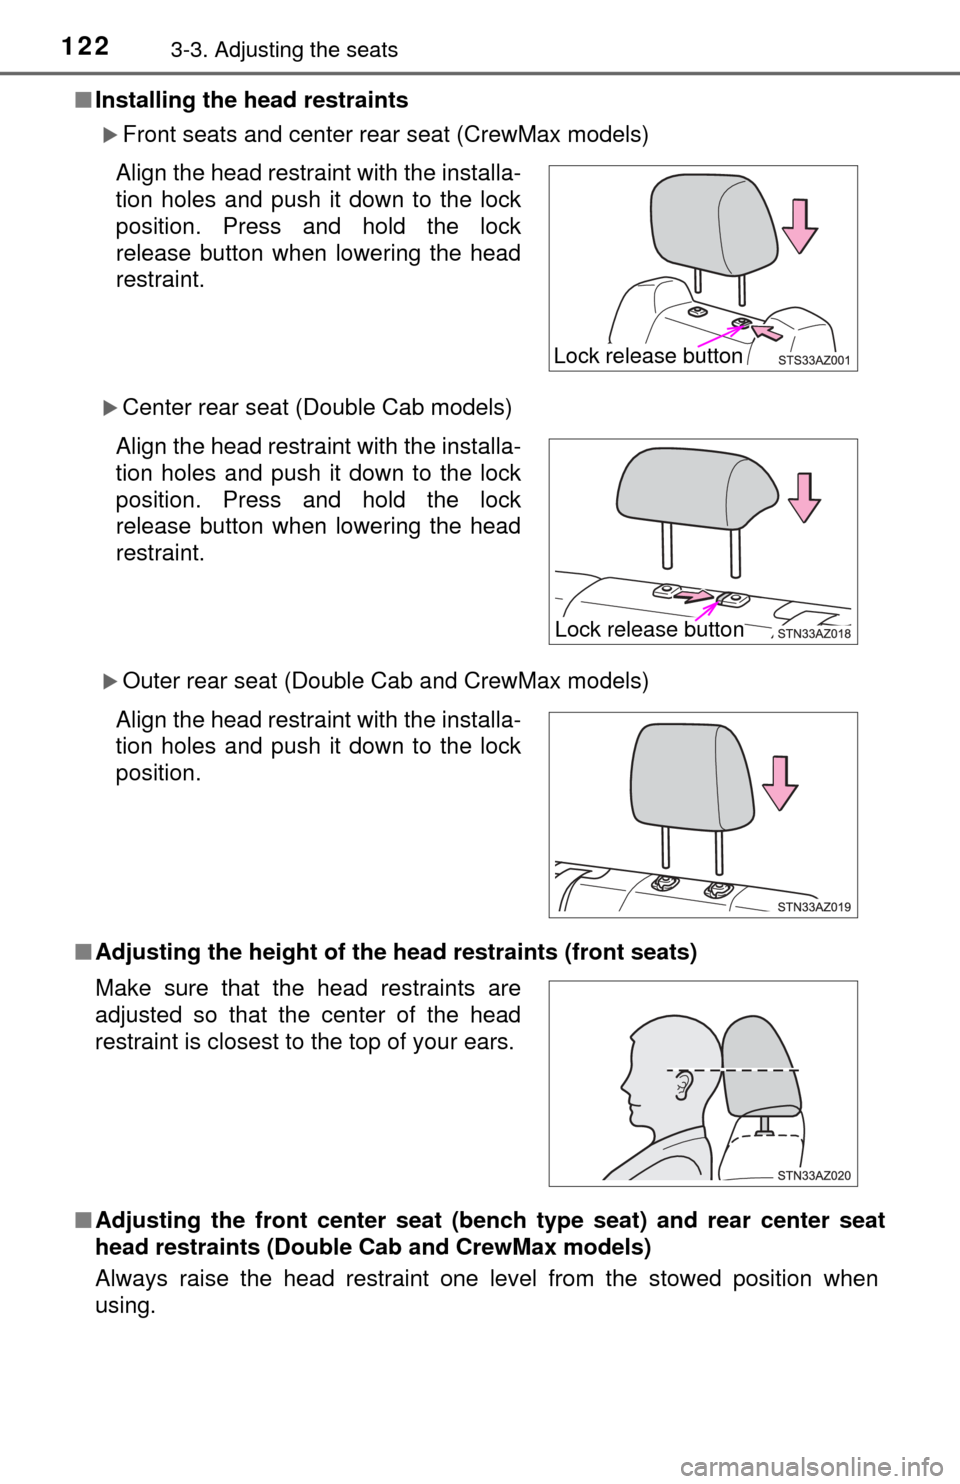
■Installing the head restraints
Front seats and center rear seat (CrewMax models)
Center rear seat (Double Cab models)
Outer rear seat (Double Cab and CrewMax models)
■ Adjusting the height of the head restraints (front seats)
■ Adjusting the front center seat (ben ch type seat) and rear center seat
head restraints (Double Cab and CrewMax models)
Always raise the head restraint one level from the stowed position when
using. Align the head restraint with the installa-
tion holes and push it down to the lock
position. Press and hold the lock
release button when lowering the head
restraint.
Align the head restraint with the installa-
tion holes and push it down to the lock
position. Press and hold the lock
release button when lowering the head
restraint.
Align the head restraint with the installa-
tion holes and push it down to the lock
position.
Make sure that the head restraints are
adjusted so that the center of the head
restraint is closest to the top of your ears.
Lock release button
Lock release button
Page 123 of 588
1233-3. Adjusting the seats
3
Operation of each component
CAUTION
■Head restraint precautions
Observe the following precautions regarding the head restraints.
Failure to do so may result in death or serious injury.
● Use the head restraints designed for each respective seat.
● Adjust the head restraints to the correct position at all times.
● After adjusting the head restraints, push down on them and make sure
they are locked in position.
● Do not drive with the head restraints removed.
Page 125 of 588
1253-4. Adjusting the steering wheel and mirrors
3
Operation of each component
Operating the switch moves the steering wheel in the following direc-
tions:Up
Down
Toward the driver
Away from the driver
To sound the horn, press on or
close to the mark.
■ After adjusting the steering wh eel (manual adjustable type)
Make sure that the steering wheel is securely locked.
The horn may not sound if the steering wheel is not securely locked.
( →P. 124)
Adjustment procedure (power-adjustable type)
1
2
3
4
Horn
Page 126 of 588

1263-4. Adjusting the steering wheel and mirrors
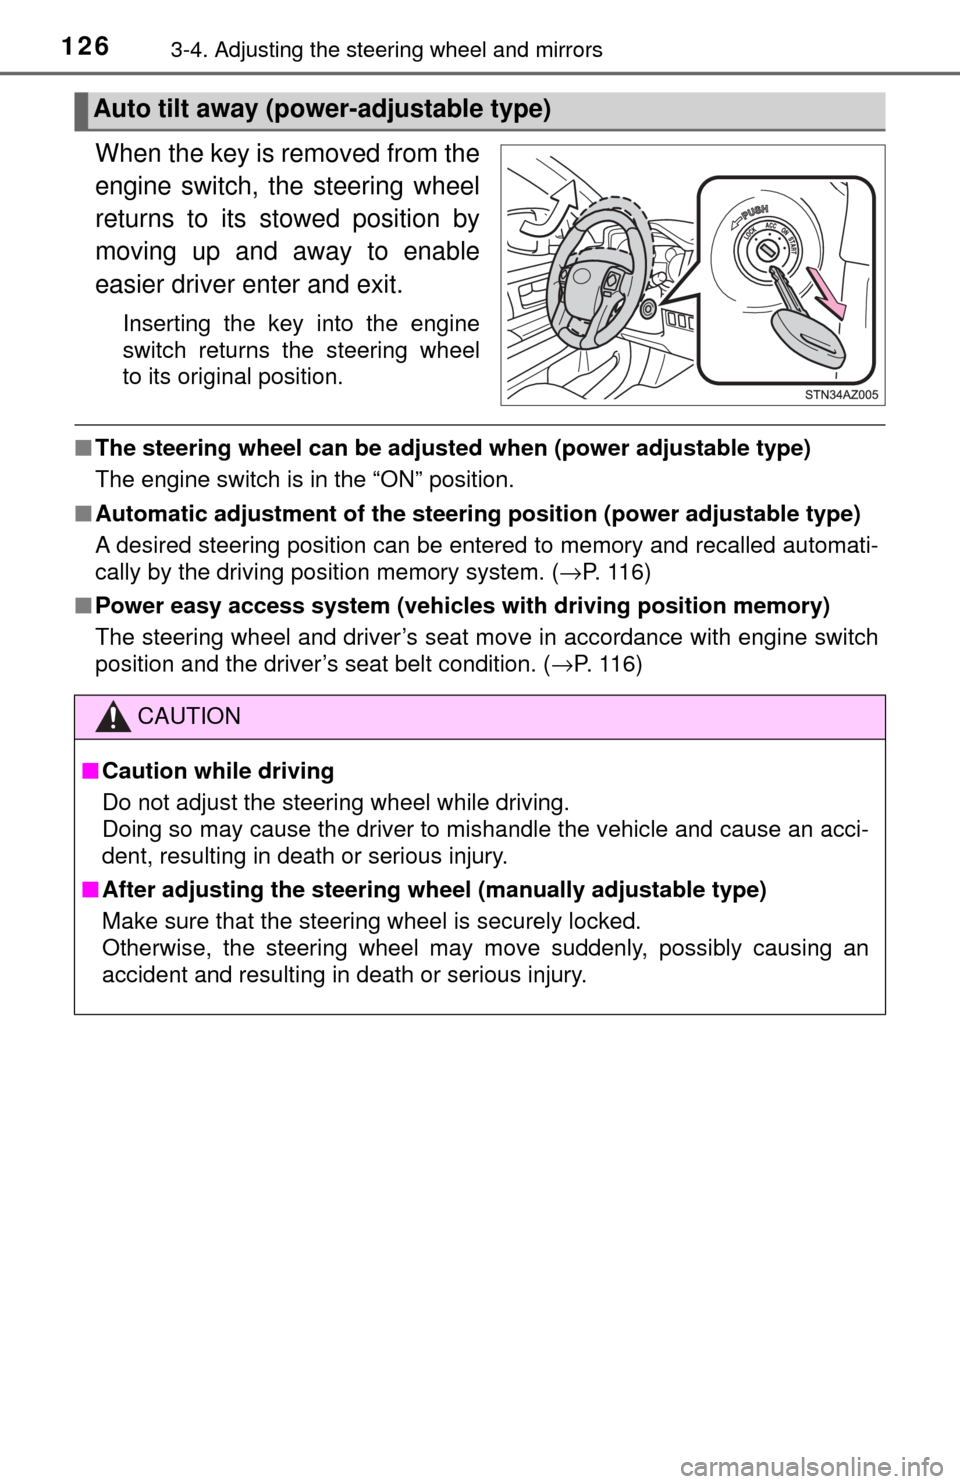
When the key is removed from the
engine switch, the steering wheel
returns to its stowed position by
moving up and away to enable
easier driver enter and exit.
Inserting the key into the engine
switch returns the steering wheel
to its original position.
■The steering wheel can be adjusted when (power adjustable type)
The engine switch is in the “ON” position.
■ Automatic adjustment of the steering position (power adjustable type)
A desired steering position can be entered to memory and recalled automati-
cally by the driving position memory system. ( →P. 116)
■ Power easy access system (vehicles with driving position memory)
The steering wheel and driver’s seat move in accordance with engine switch
position and the driver’s seat belt condition. ( →P. 116)
Auto tilt away (power-adjustable type)
CAUTION
■Caution while driving
Do not adjust the steering wheel while driving.
Doing so may cause the driver to mishandle the vehicle and cause an acci-
dent, resulting in death or serious injury.
■ After adjusting the steering wheel (manually adjustable type)
Make sure that the steering wheel is securely locked.
Otherwise, the steering wheel may move suddenly, possibly causing an
accident and resulting in death or serious injury.
Page 134 of 588
1343-5. Opening, closing the windows and moon roof
Power windows∗
The power windows can be opened and closed using the switches.
Operating the switch moves the windows as follows:
Ty p e A
Closing
Opening
One-touch opening
* (driver’s
window only)
*: To stop the window partway, oper- ate the switch in the opposite direc-
tion.
Ty p e B
Closing
One-touch closing
* (front seat
windows)
Opening
One-touch opening
* (front seat
windows)
*: To stop the window partway, oper- ate the switch in the opposite direc-
tion.
Press the switch down to lock the
passenger window switches.
Use this switch to prevent children
from accidentally opening or clos-
ing a passenger window.
∗: If equipped
Opening and closing procedures
1
2
3
1
2
3
4
Window lock switch
Page 135 of 588

1353-5. Opening, closing the windows and moon roof
3
Operation of each component
■The power windows can be operated when
The engine switch is in the “ON” position.
■ Operating the power windows a fter turning the engine off
The power windows can be operated for approximately 43 seconds after the
engine switch is turned to the “ACC” or “LOCK” position. They cannot, how-
ever, be operated once either front door is opened.
■ Jam protection functi on (type B only)
If an object becomes caught between the window and the window frame, win-
dow travel is stopped and the window is opened slightly.
■ When the power window does not close normally (type B only)
If the jam protection function is operating abnormally and a window cannot be
closed, perform the following operations using the power window switch on
the relevant door.
● After stopping the vehicle, the window can be closed by holding the power
window switch in the one-touch closing position while the engine switch is
turned to the “ON” position.
● If the window still cannot be closed even by carrying out the operation as
explained above, initialize the function by performing the following proce-
dure.
Hold the power window switch in the one-touch closing position. Continue
holding the switch for a further 6 seconds after the window has closed.
Hold the power window switch in the one-touch opening position. Con-
tinue holding the switch for a further 2 seconds after the window has
opened completely.
Hold the power window switch in the one-touch closing position once
again. Continue holding the switch for a further 2 seconds after the win\
-
dow has closed.
If you release the switch while the window is moving, start again from t\
he
beginning.
If the window continues to close but then re-open slightly even after perform-
ing the above procedure correctly, have the vehicle inspected by your Toyota
dealer.
1
2
3