2017 TOYOTA TACOMA light
[x] Cancel search: lightPage 417 of 640
4176-4. Other interior features
6
Interior features
NOTICE
■To avoid damaging the power outlet and the plug
● Close the power outlet lid when not in use.
● Do not allow foreign objects or liquids to enter the power outlet, as this
may cause a short circuit.
● Do not use plug adaptors to connect too many plugs to the power outlet.
● After removing a plug, gently close the power outlet lid.
■ To prevent the fuse from being blown
Do not use a 120 V AC appliance that requires more than the maximum
capacity of the power outlet. If a 120 V AC appliance that consumes more
than the maximum capacity is used, the protection circuit will cut the power
supply.
■ Appliances that may not op erate properly (120 V AC)
The following 120 V AC appliances may not operate even if their power con-
sumption is under maximum capacity.
● Appliances with high initial peak wattage
● Measuring devices that process precise data.
● Other appliances that require an extremely stable power supply
■ To prevent battery discharge
Turn off all the vehicle’s electronic equipment and accessories, such as the
headlights and air conditioning, when elec trical appliances that consume in
excess of 100 W are used continuously for long periods of time.
■ To prevent any damage caused by heat
● Do not use any electrical appliances that give off intense heat, such as
toasters, in any locations including t he internal or external trim, seats and
deck.
● Do not use any electrical appliances that are easily affected by vibration or
heat inside the vehicle. Vibration while driving, or the heat of the sun while
parking, may result in damage to those electrical appliances.
■ If any electrical appliances are to be used while driving
Securely fasten both the appliances and their cables to prevent them from
falling or getting caught in any of the power train components.
■ If the power outlet is loose when an electrical appliance plug is con-
nected
Replace the outlet. Contact your Toyota dealer for any necessary replace-
ments.
■ If the power outlet gets dirty
Turn the main switch off and use a soft, clean cloth to wipe it gently. Do not
use any cleansing materials, such as organic solvents, wax, or compound
cleaners, as these may damage the power outlet or cause it to malfunction.
Page 422 of 640
4226-4. Other interior features
NOTICE
■Conditions in which the wireless charger may not operate correctly
In the following situations, the wireless charger may not operate correctly:
● When a portable device is fully charged
● When there is a foreign object between the charging area and portable
device
● When a portable device becomes hot while charging
● When a portable device is placed on the wireless area with its charging
surface facing up
● When a portable device is not centered on the charging area
● When the vehicle is near a TV tower, electric power plant, gas station,
radio station, large display, airport or other facility that generates strong
radio waves or electrical noise
● When the portable device is in contact with, or is covered by any of the fol-
lowing metallic objects
• Cards to which aluminum foil is attached
• Cigarette boxes that have aluminum foil inside
• Metallic wallets or bags
• Coins
• Metal hand warmers
• Media such as CDs and DVDs
● When wireless keys (that emit radio waves) other than those of your vehi-
cle are being used nearby.
If in situations other than above the wireless charger does not operate prop-
erly or the operation indicator light is blinking, the wireless charger may be
malfunctioning. Contact your Toyota dealer.
■ To prevent failure or damage to data
● Do not bring magnetic cards, such as a credit card, or magnetic recording
media, close to the wireless charger. Otherwise, data may be erased due
to the influence of magnetism.
Additionally, do not bring precision instruments such as wrist watches,
close to the wireless charger, as such objects may malfunction.
● Do not leave portable devices in the cabin. The temperature inside the
cabin may become high when parked in the sun, and cause damage to the
device.
■ To prevent battery discharge
Do not use the wireless charger for a long period of time with the engine is
stopped.
Page 425 of 640
4256-4. Other interior features
6
Interior features
Garage door opener∗
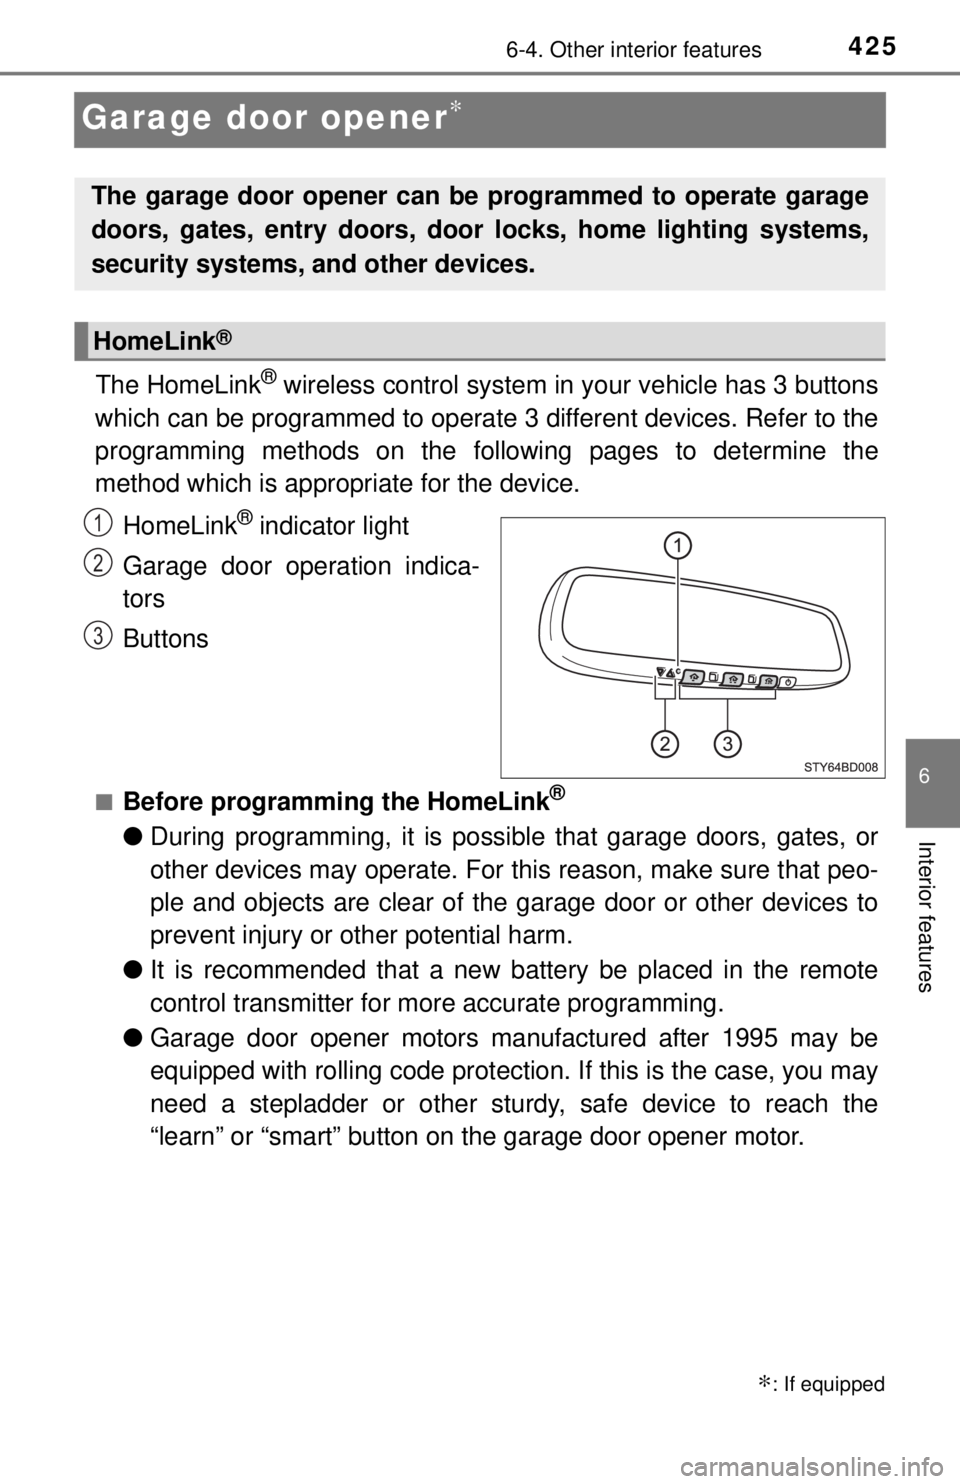
The HomeLink® wireless control system in your vehicle has 3 buttons
which can be programmed to operate 3 different devices. Refer to the
programming methods on the foll owing pages to determine the
method which is appr opriate for the device.
HomeLink
® indicator light
Garage door operation indica-
tors
Buttons
■Before programming the HomeLink®
● During programming, it is possible that garage doors, gates, or
other devices may operate. For this reason, make sure that peo-
ple and objects are clear of the garage door or other devices to
prevent injury or other potential harm.
● It is recommended that a new battery be placed in the remote
control transmitter for more accurate programming.
● Garage door opener motors manufactured after 1995 may be
equipped with rolling code protection. If this is the case, you may
need a stepladder or other sturdy, safe device to reach the
“learn” or “smart” button on the garage door opener motor.
∗: If equipped
The garage door opener can be programmed to operate garage
doors, gates, entry doors, door locks, home lighting systems,
security systems, and other devices.
HomeLink®
1
2
3
Page 426 of 640
4266-4. Other interior features
■Programming the HomeLink®
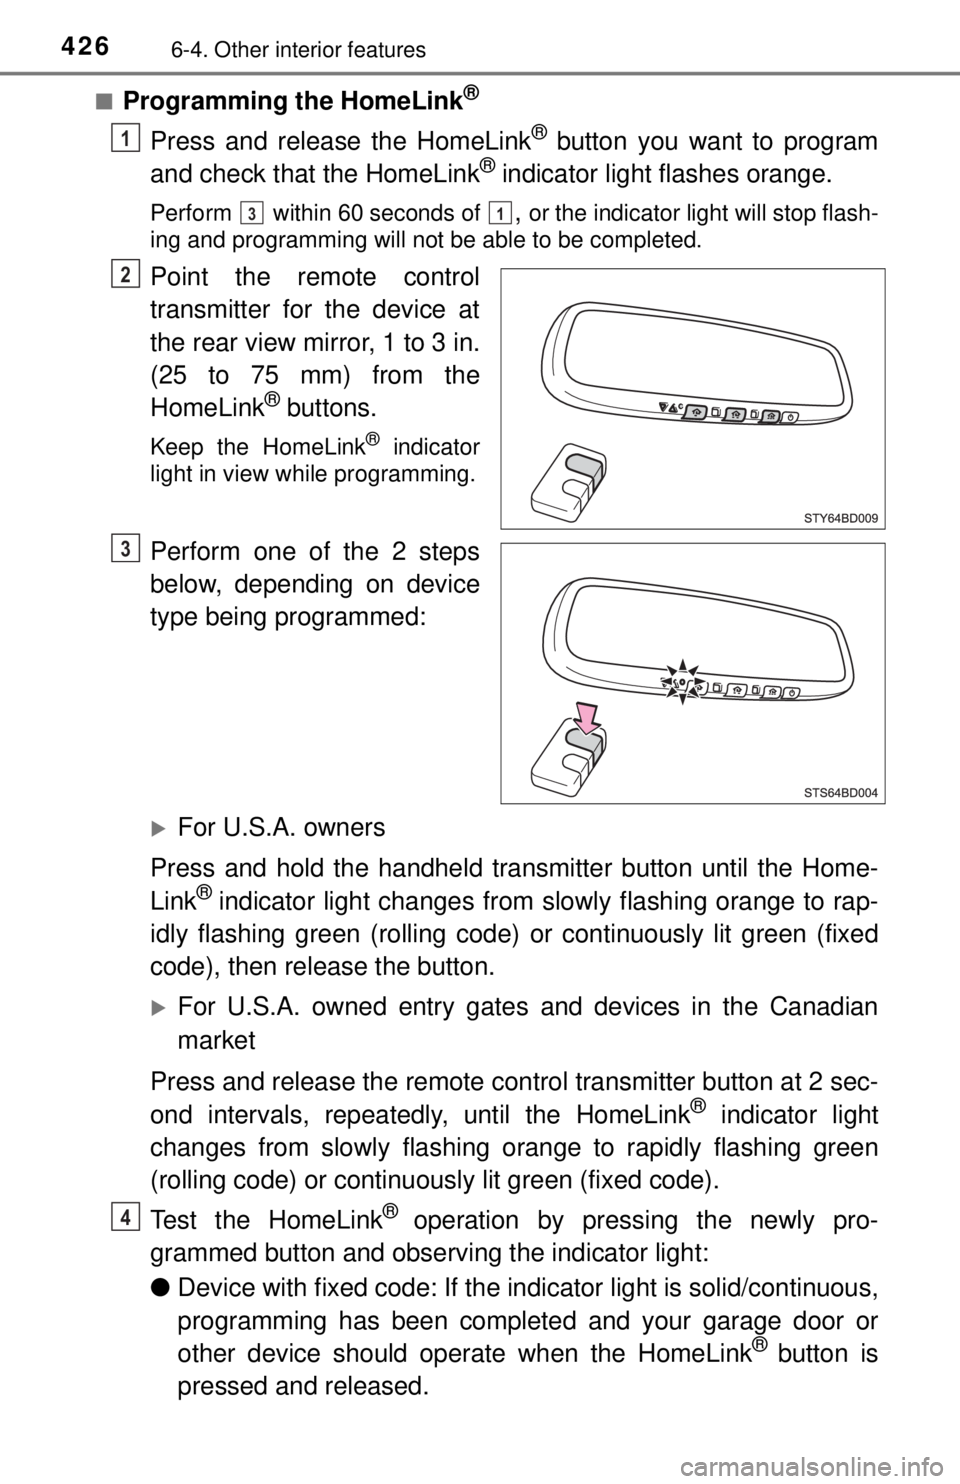
Press and release the HomeLink® button you want to program
and check that the HomeLink® indicator light flashes orange.
Perform within 60 seconds of , or the indicator light will stop flash-
ing and programming will not be able to be completed.
Point the remote control
transmitter for the device at
the rear view mirror, 1 to 3 in.
(25 to 75 mm) from the
HomeLink
® buttons.
Keep the HomeLink® indicator
light in view while programming.
Perform one of the 2 steps
below, depending on device
type being programmed:
For U.S.A. owners
Press and hold the handheld transmitter button until the Home-
Link
® indicator light changes from slowly flashing orange to rap-
idly flashing green (rolling code) or continuously lit green (fixed
code), then release the button.
For U.S.A. owned entry gates and devices in the Canadian
market
Press and release the remote control transmitter button at 2 sec-
ond intervals, repeatedly, until the HomeLink
® indicator light
changes from slowly flashing orange to rapidly flashing green
(rolling code) or continuous ly lit green (fixed code).
Test the HomeLink
® operation by pressing the newly pro-
grammed button and observing the indicator light:
● Device with fixed code: If the in dicator light is solid/continuous,
programming has been completed and your garage door or
other device should operate when the HomeLink
® button is
pressed and released.
1
31
2
3
4
Page 427 of 640
4276-4. Other interior features
6
Interior features
●Device with rolling code: If the indicator light flashes rapidly,
your garage door opener motor (or other device) is equipped
with a rolling code. Complete the programming process by
firmly pressing and holdi ng the programmed HomeLink
® but-
ton for 2 seconds and then release the button.
● If the garage door or other device does not operate, proceed
to “Programming a rolling code system”.
Repeat the steps above to program another device for any of the
remaining HomeLink
® buttons.
■Programming a rolling code system
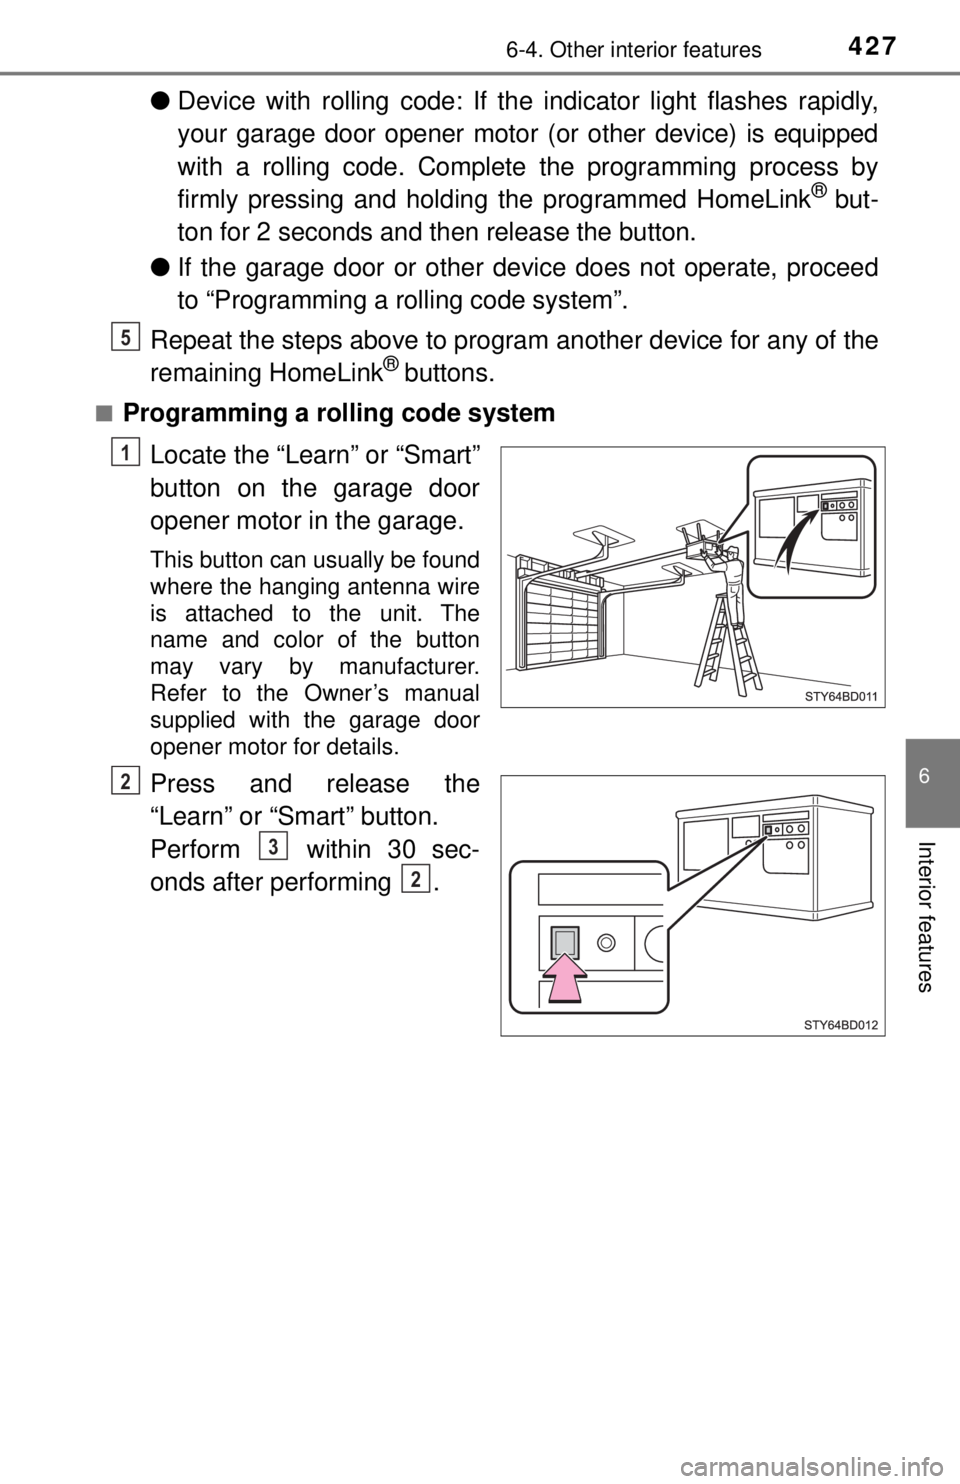
Locate the “Learn” or “Smart”
button on the garage door
opener motor in the garage.
This button can usually be found
where the hanging antenna wire
is attached to the unit. The
name and color of the button
may vary by manufacturer.
Refer to the Owner’s manual
supplied with the garage door
opener motor for details.
Press and release the
“Learn” or “Smart” button.
Perform within 30 sec-
onds after performing .
5
1
2
3
2
Page 428 of 640
4286-4. Other interior features
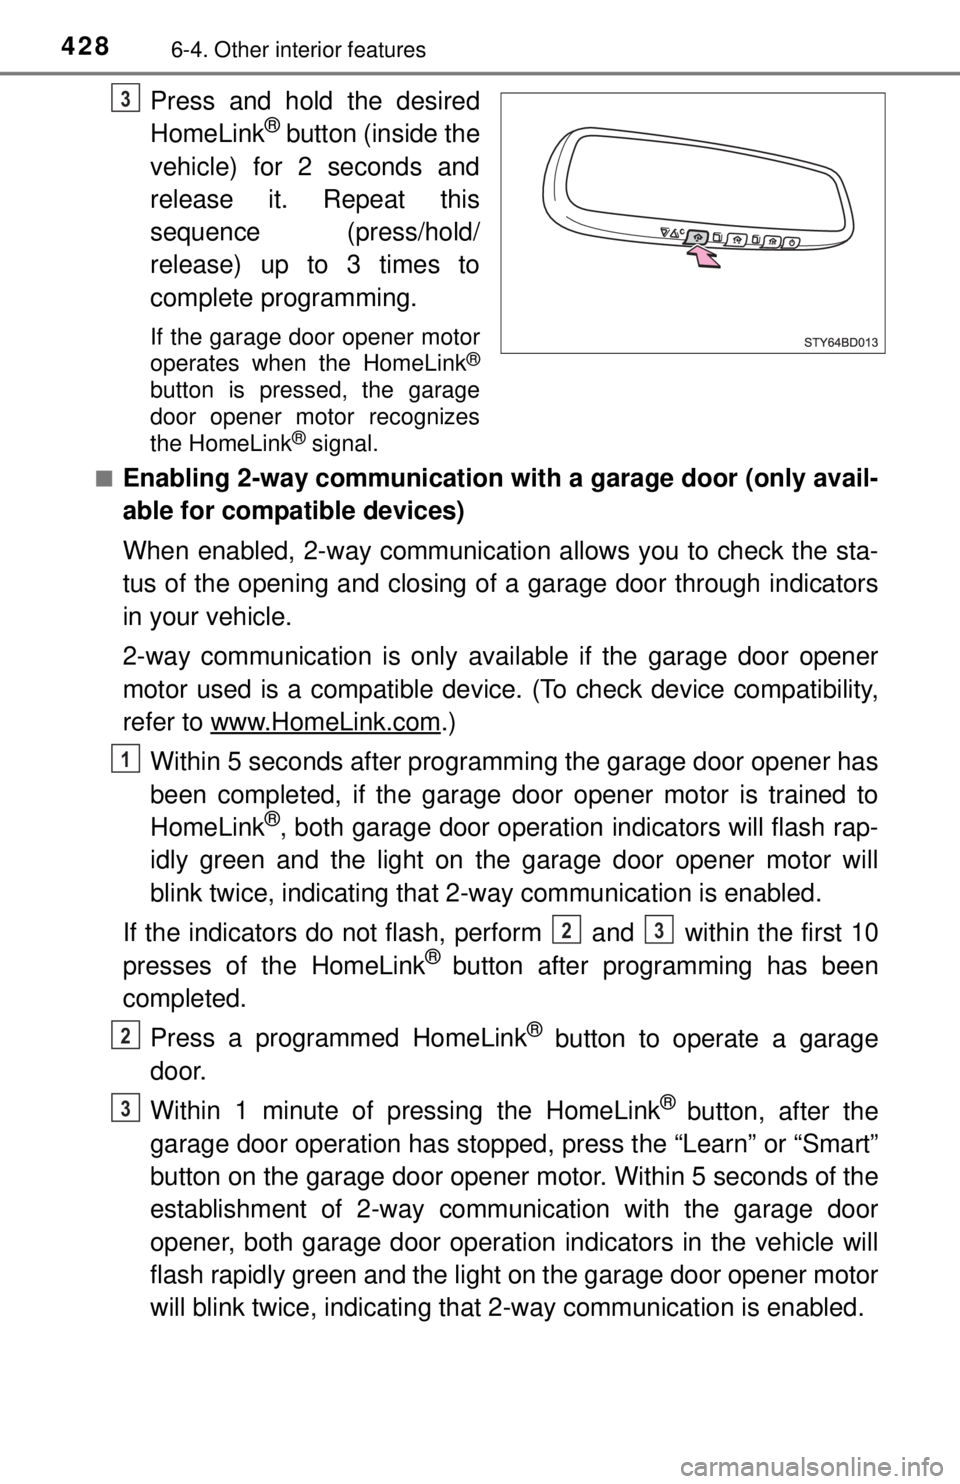
Press and hold the desired
HomeLink® button (inside the
vehicle) for 2 seconds and
release it. Repeat this
sequence (press/hold/
release) up to 3 times to
complete programming.
If the garage door opener motor
operates when the HomeLink®
button is pressed, the garage
door opener motor recognizes
the HomeLink
® signal.
■
Enabling 2-way communication with a garage door (only avail-
able for compatible devices)
When enabled, 2-way communication allows you to check the sta-
tus of the opening and closing of a garage door through indicators
in your vehicle.
2-way communication is only available if the garage door opener
motor used is a compatible device. (To check device compatibility,
refer to www.HomeLink.com
.)
Within 5 seconds after programming the garage door opener has
been completed, if the garage door opener motor is trained to
HomeLink
®, both garage door operation indicators will flash rap-
idly green and the light on the garage door opener motor will
blink twice, indicating that 2-way communication is enabled.
If the indicators do not flash, perform and within the first 10
presses of the HomeLink
® button after programming has been
completed.
Press a programmed HomeLink
® button to operate a garage
door.
Within 1 minute of pressing the HomeLink
® button, after the
garage door operation has stopped, press the “Learn” or “Smart”
button on the garage door opener motor. Within 5 seconds of the
establishment of 2-way communication with the garage door
opener, both garage door operati on indicators in the vehicle will
flash rapidly green and the light on the garage door opener motor
will blink twice, indi cating that 2-way co mmunication is enabled.
3
1
23
2
3
Page 429 of 640
4296-4. Other interior features
6
Interior features
■Reprogramming a single HomeLink® button
When the following procedure is pe rformed, buttons which already
have devices registered to them can be overwritten:
With one hand, press and hold the desired HomeLink
® button.
When the HomeLink
® indicator starts flashing orange, release
the HomeLink® button and perform “Programming the Home-
Link®” (it takes 20 seconds for the HomeLink® indicator to
start flashing).
Press the appropriate HomeLink
® button. The HomeLink® indicator
light should turn on.
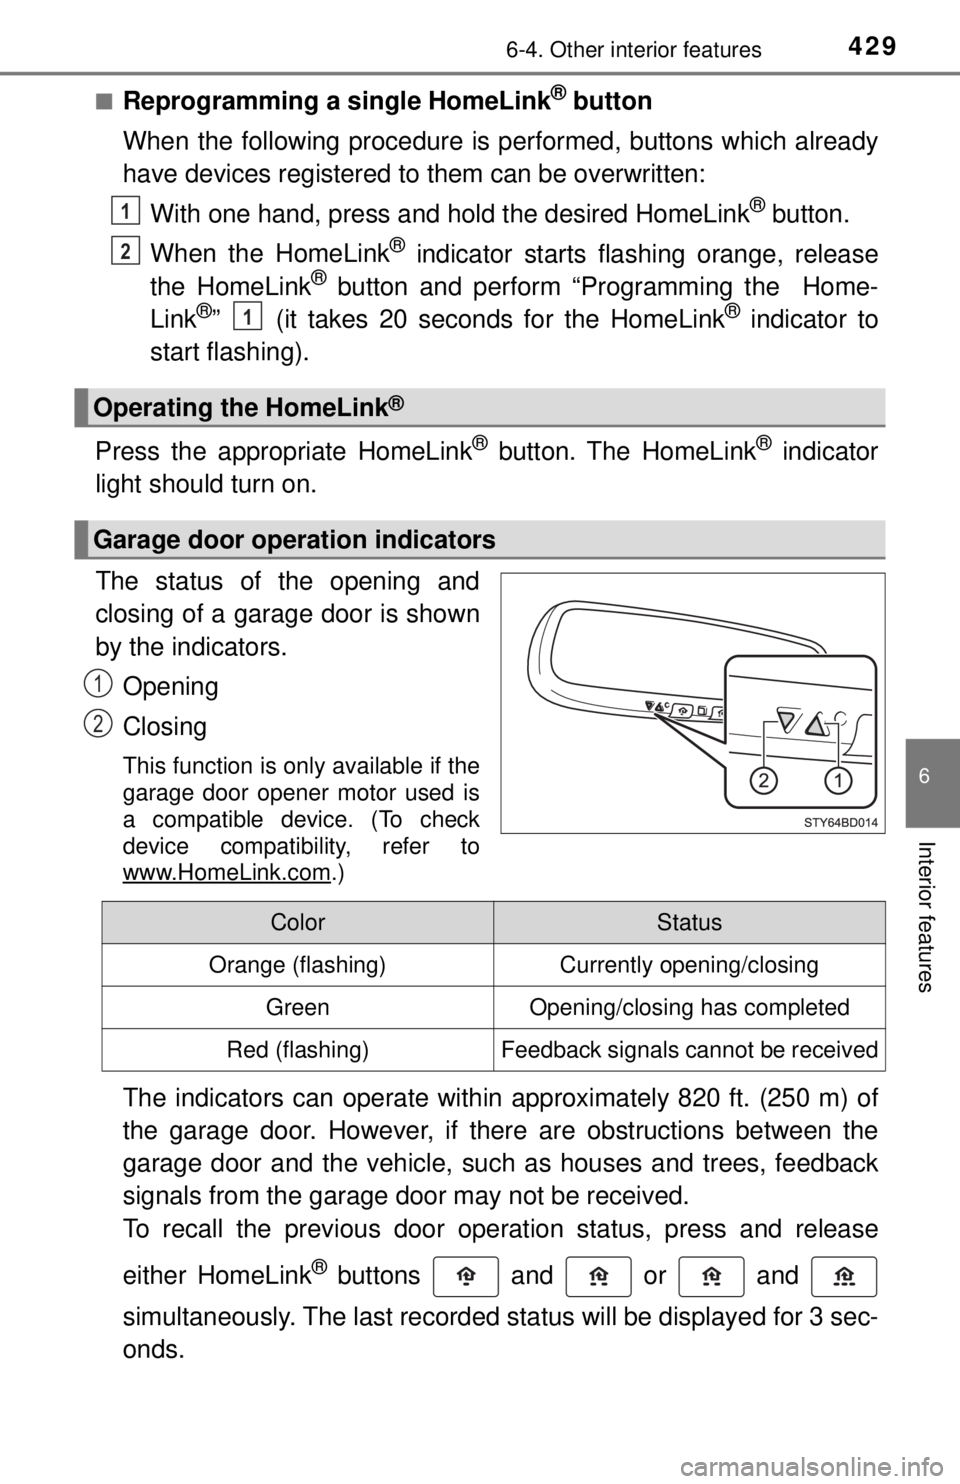
The status of the opening and
closing of a garage door is shown
by the indicators.
Opening
Closing
This function is only available if the
garage door opener motor used is
a compatible device. (To check
device compatibility, refer to
www.HomeLink.com
.)
The indicators can operate within approximately 820 ft. (250 m) of
the garage door. However, if there are obstructions between the
garage door and the vehicle, such as houses and trees, feedback
signals from the garage door may not be received.
To recall the previous door operation status, press and release
either HomeLink
® buttons and or and
simultaneously. The last recorded status will be displayed for 3 sec-
onds.
Operating the HomeLink®
Garage door operation indicators
1
2
1
1
2
ColorStatus
Orange (flashing)Currently opening/closing
GreenOpening/closing has completed
Red (flashing)Feedback signals cannot be received
Page 430 of 640
4306-4. Other interior features
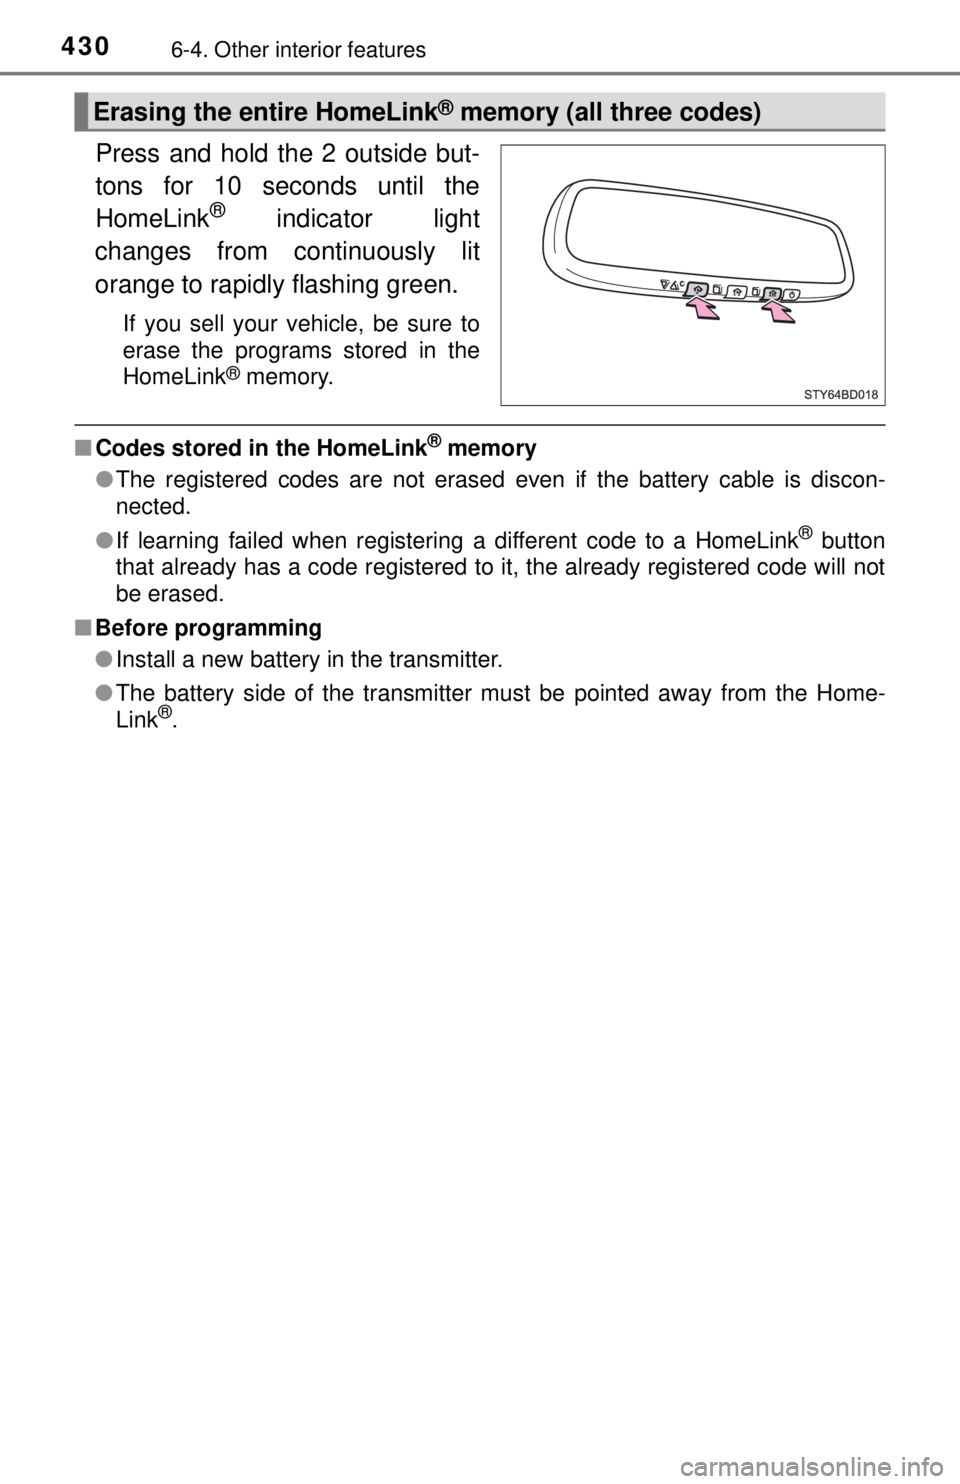
Press and hold the 2 outside but-
tons for 10 seconds until the
HomeLink
® indicator light
changes from continuously lit
orange to rapidly flashing green.
If you sell your vehicle, be sure to
erase the programs stored in the
HomeLink
® memory.
■ Codes stored in the HomeLink® memory
● The registered codes are not erased even if the battery cable is discon-
nected.
● If learning failed when registering a different code to a HomeLink
® button
that already has a code registered to it, the already registered code will not
be erased.
■ Before programming
●Install a new battery in the transmitter.
● The battery side of the transmitter must be pointed away from the Home-
Link
®.
Erasing the entire HomeLink® memory (all three codes)