2017 SUBARU FORESTER weight
[x] Cancel search: weightPage 249 of 634
Instruments and controls/Light control switch
.The timing of the change of headlight
mode may differ due to the following
factors.
–Color or brightness of the head-
lights of an oncoming vehicle or the tail
lights of a vehicle ahead
– The headlights of the oncoming
vehicle or the tail lights of the vehicle
ahead are covered with mud, snow,
etc.
– Movement and direction of an on-
coming vehicle or a vehicle ahead
– When the headlights of an oncom-
ing vehicle or the tail lights of a vehicle
ahead illuminate on only one side
– When the oncoming vehicle or
vehicle ahead is a motorcycle
– Conditions of a road (slope, curve,
road surface, etc.)
– Number of passengers and weight
of loaded cargo
– Limitation of the detection ability of
the stereo camera& Headlight flasher
CAUTION
Do not hold the lever in the flashing
position for more than just a few
seconds.
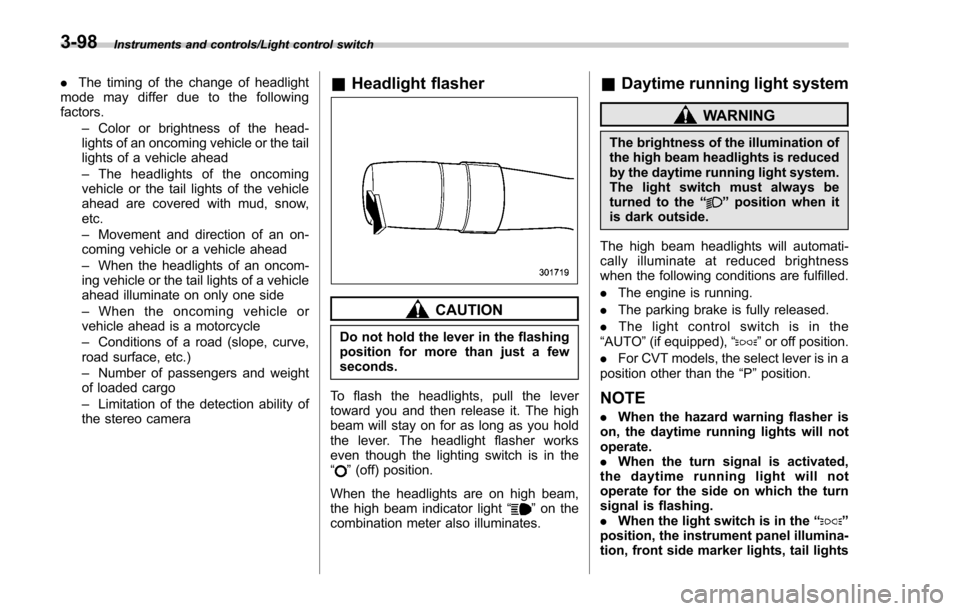
To flash the headlights, pull the lever
toward you and then release it. The high
beam will stay on for as long as you hold
the lever. The headlight flasher works
even though the lighting switch is in the
“
” (off) position.
When the headlights are on high beam,
the high beam indicator light “
”on the
combination meter also illuminates.
& Daytime running light system
WARNING
The brightness of the illumination of
the high beam headlights is reduced
by the daytime running light system.
The light switch must always be
turned to the “
”position when it
is dark outside.
The high beam headlights will automati-
cally illuminate at reduced brightness
when the following conditions are fulfilled.
. The engine is running.
. The parking brake is fully released.
. The light control switch is in the
“AUTO ”(if equipped), “
”or off position.
. For CVT models, the select lever is in a
position other than the “P”position.
NOTE
. When the hazard warning flasher is
on, the daytime running lights will not
operate.
. When the turn signal is activated,
the daytime running light will not
operate for the side on which the turn
signal is flashing.
. When the light switch is in the “
”
position, the instrument panel illumina-
tion, front side marker lights, tail lights
3-98
Page 395 of 634
Interior equipment/Cargo area cover
Cargo area cover (if
equipped)
The cargo area cover is provided for
covering the cargo area and to protect its
contents from direct sunlight. This cover is
detachable to make room for additional
cargo.
&Using the cover
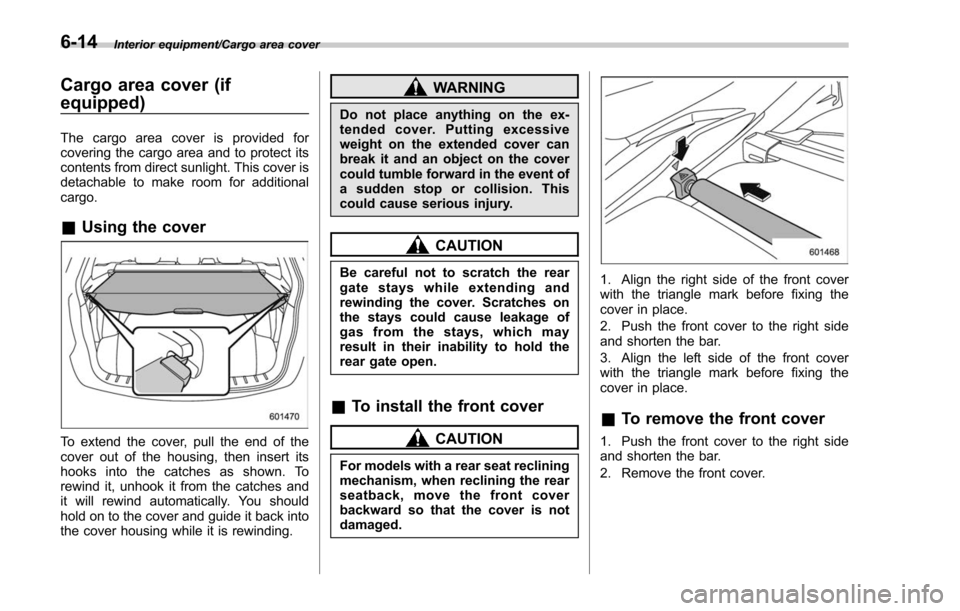
To extend the cover, pull the end of the
cover out of the housing, then insert its
hooks into the catches as shown. To
rewind it, unhook it from the catches and
it will rewind automatically. You should
hold on to the cover and guide it back into
the cover housing while it is rewinding.
WARNING
Do not place anything on the ex-
tended cover. Putting excessive
weight on the extended cover can
break it and an object on the cover
could tumble forward in the event of
a sudden stop or collision. This
could cause serious injury.
CAUTION
Be careful not to scratch the rear
gate stays while extending and
rewinding the cover. Scratches on
the stays could cause leakage of
gas from the stays, which may
result in their inability to hold the
rear gate open.
&To install the front cover
CAUTION
For models with a rear seat reclining
mechanism, when reclining the rear
seatback, move the front cover
backward so that the cover is not
damaged.
1. Align the right side of the front cover
with the triangle mark before fixing the
cover in place.
2. Push the front cover to the right side
and shorten the bar.
3. Align the left side of the front cover
with the triangle mark before fixing the
cover in place.
&To remove the front cover
1. Push the front cover to the right side
and shorten the bar.
2. Remove the front cover.
6-14
Page 478 of 634
New vehicle break-in driving–the first
1,000 miles (1,600 km) ..................................... 8-2
Fuel economy hints ............................................ 8-2
Engine exhaust gas (carbon monoxide) ............ 8-2
Catalytic converter .............................................. 8-3
Periodic inspections ........................................... 8-4
Driving in foreign countries ............................... 8-4
Driving tips for AWD models .............................. 8-5
On-road and off-road driving .............................. 8-6
Winter driving ...................................................... 8-8
Operation during cold weather ............................. 8-8
Driving on snowy and icy roads ......................... 8-10
Corrosion protection .......................................... 8-11
Snow tires ......................................................... 8-11
Tire chains ......................................................... 8-11
Rocking the vehicle ............................................ 8-12
Loading your vehicle ......................................... 8-12Vehicle capacity weight ...................................... 8-13
GVWR and GAWR (Gross Vehicle Weight Rating and Gross Axle Weight Rating) ........................ 8-14
Roof rack (if equipped) ...................................... 8-14
Roof molding and crossbar (if equipped) ............ 8-15
Trailer hitch (dealer option)............................... 8-16Connecting a trailer........................................... 8-17
If not towing a trailer .......................................... 8-18
Trailer towing..................................................... 8-19Warranties and maintenance .............................. 8-19
Maximum load limits .......................................... 8-19
Trailer hitches .................................................... 8-22
Connecting a trailer ........................................... 8-22
Trailer towing tips .............................................. 8-23
Driving tips
8
Page 490 of 634
WARNING
.When you carry something inside
the vehicle, secure it whenever
you can to prevent it from being
thrown around inside the vehicle
during sudden stops, sharp turns
or in an accident.
. Do not pile heavy loads on the
roof. These loads raise the vehi-
cle ’s center of gravity and make it
more prone to tip over.
. Secure lengthy items properly to
prevent them from shooting for-
ward and causing serious injury
during a sudden stop.
. Never exceed the maximum load
limit. If you do, some parts on
your vehicle can break, or it can
change the way your vehicle
handles. This could result in loss
of control and cause personal
injury. Also, overloading can
shorten the life of your vehicle.
. Do not place anything on the
extended cargo area cover (if
equipped). Such items could
tumble forward in the event of a
sudden stop or a collision. This
could cause serious injury.
CAUTION
. Do not carry spray cans, contain-
ers with flammable or corrosive
liquids or any other dangerous
items inside the vehicle.
. Do not close the rear gate with
cargo protruding from the cargo
area. The cargo may be da-
maged. In models with power
rear gate, the rear gate may open
via reverse function.
. In models with power rear gate,
be careful not to allow collision
between the rear gate and the
cargo when you are loading
cargo on the roof. Otherwise,
the rear gate will hit the cargo
when opening and may cause
damage to both the cargo and
the rear gate.
NOTE
For better fuel economy, do not carry
unneeded cargo.
& Vehicle capacity weight
Vehicle placard
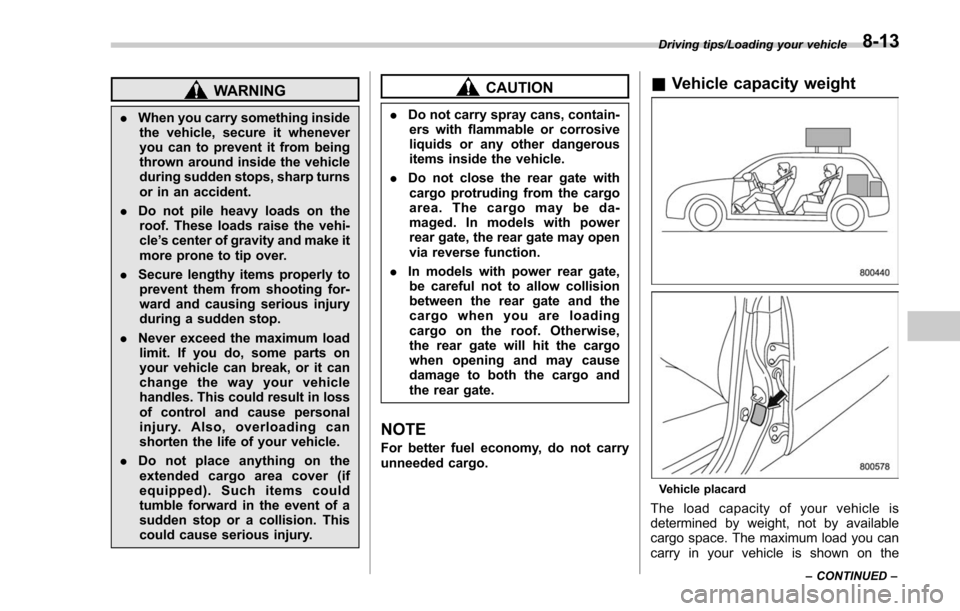
The load capacity of your vehicle is
determined by weight, not by available
cargo space. The maximum load you can
carry in your vehicle is shown on the
Driving tips/Loading your vehicle
–CONTINUED –8-13
Page 491 of 634
Driving tips/Loading your vehicle
vehicle placard attached to the driver’s
side door pillar. It includes the total weight
of the driver and all passengers and their
belongings, any optional equipment such
as a trailer hitch, roof rack or bike carrier,
etc., and the tongue load of a trailer.
& GVWR and GAWR (Gross
Vehicle Weight Rating and
Gross Axle Weight Rating)
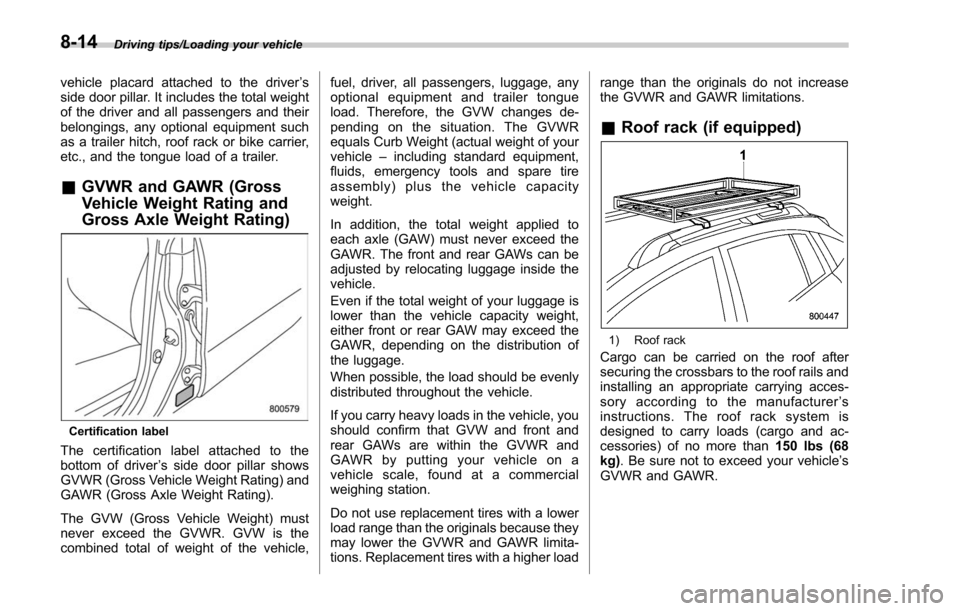
Certification label
The certification label attached to the
bottom of driver ’s side door pillar shows
GVWR (Gross Vehicle Weight Rating) and
GAWR (Gross Axle Weight Rating).
The GVW (Gross Vehicle Weight) must
never exceed the GVWR. GVW is the
combined total of weight of the vehicle, fuel, driver, all passengers, luggage, any
optional equipment and trailer tongue
load. Therefore, the GVW changes de-
pending on the situation. The GVWR
equals Curb Weight (actual weight of your
vehicle
–including standard equipment,
fluids, emergency tools and spare tire
assembly) plus the vehicle capacity
weight.
In addition, the total weight applied to
each axle (GAW) must never exceed the
GAWR. The front and rear GAWs can be
adjusted by relocating luggage inside the
vehicle.
Even if the total weight of your luggage is
lower than the vehicle capacity weight,
either front or rear GAW may exceed the
GAWR, depending on the distribution of
the luggage.
When possible, the load should be evenly
distributed throughout the vehicle.
If you carry heavy loads in the vehicle, you
should confirm that GVW and front and
rear GAWs are within the GVWR and
GAWR by putting your vehicle on a
vehicle scale, found at a commercial
weighing station.
Do not use replacement tires with a lower
load range than the originals because they
may lower the GVWR and GAWR limita-
tions. Replacement tires with a higher load range than the originals do not increase
the GVWR and GAWR limitations.
&
Roof rack (if equipped)
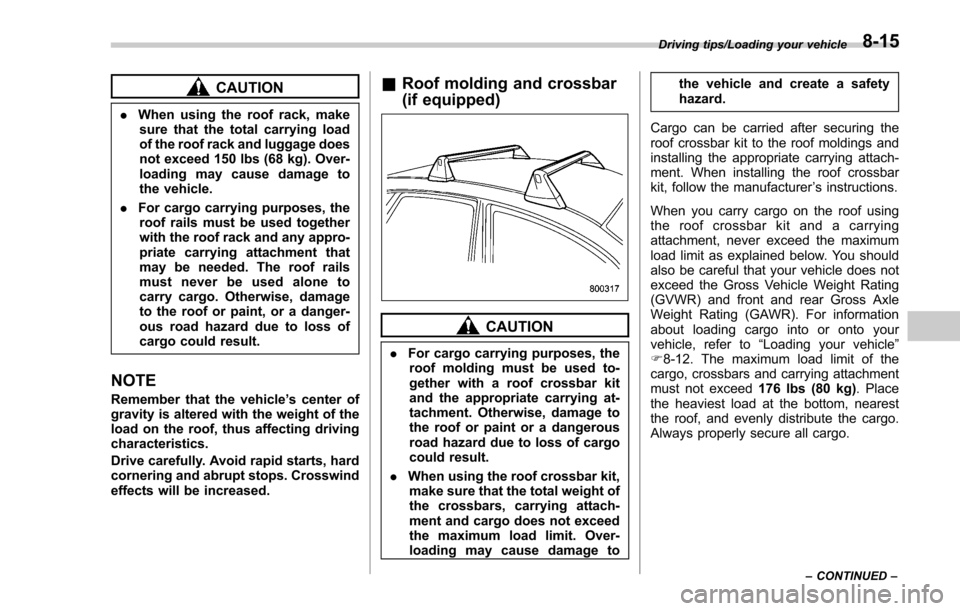
1) Roof rack
Cargo can be carried on the roof after
securing the crossbars to the roof rails and
installing an appropriate carrying acces-
sory according to the manufacturer ’s
instructions. The roof rack system is
designed to carry loads (cargo and ac-
cessories) of no more than 150 lbs (68
kg) . Be sure not to exceed your vehicle’ s
GVWR and GAWR.
8-14
Page 492 of 634
CAUTION
.When using the roof rack, make
sure that the total carrying load
of the roof rack and luggage does
not exceed 150 lbs (68 kg). Over-
loading may cause damage to
the vehicle.
. For cargo carrying purposes, the
roof rails must be used together
with the roof rack and any appro-
priate carrying attachment that
may be needed. The roof rails
must never be used alone to
carry cargo. Otherwise, damage
to the roof or paint, or a danger-
ous road hazard due to loss of
cargo could result.
NOTE
Remember that the vehicle ’s center of
gravity is altered with the weight of the
load on the roof, thus affecting driving
characteristics.
Drive carefully. Avoid rapid starts, hard
cornering and abrupt stops. Crosswind
effects will be increased.
& Roof molding and crossbar
(if equipped)
CAUTION
. For cargo carrying purposes, the
roof molding must be used to-
gether with a roof crossbar kit
and the appropriate carrying at-
tachment. Otherwise, damage to
the roof or paint or a dangerous
road hazard due to loss of cargo
could result.
. When using the roof crossbar kit,
make sure that the total weight of
the crossbars, carrying attach-
ment and cargo does not exceed
the maximum load limit. Over-
loading may cause damage to the vehicle and create a safety
hazard.
Cargo can be carried after securing the
roof crossbar kit to the roof moldings and
installing the appropriate carrying attach-
ment. When installing the roof crossbar
kit, follow the manufacturer ’s instructions.
When you carry cargo on the roof using
the roof crossbar kit and a carrying
attachment, never exceed the maximum
load limit as explained below. You should
also be careful that your vehicle does not
exceed the Gross Vehicle Weight Rating
(GVWR) and front and rear Gross Axle
Weight Rating (GAWR). For information
about loading cargo into or onto your
vehicle, refer to “Loading your vehicle”
F 8-12. The maximum load limit of the
cargo, crossbars and carrying attachment
must not exceed 176 lbs (80 kg). Place
the heaviest load at the bottom, nearest
the roof, and evenly distribute the cargo.
Always properly secure all cargo.
Driving tips/Loading your vehicle
–CONTINUED –8-15
Page 493 of 634
Driving tips/Trailer hitch (dealer option)
!Installing carrying attachments on
the crossbars
When installing any carrying attachment
such as a bike carrier, ski carrier, kayak
carrier, cargo basket, etc. on the cross-
bars, follow the manufacturer ’s instruc-
tions and make sure that the attachment is
securely fixed to the crossbars. Use only
attachments designed specifically for the
crossbars. A set of the crossbars is
designed to carry loads (cargo and attach-
ment) of not more than 165 lbs (75 kg).
Before operating the vehicle, make sure
that the cargo is properly secured on the
attachment.
NOTE
Remember that the vehicle ’s center of
gravity is altered with the weight of the
load on the roof, thus affecting the
driving characteristics.
Drive carefully. Avoid rapid starts, hard
cornering and abrupt stops. Crosswind
effects will be increased. !
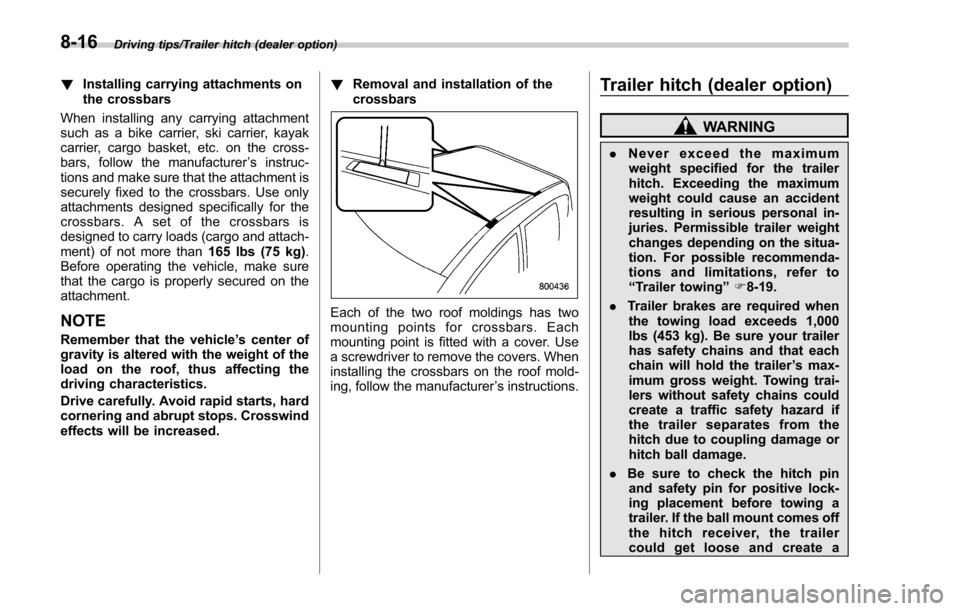
Removal and installation of the
crossbars
Each of the two roof moldings has two
mounting points for crossbars. Each
mounting point is fitted with a cover. Use
a screwdriver to remove the covers. When
installing the crossbars on the roof mold-
ing, follow the manufacturer ’s instructions.
Trailer hitch (dealer option)
WARNING
. Never exceed the maximum
weight specified for the trailer
hitch. Exceeding the maximum
weight could cause an accident
resulting in serious personal in-
juries. Permissible trailer weight
changes depending on the situa-
tion. For possible recommenda-
tions and limitations, refer to
“ Trailer towing” F8-19.
. Trailer brakes are required when
the towing load exceeds 1,000
lbs (453 kg). Be sure your trailer
has safety chains and that each
chain will hold the trailer ’s max-
imum gross weight. Towing trai-
lers without safety chains could
create a traffic safety hazard if
the trailer separates from the
hitch due to coupling damage or
hitch ball damage.
. Be sure to check the hitch pin
and safety pin for positive lock-
ing placement before towing a
trailer. If the ball mount comes off
the hitch receiver, the trailer
could get loose and create a
8-16
Page 494 of 634
traffic safety hazard.
. Although towing regulations for
trailer or caravan vehicles vary
by state/region, all regulations
agree that specifications such
as the maximum gross trailer
weight must not exceed the les-
ser of the following:
– Maximum gross trailer weight
– Maximum gross tongue
weight
– GVWR
– GAWR
. Failure to comply with the proce-
dures set forth will not only
compromise your safety, but will
also negate your insurance cov-
erage and/or may violate the
state road and traffic acts and
regulations.
. Use only the ball mount supplied
with this hitch. Use the hitch only
as a weight carrying hitch. Do not
use with any type of weight
distributing hitch.
. The standard bumper beam must
be installed after you remove the
trailer hitch. Consult a SUBARU
dealer for purchase of a standard
bumper beam if you do not have the original.
. Safety performance is decreased
and there is increased risk of
injury to passengers in the case
of an accident if the trailer hitch
or a standard bumper beam is
not installed. One of them must
always be installed on the vehi-
cle.
. If a trailer hitch is installed, it is
not possible to install the rear
towing hook.
When towing a trailer, refer to “Trailer
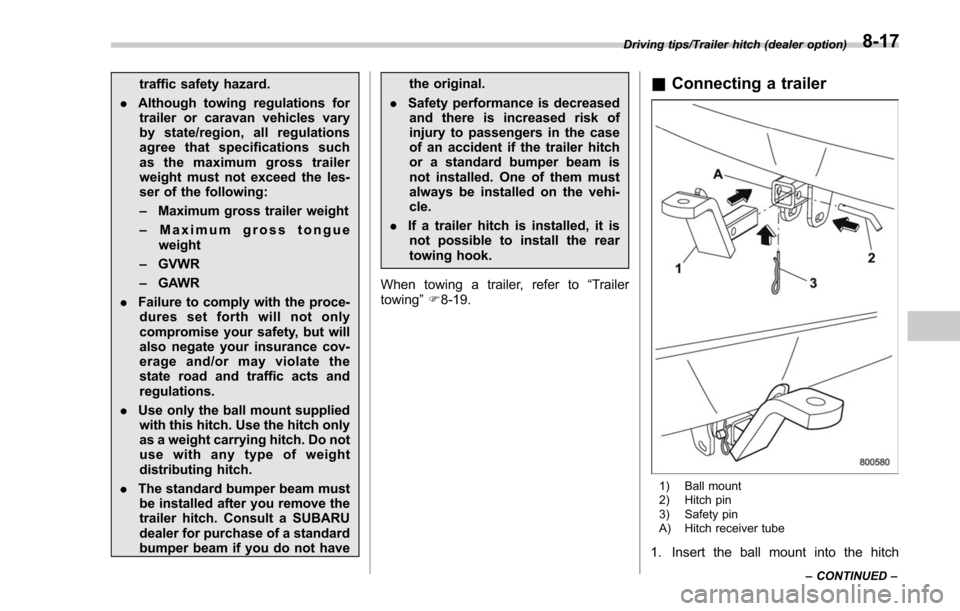
towing ”F 8-19.& Connecting a trailer
1) Ball mount
2) Hitch pin
3) Safety pin
A) Hitch receiver tube
1. Insert the ball mount into the hitch
Driving tips/Trailer hitch (dealer option)
–CONTINUED –8-17