2017 SUBARU FORESTER height
[x] Cancel search: heightPage 62 of 634
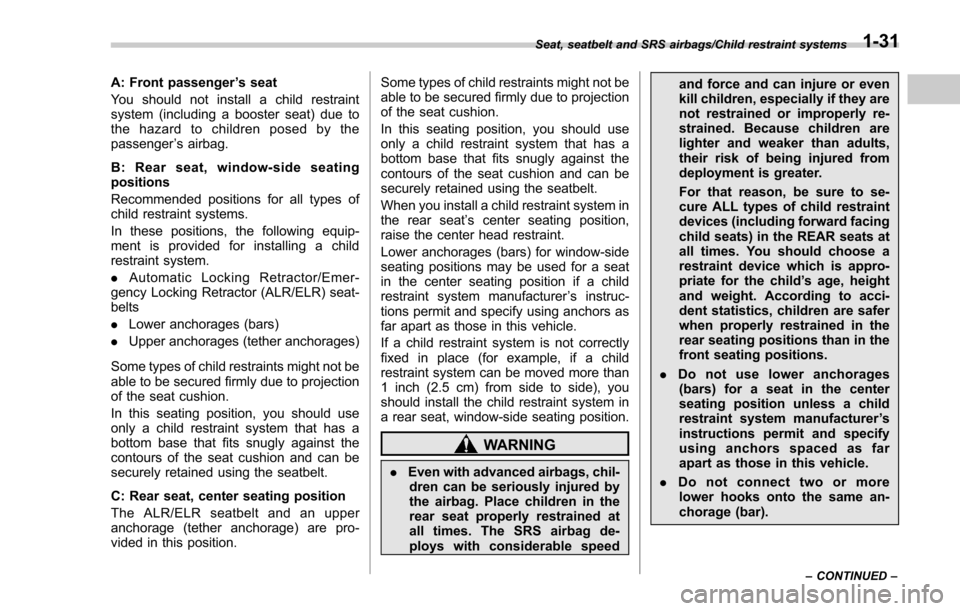
A: Front passenger’s seat
You should not install a child restraint
system (including a booster seat) due to
the hazard to children posed by the
passenger ’s airbag.
B: Rear seat, window-side seating
positions
Recommended positions for all types of
child restraint systems.
In these positions, the following equip-
ment is provided for installing a child
restraint system.
. Automatic Locking Retractor/Emer-
gency Locking Retractor (ALR/ELR) seat-
belts
. Lower anchorages (bars)
. Upper anchorages (tether anchorages)
Some types of child restraints might not be
able to be secured firmly due to projection
of the seat cushion.
In this seating position, you should use
only a child restraint system that has a
bottom base that fits snugly against the
contours of the seat cushion and can be
securely retained using the seatbelt.
C: Rear seat, center seating position
The ALR/ELR seatbelt and an upper
anchorage (tether anchorage) are pro-
vided in this position. Some types of child restraints might not be
able to be secured firmly due to projection
of the seat cushion.
In this seating position, you should use
only a child restraint system that has a
bottom base that fits snugly against the
contours of the seat cushion and can be
securely retained using the seatbelt.
When you install a child restraint system in
the rear seat
’s center seating position,
raise the center head restraint.
Lower anchorages (bars) for window-side
seating positions may be used for a seat
in the center seating position if a child
restraint system manufacturer ’s instruc-
tions permit and specify using anchors as
far apart as those in this vehicle.
If a child restraint system is not correctly
fixed in place (for example, if a child
restraint system can be moved more than
1 inch (2.5 cm) from side to side), you
should install the child restraint system in
a rear seat, window-side seating position.
WARNING
. Even with advanced airbags, chil-
dren can be seriously injured by
the airbag. Place children in the
rear seat properly restrained at
all times. The SRS airbag de-
ploys with considerable speed and force and can injure or even
kill children, especially if they are
not restrained or improperly re-
strained. Because children are
lighter and weaker than adults,
their risk of being injured from
deployment is greater.
For that reason, be sure to se-
cure ALL types of child restraint
devices (including forward facing
child seats) in the REAR seats at
all times. You should choose a
restraint device which is appro-
priate for the child
’s age, height
and weight. According to acci-
dent statistics, children are safer
when properly restrained in the
rear seating positions than in the
front seating positions.
. Do not use lower anchorages
(bars) for a seat in the center
seating position unless a child
restraint system manufacturer ’s
instructions permit and specify
using anchors spaced as far
apart as those in this vehicle.
. Do not connect two or more
lower hooks onto the same an-
chorage (bar).
Seat, seatbelt and SRS airbags/Child restraint systems
–CONTINUED –1-31
Page 63 of 634
Seat, seatbelt and SRS airbags/Child restraint systems
WARNING
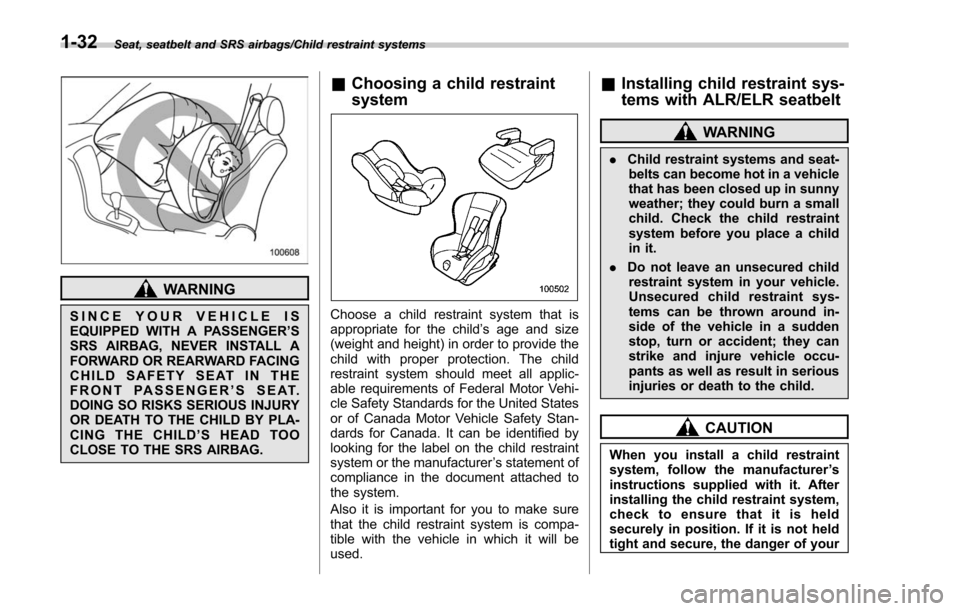
SINCE YOUR VEHICLE IS
EQUIPPED WITH A PASSENGER’S
SRS AIRBAG, NEVER INSTALL A
FORWARD OR REARWARD FACING
CHILD SAFETY SEAT IN THE
FRONT PASSENGER ’S SEAT.
DOING SO RISKS SERIOUS INJURY
OR DEATH TO THE CHILD BY PLA-
CING THE CHILD’ SHEADTOO
CLOSE TO THE SRS AIRBAG.
& Choosing a child restraint
system
Choose a child restraint system that is
appropriate for the child ’s age and size
(weight and height) in order to provide the
child with proper protection. The child
restraint system should meet all applic-
able requirements of Federal Motor Vehi-
cle Safety Standards for the United States
or of Canada Motor Vehicle Safety Stan-
dards for Canada. It can be identified by
looking for the label on the child restraint
system or the manufacturer ’s statement of
compliance in the document attached to
the system.
Also it is important for you to make sure
that the child restraint system is compa-
tible with the vehicle in which it will be
used.
& Installing child restraint sys-
tems with ALR/ELR seatbelt
WARNING
. Child restraint systems and seat-
belts can become hot in a vehicle
that has been closed up in sunny
weather; they could burn a small
child. Check the child restraint
system before you place a child
in it.
. Do not leave an unsecured child
restraint system in your vehicle.
Unsecured child restraint sys-
tems can be thrown around in-
side of the vehicle in a sudden
stop, turn or accident; they can
strike and injure vehicle occu-
pants as well as result in serious
injuries or death to the child.
CAUTION
When you install a child restraint
system, follow the manufacturer ’s
instructions supplied with it. After
installing the child restraint system,
check to ensure that it is held
securely in position. If it is not held
tight and secure, the danger of your
1-32
Page 77 of 634
Seat, seatbelt and SRS airbags/*SRS airbag (Supplemental Restraint System airbag)
have outgrown child restraint de-
vices) sit in the REAR seat properly
restrained at all times in a child
restraint device or in a seatbelt,
whichever is appropriate for the
child’s age, height and weight.
Secure ALL types of child restraint
devices (including forward facing
child seats) in the REAR seats at
all times.
According to accident statistics,
children are safer when properly
restrained in the rear seating posi-
tions than in the front seating posi-
tions.
For instructions and precautions
concerning the child restraint sys-
tem, refer to “Child restraint sys-
tems ”F 1-29.
WARNING
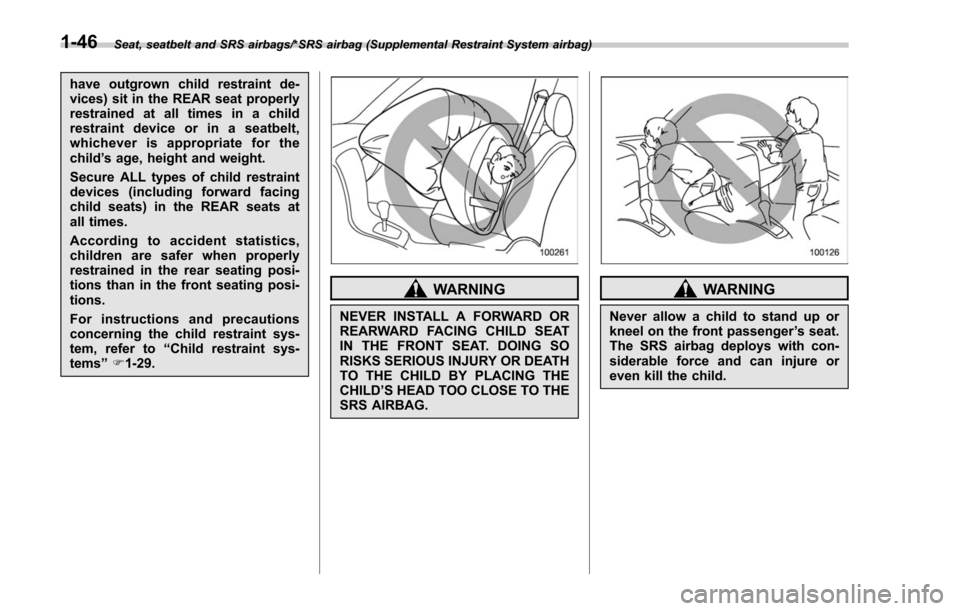
NEVER INSTALL A FORWARD OR
REARWARD FACING CHILD SEAT
IN THE FRONT SEAT. DOING SO
RISKS SERIOUS INJURY OR DEATH
TO THE CHILD BY PLACING THE
CHILD ’S HEAD TOO CLOSE TO THE
SRS AIRBAG.
WARNING
Never allow a child to stand up or
kneel on the front passenger ’s seat.
The SRS airbag deploys with con-
siderable force and can injure or
even kill the child.
1-46
Page 145 of 634
Keys and doors/Rear gate
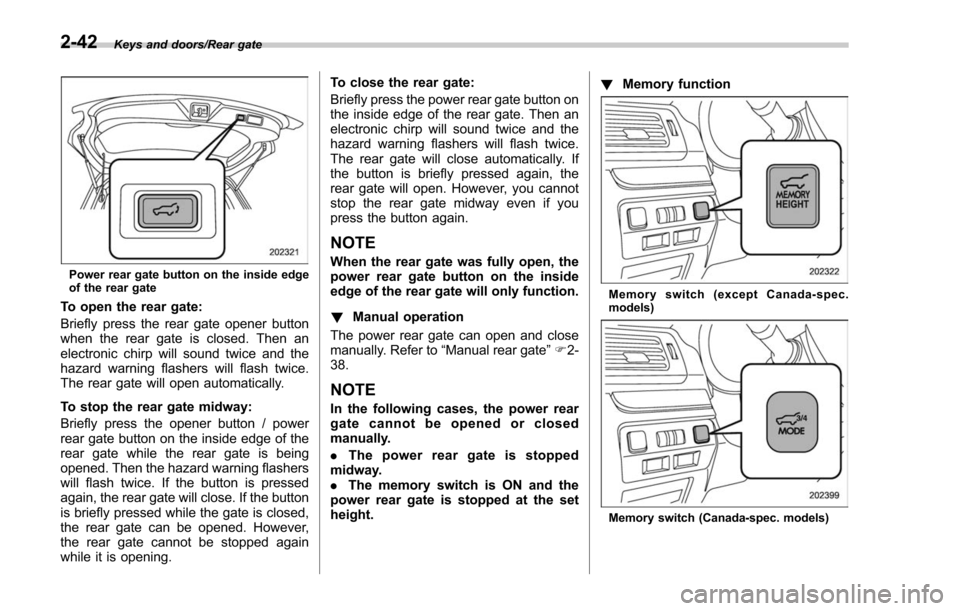
Power rear gate button on the inside edge
of the rear gate
To open the rear gate:
Briefly press the rear gate opener button
when the rear gate is closed. Then an
electronic chirp will sound twice and the
hazard warning flashers will flash twice.
The rear gate will open automatically.
To stop the rear gate midway:
Briefly press the opener button / power
rear gate button on the inside edge of the
rear gate while the rear gate is being
opened. Then the hazard warning flashers
will flash twice. If the button is pressed
again, the rear gate will close. If the button
is briefly pressed while the gate is closed,
the rear gate can be opened. However,
the rear gate cannot be stopped again
while it is opening.To close the rear gate:
Briefly press the power rear gate button on
the inside edge of the rear gate. Then an
electronic chirp will sound twice and the
hazard warning flashers will flash twice.
The rear gate will close automatically. If
the button is briefly pressed again, the
rear gate will open. However, you cannot
stop the rear gate midway even if you
press the button again.
NOTE
When the rear gate was fully open, the
power rear gate button on the inside
edge of the rear gate will only function.
!
Manual operation
The power rear gate can open and close
manually. Refer to “Manual rear gate”F 2-
38.
NOTE
In the following cases, the power rear
gate cannot be opened or closed
manually.
. The power rear gate is stopped
midway.
. The memory switch is ON and the
power rear gate is stopped at the set
height. !
Memory function
Memory switch (except Canada-spec.
models)
Memory switch (Canada-spec. models)
2-42
Page 146 of 634
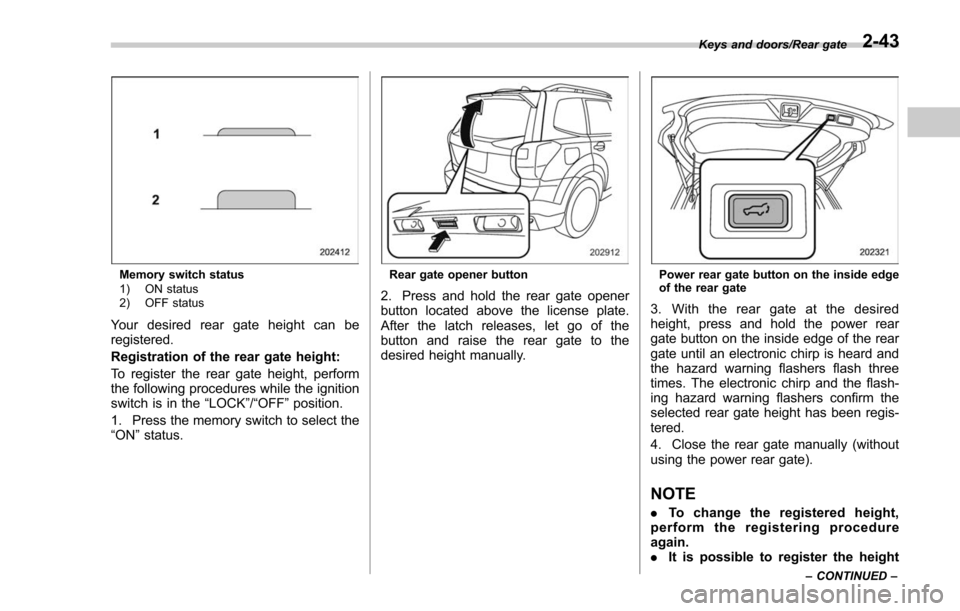
Memory switch status
1) ON status
2) OFF status
Your desired rear gate height can be
registered.
Registration of the rear gate height:
To register the rear gate height, perform
the following procedures while the ignition
switch is in the“LOCK”/“OFF ”position.
1. Press the memory switch to select the
“ON ”status.
Rear gate opener button
2. Press and hold the rear gate opener
button located above the license plate.
After the latch releases, let go of the
button and raise the rear gate to the
desired height manually.
Power rear gate button on the inside edge
of the rear gate
3. With the rear gate at the desired
height, press and hold the power rear
gate button on the inside edge of the rear
gate until an electronic chirp is heard and
the hazard warning flashers flash three
times. The electronic chirp and the flash-
ing hazard warning flashers confirm the
selected rear gate height has been regis-
tered.
4. Close the rear gate manually (without
using the power rear gate).
NOTE
. To change the registered height,
perform the registering procedure
again.
. It is possible to register the height
Keys and doors/Rear gate
–CONTINUED –2-43
Page 147 of 634

Keys and doors/Rear gate
from approximately 12 in (30 cm) or
more from the completely closed posi-
tion.
.Before closing the rear gate in step
4, it is possible to register the height
many times through step 3. Therefore,
the registered height can easily be fine-
tuned.
Retrieval of the rear gate height:
To open the rear gate and stop it at the
registered height, perform the following
procedure.
1. Press the memory switch to select the
ON status.
2. Press and hold any of the power rear
gate switches.
Even if any of the power rear gate
switches are pressed and held while the
memory switch is in the OFF status, you
can stop it at the registered height by
pressing the memory switch to select the
ON status before the rear gate reaches
the registered height.
NOTE
. The rear gate will open to the
position that is stored in the memory
function even if the rear gate is opened
by the reverse function.
. If the rear gate is opened manually
while the memory function is activated, you cannot close it by pressing the
power rear gate button on the rear gate.
To close it, press the other power rear
gate button or close it manually.
!
Reverse function
WARNING
.Do not let parts of your body be
caught intentionally to operate
the reverse function. If the re-
verse function does not operate
for some reason, this may lead to
serious injury or accidents.
. The reverse function may not
operate if foreign objects are
caught in the rear gate just
before it closes completely. Be
careful not to catch your fingers
and other body parts.
. The reverse function may not
operate depending on the object
shape and the manner in which it
was caught. Be careful not to
catch your fingers and other
body parts.
CAUTION
. If the reverse function is operated
3 times consecutively, automatic
opening and closing of the power
rear gate function will be can-
celed and the rear gate can be
opened and closed normally.
Whether the rear gate opens or
closes depends on the rear gate
height when automatic operation
is ceased. Be careful that the rear
gate does not hit anyone ’s head
or face, etc. and that fingers and
baggage, etc. are not caught in it.
. Take care not to damage the
touch sensors. Otherwise, the
reverse function may cease to
operate.
If, while opening or closing using power
rear gate, the rear gate catches persons
or baggage or hits an obstacle, an
electronic chirp will sound 3 times and
the rear gate will operate as follows.
When opening the rear gate: The rear
gate will automatically close.
When closing the rear gate: The rear
gate will automatically open.
2-44
Page 148 of 634

1) Touch sensor
Touch sensors are attached on the left
and right edges of the rear gate. If the
touch sensors detect fingers, baggage,
etc. while closing by the power rear gate
function, an electronic chirp will sounds 3
times and the rear gate will open auto-
matically.
NOTE
When the rear gate is opened using the
reverse function, it will be opened fully
or to the height registered in the
memory function.!
Rear gate drop prevention function
If, while fully opened via the power rear
gate function, the rear gate is lowered by
the weight of snow and such, an electronic
chirp will sound and the rear gate will
close automatically.
NOTE
. If there is snow on the rear gate,
only use the power rear gate function
after removing the snow.
. If you close the rear gate manually
just after the rear gate is fully opened
using the power rear gate function, the
rear gate drop prevention function will
operate to close the rear gate automa-
tically. In this case, this is not a
malfunction.
Moonroof (if equipped)
WARNING
Never let anyone ’shands,arms,
head or any objects protrude from
the moonroof. A person could be
seriously injured if any of the follow-
ing conditions occur.
. The vehicle stops suddenly.
. The vehicle turns sharply.
. The vehicle is involved in an
accident.
. Body parts protruding from the
vehicle are struck by outside
objects.
To avoid serious personal injury
caused by entrapment, always con-
form to the following instructions
without exception.
. Before closing the moonroof,
make sure that no one ’s hands,
arms, head or other objects will
be accidentally caught in the
moonroof.
. Always carry the key when you
leave the vehicle for safety rea-
sons and never allow an unat-
tended child to remain in the
Keys and doors/Moonroof
–CONTINUED –2-45
Page 253 of 634

Instruments and controls/Headlight beam leveler
Headlight beam leveler (if
equipped)
&Automatic headlight beam
leveler (models with LED
headlights)
The LED headlights generate more light
than conventional halogen headlights.
Therefore a driver of an oncoming vehicle
may experience too much glare if your
headlight beam height adjustment is high
when the vehicle is carrying a heavy load.
The automatic headlight beam leveler
adjusts the headlight beam height auto-
matically and optimally according to the
load being carried by the vehicle.
Fog light switch (if equipped)
1) Headlight switch
2) Fog light switch
The front fog lights will turn on when the
fog light switch is placed in the “”
position while the headlights are in the
following condition.
. while the headlight switch is in the “
”
position
. for models with the auto on/off head-
lights, while the headlight switch is in the
“AUTO ”position and the headlights turn
on automatically
To turn off the front fog lights, turn the
switch back down to the “
”position.
Front fog light indicator (type A)
Front fog light indicator (type B)
The indicator light on the combination
meter will illuminate when the front fog
lights are illuminated.
3-102