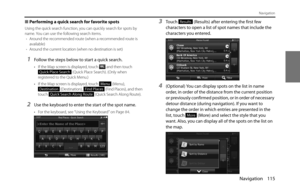
Page 145 of 334
Navigation 143
Navigation
Changing the Method for Searching for a Route
(Other Routes, etc.)
Change the Route settings to perform a new search for the route being
navigated using a different method. (See Page 161.) You can even
search again by comparing different routes. Follow the steps below to
use the initial settings screen.
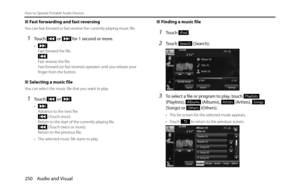
1If the Map screen is displayed, touch (Menu) to
return to the navigation menu.
2Touch (My Route) on the navigation menu.
3Touch (More).
4Touch (Route Alternatives).
5Using the current search method, three routes are
displayed in order of recommendation. Touch
(More Results) to search using a different
method. Also, if only a short distance is being navigated
or only a few search candidates are found, each search
method displays only one route.
Menu
My Route
More
Route Alternatives
More Results
Page 146 of 334

144 Navigation
Navigation
• (Fast):
Searches all roads for the quickest route following the speed
limits of the roads.
• (Short):
Searches for the shortest distance in all possible routes.
• (Green):
Searches for the route that conserves the most energy, taking
into account the merits of “Fast” and “Short”.
• (Easy):
Searches for a route that is easiest to drive, with few right and
left turns. Using this option, the program allows you to avoid
combinations of smaller roads and to take the expressway.
6Touch to return to the previous screen. The route is
searched again using the selected method. The new
recommended route is indicated by an orange line.
Changing the Road Categories used for the
Route Search
You can use the following method to search the current route again
using different road categories. This can also be changed in Settings.
(See Page 161.)
1Use the “Route Settings” function as follows.
• If the Map screen is displayed, touch and then touch
(Route Settings). (Only when registered to the
Quick Menu.)
• If the Map screen is displayed, touch (Menu),
(More), (Settings) and then touch
(Route Settings).
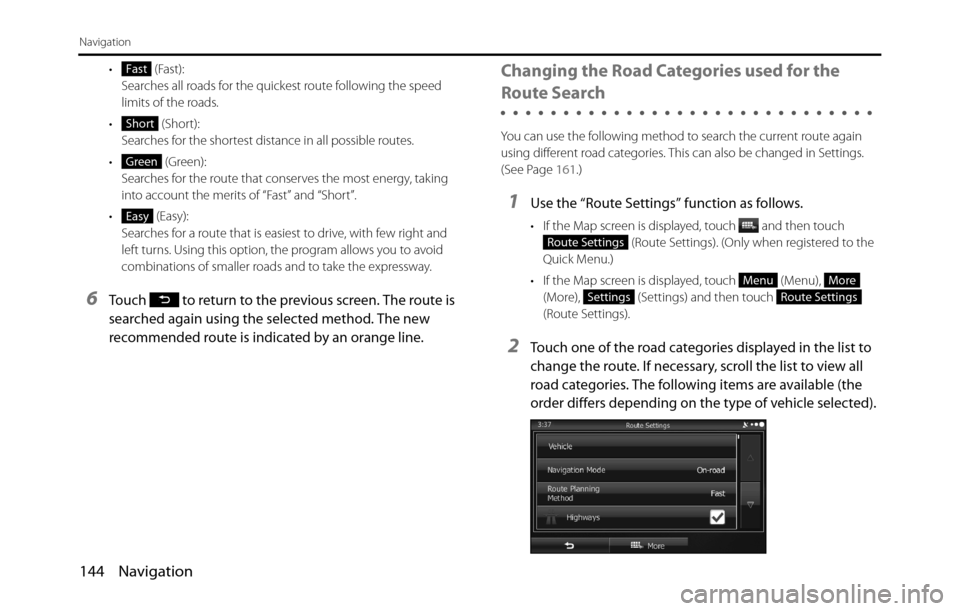
2Touch one of the road categories displayed in the list to
change the route. If necessary, scroll the list to view all
road categories. The following items are available (the
order differs depending on the type of vehicle selected).
Fast
Short
Green
Easy
Route Settings
MenuMore
SettingsRoute Settings
Page 147 of 334

Navigation 145
Navigation
• ( Vehicle):
Sets various factors to take into account when performing a
search, such as fuel consumption, vehicle model, fuel costs, and
maximum speeds on normal roads and expressways.
• (Navigation Mode):
You can change between On-road and Off-road.
Set to On-road to perform normal navigation, or set to Off-road
to navigate using the straightest possible route to the
destination.
• (Route Planning Method):
By changing the route search method, you can search for the
optimum route for a variety of situations and types of vehicle.
See the following items for more details.
• (Highways):
Select whether or not to use the expressway when creating the
route.
• (Period Charge):
Select whether or not to use toll roads (Period Charge) when
creating the route.
• (Per-use Toll):
Select whether or not to use toll roads (Per-use Toll) when
creating the route.• (Ferries):
Select whether or not to use ferries when creating the route.
(However, ferries might not always be selected for the route.)
However, information on temporary service ferries may not be
displayed on the map. There may be a fee for using the ferry.
•:
Select whether or not to use Carpool/HOV lanes when creating
the route.
• (Unpaved Roads):
Select whether or not to use unpaved roads when creating the
route.
• (Calculate Green Alternative):
Select whether or not to consider energy efficiency when
creating the route.
3Touch to set the changes. The route is searched
again, and the new recommended route is indicated by
an orange line.
Vehicle
Navigation Mode
Route Planning Method
Highways
Period Charge
Per-use Toll
Ferries
Carpool/HOV
Unpaved Roads
Calculate Green Alternative
Page 148 of 334
146 Navigation
Navigation
Saving a Position to the Destination List
The destination list is a list of frequently used destinations.
You can add any destination to this list. See “Selecting the
Destination from the Destination List” on Page 129 for more
details on searching for a route using a destination from the
destination list.
1Select a destination.
2When the map is displayed in full-screen mode with the
selected point at the center, touch (More).
3Touch (Add to Favorites).
4(Optional) You can use the keyboard to change the initial
display name in the destination list. Touch to enter
numbers or symbols.
• For the keyboard, see “Using the Keyboard” on Page 84.
5Touch (Next) to save the position as a new entry on
the destination list.
More
Add to Favorites
Next
Page 149 of 334
Navigation 147
Navigation
Displaying a Simulation of the Route
You can run a simulation of the route currently being
navigated. Follow the steps below to use the initial settings
screen.
1If the Map screen is displayed, touch (Menu) to
return to the navigation menu.
2Touch (My Route) on the navigation menu.
3Touch (More).
4Scroll down through the list, and then touch
(Simulate Navigation). The simulation
begins from the start point and works through the entire
route at the recommended speed.
5(Optional) You can use the following buttons during the
simulation (although the control buttons disappear after
a few seconds, you can touch the map to show them
again).
Menu
My Route
More
Simulate Navigation
Page 150 of 334
148 Navigation
Navigation
• : Returns to the previous route event (the previous change
in the route)
• : Pauses the simulation.
• : Goes to the next route event (the next change in the route)
• : Changes the speed of the simulation. You can select from
speeds of x4, x8, or x16. Touch again to return to normal speed.
6Touch (Back) to stop the simulation.Back
Page 151 of 334

Navigation 149
Navigation
Voice Control Navigation
By using the voice control system (voice input microphone
and button), you can set the destination by giving voice
commands. This enables you to use functions that are usually
inoperable while driving.
1By using the voice recognition button you can use voice
commands to operate the navigation. (See Page 284.)
2When using voice commands to operate the navigation,
a command list is displayed.
3Voice a command after the “beep”. From then on, you
can give voice commands that are displayed on the
command list to set the destination in the same manner.
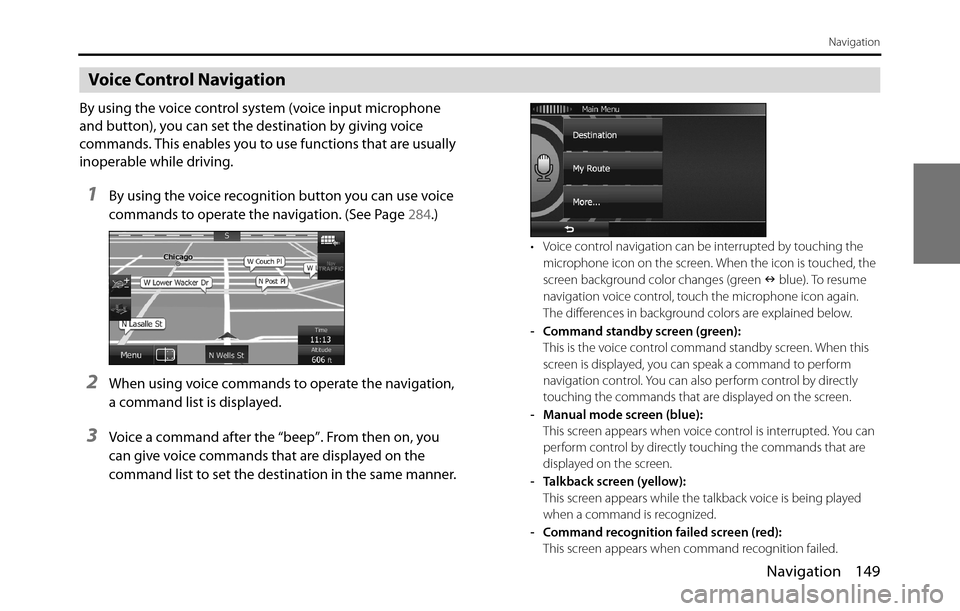
• Voice control navigation can be interrupted by touching the
microphone icon on the screen. When the icon is touched, the
screen background color changes (green Q blue). To resume
navigation voice control, touch the microphone icon again.
The differences in background colors are explained below.
- Command standby screen (green):
This is the voice control command standby screen. When this
screen is displayed, you can speak a command to perform
navigation control. You can also perform control by directly
touching the commands that are displayed on the screen.
- Manual mode screen (blue):
This screen appears when voice control is interrupted. You can
perform control by directly touching the commands that are
displayed on the screen.
- Talkback screen (yellow):
This screen appears while the talkback voice is being played
when a command is recognized.
- Command recognition failed screen (red):
This screen appears when command recognition failed.
Page 152 of 334

150 Navigation
Reference Data
The following pages explain the software's various features and menu screens.
Feature
Smart Zoom
Smart zoom offers a large improvement over standard zoom functions.
•While driving the route: When approaching an intersection, the
screen is enlarged and the viewpoint raised so that you can easily
see which way to drive at the next intersection. After navigating the
intersection, the screen is reduced and the angle lowered to check
the road in front.
•When driving without route navigation: The screen is enlarged as
you slow down and reduced as you speed up.
Switching between Day and Night Screens
For the Map screen and menu screen, the colors differ between day and
night.
•During daytime, the screen's colors are the same as those of a
printed map, and the menu is brighter.
•At night, the screen uses dark colors for large objects and reduces
the overall brightness of the screen.
The screen's color scheme differs between day and night. When Link to
Day/Night View on the Settings screen is set to “Headlight” (See Page
28.), day view or night view is selected based on whether the lights
(sidelights, tail lights, license plate light) are on or off, to make it easier to
view the screen. When “Time” is set (See Page 28.), the view changes at
the set time. Also, when set to “None” (See Page 29.), you can manually
switch to a day view or a night view screen at any time.