Page 9 of 32
 may be deactivated in the syste")
Audio mode
RDS is not available everywhere or on every
FM r a
dio s
tation.
Depending on the country and the unit, the
RDS and switching to alternative frequencies
(AF) may be deactivated in the system set-
tings ››› page 21.
TP Fucntion (traffic news stations) Fig. 4
TP function active. The TP function is an RDS radio data service.
› ›
›
page 6. If your unit has DAB ››› page 9,
you may also use the TP function without
having RDS ››› page 7.
Traffic news monitoring with the TP function
is only possible when a tuning in a traffic
news station. While traffic news monitoring is on (display:
TP ›››
Fig. 4), traffic announcements are
heard directly in the Audio mode.
Traffic news station tracking is not possible
on the AM 1)
frequency bands.
Some stations that do not broadcast their
own traffic news support the TP function by
broadcasting traffic reports by other stations
(EON). Traffic announcements broadcast by
the corresponding traffic news stations di-
rectly interrupt the current audio mode.
Switching the TP function on and off
● Press the TP function button.
If the TP function is activated in areas where
ther e i
s
no support for TP , the following no-
tice shall appear on the screen: NO TP.
● Press the TP function button again to dis-
c onnect
the
TP function again.
TP function activated
As long as the traffic news station tracking is
active and ready for functioning, the TP func-
tion b utt
on i
s shown ››› Fig. 4.
In Radio mode the station that is being lis-
tened to has to accept the TP function, or it
has to have a DAB or EON station available
that may accept the TP function If both re- quirements are fulfilled, traffic news station
track
ing is not possible.
If the traffic news station that is being lis-
tened to cannot continue getting reception, a
manual search shall have to be initiated with
arrow buttons and
› ››
p
age 6.
If
searching for a station using the arrow
keys, NO TP is displayed if the station set is
not currently compatible with TP.
In Media mode or as long as the volume may
be muted, a traffic news station is automati-
cally tuned in the background, provided the
signal of said station can be tuned in. This
operation may take some time depending on
the situation.
Incoming traffic announcement (INFO)
In active Audio mode, an incoming traffic an-
nouncement shall be directly played.
● If necessary, the radio moves to the traffic
news s
tation (EON) for the duration of the
traffic announcement.
● The Media mode will be paused and the
volume w
ill be adjusted to the preset level.
● The traffic announcement volume can be
modified with the v
olume control . This set-
ting shall also apply to subsequent an-
nouncements. »1)
This depends on the country and unit in question.
7
Page 10 of 32
 or deactivate
the TP function ( Deactivate).
Changing frequency band The selected frequency band (FM, AM
1)
or")
Audio mode
● Ther e i
s
a pop-up message to cancel the
traffic announcement ( Cancel) or deactivate
the TP function ( Deactivate).
Changing frequency band The selected frequency band (FM, AM
1)
or
DAB 1)
) i s
shown on the upper left display
area ››› Fig. 5.
● Briefly press the Radio mode on the RADIObutton of the unit to show the
FM ,
AM 1)
and
D AB 1)
›
››
Fig. 2 function buttons.
● Press one of the FM ,
AM or
D
AB function
b utt
on
s to change to the desired frequency
band.
● OR: Press the unit button several times
RADIO in order to switch between the various
f u
nction b
uttons at the bottom of the screen. Changing stations Fig. 5
Changing stations with the arrow but-
ton s
to the next available station. Fig. 6
Changing stations with the arrow but-
t on
s
is only possible with stored stations. ●
Briefly press the arrow buttons on the unit
or
on the screen.
Under the sel ect
ed settin
g for the search
mode (Buttons with arrows: ) to switch
between stations that can be set and those
that are already set ››› page 21. Tuning manually to a station frequency
● Select the desired frequency band
›››
page 6.
● Press the function button Frequency
b and.
● Turn the settin
g knob until the desired sta-
tion frequency (e.
g. 89.9 MHz ) is displayed
on the screen.
● OR: Press one of both dual arrow buttons
››
› Fig. 8 until the desired frequency is dis-
played. 1)
This depends on the country and unit in question.
8
Page 11 of 32

Audio mode
Storing stations on the station but-
t on
s Fig. 7
Stored FM frequency band station in
s t
ation b
utton 6. Fig. 8
Additional radio functions. When storing a station to a station button,
an
y
s
tation already stored to the same sta-
tion button in the same memory level will be
overwritten.
Assigning individual station buttons manual-
ly
● Select the frequency band ›››
page 8. ●
Select the s
tation ››› page 8.
● Change to the station buttons. To do this,
pres
s button
› ››
Fig. 9
● Pr e
ss and hold the chosen s
tation button
until you hear a tone.
● The station currently playing ( RADIO 21)
wi
ll then be stored to that station button.
The station button to which the current sta-
tion is shown highlighted on the screen
››› Fig. 7.
The three stations with the best reception are
automatically stored and can be tuned in on
the station list ››› Fig. 8.
You can update the list of stations by keeping
the RADIO unit button pressed or via the
f u
nction b
utton ››› Fig. 8.
Tuning in to stored stations Fig. 9
Radio mode display: change a station
u s
in
g the arrow buttons. Fig. 10
Stored stations. ●
Select the frequency band in which the sta-
tion sought i s
stored.
● Press the function button
› ›
› Fig. 9
.
● Briefly press ›››
Fig. 10 the station button to
which the desired station is stored.
Depending on the settings it is possible to
switch between stations of a frequency band
with the arrow buttons and
(Buttons
with arrows: › ›
›
page 21).
A stored station can only be played if it can
be received at your current location.
Digital radio mode (DAB, DAB+
and audio DMB)* Introduction Some units are equipped with an additional
D
AB r
a
dio receiver. »
9
Page 12 of 32

and the L Band")
Audio mode
The DAB radio receiver supports the DAB,
D AB+ and DMB-Audio br
o
adcasting stand-
ards.
In Europe, digital radio is transmitted via
Band III frequencies (174 MHz to 240 MHz)
and the L Band (1452 MHz to 1492 MHz).
The frequencies of the two bands are referred
to as “channels” and each has a channel
name e.g. 12 A .
Several DAB stations are combined into one
channel with the additional services availa-
ble in a “block”.
DAB is currently not available in all areas . In
areas without DAB, is displayed in DAB ra-
dio mode. The system and functions settings
allow in this case a change of FM station
››› page 21. In the system and functions
settings there is the configuration of other
settings for the tracking of stations and for
playing DAB notifications. Note
The radio stations are responsible for the
cont ent
of the information sent. Operation
Fig. 11
RADIO main menu: Selecting a memo-
ry l
evel and frequency band. Fig. 12
RADIO main menu: Station buttons
di s
p
layed. Starting DAB radio mode
● Press the RADIO unit button.
● Press the D
AB function button
››
›
Fig. 11 to
open the DAB Radio mode. After changing the DAB radio mode, the
avail
able frequency bands (FM, AM 1)
and
DAB 1)
) are initially displayed on the bottom
line of the screen ››› Fig. 11. After roughly 5
seconds, they are replaced by the “station
buttons” ››› Fig. 12.
The last DAB radio station tuned in ( RADIO
21) is displayed in the centre line of the screen and is played, if it can still be received
in the current location. The selected group at
that time ( DAB 5) is shown in the top line of
the screen ››› Fig. 12.
Changing the DAB Radio station and Autos-
tore
Functioning and operation are carried out
similarly to how it was described for the FM
and AM 1)
››› page 6 Radio mode.
Changing DAB frequency band channels by
hand
● Turn the adjustment knob.
The channel
selected is displayed in the cen-
tre of the screen. If a DAB group is broadcast
on the channel selected, its name will be dis-
played at the top right of the screen and the
first DAB station of that group will be played. 1)
This depends on the country and unit in question.
10
Page 13 of 32

Audio mode
Initiating station update Fig. 13
Additional DAB functions. Fig. 14
Active station update. The station update, the unit seeks available
s
t
ation gr
oups in the place where it is loca-
ted.
● Press the function button on the station
view
› ›
› Fig. 12
to visualise additional
available stations ››› Fig. 13.
● Press the function button
›
› ›
Fig. 13
, the
message from which the station update is ac-
tive is shown in the upper bar of the screen
››› Fig. 14. ●
The update c
an last a few seconds. The sta-
tion update stops when the indication dis-
appears.
The radio will be muted during station up-
date.
Media mode Introduction “M
edia sources” are audio sources contain-
in g audio fi
les on various different data me-
dia (e.g. CD, external MP3 player). These au-
dio files can be played by the respective data
media or by the radio input sockets.
Requirements for Media sources and
audio file
s Restrictions and notes
C
ont
amin
ation, exposure to high tempera-
tures and mechanical damage may render a
data medium unusable. Please observe the
manufacturer's instructions.
Please observe copyright laws.
The unit may be unable to read individual
tracks or the entire data device due to the da-
ta device configuration or the devices and
programs used for recording. Information about the best ways to create audio files and
data medi
a (compression rate, ID3 tag, etc.)
shall be found, for example, on the Internet.
Complex folder structures can also slow
down the reading of data.
Playlists only determine a certain playing or-
der. There are no files stored in a playlist. The
unit will not play a playlist if the files are not
stored on the data medium at the locations
referred to by the playlist (relative file paths).
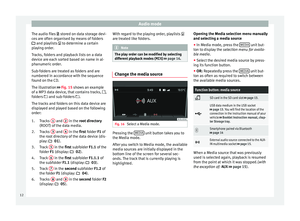
Playing order of files and folders Fig. 15
Example of the data device structure
w ith MP3 fi
l
es. » 11
Page 14 of 32

Audio mode
The audio files st
or ed on data storage devi-
ces are often organised by means of folders
and playlists to determine a certain
playing order.
Tracks, folders and playback lists on a data
device are each sorted based on name in al-
phanumeric order.
Sub-folders are treated as folders and are
numbered in accordance with the sequence
found on the CD.
The illustration ››› Fig. 15 shows an example
of a MP3 data device, that contains tracks, ,
folders and sub-folders .
The tracks and folders on this data device are
displayed and played based on the following
order:
Tracks 1 and
2 in the r
oot directory
(ROO T) of
the data media.
Tracks 3 and
4 in the fir
st folder F1 of
the r oot
directory of the data device (dis-
play: 01).
Track 5 in the fir
st subfolder F1.1 of the
f o
lder F1 (display: 02).
Track 6 in the fir
st subfolder F1.1.1 of
the s ubf
older F1.1 (display: 03).
Track 7 in the sec
ond subfolder F1.2 of
the f o
lder F1 (display: 04).
Tracks 8 and
9 in the sec
ond folder F2
(di s
play: 05).
1.
2.
3.
4.
5.
6. With regard to the playing order, playlists
are tre
ated like folders. Note
The play order can be modified by selecting
differ ent
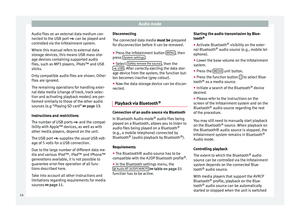
playback modes ( MIX) ››› page 16. Change the media source
Fig. 16
Select a Media mode. Pressing the
MEDIA unit button takes you to
the M edi
a mode.
Af
ter you switch to Media mode, the available
media sources are initially displayed in the
bottom line of the screen for several sec-
onds. The track that is currently playing is
highlighted. Opening the Media selection menu manually
and selecting a medi
a source
● In Media mode, press the MEDIA unit but-
t on t
o di
splay the selection menu for availa-
ble media.
● Select the desired media source by press-
ing its f
unction button.
● OR: Repeatedly press the MEDIA unit but-
t on a
s
often as required to switch between
the available media sources.
Function button: media source
SD card in the SD card slot
››› page 13.
USB data medium in the USB socket
››› page 13. You will find the location of the
connection in the instruction manual of your
vehicle ››› Booklet Instruction manual, chap-
ter Storage tray.
Smartphone paired via Bluetooth
››› page 14
External audio source connected to the AUX-
IN multimedia socket
››› page 15. When a Media source that was previously
u
sed i
s
selected again, playback is resumed
from the point at which it was stopped.( with
the exception of: AUX ››› page 15).
12
Page 15 of 32

Audio mode
RSD card playback Fig. 17
SD card slot. Track display. ●
Insert the SD card first with the recorded
s ide f
ac
ing up and with the label to the left in
the slot for SD cards ››› Fig. 1 2 .
● Press the MEDIA unit button.
Pl a
y
back of the media source last played is
resumed. To play an SD card, press the button.
In the f
o
l
der display, navigate with the func-
tion button and the adjust button
› ›
›
Fig. 1 5 . Press
to access a higher fold-
er l ev
el
and rotate the setting button to se-
lect the desired folder.
To change to the following or to the previous
title, press one of the function buttons or
.
K eep one of
the arr
ow buttons pressed to for-
ward or rewind playback.
During playback you have the following func-
tion buttons at your disposal on the lower edge of the screen. The active function but-
tons
are highlighted.
Function button: Meaning a)
Displaying the playback list. Here you can al-
so select a track directly with setting button
››› Fig. 1 5
››› Fig. 17.
Previous track or go back.
To begin playing. It can also be pressed to
pause playback. In this case the symbol
changes to
Next track or go forward.
Random play
››› page 16.
To repeat a folder or track
››› page 16. The symbol indicates that the track being
played is being repeated.
a) Valid for Media sources: TSD card, USB port and Bluetooth
Audio
You have the following options at your dis-
posal in the playback lists view (button):
Function button: Meaning
To change the main directory of the SD card.
To access a higher folder level. Another audio
source can be selected by means of the but-
ton in the folders view
››› page 12.
To begin playing. It can also be pressed to
pause playback.
Function button: Meaning
Random play
››› page 16.
To repeat a folder or track. The symbol in-
dicates that the track being played is being
repeated ››› page 16. Eject SD card
The connect
ed d
ata media must be prepared
for disconnection before it can be removed.
● Press the Infotainment button MENU , then
pre s
s System settings .
● Select Safely remove the source ,
then the SD Card . After c
orrectly ejecting
the data storage device from the system, the
function button becomes inactive (grey col-
our).
● The SD card can be ejected now.
External data storage device connec-
ted through the USB por
t Depending on the country and the unit, there
m
a
y
be one or several USB ports in the
vehicle.
The location of the USB ports depends on
the vehicle in question ››› Booklet Instruc-
tions manual, chapter Storage compartment. »
13
Page 16 of 32

Audio mode
Audio files on an external data medium con-
nect ed t
o the USB por
t can be played and
controlled via the Infotainment system.
Where this manual refers to external data
storage devices, this means USB mass stor-
age devices containing supported audio
files, such as MP3 players, iPods™ and USB
sticks.
Only compatible audio files are shown. Other
files are ignored.
The remaining operations for handling exter-
nal data media (change of track, track selec-
tion and activating playback modes) are per-
formed similarly to those of the other audio
sources (e.g “Playing SD card” ››› page 13.
Instructions and restrictions
The number of USB ports and the compat-
ibility with Apple™ devices, as well as with
other media players, depend on the unit.
The USB port supplies the usual USB volt-
age of 5 volts for a USB connection.
Due to the large number of different data me-
dia and various iPod™, iPad™ and iPhone™
generations available, it is not possible to
guarantee error-free operation of all func-
tions described here.
Take into account all other instructions and
limitations regarding requirements for media
sources ››› page 11. Disconnecting
The connected d
ata media must be prepared
for disconnection before it can be removed.
● Press the Infotainment button MENU , then
pr e
s
s System settings .
● Select Saf
ely
r
emove the source , then the
USB . After correctly ejecting the data stor-
ag e dev
ic
e from the system, the function but-
ton becomes inactive (grey colour).
● Now the data storage device can be discon-
nected.
Pla
yback via Bluetooth ® Connection of an audio source via Bluetooth
In Bluet
ooth Audio mode ®
audio fi l
es being
played on a Bluetooth, allows you to listen to
audio files being played on a Bluetooth ®
(e.g., a mobile telephone) connected by
Bluetooth ®
(audio playback by Bluetooth ®
).
Requirements
● The Bluetooth® audio source has to be
compatib
le with the A2DP Bluetooth profile ®
.
● In the Bluetooth settings menu, the
Audio BT (A2DP/AVRCP)
› ›
›
table on page 21
function has to be active. Starting the audio transmission by Blue-
tooth
®
● Activ
ate Bluetooth ®
vis
ibility on the exter-
nal Bluetooth ®
audio source (e.g., mobile tel-
ephone).
● Lower the base volume on the Infotainment
syst
em.
● Press the MEDIA unit button.
● Press the function button to select Blue-
t ooth ®
a s
a media source.
● Initiate a search of the Bluetooth ®
device
de
sired.
● Please refer to the instructions on the
scr
een of the Infotainment system and on the
Bluetooth ®
audio source regarding the rest
of the procedure.
You may still need to manually start playback
on the Bluetooth ®
source. When playback on
the Bluetooth® audio source is stopped, the
Infotainment system remains in Bluetooth ®
Audio mode.
Controlling playback
The extent to which the Bluetooth ®
audio
source can be controlled via the Infotainment
system depends on the connected Blue-
tooth ®
audio source.
With media players that support the AVRCP
Bluetooth ®
profile, playback on the Blue-
tooth ®
audio source can be automatically
started or stopped when the unit is switched
14