Page 65 of 104
.
3D
Map display in three dimensions (")
Navigation
View In the Navigation main menu, press the
V
iew function button.Function button: function
2D Map display in two dimensions (conven-
tional).
3D
Map display in three dimensions (bird's
eye view).
Buildings are also displayed in three di-
mensions. The places of interest and
well-known buildings are shown in detail
and in colour.
a)To display the destination on the map.
a)To display the route on the map.
Auto / Day /
NightTo change between day and night format.
Split screenPress to display the split screen
››› page 63.
POIDisplay points of interest on the map.
a)
This function button is only displayed with route guidance ac-
tivated.
Split screen Fig. 47
Split screen displayed. The split screen
››
›
Fig. 47 A may display any
of the inf
orm
ation described below:
● Press on the name of the split screen to se-
lect a di
splay option.
Function button: function
Audio: Indicates the selected audio source.
Compass: Displays a compass with the current travelling
direction and indicates the current position of the vehi-
cle (street name).
Manoeuvre: Displays a list of the next manoeuvres, POIs
or TMCs on the route and pressing them brings up addi-
tional information
Most frequent routesa) : Information on the user's most fre-
quent routes.
Function button: function
Position: current vehicle position in coordinates and GPS
status (satellite reception).
a) This function button is only shown when route guidance is
not active or when predictive route guidance is active.
Press the function button to close the split
sc r
een.
At any moment during navigation, pressing
inside the map will make a pop-up menu ap-
pear with the following functions:
Function button: function
Street name or coordinates: shows the details of the point
selected on the map.
Only when you press on an icon on the map:
POI: name of the point of interest (when only one
appears on the map).
Group of POIs: more points of interest (when you
press on the map on various POIs grouped togeth-
er).
Favourite: name of the favourite.
Home: Home address.
Start route guidance: starts guidance directly.
Add stopover destination: only when you have an active
route.
Search nearby: enters in the search menu, but only for the
area around the point selected on the map.» 63
Page 66 of 104

Map display
Fig. 48
Messages and function buttons on
the m ap di
s
play. Function buttons and messages on the map")
NavigationFunction button: function
Demo mode start (only when demo mode is active)
Map display
Fig. 48
Messages and function buttons on
the m ap di
s
play. Function buttons and messages on the map
di
s
p
lay.
To activate function buttons
and , press
function button .
Function button: function
Current altitude indicator.
To centre the vehicle position on the map.
To centre the destination on the map. This
function button is only displayed if either
Display destination on map
or Display route
on the map is selected ››› page 63.
Function button: function
To change the orientation of the map (north-
facing or direction of travel). This function is
only available in 2D mode.
View map scale. Turn the setup button or
move your fingers together/apart on the
touchscreen to change the scale of the map.
To select automatic scaling. If the function
is active, the symbol is displayed in blue.
Briefly zooms in on the map. After a few
seconds, it automatically returns to the last
selected scale.
It can mute or repeat the last announce-
ment, or can change the announcement vol-
ume.
Road signs
: Depending on the vehicle's equipment,
the road signs stored in the navigation data are dis-
played ››› page 67. Traffic reports and dynamic route
guid
anc
e (TRAFFIC) Fig. 49
Traffic reports The Infotainment system constantly receives
tr
affic
r
eports (TMC/TMCpro) in the back-
ground, provided a TMC traffic news station
can be received at the current location. The
station being listened to does not have to be
the traffic news station.
TMC traffic reports are displayed on the map
with symbols ››› page 65, Traffic reports on
map (selection) and are required for dynamic
route guidance ››› page 65, Dynamic route
guidance.
List of available traffic reports
● Press the Infotainment MENU button
› ›
›
Fig. 1 1 and then select the
Tr
affic con-
text.
64
Page 67 of 104

Navigation
Dynamic route guidance
In or der f
or dy
namic route guidance to func-
tion, Dynamic route must be activated in
the route options ››› page 67.
If during route guidance a traffic report is re-
ceived that affects the route being travelled,
an alternative route will be searched for if the
Infotainment system calculates that time can
be saved.
If it calculates that time will not be saved us-
ing the alternative route, it will continue on
the route with the traffic congestion. An an-
nouncement will be made in each case.
Shortly before arriving at the announced con-
gested traffic, it will be announced once
again.
Avoiding congestion by following the instruc-
tions of a traffic report does not always save
time as the alternate roads may be at a
standstill. The quality of the dynamic route
guidance depends on the information con-
tained in the traffic reports.
The remainder of the route to be travelled
may be manually excluded to cause a new
route calculation ››› page 60.
Traffic reports on map (selection)
Symbol: Meaning
: Traffic congestion
Symbol: Meaning
: Traffic jam
: Accident
: Slippery road surface (ice or snow)
: Slippery road surface
: Danger
: Road works
: Strong wind
: Road closed to traffic
During route guidance, traffic congestion that
doe
s
not
affect the route calculated is dis-
played in grey.
The extent of the traffic congestion along the
route calculated is shown by a red line.
Any incidents that affect the route calculated
and have caused the route to be recalculated
are displayed in orange.
The position of a symbol indicates the start
of the traffic congestion if it is clearly defined
in the traffic report. Predictive navigation
Fig. 50
Predictive navigation When you activate Predictive navigation, the
sy s
t
em detects and stores in the background
routes that are frequently followed, without
them being active destination routes. This
function has no navigation announcements
unless the user requires them by pressing
the right thumbwheel of the multifunction
steering wheel.
● On the main screen of the Navigation
menu, in the pop-up window
, press the
Frequent routes button. To display frequently
f o
l
lowed routes press the Show on map button
› ›
›
Fig. 50.
65
Page 68 of 104
 Importing vCards to the destination memory
● Insert the data storage device with the stor-
ed vC ar
ds or connect it to the Infotainment
s")
Navigation
Importing vCards (electronic business
c ar
d
s) Importing vCards to the destination memory
● Insert the data storage device with the stor-
ed vC ar
ds or connect it to the Infotainment
system ››› page 37.
● Press the SETTINGS function button in the
main Na
vigation menu.
● In the Navigation settings menu,
pres
s the Import destinations function button.
● Select the data carrier with the vCards
s av ed in the li
st.
● Press Import al
l vCards from this folder .
● Confirm the import notice with the OKfunction button.
The s
av
ed
vCards will now be in the destina-
tion memory ›››
page 60 and may be used for
navigation. Note
Only one address per vCard can be imported.
In the event an
y vCards have multiple ad-
dresses, only the main address will be impor-
ted. Importing Personal POI
Importing the Personal POI to a points of in-
ter
e
st destination memory
● Insert the data storage device with the stor-
ed Person
al POI or connect it to the Infotain-
ment system ››› page 37.
● Press the Infotainment MENU button
›› ›
Fig. 1 1 and then select the
Settings con-
text.
● In the Settings menu, pres
s the
Manage memory function button.
● Press U
pd
at
e my POIs and then press
U
pd
at e and
Ne
xt to import the Personal POIs.
● Confirm the import notification with the OK function button.
The s
t
or
ed Personal POI are now in the points
of interest destination memory ›››
page 62
and can be used for navigation purposes.
The stored Personal POI can be deleted in the
Navigation Settings menu
››› page 67. Navigation with images Fig. 51
Images main menu. Selecting an image and starting route guid-
anc
e
B e
ar in mind the requirements and formats of
the compatible images ››› page 37.
● Insert the data storage device with the stor-
ed image
s or connect it to the Infotainment
system.
● Press the Infotainment MENU button
› ›
›
Fig. 1 1 and then select the
Imag
e s con-
text.
● Press the SOURCE
› ›
›
Fig. 51 function button
and select the data storage device where the
images are stored.
● Select the desired image.
● If the image displayed was taken using GPS
localis
ation, the function button will ap-
pe ar
. Pr
ess to start guidance to a destination.
66
Page 69 of 104

Navigation
Road sign indicators The road sign indicators must be active in the
Navigation Setup menu ›››
page 67.
If road signs for the road being travelled are
stored in the navigation data, the system can
show them on the map display (e.g. a speed
restriction).
Please bear in mind how recent the naviga-
tion data is and the limitations of the system
››› page 56 !
Traffic sign recognition Some vehicles are also equipped with a cam-
er
a f
or tr
affic sign recognition. If traffic sign
recognition is installed in the vehicle and ac-
tivated, the recognised traffic signs and addi-
tional information are displayed in the map
view.
Read and take note of the information and in-
dications provided by the traffic sign recogni-
tion system in the vehicle ›››
Booklet Instruc-
tion Manual.
Route guidance in demo mode If demo mode is activated in the
Naviga-
tion Settings menu ››
›
page 67, an ad-
ditional pop-up window opens when you
start route guidance. ●
Pres
sing the Demo mode function button
s t
ar
ts a “virtual route guidance” to the desti-
nation you have entered.
● If you press the Normal function button, a
“r e
al
route guidance” starts.
The sequence of events and the operations in
virtual route guidance are similar to those in
real route guidance.
Virtual route guidance is repeated when you
reach the fictitious destination and always
starts again from the starting point if not
aborted beforehand.
If the starting point for demo mode has been
defined manually in the Navigation Set-
tings menu, virtual route guidance will start
from the position set.
A manually entered starting point is overwrit-
ten with the current vehicle location if the ve-
hicle moves off. Note
Disable demo mode after use, otherwise you
wi l
l be prompted to choose between virtual
and normal route guidance each time you
start route guidance. Navigation settings
Settin g
s ●
Press the SET
TINGS function button in the
main Na
vigation menu.
Function button: function
Route options: To make adjustments to route calculation.
Suggest 3 alternative routes: After starting route guid-
ance, 3 alternative routes are suggested ››› page 59.
Route: Select the route type.
Economical: The route is calculated by taking into
consideration economic factors.
Fast: The fastest route to the destination.
Short: shortest route to the destination, even if it
results in a longer travelling time.
Most frequent routes: Information on the user's most
frequent routes.
Dynamic route: Dynamic route guidance is activated
when a TMC is received ››› page 64.
Avoid motorways and highways: Motorways will be ex-
cluded from the calculation whenever possible.
Avoid ferries and motorail trains: Ferries and motorail
trains will not be considered in the calculation of the
route whenever possible.
Avoid toll roads: Toll roads will be excluded from the
calculation whenever possible.
Avoid tunnels: Tunnels will be excluded from the cal-
culation whenever possible.» 67
Page 70 of 104

NavigationFunction button: function
Avoid routes requiring toll stickers: Routes requiring toll
stickers will be excluded from the calculation when-
ever possible.
Show available toll stickersa) : To mark the available toll
stickers on the list ( Avoid routes requiring toll stickersmust be active).
Roads requiring toll stickers that have been marked
as having said toll sticker will be taken into account
in the calculation of the route.
Include trailer: Calculate the route and arrival time
for the vehicle with a trailer.
Map: To make adjustments to the visual display of the
map.
Show road signs: The road signs stored in the navi-
gation data for the road being travelled will be dis-
played during route guidance ››› page 67.
Lane guidance: During route guidance, when driving
and turning on multi-lane roads, an additional dis-
play is shown with lane guidance. This will only ap-
pear if there is information in the database for the
area being driven in.
Show favourites: The stored destinations are shown
on the map as favourites ().
Show POI
Select categories for POI: To select which point of in-
terest categories are displayed on the map
››› page 62.
Show brand logos for POIs: View of category logos
of the selected points of interest (e.g. view of pet-
rol station logos).
Function button: function
Manage memory: To modify saved destinations.
Sort contacts: To select the sequential order of the en-
tries in the phonebook that have (postal) addresses,
see also ››› page 60.
Define home address: To assign or edit a home address,
see also ››› page 62.
Delete my points of interest (POI): To delete the points of
interest stored in the destination memory ››› page 66.
Update my POIs: To update the stored points of interest
››› page 66.
Import destinations (SD/USB): To import electronic busi-
ness cards (vCards) into the destination memory
››› page 66.
Delete user data: To delete the stored destinations
(e.g., the Last destinations or the Destina-
tion memory ).
Navigation announcements: To make adjustments to naviga-
tion announcements.
Volume: To adjust the volume for driving recommen-
dations.
Entertainment fading (nav. announcements): Adjusting the
volume of the active audio source during navigation
instructions.
No voice guidance during call: No audible driving in-
structions will be given during a telephone conversa-
tion.
Note: My POIs: Audible announcement when nearing
a point of interest.
Fuel options: To make adjustments relating to fuel.
Function button: function
Select preferred fuel station: The selected petrol station
mark will be shown before other points of interest in
the search.
Fuel warning: The warning to refuel is active.
If the fuel level reaches the reserve level, the corre-
sponding warning is generated which permits the
search for petrol stations.
Version information: Information on the stored navigation
data.
Maximum speeds: Shows the speed limits, depending on
the road, for the current country.
Advanced settings: To make advanced adjustments to the
navigation.
Time display: displayed during route guidance.
Estimated time of arrival: The estimated time of arrival
at the final destination is displayed.
Duration: The estimated travelling time to the final
destination is displayed.
Status line: displayed during route guidance.
Destination: The distance calculated to final desti-
nation is displayed.
Next stopover: The calculated distance until next
stopover is displayed.
Note: National border crossed: Displays the speed lim-
its of the country in question when crossing the bor-
der.
Demo mode: When Demo mode is activated and
route guidance is started, virtual guidance to the en-
tered destination can be initiated ››› page 67. 68
Page 71 of 104

NavigationFunction button: function
Define demo mode starting point: if demo mode is acti-
vated, a fictitious starting point for virtual route
guidance can be defined when the vehicle is sta-
tionary.
Waypoint modeb) : To start Offroad navigation.
a) This function depends on the country.
b) Only available for the model: “Navi System Plus”.
Navigation in Offroad mode*
Introduction 3 Only
available for the model: Navi System Plus
O
ffroad* navigation is a function for offroad
driving that provides directions in “non-digi-
tised areas” at low speeds.
Non-digitised areas are areas about which
the system does not have information for the
streets or terrain. It does not detect streets,
buildings or natural limits such as mountains
or rivers, although they may be shown on the
map.
Offroad* navigation is not suitable for driving
on conventional roads as it does not detect
one-way streets, motorway entries or similar. Offroad Navigation Menu 3 Only available for the model: Navi System Plus
Fig. 52
Offroad Navigation Menu start Press the
SETTINGS function button in the
m ain Nav
igation menu.
● In the menu, press the Way
point mode
function button.
● The Offroad Navigation menu opens
›››
Fig. 52.
Function buttons in the Offroad Navigation
menu
Function button: function
RECORD: Initiates the plotting of an Offroad tour.
MEMORY: Opens a list allowing the selection of a stored
Offroad tour.
EXIT: Ends Offroad navigation. Recording an Offroad tour
3 Only available for the model: Navi System Plus
Fig. 53
Recording an Offroad tour An Offroad tour is formed by a series of stor-
ed wa
ypoin
t
s.
Starting recording
● In the Offroad Navigation menu, in the pop-
up window pr
ess the RECORD pop-up button.
● In the pop-up window, the user is able to
p lot
the t
our with a given destination or start
plotting the route without giving a final desti-
nation.
● Starts plotting the route.
The offroa
d markers can be recorded by indi-
cating a manual waypoint. »
69
Page 72 of 104

Navigation
● In the O ffr
o
ad Navigation menu, press the
ADD WAYPOINT function button. The tour way-
points defined m
anual
ly are shown on the
map by a marker.
Ending recording
● Press the STOP RE
CORDING function button in
the m ain O
ffr
oad Navigation menu.
Managing stored Offroad tours 3 Only
available for the model: Navi System Plus Fig. 54
Offroad Navigation menu, stored
t our
s ●
Press the MEMORY function button in the
O ffr
o
ad Navigation menu.
● A list of stored Offroad tours opens, if there
are any
.
When a tour is selected, the following icons
will appear ››› Fig. 54: Export the tour to an SD card.
Edit the n
ame of the tour.
Delete the tour.
Load tour
Function button: function
IMPORT: allows the import of an Offroad route in “.GPX”
format. Loading an Offroad tour
When the Offr
o
ad tour is selected, press Play
and the selected tour will be loaded onto
the Navigation system.
Creating an Offroad tour 3 Only
available for the model: Navi System Plus Fig. 55
Offroad route guidance mode
Start route guidance
● Loads the stored Offroad tour.
● Starting off in a stored route is not detected
b y
the sy
stem automatically.
Setup
Function button: function
Invert: Reverses the direction of the stored Offroad tour.
Next point: Starts the Offroad tour from the nearest point.
Start: Starts the complete Offroad tour. When route guidance starts, the system
sw
itc
hes to the map view.
Stopping route guidance ● Press the Options button on the screen and
then pr e
s
s Stop .
End w a
y
point navigation
● Press the EXIT function button in the Off-
r o
a
d Navigation menu. WARNING
Terrain features are disregarded during route
guidanc e Driv
e slowly and following the in-
structions in order to perform the manoeuvre
as far as possible! 70
 1
1 2
2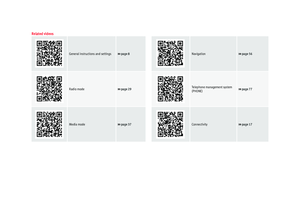 3
3 4
4 5
5 6
6 7
7 8
8 9
9 10
10 11
11 12
12 13
13 14
14 15
15 16
16 17
17 18
18 19
19 20
20 21
21 22
22 23
23 24
24 25
25 26
26 27
27 28
28 29
29 30
30 31
31 32
32 33
33 34
34 35
35 36
36 37
37 38
38 39
39 40
40 41
41 42
42 43
43 44
44 45
45 46
46 47
47 48
48 49
49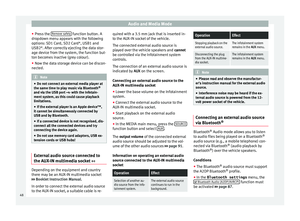 50
50 51
51 52
52 53
53 54
54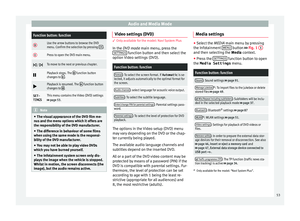 55
55 56
56 57
57 58
58 59
59 60
60 61
61 62
62 63
63 64
64 65
65 66
66 67
67 68
68 69
69 70
70 71
71 72
72 73
73 74
74 75
75 76
76 77
77 78
78 79
79 80
80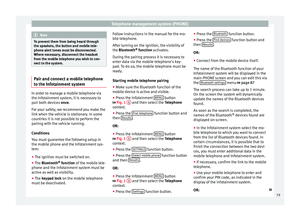 81
81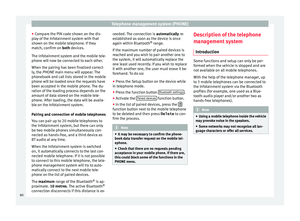 82
82 83
83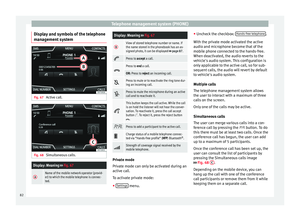 84
84 85
85 86
86 87
87 88
88 89
89 90
90 91
91 92
92 93
93 94
94 95
95 96
96 97
97 98
98 99
99 100
100 101
101 102
102 103
103