Page 9 of 104

Introduction
Introduction Saf ety
in
structions relating to the In-
fotainment system Travelling on today's roads requires the driv-
er's f
u
ll attention at all times.
Only operate the radio and its various func-
tions when the traffic situation really permits
this. WARNING
● Bef or
e starting the trip, you should famili-
arise yourself with the different radio func-
tions.
● High audio volume may represent a danger
to y
ou and to others.
● Adjust the volume in a way that you can
distin
guish surrounding noise, for example,
horns and sirens, etc.
● Changes to the Infotainment system set-
tings
should be made when the car is stop-
ped, or by a passenger. WARNING
Distracting the driver in any way can lead to
an acc ident
and cause injuries. Operating the
Infotainment system can distract your atten-
tion from the traffic.
● Always drive carefully and responsibly. ●
Select
volume settings that allow you to
easily hear signals from outside the vehicle
at all times (e.g. emergency services sirens
and horns).
● Hearing may be impaired if using too high a
volume settin
g, even if only for short periods
of time. WARNING
The volume level may suddenly change when
y ou sw it
ch audio source or connect a new au-
dio source.
● Lower the base volume before connecting
or switc
hing audio sources. WARNING
The driving recommendations and traffic indi-
cation s
shown on the navigation system may
differ from the current traffic situation.
● Traffic signs and traffic regulations have
priority ov
er the recommendations and dis-
plays provided by the navigation system.
● Adjust your vehicle speed and driving style
to suit
visibility, weather, road and traffic
conditions. WARNING
Connecting, inserting or removing a data me-
dium whil e driv
ing can distract your attention
from the traffic and cause an accident. WARNING
Connecting leads for external devices may
ob s
truct the driver.
● Arrange the connecting leads so that they
do not ob
struct the driver. WARNING
External devices that are loose or not proper-
ly sec ur
ed could move around the passenger
compartment during a sudden driving or
braking manoeuvre or an accident and cause
damage or injury.
● Never place or fit external devices to the
doors, wind
screen, steering wheel, dash pan-
el, the backs of the seats, on top of or near
the area marked “AIRBAG” or between these
areas and the occupants. External devices
can cause serious injury in an accident, espe-
cially when the airbags inflate. WARNING
The armrest may obstruct the driver's arm
mov ement
s, which could cause an accident
and severe injuries.
● Always keep the armrest closed while the
vehicl
e is in motion. WARNING
Opening a CD or DVD player's housing can
le a
d to injuries from invisible laser radiation.
● Have CD or DVD players repaired only by a
qualified work
shop. » 7
Page 10 of 104

Introduction
CAUTION
The Infotainment system can be damaged by
the incorr ect
insertion of a data storage de-
vice or the insertion of an incompatible data
storage device.
● When inserting a data storage device, make
sure it
is correctly positioned ››› page 37.
● Applying force may irreparably damage the
memory c
ard slot locking mechanism.
● Only use compatible memory cards.
● When inserting and removing CDs and
DVDs, a
lways hold them at right angles to the
front of the CD/DVD drive without tilting so as
not to scratch them.
● If a CD or DVD is inserted while another is
alre
ady in the unit or being ejected, the DVD
drive may be irreparably damaged. Always
wait until the data medium is completely
ejected. CAUTION
Any foreign objects stuck to a data storage
devic e and non-r
ound media may damage the
CD or DVD player.
● Only clean, standard 12 cm CDs or DVDs
should be u
sed.
– Do not affix stickers or other items to the
data medium. Stickers may peel off and
damage the drive.
– Do not use printable data media. Printed
labels and coverings may peel off and
damage the CD/DVD drive. –
Do not in ser
t 8 cm single CDs or irregu-
larly shaped CDs or DVDs.
– Do not insert DVD-Plus discs, Dual Discs
or Flip Discs, as these are thicker than
normal CDs. CAUTION
The vehicle loudspeakers may be damaged if
the vo
lume is too high or the sound is distor-
ted. General instructions for use
R el
at
ed video Fig. 3
General instruc-
tions and settin
gs Introduction
If the setup is changed, this may change the
di
s
p
lay on the screen and in some cases, the
Infotainment system may behave in a manner
different to that described in this manual. Note
● Lightly pr e
ssing the buttons or briefly
pressing the touchscreen is sufficient to op-
erate the Infotainment system.
● Not all listed function buttons and func-
tions de
scribed may be available due to the
device software used in your market. The
equipment is not faulty if a function button is
missing from the screen.
● Due to country-specific legislation, certain
function
s may not be available on the screen
when the vehicle is travelling above a certain
speed.
● Using a mobile telephone in the vehicle
may
cause noise from the vehicle loudspeak-
ers.
● Restrictions on the use of devices using
Bluetooth ®
tec
hnology may apply in some
countries. For further information, contact the
local authorities.
● On some vehicles with ParkPilot, the vol-
ume of the audio sourc
e is automatically low-
ered when reverse gear is selected. You can
change settings for lowering the volume in
the Sound setup menu ››› page 91. Diagram of the menus
The Infotainment system touchscreen
› ›
›
Fig. 1 4 can be used to select the differ-
ent main menu
s.
8
Page 11 of 104

Introduction
Press the infotainment MENU button
›››
Fig. 1
1 to open the menu summary
››
› page 5.
The display of the touchscreen's main menu
››› Fig. 1 4 can be switched between “grid”
and “c ar
ou
sel” via the Settings menu
››› page 90.
Infotainment system rotary knobs and
button
s Fig. 4
Main menu Rotary/push knobs
The r
ot
ar
y knob ››› Fig. 1 3 is the volume
c ontr
o
l or the on/off button.
Infotainment buttons
The buttons on the unit are shown in this
manual with the word "Infotainment button"
and their function within a rectangle, for ex-
ample, MENU Infotainment button. The Infotainment buttons are used by
pre
s
s-
ing them or pressing and holding. Note
● There m a
y be more icons on the second
page, depending on the infotainment version.
In this case, to see the other icons press the
function button ››› Fig. 4 (arrow) or swipe your
finger horizontally across the screen. Switch on and Switch off
To manually switch the Infotainment system
on and off
, briefly
pr
ess the rotary knob
››› Fig. 1 3 .
When sw it
c
hing on, the system starts-up with
the last set volume, provided that this does
not exceed the preset maximum start-up vol-
ume ›››
page 91, Sound and volume set-
tings.
The unit will switch off automatically when
the key is removed from the ignition or when
the on/off button is pressed (depending on
the equipment fitted or the vehicle). If the In-
fotainment system is switched on again, it
will switch off automatically after approxi-
mately 30 minutes (switch-off delay). Note
● The Infot ainment
system is a part of the ve-
hicle. It cannot be used in any other vehicle. ●
If the b att
ery has been disconnected, the
ignition must be activated before switching
on the Infotainment system. Change base volume
Increasing or decreasing the volume or mut-
ing the sou
nd
Inc
reasing the volume : Turn the volume con-
trol clockwise or move the left thumbwheel
on the multifunction steering wheel upward
››› Booklet Instruction Manual.
Lowering the volume : Turn the volume con-
trol anti-clockwise or move the left thumb-
wheel on the multifunction steering wheel
downward ››› Booklet Instruction Manual.
Changes in volume are indicated by a volume
bar on the screen. The volume can be control-
led using the steering wheel controls. In this
case, the changes in volume are displayed on
the instrument panel by a volume bar.
It is possible to preset certain volume set-
tings and adjustments ››› page 91, Sound
and volume settings .
Muting the Infotainment system sound
● Turn the volume control anti-clock
wise
until it displays . »
9
Page 12 of 104

Introduction
Muting the Infotainment system sound stops
the medi a sour
c
e that is playing The screen
displays . Note
If the base volume has been considerably in-
cr e
ased to play a certain audio source, lower
the volume again before switching to another
audio source. Operation of the function buttons and
the ins
truction
s on the screenFig. 5
View of some of the function buttons
on the s c
r
een. Fig. 6
Sound setup menu The Infotainment system comes equipped
w ith a t
ouc
hscreen ››› page 4 4 .
A ctiv
e ar
eas of the screen that call up a cer-
tain function are called “function buttons”.
These buttons are operated by briefly press-
ing the screen or by pressing and holding.
The function buttons appear in the instruc-
tions with the label “function button” and a
button symbol inside a rectangle .
F u
nction b
uttons start functions or open sub-
menus. The currently selected menu is dis-
played in the title bar ››› Fig. 5 B of the sub-
menu s.
In activ
e (grey) function buttons cannot be se-
lected.
Increase or decrease the size of the images
displayed on the screen
The size of the navigation map image
››› page 56 and, for example, photos when viewing images
›››
page 37 can be enlarged
or reduced. To do so, enlarge or reduce the
image displayed by moving two fingers.
Overview of screen and function buttons
Display and function buttons: operation and ef-
fect
AThe title bar shows the selected menu and,
where applicable, other function buttons.
BPress it to open another menu.
C
The scroll bar is shown on the right and its
size depends on the entries in the list. Move
the bar on the screen by pressing lightly and
without lifting the finger, see ››› page 11,
Open list entries and search lists .
D
Movable cursor: Move the cursor around the
screen by pressing lightly and without lifting
the finger.
OR: To move the cursor to a particular posi-
tion, press that spot on the screen.
Fixed crosshair: Press the up, down, left and
right arrows to move the sound according to
preference. The cursor D
will move.
OR: Press the central button to centre the
stereo sound in the centre of the passenger
compartment
Press it on some lists to move up a level,
one by one.
10
Page 13 of 104

IntroductionDisplay and function buttons: operation and ef-
fect
BACK Press to return from the submenus one at a
time to the main menu or to undo the en-
tries made.
When pressed, a pop-up window opens (op-
tions window) which displays other setup
options.
/ Some functions or messages are accompa-
nied by a check box and are activated or
deactivated by pressing said check box.
OKPress to confirm an entry or a selection. ×
Press to close a pop-up window or an input
window.
/ Press them to change the setup adjustments
one at a time.
Move the slider around the screen by press-
ing it lightly and without lifting your finger. Open list entries and search lists
Fig. 7
Entries on a setup menu list. The entries on the lists can be activated by
pr
e
s
sing them on the screen directly.
Mark list entries using the setup button and
open them ● Turn the setup button to mark the entries
on the lis
t with a rectangle one by one and
continue searching the list in this manner.
● Press the setup butt
on to activate the
marked entry on the list.
Search lists (scrolling the screen)
The scroll bar is shown on the right and its
size depends on the entries in the list
››› Fig. 7 1 .
● Briefly press the sc
r
een above or below the
scroll marker. ●
OR: Place a fin
ger over the scroll marker
and without lifting it , move it around the
screen. Lift your finger off the screen when
you reach the desired position.
● OR: Place your finger in the centre of the
sc
reen and without lifting it , move it around
the screen. Lift your finger off the screen
when you reach the desired position.
Input masks with on-screen keypad Fig. 8
Input window with on-screen keypad. Input windows with on-screen keypad are
u
sed f
or f
unctions such as entering an entry
name, selecting a destination address or en-
tering a search term for searching long lists.
The function buttons listed below are not
available in all countries or for all topics.
Subsequent chapters only explain those
functions that differ from those in the screen
shown in the figure. »
11
Page 14 of 104

Introduction
The input line with cursor is located in the
t op b
ar of
the screen. All inputs are displayed
here.
Input windows for “free text input”
In the input masks for open text, you may en-
ter letters, numbers and special characters in
any combination.
Input windows for selecting a saved entry
(e.g. selection of a destination address)
It is only possible to select a sequence of let-
ters, numbers and special characters that
matches a stored entry.
Suggestions for matching destinations ap-
pear depending on the characters entered in
the input line ››› Fig. 8 4 . In the case of com-
pou nd n
ame
s, it is necessary to enter a
space.
If there are fewer than 99 selectable entries,
the number of remaining entries is displayed
after the input line 3 . Pressing this function
b utt
on di
splays these remaining entries in a
list.
Overview of the function buttons
Icon and function text: operation and effect
Letters
and dig-
itsPress them to copy them into the input line.
Icon and function text: operation and effect
1
Press to change the keypad to another lan-
guage. Keypad languages can be selected
from the menu system setup
››› page 90.
2Press to show symbols on the keypad.
3Displays the number and opens the list of
remaining selectable entries that match the
entered text.
4Scroll bar, the size of which depends on the
number of matching entries.
5
Hold and press to display a pop-up window
with the special characters based on said
letter. Press the desired character to enter it.
Some special characters can be written out
instead (e.g. “AE” for “Ä”).
Press to enter a space.
Press to delete characters in the input line
from right to left.
Press and hold to delete several characters.
BACK Press to close the input window.
Additional displays and display op-
tion
s The displays appearing on the screen may
v
ar y
depending on the settings, and may dif-
fer from those described here. The status bar on the screen can display, for
examp
le, the current time and outside tem-
perature.
All displays can be viewed only after com-
pletely restarting the Infotainment system.
Initial configuration wizard Fig. 9
Initial configuration wizard The initial configuration wizard will help you
t
o set
up
your Infotainment system the first
time you switch it on.
Every time you switch on the Infotainment
system, the initial setup screen will appear
››› Fig. 9 if any parameters have not been set
or if the NEVER function button has not been
pressed.
12
Page 15 of 104

IntroductionFunction
buttonFunction
CLOSE
Closes the Configuration Wizard, and the
main menu or last mode in which you
used the Infotainment system will ap-
pear. The next time you switch on the
system, the Configuration Wizard will
start up again.
NEVER
Disables the possibility of changing the
settings of the Infotainment system. If
you want to perform the initial system
setup, you must enter via
System set-
up and select Configuration Wiz-
ard ››› page 90.
STARTStarts up the Configuration Wizard.
APress to configure the time and date (if it
has a navigation system it will be config-
ured automatically with the GPS).
BPress to search and store to memory the
radio stations that have the best recep-
tion at that moment.
CPress to link your mobile telephone to
the Infotainment system.
Da)Press to select your home address using
your current position or by manually en-
tering an address.
Function
buttonFunction
PREVIOUS
NEXT
To go to the previous or next parameter
to set.
When a parameter has been set, the only
way to reset it is from the main menu,
clicking on it, and not using the Previ-
ous/Next buttons.
When setting any parameter, a confirma-
tion mark will appear on it
.
FINISH
Once one or more settings have been ap-
plied, click on this in the main menu of
the wizard to confirm and finalize the
settings.
If there are any parameters you have not
set, the next time you connect the Info-
tainment system, the Initial Configura-
tion Wizard will start up.
a) Only valid for Navi System and Navi System Plus.
Voice control
Operation Fig. 10
Voice control: main screen (model
di s
p
layed: Navi System) Many radio, media, telephone and navigation
f
u
nction
s may be performed through voice
commands.
The Infotainment system's voice control will
only be available for the language selected in
System setup ››› page 90.
Setup of voice control ››› page 16.
Start and stop the voice control
● To activate the voice control, briefly press
the button on the mu
lti-function steering
wheel .
● When you activate voice control, a tone will
be heard f
or the start of the dialogue and the
voice control main screen will be displayed, »
13
Page 16 of 104
. The spoken instructions will
guide you through the following “d")
Introduction
››› Fig. 10, (the m ain s
c reen will appear in the
format selected in Voice control settings
››› page 16). The spoken instructions will
guide you through the following “dialogue”.
● Pronounce the desired order and follow the
instruction
s of the “dialogue”. A function can
often be activated with different spoken com-
mands. If in doubt, try giving a command or
say Help.
● When an action is performed (e.g. calling a
contact), the
voice control automatically de-
activates and must be reactivated again
when needed. There are certain commands
after which the voice control does not end
and waits with What do you wish to do
now? .
● To finish voice control manually, either
pres
s and hold the button on the multi-
function steering wheel until the correspond-
ing confirmation signal is heard, or give two
quick presses on the button on the steer-
ing wheel, or press the function button in
the top right corner of the screen.
● Voice control can also be ended by giving
the fol
lowing orders: End Voice Control or
Cancel.
Help with voice control
Listening to Help when using voice control for
the first time is recommended.
● Switch on the speech control system .●
Give the Help
command in the language
established in the System setup , and fol-
low the dialogue instructions. The Help com-
mand can also be spoken followed by the in-
fotainment system function, for example,
“Help with the navigation”.
Interaction with the dialogue mode
Icons in the top left corner:
The system is expecting a command
from the user.
The system has recognised a command
and will act shortly.
The system is sending a spoken com-
mand and confirms the command given.
The system is in pause mode. (max. 3
minutes).Hide or show the voice control menu
››› Fig. 10.
Operation during the dialogue
While the infotainment system transmits a
spoken indication, the display will show the
symbol .
● The announcement can be stopped by
pres
sing the upper left icon on the screen or
the button on the steering wheel and
voice recognition for the user will resume.
/ IMPORTANT: The system will ONLY recognise
a command when the
symbol is displayed
as “active” on the display or touch screen.
If you make a mistake when giving a com-
mand or give an incomplete command, and it
has no effect, you can repeat the command.
The symbol remains active.
● Briefly press the button t
o repeat the
command.
Instructions for voice control
For optimum functioning of the voice control,
follow these instructions:
● Speak slowly and clearly, as far as possi-
ble.
The system will not recognise words that
are not pronounced clearly, or words and fig-
ures in which syllables are omitted.
● Telephone numbers must be given digit by
digit or in bloc
ks of numbers in ones, tens or
hundreds.
● Speak at a normal volume, without exag-
gerat
ed intonation or long pauses.
● Avoid noise from the exterior and nearby
(for ex
ample, conversations inside the vehi-
cle). Close all doors, windows and the sliding
roof.
● Do not aim the air from the diffusers at the
roof of
the passenger compartment.
● If you are driving very fast, speak a little
louder.
14
 1
1 2
2 3
3 4
4 5
5 6
6 7
7 8
8 9
9 10
10 11
11 12
12 13
13 14
14 15
15 16
16 17
17 18
18 19
19 20
20 21
21 22
22 23
23 24
24 25
25 26
26 27
27 28
28 29
29 30
30 31
31 32
32 33
33 34
34 35
35 36
36 37
37 38
38 39
39 40
40 41
41 42
42 43
43 44
44 45
45 46
46 47
47 48
48 49
49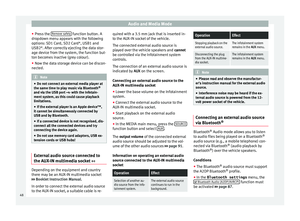 50
50 51
51 52
52 53
53 54
54 55
55 56
56 57
57 58
58 59
59 60
60 61
61 62
62 63
63 64
64 65
65 66
66 67
67 68
68 69
69 70
70 71
71 72
72 73
73 74
74 75
75 76
76 77
77 78
78 79
79 80
80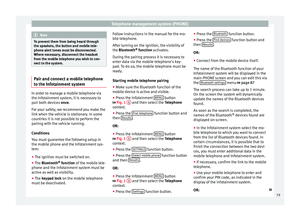 81
81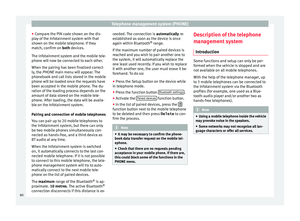 82
82 83
83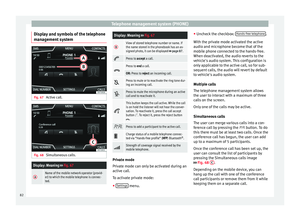 84
84 85
85 86
86 87
87 88
88 89
89 90
90 91
91 92
92 93
93 94
94 95
95 96
96 97
97 98
98 99
99 100
100 101
101 102
102 103
103