2017 PEUGEOT 5008 buttons
[x] Cancel search: buttonsPage 72 of 404
70
Reinitialising the electric
windows
Following reconnection of the battery, the
safety anti-pinch function must be reinitialised.
The safety anti-pinch function is not active
during these operations.
For each window:
-
b
ring the window down completely,
then bring it back up. It will go up by a
few centimetres each time. Per form the
operation again until the window is fully
closed,
-
c
ontinue to pull the switch for at least one
second after reaching this position, window
closed. In the event of contact during operation
of the windows, you must reverse the
movement of the window. To do this, press
the switch concerned.
When operating the passenger electric
window switches, the driver must ensure
that nothing is preventing correct closing
of the windows.
The driver must ensure that the
passengers use the electric windows
c o r r e c t l y.
Be particularly aware of children when
operating the windows.
Be aware of passengers or other persons
present when closing the windows using
the electronic key or the "
K
eyless Entry
and Starting" system.
Panoramic opening sunroof
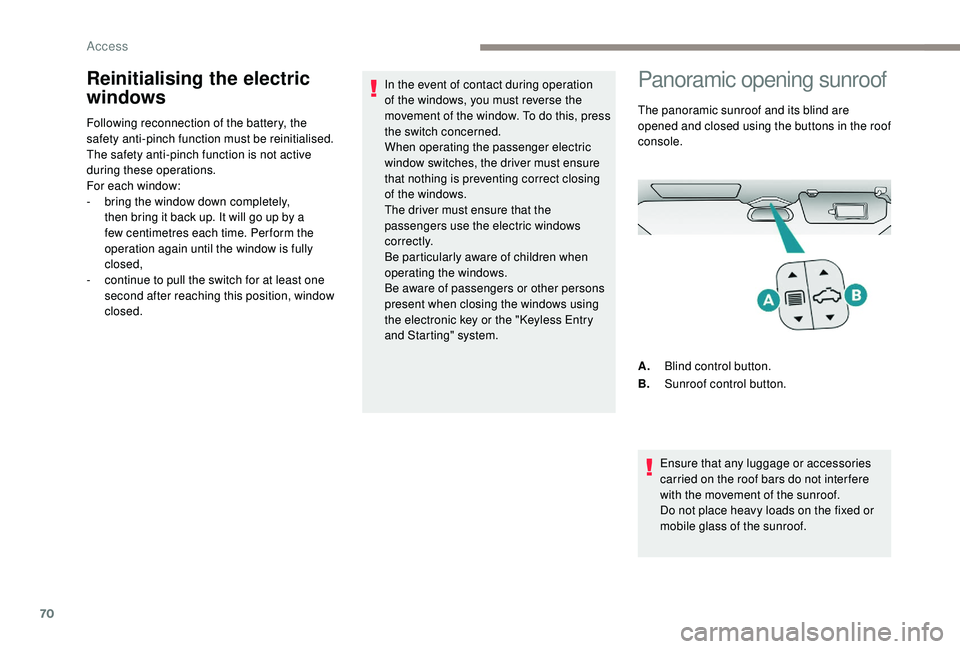
The panoramic sunroof and its blind are
opened and closed using the buttons in the roof
console.
A. Blind control button.
B. Sunroof control button.
Ensure that any luggage or accessories
carried on the roof bars do not inter fere
with the movement of the sunroof.
Do not place heavy loads on the fixed or
mobile glass of the sunroof.
Access
Page 73 of 404
71
Principles
Complete opening of the sunroof involves partly
raising the mobile glass, then sliding it over the
fixed glass.
Any intermediate position is possible.
Opening the roof involves opening the blind. By
contrast, the blind can remain open when the
roof is closed.
The control buttons for the sunroof and blind
can be used:
-
w
ith the ignition on, if the state of charge of
the battery is adequate,
-
w
ith the engine running,
-
i
n STOP mode with Stop & Start,
-
d
uring the 45 seconds after switching off
the ignition,
-
d
uring the 45 seconds after locking the
vehicle.
Before operating the sunroof or blind
control buttons, ensure that no object or
person might prevent the movement.
Operating the sunroof
Opening
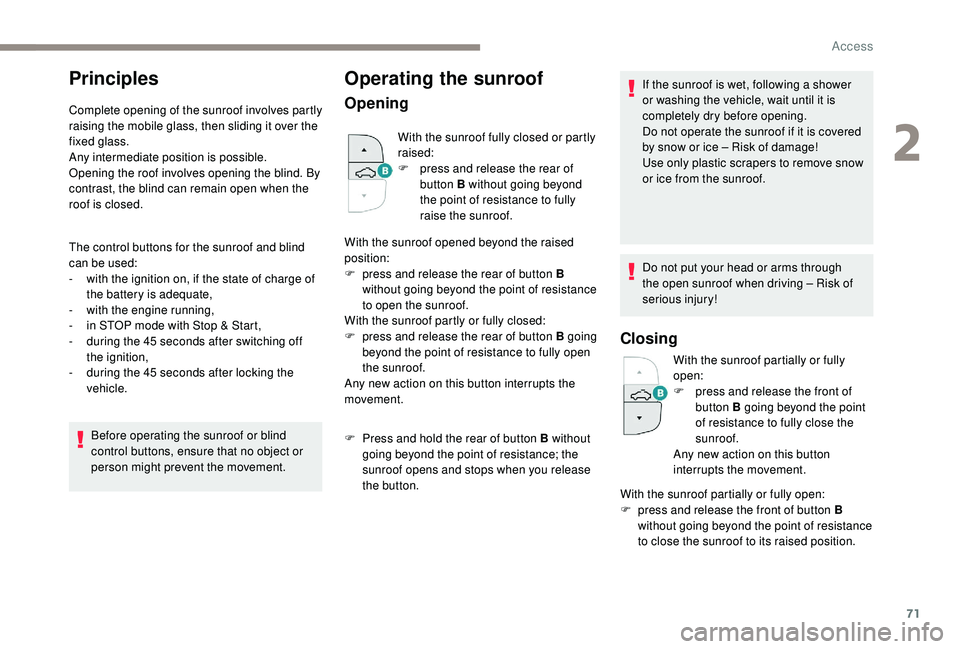
With the sunroof fully closed or partly
raised:
F
p
ress and release the rear of
button B without going beyond
the point of resistance to fully
raise the sunroof.
With the sunroof opened beyond the raised
position:
F
p
ress and release the rear of button B
without going beyond the point of resistance
to open the sunroof.
With the sunroof partly or fully closed:
F
p
ress and release the rear of button B going
beyond the point of resistance to fully open
the sunroof.
Any new action on this button interrupts the
movement.
F
P
ress and hold the rear of button B without
going beyond the point of resistance; the
sunroof opens and stops when you release
the button. If the sunroof is wet, following a shower
or washing the vehicle, wait until it is
completely dry before opening.
Do not operate the sunroof if it is covered
by snow or ice – Risk of damage!
Use only plastic scrapers to remove snow
or ice from the sunroof.
Do not put your head or arms through
the open sunroof when driving – Risk of
serious injury!
Closing
With the sunroof partially or fully
open:
F
p
ress and release the front of
button B going beyond the point
of resistance to fully close the
sunroof.
Any new action on this button
interrupts the movement.
With the sunroof partially or fully open:
F
p
ress and release the front of button B
without going beyond the point of resistance
to close the sunroof to its raised position.
2
Access
Page 83 of 404

81
Before moving the seat backwards,
ensure that there is nothing that might
prevent the full travel of the seat.
There is a risk of trapping or pinching
passengers if present in the rear seats
or jamming the seat if large objects are
placed on the floor behind the seat.
Storing driving positions
Associated with adjustments of the electrical
driver’s seat, this function allows two driving
positions to be memorised, to make these
adjustments easier if there are frequent driver
changes.
It takes account of the electric adjustments of
the seat and the door mirrors.
Storing a position
Using buttons M / 1 / 2
F S it in the driver’s seat.
F
S
witch on the ignition.
F
A
djust your seat and the door mirrors.
F
P
ress button M , then press button 1
or
2
within four seconds.
An audible signal indicates that the position has
been stored.
Storing a new position cancels the
previous position.
Recalling a stored position
Ignition on or engine running
F P ress button 1 or 2 to recall the
corresponding position.
An audible signal confirms that adjustment is
complete.
You can interrupt the current movement by
pressing button M , 1
or 2 or by using one
of the seat controls.
A stored position cannot be recalled while
driving.
Recalling stored positions is deactivated
45
seconds after switching off the ignition.
Heated seats
The function is active only with the engine
running.
Switching on
F Press the button corresponding to your seat.
F
E
ach press changes the level of heating; the
corresponding number of indicator lamps
come on:
•
1
indicator lamp = low.
•
2
indicator lamps = medium.
•
3
indicator lamps = high.
Switching off
F Press the button again until all the indicator lamps are off.
The state of the system is not kept in memory
when the ignition is switched off.
Do not use the function when the seat is
not occupied.
Reduce the intensity of the heating as
soon as possible.
When the seat and passenger
compartment have reached an adequate
temperature, you can stop the function;
reducing the consumption of electrical
current reduces fuel consumption.
3
Ease of use and comfort
Page 96 of 404
94
Heating and Ventilation
Air intake
The air circulating in the passenger
compartment is filtered and originates either
from the outside via the grille located at the
base of the windscreen or from the inside in air
recirculation mode.
Controls
The incoming air follows various routes
depending on the controls selected by
the driver, the front passenger and rear
passengers, according to the level of
equipment .
The temperature control enables you to obtain
the level of comfort required by mixing the air of
the various circuits.
The air distribution control enables you to
select the air vents used in the passenger
compartment by the combined use of the
associated buttons.
The air flow control enables you to increase or
reduce the speed of the ventilation fan.
Depending on your vehicle, the controls are
accessible in the "Air conditioning" menu of
the touch screen or are grouped together on
control panel on the centre console.
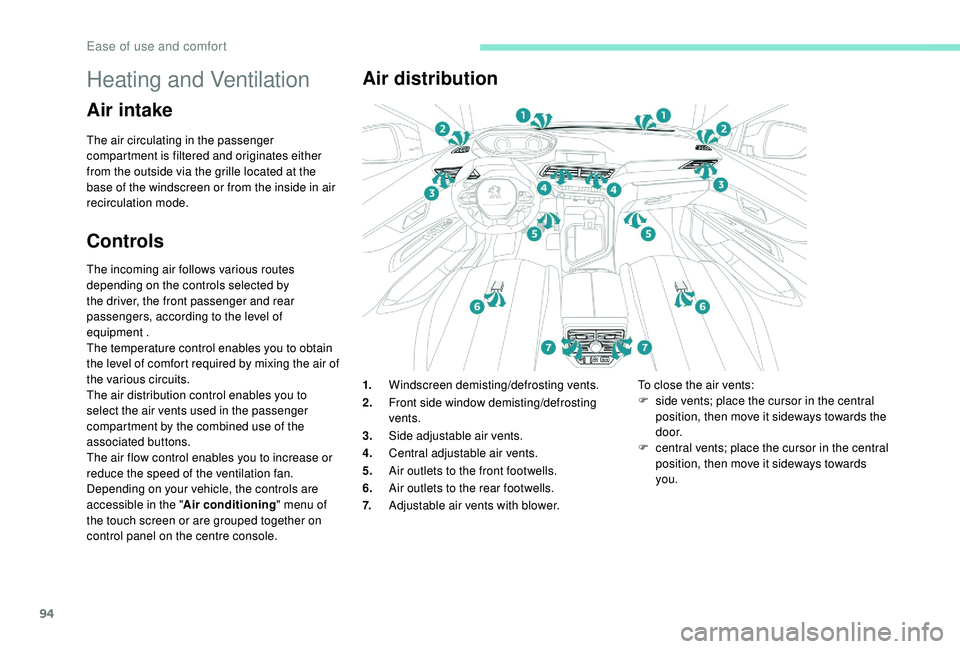
Air distribution
1. Windscreen demisting/defrosting vents.
2. Front side window demisting/defrosting
vents.
3. Side adjustable air vents.
4. Central adjustable air vents.
5. Air outlets to the front footwells.
6. Air outlets to the rear footwells.
7. Adjustable air vents with blower. To close the air vents:
F
s ide vents; place the cursor in the central
position, then move it sideways towards the
d o o r.
F
c
entral vents; place the cursor in the central
position, then move it sideways towards
you.
Ease of use and comfort
Page 99 of 404
97
Semi-automatic mono-
zone air conditioning
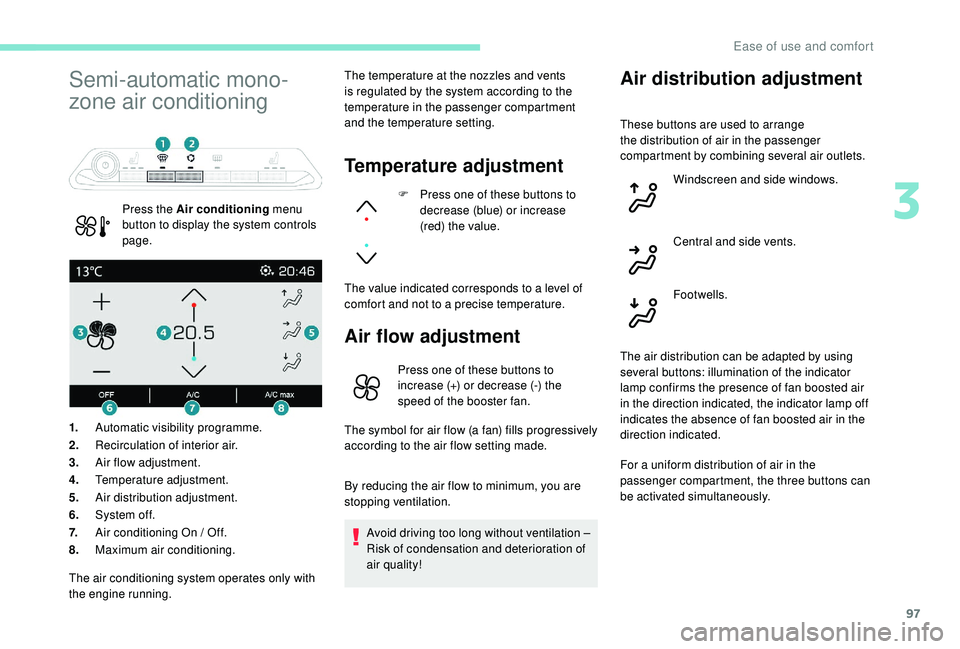
Press the Air conditioning menu
button to display the system controls
page. The temperature at the nozzles and vents
is regulated by the system according to the
temperature in the passenger compartment
and the temperature setting.
Temperature adjustment
F Press one of these buttons to
decrease (blue) or increase
(red) the value.
The value indicated corresponds to a level of
comfort and not to a precise temperature.
Air flow adjustment
1. Automatic visibility programme.
2. Recirculation of interior air.
3. Air flow adjustment.
4. Temperature adjustment.
5. Air distribution adjustment.
6. System of f.
7. Air conditioning On / Off.
8. Maximum air conditioning.
Air distribution adjustment
Press one of these buttons to
increase (+) or decrease (-) the
speed of the booster fan.
The symbol for air flow (a fan) fills progressively
according to the air flow setting made.
By reducing the air flow to minimum, you are
stopping ventilation.
Avoid driving too long without ventilation –
Risk of condensation and deterioration of
air quality!
The air conditioning system operates only with
the engine running. These buttons are used to arrange
the distribution of air in the passenger
compartment by combining several air outlets.
Windscreen and side windows.
Central and side vents.
Footwells.
The air distribution can be adapted by using
several buttons: illumination of the indicator
lamp confirms the presence of fan boosted air
in the direction indicated, the indicator lamp off
indicates the absence of fan boosted air in the
direction indicated.
For a uniform distribution of air in the
passenger compartment, the three buttons can
be activated simultaneously.
3
Ease of use and comfort
Page 101 of 404

99
Automatic dual-zone air
conditioning
Press the Air conditioning menu
button to display the system controls
page. 1.
Automatic visibility programme.
2. Recirculation of interior air.
3. Adjusting the temperature on driver's
side.
4. Adjusting the temperature on passenger's
side.
5. Adjusting the air distribution.
6. Adjusting the air flow.
7. System switch-off.
8. Air conditioning on/off.
9. Automatic comfort programme on/off.
10. Maximum air conditioning.
11. Access to the secondary page.
12 . Selection of settings for the automatic
comfort programme (Soft/Normal/Fast).
13. "AQS (Air Quality System)" function (with
pollution sensor).
14 . Mono-zone / Dual-zone.
15. "REAR" function (depending on version).
The air conditioning system operates with
the engine running, but the ventilation and its
controls are available with the ignition on.
Operation of the air conditioning and regulation
of temperature, air flow and air distribution in
the passenger compartment are automatic.
Temperature adjustment
Automatic comfort
programme
F Press this button to activate or deactivate the automatic mode
of the air conditioning system.
The driver and front passenger can each
choose their own temperature setting.
The value indicated corresponds to a level of
comfort and not to a precise temperature.
F
P
ress one of these buttons to
increase the value.
F
P
ress one of these buttons to
decrease the value.
It is recommended that you avoid a difference
of more than 3°C in the settings for left and
right.
When the indicator lamp in the button is on, the
air conditioning system operates automatically:
the system manages the temperature, air
flow and air distribution in the passenger
compartment in an optimum way according to
the comfort level you have selected.
3
Ease of use and comfort
Page 102 of 404
100
�$�8�7�2
�)�$�6�7
�$�8�7�2
�1�2�5�0�$�/
�6�2�)�7
�$�8�7�2
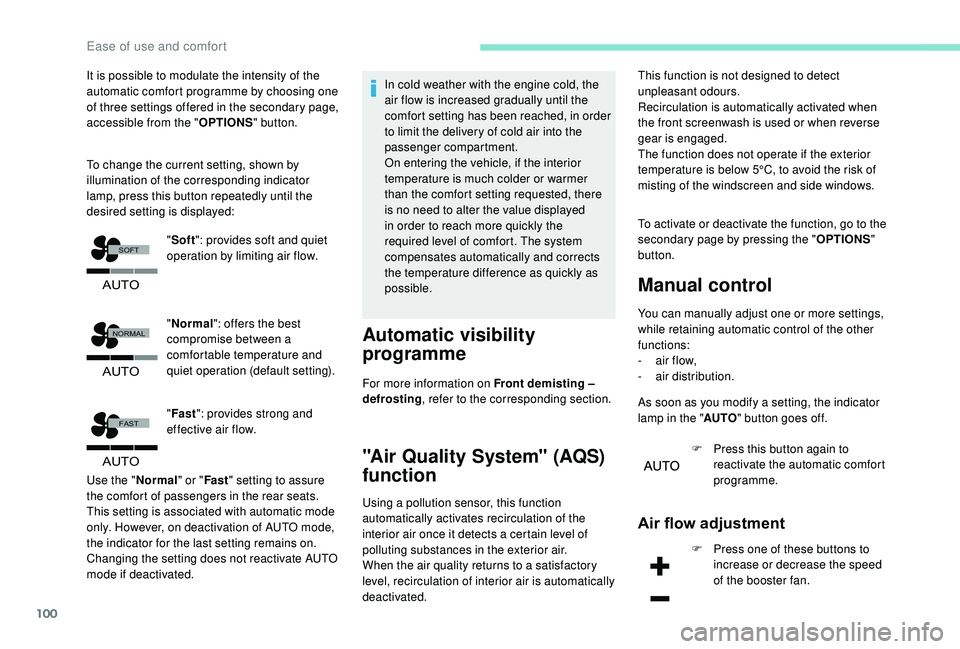
It is possible to modulate the intensity of the
automatic comfort programme by choosing one
of three settings offered in the secondary page,
accessible from the "OPTIONS" button.
To change the current setting, shown by
illumination of the corresponding indicator
lamp, press this button repeatedly until the
desired setting is displayed:
"Normal ": offers the best
compromise between a
comfortable temperature and
quiet operation (default setting).
" Fast ": provides strong and
effective air flow.
Use the " Normal" or "Fast" setting to assure
the comfort of passengers in the rear seats.
This setting is associated with automatic mode
only. However, on deactivation of AUTO mode,
the indicator for the last setting remains on.
Changing the setting does not reactivate AUTO
mode if deactivated. In cold weather with the engine cold, the
air flow is increased gradually until the
comfort setting has been reached, in order
to limit the delivery of cold air into the
passenger compartment.
On entering the vehicle, if the interior
temperature is much colder or warmer
than the comfort setting requested, there
is no need to alter the value displayed
in order to reach more quickly the
required level of comfort. The system
compensates automatically and corrects
the temperature difference as quickly as
possible.
Automatic visibility
programme
For more information on Front demisting –
defrosting
, refer to the corresponding section.
"Air Quality System" (AQS)
function
Using a pollution sensor, this function
automatically activates recirculation of the
interior air once it detects a certain level of
polluting substances in the exterior air.
When the air quality returns to a satisfactory
level, recirculation of interior air is automatically
deactivated. To activate or deactivate the function, go to the
secondary page by pressing the "
OPTIONS"
button.
Manual control
You can manually adjust one or more settings,
while retaining automatic control of the other
functions:
-
a
ir flow,
-
a
ir distribution.
As soon as you modify a setting, the indicator
lamp in the " AUTO" button goes off.
F
P
ress this button again to
reactivate the automatic comfort
programme.
Air flow adjustment
F Press one of these buttons to increase or decrease the speed
of the booster fan.
"
Soft ": provides soft and quiet
operation by limiting air flow. This function is not designed to detect
unpleasant odours.
Recirculation is automatically activated when
the front screenwash is used or when reverse
gear is engaged.
The function does not operate if the exterior
temperature is below 5°C, to avoid the risk of
misting of the windscreen and side windows.
Ease of use and comfort
Page 103 of 404
101
By reducing the air flow to minimum, you are
stopping ventilation.
"OFF " is displayed alongside the fan.
Avoid driving too long without ventilation –
Risk of condensation and deterioration of
air quality!
Air distribution adjustment
You can vary the distribution of air in the passenger
compartment using these three buttons.
Windscreen and side windows.
Central and side vents.
The air flow symbol (a fan) is filled in
progressively as the speed of the fan is
increased.
Footwells.
Each press on a button activates or deactivates
the function. The indicator lamp is on when the
button is activated. For a uniform distribution
of air in the passenger compartment, the three
buttons can be activated simultaneously. In AUTO mode, the indicator lamps in all three
buttons are off.
Air conditioning On / Off
The air conditioning is designed to operate
effectively in all seasons, with the windows
closed.
It enables you to:
-
l
ower the temperature, in summer,
-
i
ncrease the effectiveness of the demisting
in winter, above 3°C.
Switching on
F Press this button, its indicator lamp comes on.
The air conditioning does not operate
when the air flow adjustment is set to off.
Switching off
F Press this button again, its indicator lamp goes off.
Maximum air conditioning
This function allows faster cooling of the air in
the passenger compartment.
The system automatically adjusts the
temperature setting to the lowest possible, air
distribution towards the centre and outer vents,
air flow to maximum and activates recirculation
of interior air.
Switching off the air conditioning may result in
some discomfort (humidity, condensation). F
P
ress this button to activate
the function; its indicator lamp
comes on.
F
P
ress this button again to deactivate the
function and return to the previous settings;
its indicator lamp goes off.
Mono-zone / Dual-zone
The passenger temperature setting can be
linked to the driver's setting (mono-zone
function).
It is available in the secondary page by
pressing the " OPTIONS" button.
F
P
ress this button to activate
the " MONO " function; its " ON"
status is displayed.
The function is automatically deactivated if the
passenger uses their temperature adjustment
buttons (dual-zone function).
3
Ease of use and comfort