2017 MERCEDES-BENZ GLA SUV ground clearance
[x] Cancel search: ground clearancePage 94 of 369

You will find details on the tailgate opening
dimensions in the "Vehicle data" section
(Y page 358).
Opening automatically You can open the tailgate automatically using
the key or the handle on the tailgate.
X Press and hold the Fbutton on the key
until the tailgate opens.
or
X If the tailgate is unlocked, pull the tailgate
handle and release it again immediately.
Closing automatically Vehicles with the EASY-PACK tailgate:
you
can also close the tailgate automatically from
outside the vehicle. X
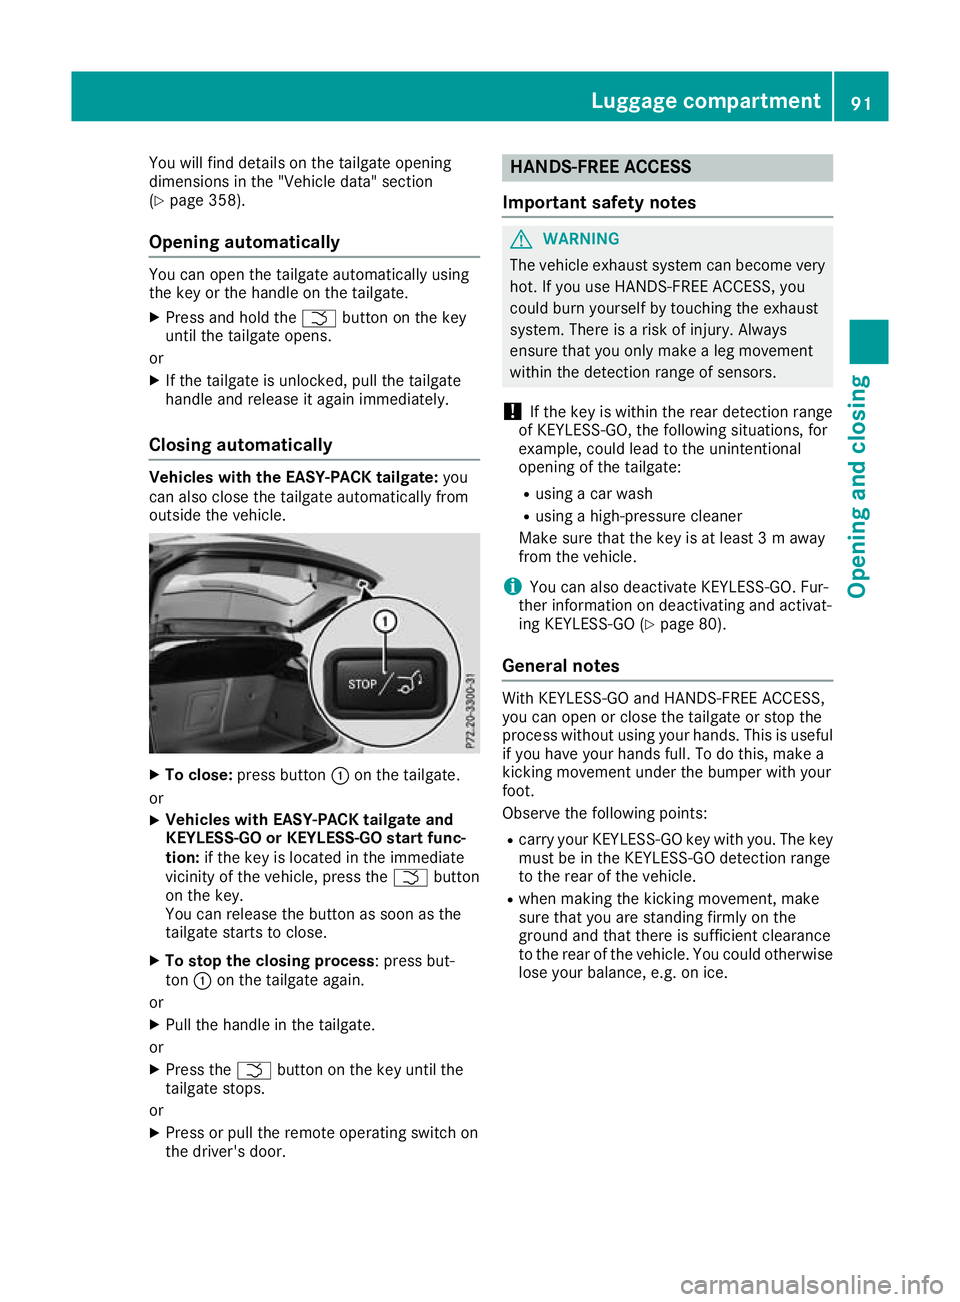
To close: press button :on the tailgate.
or X Vehicles with EASY-PACK tailgate and
KEYLESS-GO or KEYLESS-GO start func-
tion: if the key is located in the immediate
vicinity of the vehicle, press the Fbutton
on the key.
You can release the button as soon as the
tailgate starts to close.
X To stop the closing process : press but-
ton :on the tailgate again.
or
X Pull the handle in the tailgate.
or X Press the Fbutton on the key until the
tailgate stops.
or X Press or pull the remote operating switch on
the driver's door. HANDS-FREE ACCESS
Important safety notes G
WARNING
The vehicle exhaust system can become very
hot. If you use HANDS-FREE ACCESS, you
could burn yourself by touching the exhaust
system. There is a risk of injury. Always
ensure that you only make a leg movement
within the detection range of sensors.
! If the key is within the rear detection range
of KEYLESS-GO, the following situations, for
example, could lead to the unintentional
opening of the tailgate:
R using a car wash
R using a high-pressure cleaner
Make sure that the key is at least 3 m away
from the vehicle.
i You can also deactivate KEYLESS-GO. Fur-
ther information on deactivating and activat-
ing KEYLESS-GO (Y page 80).
General notes With KEYLESS-GO and HANDS-FREE ACCESS,
you can open or close the tailgate or stop the
process without using your hands. This is useful
if you have your hands full. To do this, make a
kicking movement under the bumper with your
foot.
Observe the following points:
R carry your KEYLESS-GO key with you. The key
must be in the KEYLESS-GO detection range
to the rear of the vehicle.
R when making the kicking movement, make
sure that you are standing firmly on the
ground and that there is sufficient clearance
to the rear of the vehicle. You could otherwise lose your balance, e.g. on ice. Luggage compartment
91Opening and closing Z
Page 98 of 369

Opening/closing from outside
Opening X
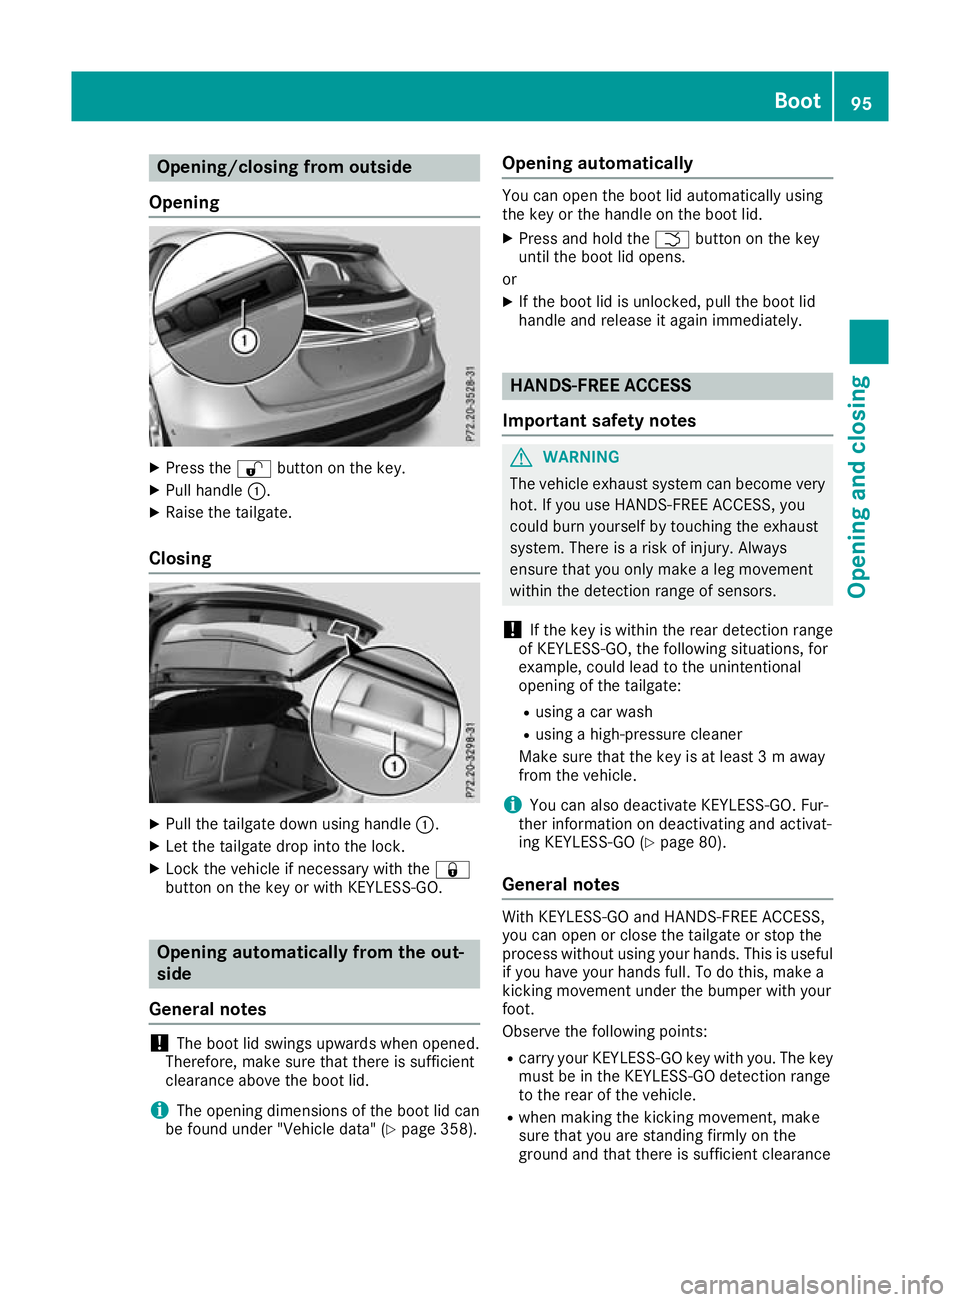
Press the %button on the key.
X Pull handle :.
X Raise the tailgate.
Closing X
Pull the tailgate down using handle :.
X Let the tailgate drop into the lock.
X Lock the vehicle if necessary with the &
button on the key or with KEYLESS-GO. Opening automatically from the out-
side
General notes !
The boot lid swings upwards when opened.
Therefore, make sure that there is sufficient
clearance above the boot lid.
i The opening dimensions of the boot lid can
be found under "Vehicle data" (Y page 358).Opening automatically You can open the boot lid automatically using
the key or the handle on the boot lid.
X Press and hold the Fbutton on the key
until the boot lid opens.
or X If the boot lid is unlocked, pull the boot lid
handle and release it again immediately. HANDS-FREE ACCESS
Important safety notes G
WARNING
The vehicle exhaust system can become very
hot. If you use HANDS-FREE ACCESS, you
could burn yourself by touching the exhaust
system. There is a risk of injury. Always
ensure that you only make a leg movement
within the detection range of sensors.
! If the key is within the rear detection range
of KEYLESS-GO, the following situations, for
example, could lead to the unintentional
opening of the tailgate:
R using a car wash
R using a high-pressure cleaner
Make sure that the key is at least 3 m away
from the vehicle.
i You can also deactivate KEYLESS-GO. Fur-
ther information on deactivating and activat-
ing KEYLESS-GO (Y page 80).
General notes With KEYLESS-GO and HANDS-FREE ACCESS,
you can open or close the tailgate or stop the
process without using your hands. This is useful
if you have your hands full. To do this, make a
kicking movement under the bumper with your
foot.
Observe the following points:
R carry your KEYLESS-GO key with you. The key
must be in the KEYLESS-GO detection range
to the rear of the vehicle.
R when making the kicking movement, make
sure that you are standing firmly on the
ground and that there is sufficient clearance Boot
95Opening and closing Z
Page 177 of 369

Observe the following notes:
R Stop the vehicle before driving off-road. If
necessary, activate the off-road program
(Y page 151).
R To avoid damaging the vehicle, make sure
there is always sufficient ground clearance.
R Make sure that items of luggage and loads are
stowed safely and are well secured
(Y page 293).
R Always keep the engine running and in gear
when driving on a downhill gradient. Activate
DSR (Y page 190).
R Drive slowly and evenly, if necessary at walk-
ing pace.
R Ensure that the wheels are in contact with the
ground at all times.
R Drive with extreme care on unknown off-road
routes where visibility is poor. For safety rea-
sons, get out of the vehicle first and survey
the off-road route.
R Check the depth of water before fording rivers
and streams.
R Watch out for obstacles.
R Take care when turning on an uphill or down-
hill slope or when driving across a slope. The
vehicle could otherwise tip over.
R Always keep the side windows and the pano-
rama sliding sunroof closed during the jour-
ney.
R Do not deviate from marked routes.
R Do not use the HOLD function when driving
off-road, on steep uphill or downhill gradients
or on slippery or loose surfaces. The HOLD
function cannot hold the vehicle on such sur- faces.
Checklist before off-road driving X
Engine oil level: check the engine oil and top
it up if necessary.
When driving on steep gradients, the oil level must be sufficiently high to ensure a correct
oil supply in the vehicle.
X Wheels and tyres: check the tyre tread
depth and tyre pressure.
X Check for damage and remove any foreign
objects, e.g. small stones, from the wheels/
tyres.
X Replace any missing valve caps. X
Replace dented or damaged wheels.
X Wheels: dented or bent wheels can lead to a
loss of tyre pressure and damage to the tyre
bead. Before driving off-road, check the
wheels and replace them if necessary.
Checklist after off-road driving !
If you detect damage to the vehicle after
driving off-road, have the vehicle checked
immediately at a qualified specialist work-
shop.
X Deactivate the off-road program
(Y page 151).
X Deactivate DSR (Y page 190).
X Clean the headlamps and rear lights and
check for damage.
X Clean the front and rear licence plates.
X Clean the wheels and tyres with a water jet
and remove any foreign objects.
X Clean the wheels, wheel arches and the vehi-
cle underside with a water jet; check for any
foreign objects and damage.
X Check whether twigs or other parts of plants
have become trapped. These increase the risk
of fire and can damage fuel pipes, brake
hoses or the air bellows of the axle joints and propeller shafts.
X After the trip, examine without fail the entire
undercarriage, wheels, tyres, brakes, body-
work structure, steering, chassis and exhaust
system for damage.
X After driving in sand, mud, gravel, water or
similar dirty conditions, have the following
checked and cleaned:
R brake discs
R wheels
R brake pads
R axle joints
X If you detect strong vibrations after driving
off-road, check for foreign objects in the
wheels and drive train and remove them if
necessary. Foreign objects can disturb the
balance and cause vibrations.
Driving over poor road surfaces places greater
demands on your vehicle than driving on normal roads. After driving off-road, check the vehicle.
This allows you to detect damage promptly and
reduce the risk of an accident to yourself and
other road users. 174
Driving tipsDriving and parking
Page 178 of 369

Driving on sand
Observe the following rules when driving on
sand:
R Activate the off-road program (Y page 151).
R Avoid high engine speeds.
R Use the left-hand steering wheel gearshift
paddle to shift to a lower gear appropriate to
the terrain.
R Drive quickly to overcome the rolling resist-
ance. Otherwise, the vehicle could dig itself
into the sand.
R Drive in the tracks of other vehicles if possi-
ble. Make sure that:
- the tyre ruts are not too deep
- the sand is firm enough
- your vehicle has sufficient ground clear-
ance
Tyre ruts and unpaved roads !
Check that the ruts are not too deep and
that your vehicle has sufficient clearance.
Otherwise, your vehicle could be damaged or bottom out and get stuck.
Observe the following rules when driving along
ruts in off-road terrain or on roads with loose
gravel: R Activate the off-road program (Y page 151).
R Avoid high engine speeds.
R Shift to a lower gear using the left-hand steer-
ing wheel gearshift paddle.
R Drive slowly.
R Where ruts are too deep, drive with the
wheels on one side on the middle section of
turf if possible. Travelling uphill
Approach/departure angle G
WARNING
If you drive on a steep incline at an angle or
turn on a steep incline, the vehicle could slip
sideways, tip and overturn. There is a risk of
an accident.
When driving on an incline, drive into the line of fall (upwards or downwards in a straight
line) and do not turn. R
Observe the warnings for off-road driving
(Y page 173).
R Follow the line of fall when driving on slopes
and steep inclines.
R Before driving on extreme uphill and extreme
downhill gradients, select the off-road pro-
gram (Y page 151).
R Drive slowly.
R Accelerate gently and make sure that the
wheels are gripping.
R Avoid high engine speeds, except when driv-
ing on sandy and muddy routes with high driv-
ing resistance.
R Use the left-hand steering wheel gearshift
paddle to shift to a lower gear appropriate to
the gradient.
R Use the left-hand gearshift paddle to shift to a
lower gear on long and steep downhill gradi-
ents.
Hill start assist will aid you when pulling away on
a hill. Further information on hill start assist
(Y page 147).
Do not shift into transmission position iwhen
driving off-road. You could lose control of the
vehicle if you attempt to brake the vehicle using
the service brake. If the gradient is too steep for your vehicle, back up in reverse gear.
Always observe the approach/departure angle
values (Y page 359).
Maximum gradient-climbing capability Always observe the maximum gradient climbing
ability values (Y page 359).
Hilltops When driving up an uphill gradient, slightly
reduce pressure on the accelerator immediately
before reaching the brow of the hill. Make use of the vehicle's own impetus to travel over the
brow.
This style of driving prevents:
R the vehicle from lifting off the ground on the
brow of a hill
R the vehicle from travelling too quickly down
the other side Driving tips
175Driving and pa rking Z