2017 MERCEDES-BENZ GLA SUV oil change
[x] Cancel search: oil changePage 161 of 369
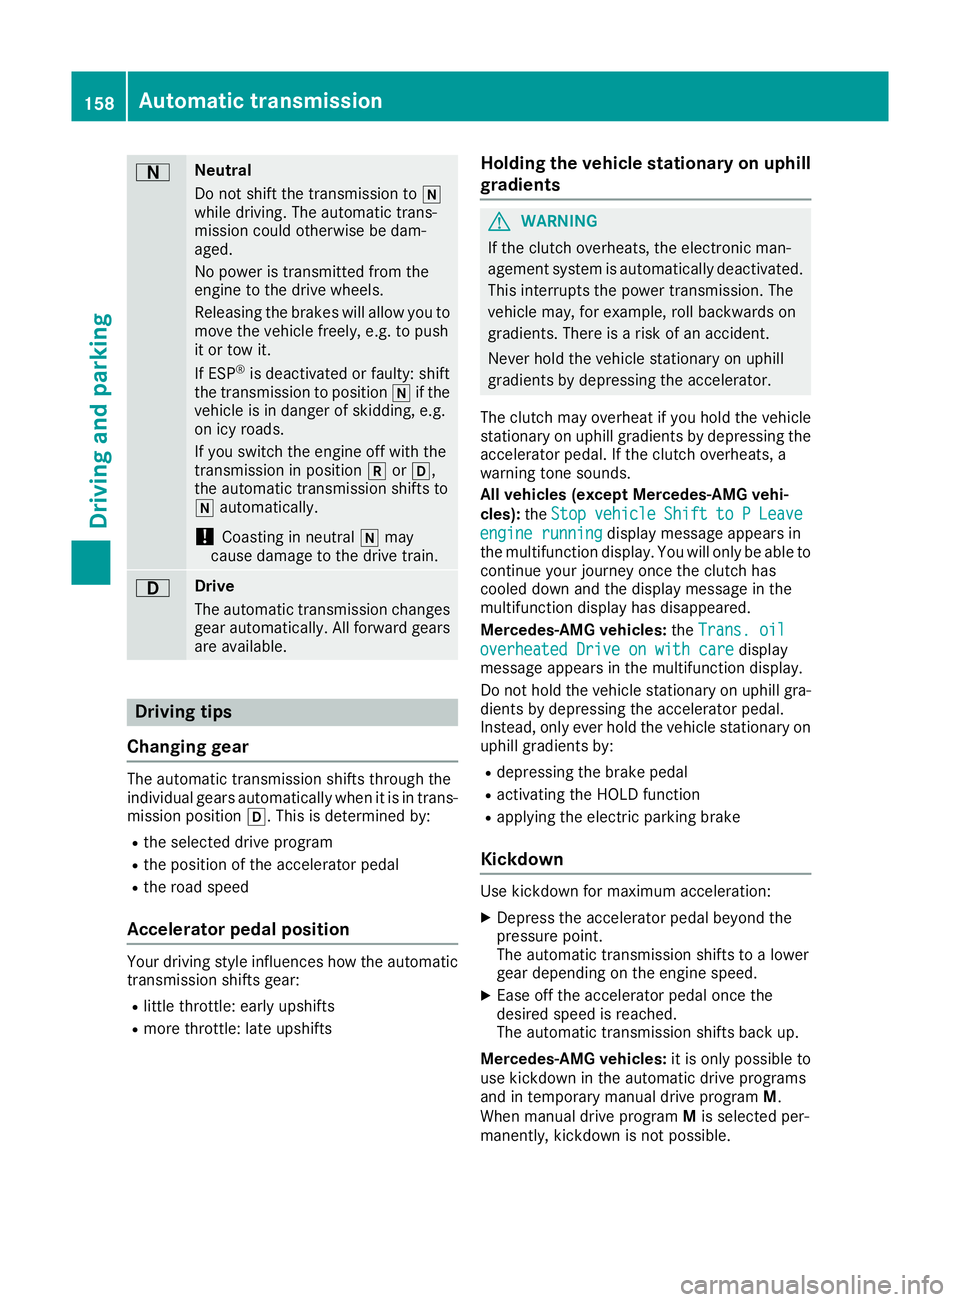
A Neutral
Do not shift the transmission to
i
while driving. The automatic trans-
mission could otherwise be dam-
aged.
No power is transmitted from the
engine to the drive wheels.
Releasing the brakes will allow you to
move the vehicle freely, e.g. to push
it or tow it.
If ESP ®
is deactivated or faulty: shift
the transmission to position iif the
vehicle is in danger of skidding, e.g.
on icy roads.
If you switch the engine off with the
transmission in position korh,
the automatic transmission shifts to
i automatically.
! Coasting in neutral
imay
cause damage to the drive train. 7 Drive
The automatic transmission changes
gear automatically. All forward gears
are available. Driving tips
Changing gear The automatic transmission shifts through the
individual gears automatically when it is in trans-
mission position h. This is determined by:
R the selected drive program
R the position of the accelerator pedal
R the road speed
Accelerator pedal position Your driving style influences how the automatic
transmission shifts gear:
R little throttle: early upshifts
R more throttle: late upshifts Holding the vehicle stationary on uphill
gradients G
WARNING
If the clutch overheats, the electronic man-
agement system is automatically deactivated. This interrupts the power transmission. The
vehicle may, for example, roll backwards on
gradients. There is a risk of an accident.
Never hold the vehicle stationary on uphill
gradients by depressing the accelerator.
The clutch may overheat if you hold the vehicle
stationary on uphill gradients by depressing the accelerator pedal. If the clutch overheats, a
warning tone sounds.
All vehicles (except Mercedes-AMG vehi-
cles): theStop
Stop vehicle vehicle Shift
Shiftto
toP
PLeave
Leave
engine running
engine running display message appears in
the multifunction display. You will only be able to
continue your journey once the clutch has
cooled down and the display message in the
multifunction display has disappeared.
Mercedes-AMG vehicles: theTrans. oil
Trans. oil
overheated Drive on with care overheated Drive on with care display
message appears in the multifunction display.
Do not hold the vehicle stationary on uphill gra- dients by depressing the accelerator pedal.
Instead, only ever hold the vehicle stationary on
uphill gradients by:
R depressing the brake pedal
R activating the HOLD function
R applying the electric parking brake
Kickdown Use kickdown for maximum acceleration:
X Depress the accelerator pedal beyond the
pressure point.
The automatic transmission shifts to a lower
gear depending on the engine speed.
X Ease off the accelerator pedal once the
desired speed is reached.
The automatic transmission shifts back up.
Mercedes-AMG vehicles: it is only possible to
use kickdown in the automatic drive programs
and in temporary manual drive program M.
When manual drive program Mis selected per-
manently, kickdown is not possible. 158
Automatic transmissionDriving an
d parking
Page 166 of 369
Kickdown
X
For maximum acceleration, depress the
accelerator pedal beyond the pressure point.
The automatic transmission shifts to a lower
gear depending on the engine speed.
X Shift back up once the desired speed is
reached.
During kickdown, you cannot shift gears using
the steering wheel gearshift paddles. If you apply full throttle, the automatic trans-
mission shifts up to the next gear when the
maximum engine speed is reached. This pre-
vents the engine from overrevving.
Mercedes-AMG vehicles: it is only possible to
use kickdown in temporary manual drive pro-
gram M. When manual drive program Mis selec-
ted permanently, kickdown is not possible. Problems with the transmission
Problem
Possible causes/consequences and
M MSolutions The transmission has
problems shifting gear. The transmission is losing oil.
X Have the transmission checked at a qualified specialist workshop
immediately. The acceleration ability
is deteriorating.
The transmission no lon-
ger shifts into all of the
gears.
Reverse gear can no lon-
ger be engaged. The transmission is in emergency mode.
X Stop.
X Shift the transmission to position j.
X Switch off the engine.
X Wait at least ten seconds before restarting the engine.
X Shift the transmission to position h.
X Have the transmission checked at a qualified specialist workshop
immediately. Refuelling
Important safety notes
G
WARNING
Fuel is highly flammable. If you handle fuel
incorrectly, there is a risk of fire and explo-
sion.
You must avoid fire, naked flames, creating
sparks and smoking. Switch off the engine
and, if applicable, the auxiliary heating before refuelling. G
WARNING
Fuels are poisonous and hazardous to health. There is a danger of injury.
Do not swallow fuel or let it come into contact
with skin, eyes or clothing. Do not inhale fuel vapours. Keep fuels out of the reach of chil-
dren.
If you or others come into contact with fuel,
observe the following:
R Wash the fuel off any affected areas of skin
with water and soap immediately.
R If you get fuel in your eyes, rinse them thor-
oughly with clean water immediately. Seek
immediate medical attention.
R If fuel is swallowed, seek immediate medi-
cal attention. Do not induce vomiting.
R Change any clothing that has come into
contact with fuel immediately. G
WARNING
Electrostatic charge can cause sparks and
thereby ignite fuel vapours. There is a risk of
fire and explosion. Refuelling
163Driving and pa rking
Z
Page 310 of 369
oil level. Observe the notes on the engine oil
level (Y
page 304).
The multifunction display shows a service mes-
sage for a few seconds, e.g.:
R Service A in .. days Service A in .. days
R Service A due
Service A due
R Service A overdue by .. days
Service A overdue by .. days
Depending on the operating conditions of the
vehicle, the remaining time or distance until the
next service due date is displayed.
The letter indicates which service is due. A A
stands for a minor service and B
Bfor a major ser-
vice. A number or another letter may be dis-
played after the letter.
For certain countries only: the position after the
letter A Aor B
Bindicates any necessary additional
maintenance work. If you notify a qualified spe-
cialist workshop of this display, you will receive a statement on the associated costs.
The ASSYST PLUS service interval display does
not take into account any periods of time during
which the battery is disconnected.
Maintaining the time-dependent service sched-
ule:
X Note down the service due date displayed in
the multifunction display before disconnect-
ing the battery.
or
X After reconnecting the battery, subtract the
battery disconnection periods from the ser-
vice date shown on the display. Hiding service messages
X Press the aor% button on the steering
wheel. Displaying service messages
X Switch the ignition on.
X Press the =or; button to select the
Serv. Serv. menu.
X Press the 9or: button to select the
ASSYST
ASSYST PLUS
PLUSsubmenu and confirm by press-
ing the abutton.
The service due date appears in the multi-
function display. Information about service
Resetting the ASSYST PLUS service
interval display !
If the ASSYST PLUS service interval display
has been inadvertently reset, this setting can
be corrected at a qualified specialist work-
shop.
Have service work carried out as described in the Service Booklet. This may otherwise lead
to increased wear and damage to the major
assemblies or the vehicle.
A qualified specialist workshop, e.g. a
Mercedes-Benz Service Centre, will reset the
ASSYST PLUS service interval display after the
service work has been carried out. You can also
obtain further information on maintenance
work, for example.
Special service requirements The prescribed service interval is based on nor-
mal operation of the vehicle. Service work will
need to be performed more often if the vehicle is
operated under arduous conditions or increased loads, for example:
R Regular city driving with frequent intermedi-
ate stops
R If the vehicle is primarily used to travel short
distances
R For frequent use in mountainous terrain or on
poor road surfaces
R If the engine is often left idling for long periods
R In particularly dusty conditions, or if air-recir-
culation mode is frequently used.
In these or similar operating conditions, have
the interior filter, engine air cleaner, engine oil
and oil filter, for example, changed more fre-
quently. The tyres must be checked more fre-
quently if the vehicle is operated under
increased loads. Further information can be
obtained at a qualified specialist workshop, e.g.
a Mercedes-Benz Service Centre.
Driving abroad An extensive Mercedes-Benz Service network is
also available in other countries. You can obtain further information from any Mercedes-Benz
Service Centre. ASSYST PLUS
307Maintenance and care Z
Page 316 of 369
become porous. This could result in plastic
parts breaking away when the airbags are
deployed. There is a danger of injury.
Do not use care products and cleaning agents containing solvents to clean the cockpit.
! Never attach the following to plastic surfa-
ces:
R stickers
R films
R perfume oil container or similar
You could otherwise damage the plastic.
! Do not allow cosmetics, insect repellent or
sunscreen to come in contact with the plastic trim. This maintains the high-quality look of
the surfaces.
X Wipe the plastic trim with a damp, lint-free
cloth, e.g. a microfibre cloth.
X Heavy soiling: use care and cleaning prod-
ucts recommended and approved by
Mercedes-Benz.
The surface may change colour temporarily.
Wait until the surface is dry again.
Cleaning the steering wheel and gear
lever or selector lever X
Thoroughly wipe with a damp cloth or use
leather care agents that have been recom-
mended and approved by Mercedes-Benz.
Cleaning wood trim and trim elements !
Do not use solvent-based cleaning agents
such as tar remover, wheel cleaners, polishes
or waxes. There is otherwise a risk of damag- ing the surface.
X Wipe the wooden trim and trim elements with
a damp, lint-free cloth, e.g. a microfibre cloth.
X Heavy soiling: use car care and cleaning
products recommended and approved by
Mercedes-Benz.
Cleaning the seat covers General notes
! Do not use a microfibre cloth to clean covers
made out of real leather, artificial leather or DINAMICA. If used frequently, this can dam-
age the cover.
Note that regular care is essential to make sure
that the appearance and comfort of the covers
are retained over time.
Genuine leather seat covers
! To retain the natural appearance of the
leather, observe the following cleaning
instructions:
R Clean genuine leather covers carefully with
a damp cloth and then wipe the covers
down with a dry cloth.
R Make sure that the leather does not
become soaked. It may otherwise become
rough and cracked.
R Only use leather care agents that have
been tested and approved by Mercedes-
Benz. You can obtain these from a qualified
specialist workshop.
Leather is a natural product.
It has natural surface properties, e.g.:
R unevenness in structure
R marks caused by growth and injury
R subtle colour differences
These are characteristics of leather and not
material faults.
Seat covers from other materials
! Observe the following when cleaning:
R clean artificial leather covers with a cloth
moistened with a solution containing 1%
detergent (e.g. washing-up liquid).
R clean cloth covers with a microfibre cloth
moistened with a solution containing 1%
detergent (e.g. washing-up liquid). Rub
carefully, and always wipe entire seat sec-
tions to avoid leaving visible lines. Leave
the seat to dry afterwards. Cleaning results
depend on the type of dirt and how long it
has been there.
R Clean DINAMICA covers with a damp cloth.
Make sure that you wipe entire seat sec-
tions to avoid leaving visible lines.
Cleaning the seat belts G
WARNING
Seat belts may be severely weakened if
bleached or coloured. This may lead to the Care
313Maintenance and care
Z
Page 346 of 369
the wheels or tyres have different dimensions.
The wheel brakes or suspension components may also be damaged. There is a risk of acci-
dent.
Interchange front and rear wheels only if the
wheels and tyres are of the same dimensions.
! On vehicles fitted with a tyre pressure mon-
itor, electronic components are located in the wheel.
Tyre-fitting tools should not be applied in thearea of the valve, as this could damage the
electronic components.
Only have tyres changed at a qualified spe-
cialist workshop.
Interchanging the front and rear wheels of dif-
fering dimensions can render the general oper-
ating permit invalid.
Observe the instructions and safety notes in the "Changing a wheel" section (Y page 342).
The wear patterns on the front and rear tyres
differ depending on the operating conditions.
Interchange the wheels before a clear wear pat-
tern has formed on the tyres. Front tyres typi-
cally wear more on the shoulders, while rear
tyres wear more in the centre.
On vehicles that have front and rear wheels of
the same size, you can interchange the wheels
every 5,000 to 10,000 km depending on the
degree of tyre wear. Ensure the direction of
rotation is maintained.
Clean the contact surfaces of the wheel and the
brake disc thoroughly every time a wheel is
interchanged. Check the tyre pressure and, if
necessary, restart the tyre pressure loss warn-
ing system or the tyre pressure monitor. Direction of rotation
Tyres with a specified direction of rotation have additional benefits, e.g. if there is a risk of aqua-
planing. These advantages can only be gained if the tyres are fitted corresponding to the direc-
tion of rotation.
An arrow on the sidewall of the tyre indicates its correct direction of rotation. Storing wheels
Store wheels in a cool, dry and preferably dark
place if they are not being used. Protect the
tyres against oil, grease, petrol and diesel. Fitting a wheel
Preparing the vehicle X
Stop the vehicle on solid, non-slippery and
level ground.
X Apply the electric parking brake manually.
X Move the front wheels to the straight-ahead
position.
X Vehicles with manual transmission: fully
depress the clutch pedal and engage first or
reverse gear.
X Vehicles with automatic transmission:
shift the transmission to position
j.
X Switch off the engine.
X Vehicles without KEYLESS-GO: remove the
key from the ignition lock.
X Vehicles with KEYLESS-GO start-function
or KEYLESS-GO: open the driver's door.
The vehicle electronics are now in position
u. This is the same as “key removed”.
X Vehicles with KEYLESS-GO start function
or KEYLESS-GO: remove the Start/Stop but-
ton from the ignition lock (Y page 144).
X If included in the vehicle equipment, remove
the tyre-change tool kit from the vehicle.
X Additionally secure the vehicle against rolling
away (Y page 166).
i Apart from some country-specific variants,
vehicles are not equipped with a tyre-change
tool kit. Some tools for changing a wheel are
specific to the vehicle. For more information
on which tools are required to perform a
wheel change on your vehicle, consult a quali-
fied specialist workshop.
Necessary tyre-changing tools may include,
for example:
R Jack
R Wheel chock
R Wheel wrench Changing a
wheel
343Wheels an d tyres Z
Page 348 of 369
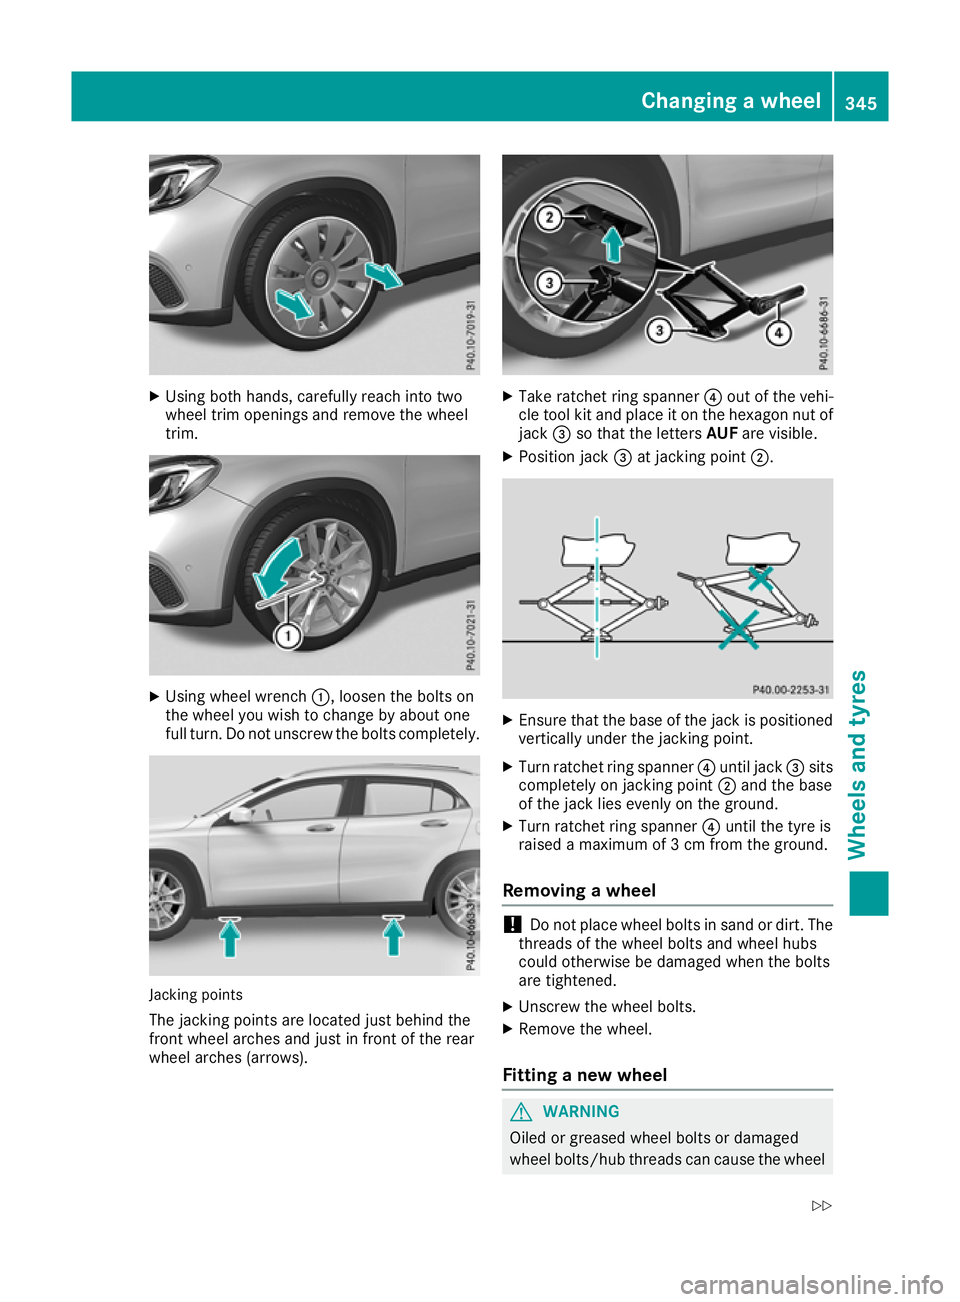
X
Using both hands, carefully reach into two
wheel trim openings and remove the wheel
trim. X
Using wheel wrench :, loosen the bolts on
the wheel you wish to change by about one
full turn. Do not unscrew the bolts completely. Jacking points
The jacking points are located just behind the
front wheel arches and just in front of the rear
wheel arches (arrows). X
Take ratchet ring spanner ?out of the vehi-
cle tool kit and place it on the hexagon nut of
jack =so that the letters AUFare visible.
X Position jack =at jacking point ;. X
Ensure that the base of the jack is positioned
vertically under the jacking point.
X Turn ratchet ring spanner ?until jack =sits
completely on jacking point ;and the base
of the jack lies evenly on the ground.
X Turn ratchet ring spanner ?until the tyre is
raised a maximum of 3 cm from the ground.
Removing a wheel !
Do not place wheel bolts in sand or dirt. The
threads of the wheel bolts and wheel hubs
could otherwise be damaged when the bolts
are tightened.
X Unscrew the wheel bolts.
X Remove the wheel.
Fitting a new wheel G
WARNING
Oiled or greased wheel bolts or damaged
wheel bolts/hub threads can cause the wheel Changing a wheel
345Wheels and tyres
Z
Page 349 of 369
bolts to come loose. As a result, you could
lose a wheel while driving. There is a risk of
accident.
Never oil or grease wheel bolts. In the event of damage to the threads, contact a qualified
specialist workshop immediately. Have the
damaged wheel bolts or hub threads
replaced/renewed. Do not continue driving. G
WARNING
If you tighten the wheel bolts or wheel nuts
when the vehicle is raised, the jack could tip
over. There is a risk of injury.
Only tighten the wheel bolts or wheel nuts
when the vehicle is on the ground.
It is imperative to observe the instructions and
safety notes on "Changing a wheel"
(Y page 342).
Only use wheel bolts that have been designed
for the wheel and the vehicle. For safety rea-
sons, Mercedes-Benz recommends that you
only use wheel bolts which have been approved for Mercedes-Benz vehicles and the respective
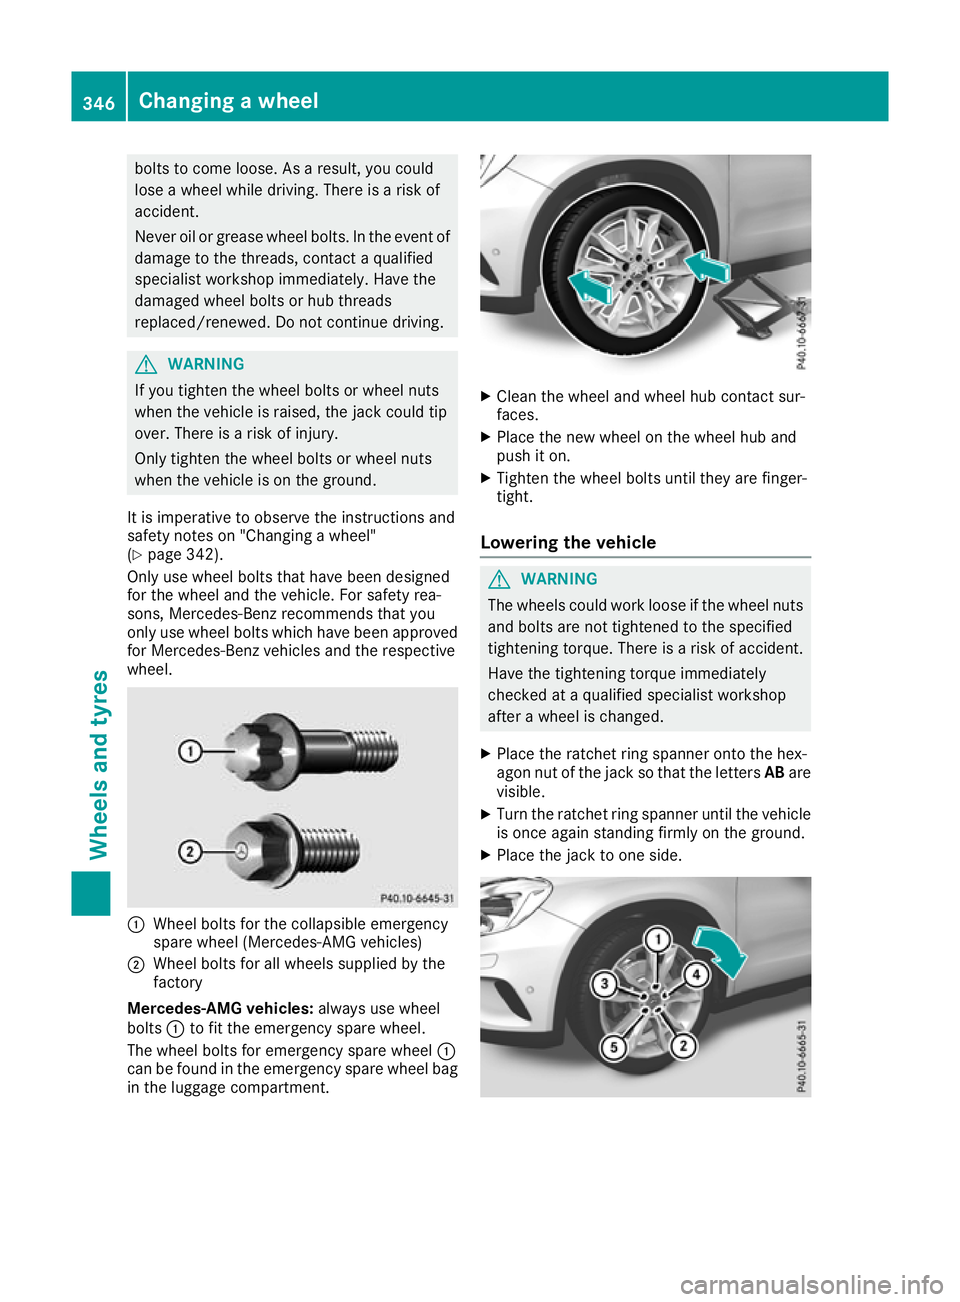
wheel. :
Wheel bolts for the collapsible emergency
spare wheel (Mercedes-AMG vehicles)
; Wheel bolts for all wheels supplied by the
factory
Mercedes-AMG vehicles: always use wheel
bolts :to fit the emergency spare wheel.
The wheel bolts for emergency spare wheel :
can be found in the emergency spare wheel bag
in the luggage compartment. X
Clean the wheel and wheel hub contact sur-
faces.
X Place the new wheel on the wheel hub and
push it on.
X Tighten the wheel bolts until they are finger-
tight.
Lowering the vehicle G
WARNING
The wheels could work loose if the wheel nuts and bolts are not tightened to the specified
tightening torque. There is a risk of accident.
Have the tightening torque immediately
checked at a qualified specialist workshop
after a wheel is changed.
X Place the ratchet ring spanner onto the hex-
agon nut of the jack so that the letters ABare
visible.
X Turn the ratchet ring spanner until the vehicle
is once again standing firmly on the ground.
X Place the jack to one side. 346
Changing a wheelWheels and tyres
Page 358 of 369

!
Do not use the following:
R marine diesel
R heating oil
R bio-diesel
R vegetable oil
R petrol
R paraffin
R kerosene
Do not mix such fuels with diesel fuel and do
not use any special additives. Otherwise,
engine damage may occur.
! Vehicles with diesel particle filters:
in
countries outside the EU, only use low sulphur
Euro diesel with a sulphur content of under
50 ppm. Otherwise, the emission control sys- tem could be damaged.
! Vehicles without a diesel particle filter:
in countries where only diesel fuel with a high sulphur content is available, you will need to
carry out your vehicle's oil change at shorter
intervals. More information about the interval for oil change can be obtained from any quali-
fied specialist workshop.
Usually you will find information about the fuel
grade on the pump. If you cannot find the label
on the petrol pump, ask the filling station staff.
Information on refuelling (Y page 164).
Low outside temperatures In winter months, diesel fuel with an improved
cold flow quality is available. In Europe, the
EN 590 standard defines various climate-
dependent temperature categories. Malfunc-
tions can be avoided by refuelling with diesel
fuel that corresponds to the climatic specifica-
tions outlined in EN 590. At unusually low out-
side temperatures, it is possible that the flow
characteristics of the diesel fuel could be insuf- ficient. Accordingly, diesel fuel from warmer
areas may not be suitable for operation in colder
climatic conditions.
i Further information on country-specific fuel
properties and fuel types with low-tempera-
ture resistance can be obtained from oil com-
panies, e.g. at filling stations. Engine oil
General notes When handling engine oil, observe the important
safety notes on service products (Y page 352).
The quality of the engine oil is decisive for the
function and service life of an engine. After
extensive tests, Mercedes-Benz approves
engine oils that correspond to the current tech-
nical standard.
Therefore, only Mercedes-Benz-approved
engine oils may be used in Mercedes-Benz
engines.
Further information on tested and approved
engine oils can be obtained from any Mercedes-
Benz Service Centre. Mercedes-Benz recom-
mends that you have the engine oil change car- ried out at a qualified specialist workshop.
Mercedes-Benz approval is indicated on the oil
container by the inscription "MB-Freigabe" or
"MB-Approval" and the corresponding designa-
tion, e.g. MB-Freigabe or MB-Approval 229.51.
You can call up an overview of approved engine
oils on the Internet at
http://bevo.mercedes-benz.com by entering
the designation, e.g. 229.5.
The table shows which engine oils have been
approved for your vehicle.
Missing values were not available at the time of going to print.
Petrol engines: for certain countries, different
engine oils can be used, provided that the main-
tenance intervals are reduced. For more infor-
mation, please contact a qualified specialist
workshop. Petrol engines MB-Freigabe or
MB-Approval All models
229.5Service products and capacities
355Technical data Z