2017 MERCEDES-BENZ GLA SUV climate settings
[x] Cancel search: climate settingsPage 136 of 369
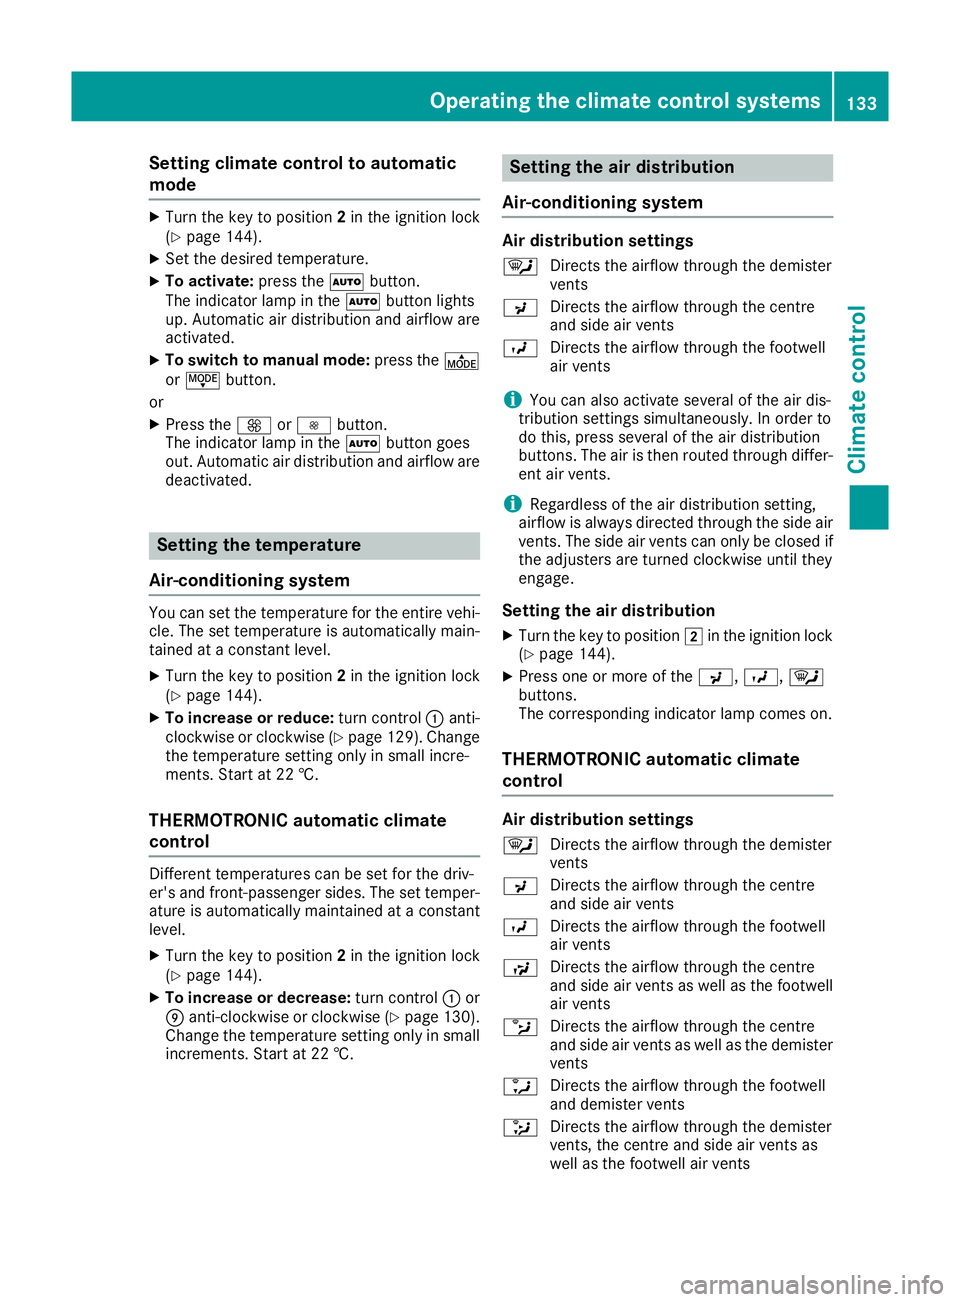
Setting climate control to automatic
mode X
Turn the key to position 2in the ignition lock
(Y page 144).
X Set the desired temperature.
X To activate: press theÃbutton.
The indicator lamp in the Ãbutton lights
up. Automatic air distribution and airflow are
activated.
X To switch to manual mode: press theÉ
or Ë button.
or
X Press the KorI button.
The indicator lamp in the Ãbutton goes
out. Automatic air distribution and airflow are deactivated. Setting the temperature
Air-conditioning system You can set the temperature for the entire vehi-
cle. The set temperature is automatically main-
tained at a constant level.
X Turn the key to position 2in the ignition lock
(Y page 144).
X To increase or reduce: turn control:anti-
clockwise or clockwise (Y page 129). Change
the temperature setting only in small incre-
ments. Start at 22 †.
THERMOTRONIC automatic climate
control Different temperatures can be set for the driv-
er's and front-passenger sides. The set temper- ature is automatically maintained at a constant
level.
X Turn the key to position 2in the ignition lock
(Y page 144).
X To increase or decrease: turn control:or
E anti-clockwise or clockwise (Y page 130).
Change the temperature setting only in small
increments. Start at 22 †. Setting the air distribution
Air-conditioning system Air distribution settings
¯ Directs the airflow through the demister
vents
P Directs the airflow through the centre
and side air vents
O Directs the airflow through the footwell
air vents
i You can also activate several of the air dis-
tribution settings simultaneously. In order to
do this, press several of the air distribution
buttons. The air is then routed through differ-
ent air vents.
i Regardless of the air distribution setting,
airflow is always directed through the side air vents. The side air vents can only be closed if
the adjusters are turned clockwise until they
engage.
Setting the air distribution X Turn the key to position 2in the ignition lock
(Y page 144).
X Press one or more of the P,O,¯
buttons.
The corresponding indicator lamp comes on.
THERMOTRONIC automatic climate
control Air distribution settings
¯ Directs the airflow through the demister
vents
P Directs the airflow through the centre
and side air vents
O Directs the airflow through the footwell
air vents
S Directs the airflow through the centre
and side air vents as well as the footwell
air vents
b Directs the airflow through the centre
and side air vents as well as the demister
vents
a Directs the airflow through the footwell
and demister vents
_ Directs the airflow through the demister
vents, the centre and side air vents as
well as the footwell air vents Operating the climate control systems
133Climate control
Page 137 of 369
i
Regardless of the air distribution setting,
airflow is always directed through the side air
vents. The side air vents can only be closed if the adjusters are turned clockwise until they
engage.
Setting the air distribution X Turn the key to position 2in the ignition lock
(Y page 144).
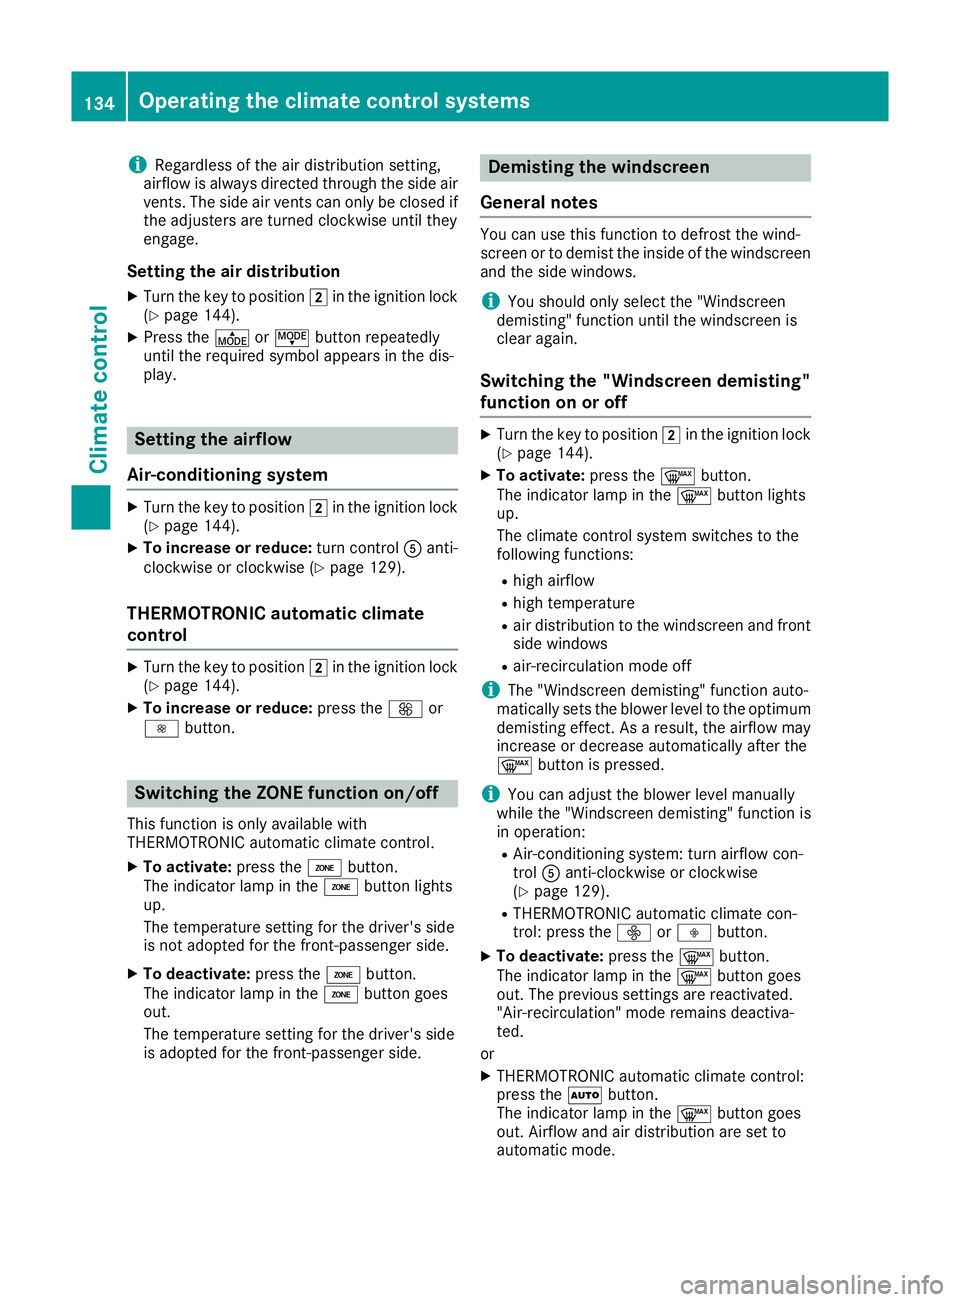
X Press the ÉorË button repeatedly
until the required symbol appears in the dis-
play. Setting the airflow
Air-conditioning system X
Turn the key to position 2in the ignition lock
(Y page 144).
X To increase or reduce: turn controlAanti-
clockwise or clockwise (Y page 129).
THERMOTRONIC automatic climate
control X
Turn the key to position 2in the ignition lock
(Y page 144).
X To increase or reduce: press theKor
I button. Switching the ZONE function on/off
This function is only available with
THERMOTRONIC automatic climate control.
X To activate: press theábutton.
The indicator lamp in the ábutton lights
up.
The temperature setting for the driver's side
is not adopted for the front-passenger side.
X To deactivate: press theábutton.
The indicator lamp in the ábutton goes
out.
The temperature setting for the driver's side
is adopted for the front-passenger side. Demisting the windscreen
General notes You can use this function to defrost the wind-
screen or to demist the inside of the windscreen
and the side windows.
i You should only select the "Windscreen
demisting" function until the windscreen is
clear again.
Switching the "Windscreen demisting"
function on or off X
Turn the key to position 2in the ignition lock
(Y page 144).
X To activate: press the¬button.
The indicator lamp in the ¬button lights
up.
The climate control system switches to the
following functions:
R high airflow
R high temperature
R air distribution to the windscreen and front
side windows
R air-recirculation mode off
i The "Windscreen demisting" function auto-
matically sets the blower level to the optimum
demisting effect. As a result, the airflow may
increase or decrease automatically after the
¬ button is pressed.
i You can adjust the blower level manually
while the "Windscreen demisting" function is
in operation:
R Air-conditioning system: turn airflow con-
trol Aanti-clockwise or clockwise
(Y page 129).
R THERMOTRONIC automatic climate con-
trol: press the óorô button.
X To deactivate: press the¬button.
The indicator lamp in the ¬button goes
out. The previous settings are reactivated.
"Air-recirculation" mode remains deactiva-
ted.
or
X THERMOTRONIC automatic climate control:
press the Ãbutton.
The indicator lamp in the ¬button goes
out. Airflow and air distribution are set to
automatic mode. 134
Operating the climate control systemsClimate cont
rol
Page 157 of 369
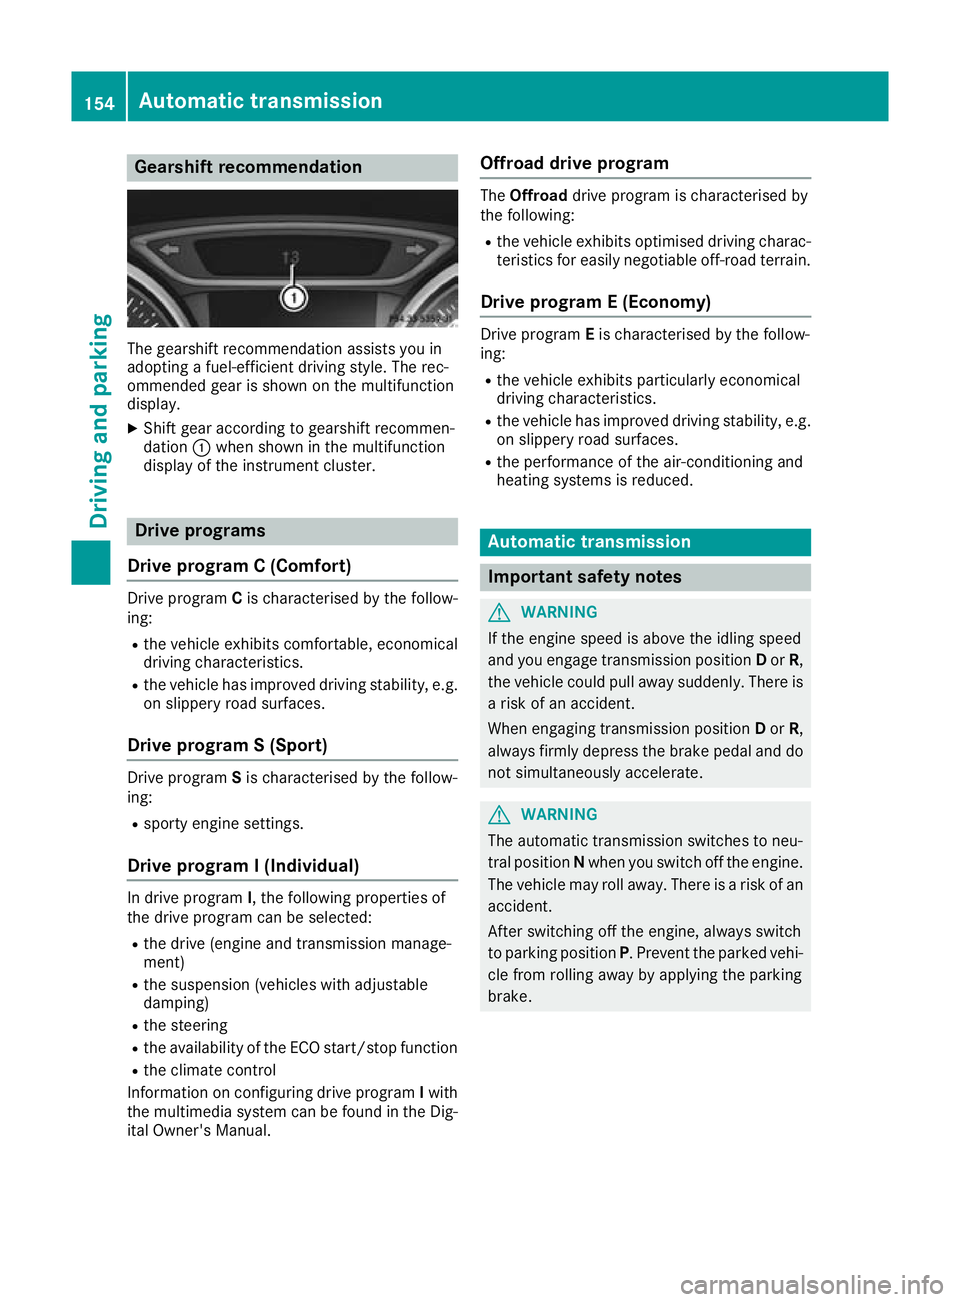
Gearshift recommendation
The gearshift recommendation assists you in
adopting a fuel-efficient driving style. The rec-
ommended gear is shown on the multifunction
display.
X Shift gear according to gearshift recommen-
dation :when shown in the multifunction
display of the instrument cluster. Drive programs
Drive program C (Comfort) Drive program
Cis characterised by the follow-
ing:
R the vehicle exhibits comfortable, economical
driving characteristics.
R the vehicle has improved driving stability, e.g.
on slippery road surfaces.
Drive program S (Sport) Drive program
Sis characterised by the follow-
ing:
R sporty engine settings.
Drive program I (Individual) In drive program
I, the following properties of
the drive program can be selected:
R the drive (engine and transmission manage-
ment)
R the suspension (vehicles with adjustable
damping)
R the steering
R the availability of the ECO start/stop function
R the climate control
Information on configuring drive program Iwith
the multimedia system can be found in the Dig-
ital Owner's Manual. Offroad drive program The
Offroad drive program is characterised by
the following:
R the vehicle exhibits optimised driving charac-
teristics for easily negotiable off-road terrain.
Drive program E (Economy) Drive program
Eis characterised by the follow-
ing:
R the vehicle exhibits particularly economical
driving characteristics.
R the vehicle has improved driving stability, e.g.
on slippery road surfaces.
R the performance of the air-conditioning and
heating systems is reduced. Automatic transmission
Important safety notes
G
WARNING
If the engine speed is above the idling speed
and you engage transmission position Dor R,
the vehicle could pull away suddenly. There is a risk of an accident.
When engaging transmission position Dor R,
always firmly depress the brake pedal and do not simultaneously accelerate. G
WARNING
The automatic transmission switches to neu-
tral position Nwhen you switch off the engine.
The vehicle may roll away. There is a risk of an
accident.
After switching off the engine, always switch
to parking position P. Prevent the parked vehi-
cle from rolling away by applying the parking
brake. 154
Automatic transmissionDriving and parking
Page 162 of 369
For further information on kickdown in manual
drive program M(Y page 163).
Gliding mode (diesel engines only) Gliding mode is characterised by the following:
R the combustion engine is disconnected from
the drive train
R the engine is running at idling speed
R the gear indicated after the transmission
position hdisappears in the multifunction
display (Y page 157)
Gliding mode can be activated and transmission
position hshown in green under the following
conditions:
R you select the "ECO" setting for the drive sys-
tem within the Individualdrive program. You
can find information about this in the Digital
Owner's Manual
R the speed is within a suitable range
R the type of road is suitable, e.g. no steep uphill
or downhill gradients
R the distance to the vehicle in front is sufficient
R you are no longer depressing the accelerator
pedal
Gliding mode is deactivated under the following
conditions:
R you depress the accelerator pedal
R you depress the brake pedal
R you use the DIRECT SELECT lever to switch
the transmission position (Y page 155)
R you use the DYNAMIC SELECT controller to
change the drive program (Y page 152)
R you activate manual gearshifting
(Y page 161)
R the distance to the vehicle in front is too short
R you leave the suitable speed range
Towing a trailer Not all models can tow a trailer. For further
information, see (Y page 213).
X Drive in the middle of the engine speed range
on uphill gradients.
X Depending on the uphill or downhill gradient,
select a lower gear (Y page 171), even if
cruise control, Distance Pilot DISTRONIC or
the speed limiter are activated. Drive programs
All vehicles (except Mercedes-AMG
vehicles) Drive program C (Comfort)
Drive program Cis characterised by the follow-
ing:
R the vehicle exhibits comfortable, economical
driving characteristics.
R the vehicle pulls away more gently in forward
and reverse gears unless the accelerator
pedal is depressed fully.
R the vehicle has improved driving stability, e.g.
on slippery road surfaces.
R optimal fuel consumption resulting from the
automatic transmission shifting up sooner.
The vehicle is driven in the low engine speed
range and the wheels are less likely to spin.
Drive program S (Sport) Drive program Sis characterised by the follow-
ing:
R sporty engine settings.
R the automatic transmission shifts up later.
Fuel consumption may be higher as a result of
the later automatic transmission shift points.
Drive program I (Individual)
In drive program I, the following properties of
the drive program can be selected:
R the drive (engine and transmission manage-
ment)
R the suspension (vehicles with adjustable
damping)
R the steering
R the availability of the ECO start/stop function
R the climate control
Information on configuring drive program Iwith
the multimedia system can be found in the Dig-
ital Owner's Manual.
i To permanently shift the gears manually in
drive program Iusing the steering wheel gear-
shift paddles, select the M(Manual) setting
for the drive. Automatic transmission
159Driving and parking Z
Page 282 of 369
Adding favourites
Adding predefined favourites
X Press the gbutton.
X COMAND Online: slide6the controller.
X Audio 20: slide5or6 the controller.
The menu bar is displayed.
X Select Reassign
Reassign.
The categories are displayed.
X Select a category.
The favourites are displayed.
X Select a favourite.
X COMAND Online: to add the favourite to the
desired position, turn and press the control-
ler.
X Audio 20: to add the favourite to the desired
position, turn, slide 5or6 and press the
controller.
If a favourite has already been added at this
position, it will be overwritten.
Adding your own favourites You can add climate control as a favourite, for
example.
X Select Vehicle
VehicleQClimate control Climate control.
X Press and hold the gbutton until the
favourites are displayed.
X Add a favourite to the desired position.
If a favourite has already been added at this
position, it will be overwritten. Navigation mode
Important safety notes G
WARNING
If you operate information and communica-
tion equipment integrated in the vehicle when driving, you could be distracted from the traf-
fic situation. This could also cause you to lose control of the vehicle. There is a risk of an
accident.
Only operate this equipment when the traffic
situation permits. If you cannot be sure of this,
stop the vehicle paying attention to road and
traffic conditions and operate the equipment
with the vehicle stationary. You must observe the legal requirements for the
country in which you are currently driving when operating the navigation system.
General notes Correct functioning of the navigation system
depends, amongst other things, on GPS recep-
tion. In certain situations, GPS reception may be
impaired, there may be interference or there
may be no reception at all, e.g. in tunnels or
multi-storey car parks.
Audio 20 is equipped with Garmin ®
MAP PILOT
(see the manufacturer's operating instructions).
The Garmin ®
MAP PILOT operating instructions
are stored on the SD card as a PDF file. The SD card box contains a quick guide.
The following descriptions apply to navigation
with COMAND Online. Further information can
be found in the Digital Owner's Manual.
Selecting a route type and route options Multimedia system:
X Select Navi
NaviQNavigation Navigation.
The map displays the current vehicle position.
X Slide 6the controller.
X Select Options
OptionsQRoute settings Route settings.
Notes for route types:
R Eco route Eco route
R Dynamic route
Dynamic route
Traffic reports on the route for the route guid-
ance are taken into account (not available in
all countries).
R Dynamic route only after request Dynamic route only after request
You can decide whether or not current traffic
reports should be included in the route cal-
culation (not available in all countries).
R Calculate alternative routes Calculate alternative routes
Different routes are being calculated. In order
to do so, instead of Start Start, select the menu
item Continue
Continue.
X To avoid/use route options: selectAvoid
Avoid
options
options.
X Select a route option.
Notes for route options:
R Use toll roads
Use toll roads Operating system
279Multimedia system Z