2017 MERCEDES-BENZ G-Class fuel consumption
[x] Cancel search: fuel consumptionPage 12 of 286
Exhaustsee Exhaust pipe
Exhaust check .................................. .123
Exhaus tpipe
Cleaning ......................................... 235
Exterior lighting
Cleaning ......................................... 234
see Lights
Exterior mirrors
Adjusting ......................................... 81
Dipping (automatic) ......................... 83
Folding in whe nlocking (on-board
computer) ...................................... 167
Folding in/out( automatically). ........ 82
Folding in/out (electrically) ............. 82
Outofp osition (troubleshooting )..... 82
Setting ............................................. 82
Storing settings (memory func-
tion) ................................................. 83
Storing the parking position ............. 83
F
Favorites
Overview ........................................ 200
Filler cap
see Refueling
First-aidk it......................................... 238
Flat tire
Changing awheel /mounting the
spare wheel. .................................. 269
Preparing the vehicl e..................... 240
Folding the seat backres t(rear)
forwards/back .................................. 207
Frequencies
Mobil ephone ................................. 274
Two-way radio ................................ 274
Fuel
Additives ........................................ 278
Consumption statistics .................. 160
Displaying the rang e...................... 160
Driving tip s.................................... 122
Fue lgauge ....................................... 32
Grade (gasoline )............................ 277
Important safety notes .................. 277
Premium-grade unleade dgaso-
line ................................................. 277
Problem (malfunction) ................... 120 Refueling ........................................ 118
Tank content/reserve fue
l............. 277
Fue lfille rflap
Closing ........................................... 119
Emergency release ........................ 119
Opening ......................................... 119
Fue llevel
Calling up the rang e(on-board
computer) ...................................... 160
Fue ltank
Capacity ........................................ 277
Problem (malfunction) ................... 120
Fus eallocatio nchart ........................ 249
Fus ebox
cargo compartment ....................... 250
Dashboard ..................................... 249
Front-passenger footwell ............... 249
Transmission tunne l....................... 250
Fuses
Allocation chart ............................. 249
Before changing ............................. 249
Dashboard fus ebox ....................... 249
Fus ealloc ation chart ..................... 249
Fus ebox in the carg ocompart-
ment .............................................. 250
Fus ebox in the front-passenger
footwell .......................................... 249
Fus ebox in the transmission tun-
nel ................................................. 250
Important safety notes .................. 248
G
Garaged ooro pener
Clearing the memory ..................... 224
Generaln otes ................................ 221
Important safety notes .................. 222
Opening/closing the garag edoor..2 24
Problems whe nprogramming ........2 24
Programming the remote control ... 222
Synchronizing the rolling code ....... 223
Gasoline ............................................. 277
Gear indicator (on-board com-
puter) ..................................................1 67
Genuine parts ...................................... 23
Glove box ...........................................2 05
10Index
Page 25 of 286

Protecting the environment
General notes
HEnvironmental note
Daimler's declared policy is one of compre-
hensive environmental protection.
The objectives are for the natural resources
that form the basis of our existence on this
planet to be used sparingly and in amanner
that takes the requirements of both nature
and humanity into account.
You too can help to protect the environment
by operating your vehicle in an environmen-
tally responsible manner.
Fuel consumption and the rate of engine,
transmission, brake and tire wear are affected by these factors:
Roperating conditionsofy our vehicle
Ryour personal driving style
You can influence both factors. You should
bear the following in mind:
Operating conditions:
Ravoid short trips as these increase fuel con-
sumption.
Ralways make sure that the tire pressures
are correct.
Rdo not carry any unnecessary weight.
Rremove roof racks once you no longer need
them.
Rar egularly serviced vehicle will contribute
to environmental protection. You should
therefore adhere to the service intervals.
Ralways have service work carried out at a
qualified specialist workshop.
Personal driving style:
Rdo not depress the accelerator pedal when
startin gthe engine.
Rdo not warm up the engine when the vehicle
is stationary.
Rdrive carefully and maintain asafe distance
from the vehicle in front.
Ravoid frequent, sudden acceleration and
braking.
Rchange gear in good time and use each gear
only up to Ôof its maximum engine speed.
Rswitch off the engine in stationary traffic.
Rkeep an eye on the vehicle's fuel consump-
tion.
Environmental concerns and recom-
mendations
Wherever the Operator's Manual requires you to
dispose of materials, first try to regenerate or re-
use them. Observe the relevant environmental
rules and regulations when disposing of materi-
als. In this way you will help to protect the envi-
ronment.
Genuine Mercedes-Benz parts
HEnvironmental note
Daimler AG also suppliesr econditioned major
assemblies and parts which are of the same
quality as new parts. They are covered by the
same Limited Warranty entitlements as new
parts.
!Air bags and Emergency Tensioning Devi-
ces, as well as control units and sensors for
these restraint systems, may be installed in
the following areas of your vehicle:
Rdoors
Rdoor pillars
Rdoor sills
Rseats
Rcockpit
Rinstrumentc luster
Rcenter console
Do not install accessories such as audio sys-
tems in these areas. Do not carry out repairs or welding. You could impair the operating
efficiency of the restraint systems.
Have aftermarket accessories installed at a
qualified specialist workshop.
You could jeopardize the operating safety of
your vehicle if you use parts, tires and wheels as
well as accessories relevant to safety which
have not been approved by Mercedes-Benz. This
could lead to malfunction sinsafety-relevant
Genuine Mercedes-Benz parts23
Introduction
Z
Page 108 of 286
XReleasethe brak epedal .
XCarefully depress th eaccelerato rpedal .
ECO start/stop function
Important safety notes
GWARNIN G
If th eengineiss witched off automatically and
you exit th evehicle, th eengineisr estarte d
automatically. The vehicl emay begi nmoving .
There is ariskofa cciden tand injury.
If you wish to exit th evehicle, always tur noff
th ei gnition and secure th evehicl eagainst
rollin gaway.
General notes
The ECO start/sto pfunction switches th e
engin eoff automatically when th evehicl estops
moving .
The engin estartsa utomatically when th edriver
want stop ull away again .The ECO start/sto p
function thereby help syou to reduce th efuel
consumption and emission sofyour vehicle.
The ECO start/sto pfunction is activated eac h
time th eengineiss witched on .
The ECO start/sto pfunction is only available in
driv eprogram C/E.
The system is operational if all condition sfor
automatic engin eswitch-off hav ebeen fulfilled
(
Ypage 106) and th eè symbol is shown in
green in th emultifunction display.
In addition ,the Stop/Star tactive
message
is shown in th eAMG men uint hemultifunction
display.
If no tall condition sfor automatic engin eswitch -
off are fulfilled (
Ypage 106), theè ECO
symbol is shown in yellow in th emultifunction
display.
In addition ,the Stop/Star tinactive
mes -
sage is shown in th eAMG men uint hemulti-
function display.
If th eECO start/sto pfunction has been man -
ually deactivated (
Ypage 106) oramalfunction
has caused th esystem to be deactivated, th e
è ECO symbol is no tdisplayed.
The Stop/Star tactive
orStop/Star tinactivemessage in th eAMG men uint he
multifunction display goes out .
Deactivating/activating theECO start/
stop function
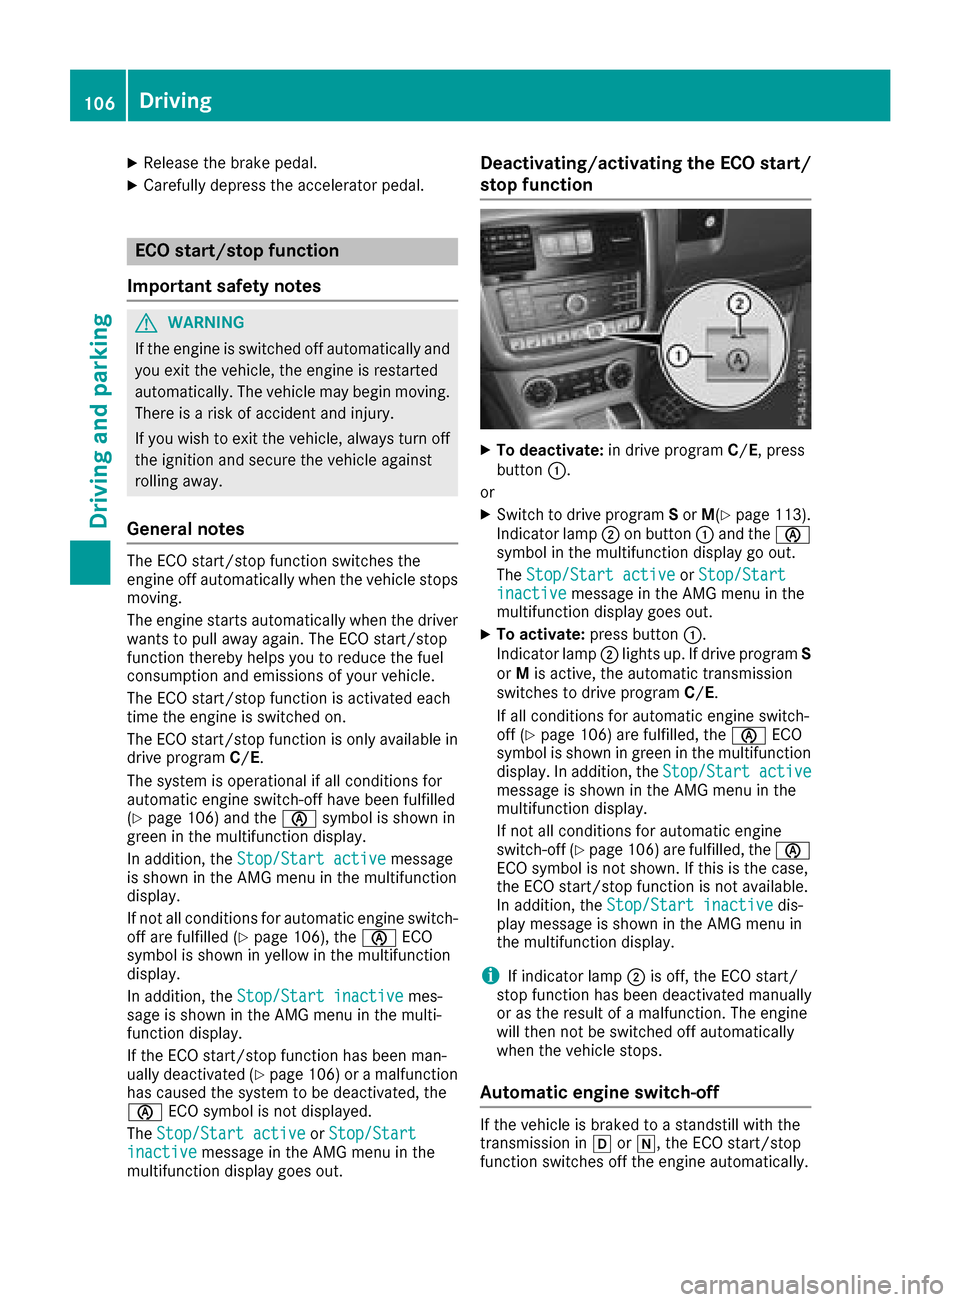
XTo deactivate: in driveprogram C/E,p ress
butto n:.
or
XSwitc htod rivep rogram Sor M(Ypage 113).
Indicato rlamp ;on butto n: and th eè
symbol in th emultifunction display go out .
The Stop/Star tactive
orStop/Star tinactivemessage in th eAMG men uint he
multifunction display goes out .
XTo activate:press button:.
Indicato rlamp ;lights up. If driv eprogram S
or Mis active ,the automatic transmission
switches to driv eprogram C/E.
If all condition sfor automatic engin eswitch -
off (
Ypage 106) are fulfilled ,the è ECO
symbol is shown in green in th emultifunction
display. In addition ,the Stop/Star tactive
message is shown in th eAMG men uint he
multifunction display.
If no tall condition sfor automatic engin e
switch-off (
Ypage 106) are fulfilled ,the è
ECO symbol is no tshown. If this is th ecase,
th eE CO start/sto pfunction is no tavailable.
In addition ,the Stop/Star tinactive
dis-
play message is shown in th eAMG men uin
th em ultifunction display.
iIf indicator lamp ;is off ,the ECO start /
stop function has been deactivated manually
or as th eresult of amalfunction .The engin e
will then no tbeswitched off automatically
when th evehicl estops .
Automati cengines witch-off
If thevehicl eisb raked to astandstill wit hthe
transmission in hori,t heECO start/sto p
function switches off th eenginea utomatically.
106Driving
Driving and parking
Page 116 of 286
Steering wheel paddle shifters
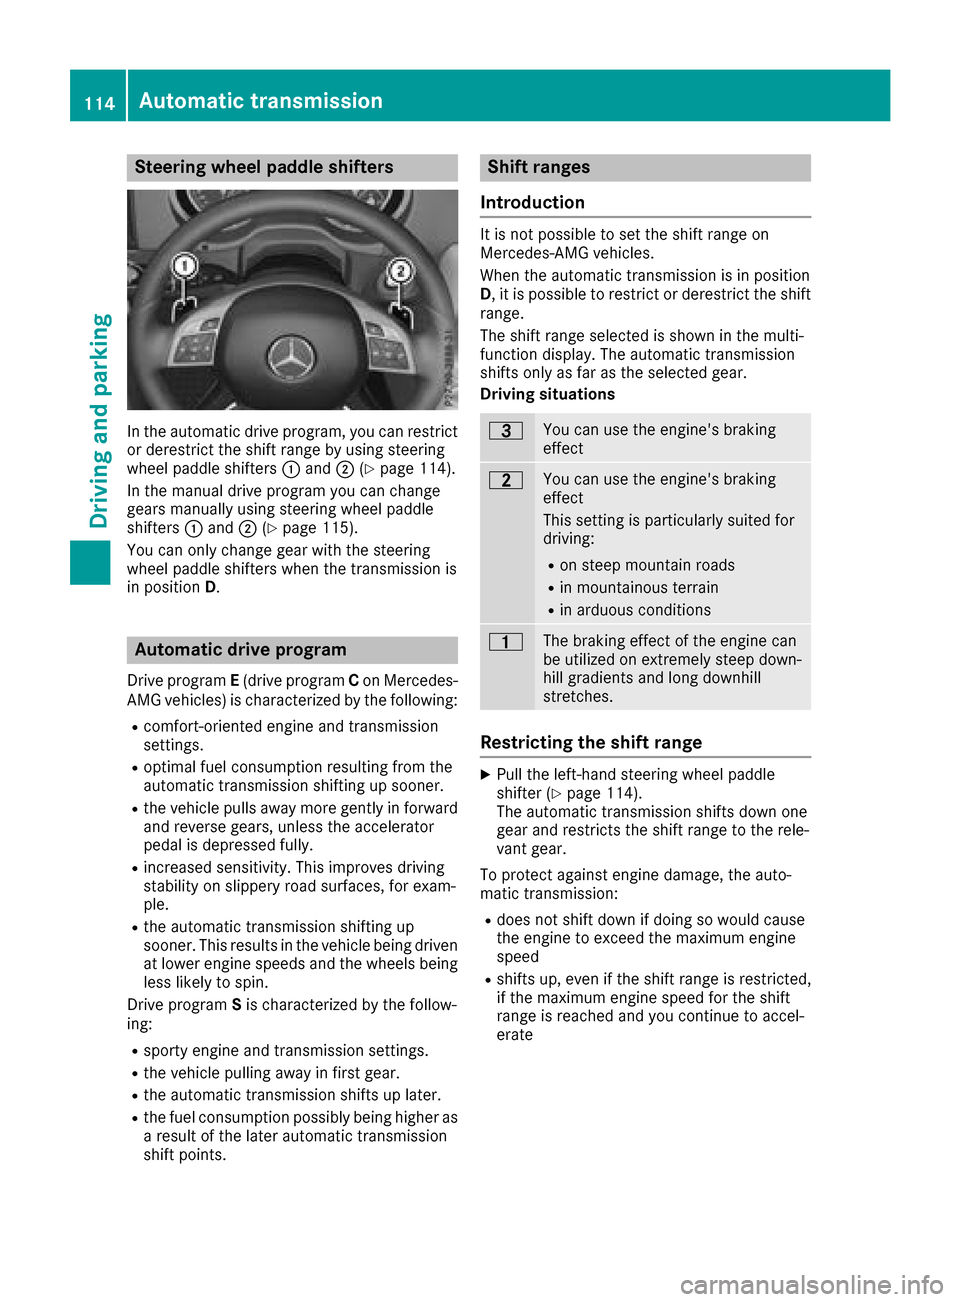
In the automatic drive program, you can restrict
or derestrict the shift range by using steering
wheel paddle shifters:and ;(
Ypage 114).
In the manual drive program you can change
gears manually using steering wheel paddle
shifters :and ;(
Ypage 115).
You can only change gear with the steering
wheel paddle shifters when the transmission is
in position D.
Automatic drive program
Drive program E(drive program Con Mercedes-
AMG vehicles) is characterized by the following:
Rcomfort-oriented engine and transmission
settings.
Roptimal fuel consumption resulting from the
automatic transmission shifting up sooner.
Rthe vehicle pulls away more gently in forward
and reverse gears, unless the accelerator
pedal is depressed fully.
Rincreased sensitivity. This improves driving
stability on slippery road surfaces, for exam-
ple.
Rthe automatic transmission shifting up
sooner. This results in the vehicle being driven
at lower engine speeds and the wheels being
less likely to spin.
Drive program Sis characterized by the follow-
ing:
Rsporty engine and transmission settings.
Rthe vehicle pulling away in first gear.
Rthe automatic transmission shifts up later.
Rthe fuel consumption possibly being higher as
ar esult of the later automatic transmission
shift points.
Shift ranges
Introduction
It is not possible to set the shift range on
Mercedes-AMG vehicles.
When the automatic transmission is in position
D,itisp ossible to restrict or derestrict the shift
range.
The shift range selected is shown in the multi-
function display.T he automatic transmission
shifts only as far as the selected gear.
Driving situations
=You can use the engine's braking
effect
5You can use the engine's braking
effect
This settingisp articularly suited for
driving:
Ron steep mountain roads
Rin mountainous terrain
Rin arduous conditions
4The braking effect of the engine can
be utilized on extremely steep down-
hill gradients and long downhill
stretches.
Restricting the shift range
XPull the left-hand steering wheel paddle
shifter (Ypage 114).
The automatic transmission shifts down one
gear and restrictst he shift range to the rele-
vant gear.
To protect against engine damage, the auto-
matic transmission:
Rdoes not shift down if doing so would cause
the engine to exceed the maximum engine
speed
Rshifts up, even if the shift range is restricted,
if the maximum engine speed for the shift
range is reached and you continue to accel-
erate
114Automatic transmission
Driving and parking
Page 162 of 286
Trip menu
Standard display
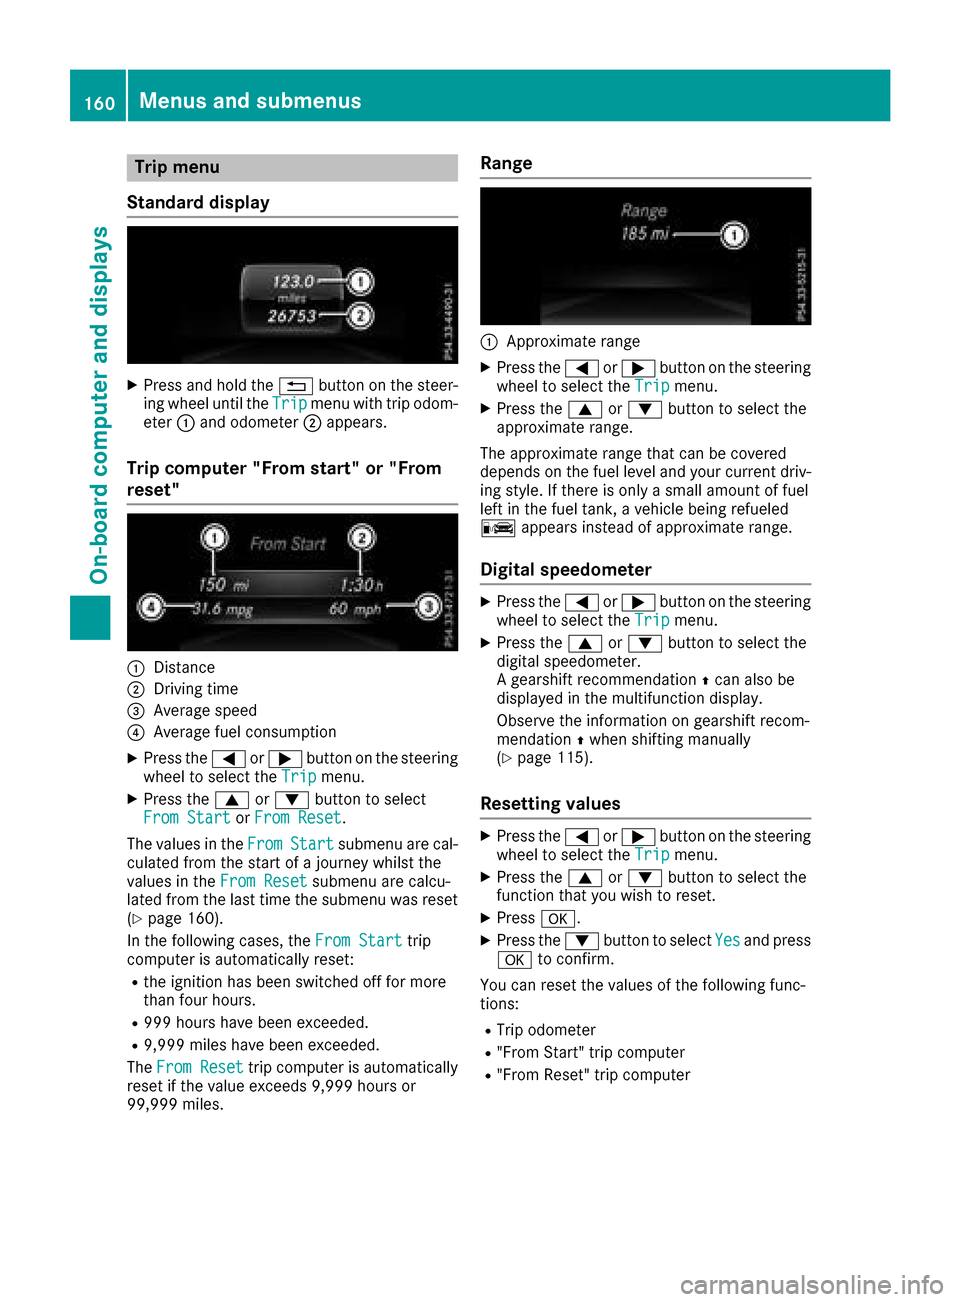
XPress and hol dthe % button on the steer-
ing whee lunti lthe Tripmenu with trip odom-
eter :and odometer ;appears.
Trip computer" From start" or "From
reset"
:Distance
;Driving time
=Averag espeed
?Averag efuelconsumption
XPress the =or; button on the steering
whee ltoselect the Tripmenu.
XPress the 9or: button to select
FromS tartorFromR eset.
The values in the From
Startsubmenu arecal-
culate dfromt he start of ajourney whilst the
values in the FromReset
submenu ar ecalcu-
lated fromt he last time the submenu wa sreset
(
Ypage 160).
In the following cases, the FromStart
trip
compute risautomaticall yreset:
Rthe ignition hasb eens witched off for more
thanf ourh ours.
R999 hours have been exceeded.
R9,999 miles have been exceeded.
The FromR eset
trip compute risautomatically
reset if the valu eexceed s9,999 hours or
99,999 miles.
Range
:Approximate range
XPress the =or; button on the steering
whee ltoselect the Tripmenu.
XPress the 9or: button to select the
approximate range.
The approximate range thatc an be covered
depends on the fuel level and your current driv-
ing style .Ifthere is onl yasmall amount of fuel
left in the fuel tank, avehicl ebeing refueled
C appear sinstea dofa pproximate range.
Digital speedometer
XPress the =or; button on the steering
whee ltoselect the Tripmenu.
XPress the 9or: button to select the
digital speedometer.
Ag ears hift recommendation Zcan also be
displaye dinthe multifunctio ndisplay .
Observe the informatio nongearshift recom-
mendation Zwhen shifting manually
(
Ypage 115).
Resetting values
XPress the =or; button on the steering
whee ltoselect the Tripmenu.
XPress the 9or: button to select the
functio nthaty ouwish to reset.
XPress a.
XPress the :button to select Yesand press
a to confirm.
Yo uc an reset the values of the following func-
tions:
RTri po dometer
R"From Start" trip computer
R"From Reset" trip computer
160Menus and submenus
On-board computer and displays
Page 258 of 286
not permitany reliableconclusio nabout the tire
pressure. On vehicles equipped with the elec-
tronict ire pressure monitor, the tire pressure
can be checked in the on-board computer.
The tire temperature and pressure increase
when the vehicl eisinmotion. Thi sisdependent
on the driving speed and the load.
Therefore, yo ushoul donlyc orrect tire pres-
sures when the tire sare cold.
The tire sare cold:
Rif the vehicl ehasbeen parked withou tdirect
sunlight on the tire sfor at leas tthreeh ours
and
Rif the vehicl ehasnot been driven further than
1m ile( 1.6 km)
The tire temperature changes depending on the outsid etemperature ,the vehicl espeed and the
tire load .Ifthe tire temperature changes by
18 ‡(10 †), the tire pressure changes by
approximately10k Pa (0.1 bar/1.5 psi). Take
thisi nto account when checking the pressure of
warm tires. Onlyc orrect the tire pressure if it is
too lo wfor the current operating conditions. If
yo uc heck the tire pressure when the tire sare
warm, the resulting value will be highe rthani f
the tire swerec old. Thi sisnormal. Do not
reduce the tire pressure to the value specified
for coldt ires. The tire pressure woul dotherwise
be too low.
Observe the recommende dtire pressures for
coldt ires:
Ron the Tire and Loading Informatio nplacard
on the B-pillar on the driver's side
Rin the tire pressure table in the fue lfille rflap
(Ypage 119)
Underinflated or overinflated tires
Underinflated tires
GWARNING
Tires with pressure thati stoo lo wcan over-
hea tand burst as aconsequence .Inaddition,
they also suffer from excessive and/or irreg-
ular wear, which can severely impai rthe brak-
ing propertie sand the driving characteristics.
There is ariskofana ccident.
Avoidt ire pressures thata re too lowinallthe
tires, including the spare wheel. Underinflated tire
smay:
Roverheat, leading to tire defects
Radversel yaffect handling
Rwear excessivelya nd/or unevenly
Rhave an adverseeffect on fuelconsumption
Overinflated tires
GWARNING
Tires with excessivelyh ighp ressure can burst
because they are damaged more easily by
roadd ebris, potholes etc. In addition, they
also suffer from irregula rwear, which can
severely impai rthe braking propertie sand the
driving characteristics. There is ariskofa n
accident.
Avoi dtire pressures thata re too high in allthe
tires, including the spare wheel.
Overinflated tire smay:
Rincreas ethe braking distance
Radversel yaffect handling
Rwear excessivelya nd/or unevenly
Rhave an adverseeffect on ridecomfort
Rbe more likelytob ecome damaged
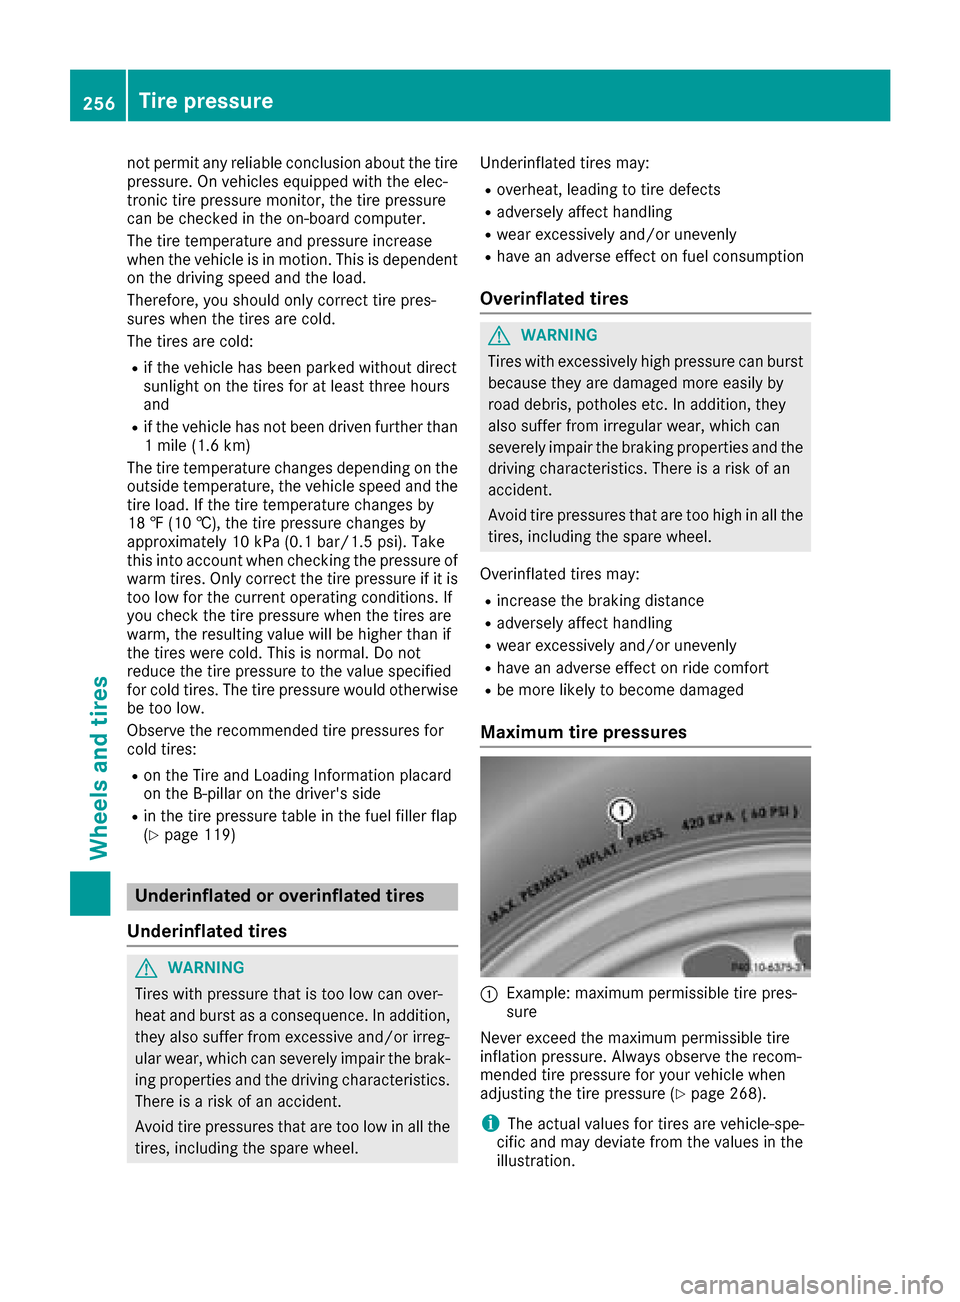
Maximum tire pressures
:Example :maximu mp ermissibl etire pres-
sure
Never exceed the maximu mpermissibl etire
inflation pressure. Alway sobserve the recom-
mended tire pressure for your vehicl ewhen
adjusting the tire pressure (
Ypage 268).
iThe actual value sfor tire sare vehicle-spe-
cifi cand mayd eviate from the value sinthe
illustration.
256Tire pressure
Wheel sand tires
Page 275 of 286

The tightening torque must be96 lb-ft
(130 Nm).
XDismantle the pump lever.
XPush the jack piston back in and close the
drain plug.
XUse the nuts to secure the faulty wheel to the
spare wheel bracket (Ypage 239).
XStow the jack and the vehicle tools in the
vehicle again.
XCheck the tire pressure of the newly installed
wheel and adjust it if necessary.
Observe the recommended tire pressure
(
Ypage 254).
If you are driving with the emergencys pare
wheel installed, the tire pressure monitor can-
not function reliably.O nly restart the tire pres-
sure monitor when the defective wheel has been replaced with anew wheel.
All mounted wheels must be equipped with func-
tionin gsensors for the tire pressure monitor.
Wheel and tire combinations
You can ask for information regarding permitted
wheel/tire combinations at an authorized
Mercedes-Benz Center.
!For safety reasons, Mercedes-Benz recom-
mends that you only use tires, wheels and
accessories which have been specifically
approved by Mercedes-Benz for your vehicle.
These are specially adapted to the various
driving safety systems, such as ABS or ESP
®.
Only use tires, wheels and accessories tested
and recommended by Mercedes-Benz.C er-
tain characteristics, such as handling, vehicle
noise emissions, fuel consumption, etc. may
otherwise be adversely affected. In addition,
other wheel sizes may cause the tires to rub
against the vehicle body and axle compo-
nents, when under load. This may result in
damage to the tire or to the vehicle.
Mercedes-Benz is not responsible for any
damage caused by using tires, wheels or
accessories different from those recommen-
ded.
Information on tires, wheels and permissible
combinations can be obtained at aqualified
specialist workshop.
!Retreaded tires are neither tested nor rec-
ommended by Mercedes-Benz,s ince previ-ous damage cannot alwaysbed
etected on
retreaded tires. As aresult, Mercedes-Benz
cannot guarantee vehicle safety if retreaded
tires are mounted. Do not mount used tires if
you have no information about their previous
usage.
The recommended pressures for various oper-
ating conditions can be found:
Ron the Tire and Loading Information placard
on the B-pillar on the driver's side
Rin the tire pressure table in the fuel filler flap
Observe the notes on recommended tire pres-
sures under various operating conditions
(
Ypage 254).
Check tire pressures regularly, and only when
the tires are cold. Comply with the maintenance
recommendations of the tire manufacturer in
the vehicle document wallet.
Notes on equipping the vehicle:
Ralwaysi nstall tires of the same size on one
axle (left/right)
Ralwaysi nstall the same type of tires on your
vehicle (summer tires, winter tires, all-
weather tires, all-terrain tires)
Wheel and tirec ombinations273
Wheels and tires
Z